


转载请标明出处!尊重原创,尊重知识。 ,新人新作,望大家多多指教!
从一个新出炉的小白,在创业公司工作了4个月,做了3个项目,多余的也不说了,这些不是重点。主要是想总结一下在这个过程中的一些心得笔记。可以说,自己能够做出这几个项目,还是得靠大家的技术博客,来学习模仿的。废话就这么多,开始~
一个项目的开始,你得准备一些工具类,熟悉好用的开源类库。
首先是大神的Xutils框架----链接地址https://github.com/alafighting/xUtils,高度封装了Http请求,Bitmaps异步处理,完善的ViewUtils。反正我用起来是很方便。使用方法我也就不一一介绍了,大神们说的很详细了。
然后一个很好用的UniversalImageLoader的图片异步处理框架。附上它的git链接---https://github.com/nostra13/Android-Universal-Image-Loader。使用方法也是很简单的,基本上是在application文件里面配置下全局设置,然后使用本地加载图片或者网络异步加载图片。想深入研究的,可以看看网络上的详细的博客,这里就不赘述了。
XlistView---上下拉刷新。用的比较多了,之前也没什么时间研究新的,使用起来还是蛮方便的。有人推荐了一个ZrcListView,有兴趣的可以看看,效果还是不错的!
接下来你的看看你的项目需求了。这里记下一个常用的项目需求的对应处理:
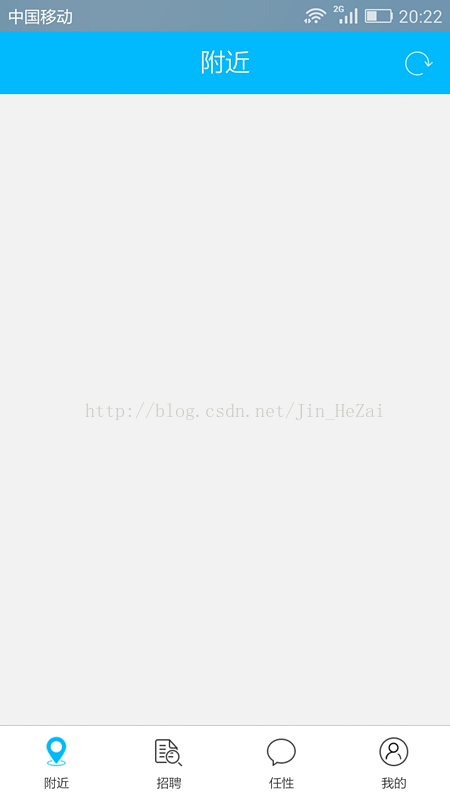
这种版面的处理应该是比较常见的。有四个功能主页,用碎片处理,底部栏是4个切换的标签。
OK,接下来我们要先处理4个切换的碎片布局
<span style="white-space:pre">	</span><FrameLayout
     	        android:id="@+id/CenterLayout"
        	android:layout_width="match_parent"
                android:layout_height="0dp"
     	        android:layout_weight="1" >
   	 </FrameLayout>
然后,可以写4个Fragment碎片。
接着,开始处理功能切换问题。
这里,我们要自定义一个标签布局。因为是简单的4个等距离模块,直接可以继承LInearLayout.功能不难,直接上代码。
package com.imhuoban.partner.widget;

import java.util.ArrayList;
import java.util.List;

import android.content.Context;
import android.content.res.TypedArray;
import android.graphics.Color;
import android.util.AttributeSet;
import android.view.Gravity;
import android.view.LayoutInflater;
import android.view.View;
import android.widget.ImageView;
import android.widget.LinearLayout;
import android.widget.TextView;

import com.imhuoban.partner.R;
import com.imhuoban.partner.application.PartnerApplication;
import com.imhuoban.partner.common.Appmsg;

/**
 * 自定义的底部栏标签
 * 注意实现接口OnTabSelectedListener
 * @author ZhangHao
 */
public class MyTabWidget extends LinearLayout {

	private int[] mDrawableDFs = new int[] { R.drawable.bottom_1_df,R.drawable.bottom_2_df,R.drawable.bottom_4_df,R.drawable.bottom_5_df };
	private int[] mDrawableCKs=new int[]{ R.drawable.bottom_1_ck,R.drawable.bottom_2_ck,R.drawable.bottom_4_ck,R.drawable.bottom_5_ck };

	// 存放底部菜单的各个文字CheckedTextView
	private List


     mCheckedList = new ArrayList


     ();

	// 存放底部菜单每项View
	private List


       mViewList = new ArrayList


       ();

	// 存放指示点
	private ArrayList


         mImgs=new ArrayList

          (); // 底部菜单的文字数组 private String[] mLabels={Appmsg.ClassName.FMTITLE_NEARBY,Appmsg.ClassName.FMTITLE_EMPLOY,Appmsg.ClassName.FMTITLE_CAPRICE,Appmsg.ClassName.FMTITLE_MINE}; public MyTabWidget(Context context, AttributeSet attrs, int defStyle) { super(context, attrs, defStyle); TypedArray a = context.obtainStyledAttributes(attrs,R.styleable.TabWidget, defStyle, 0); // 读取xml中,各个tab使用的文字 a.recycle(); // 初始化控件 init(context); } public MyTabWidget(Context context, AttributeSet attrs) { this(context, attrs, 0); } public MyTabWidget(Context context) { super(context); init(context); } /** * 初始化控件 */ private void init(final Context context) { /**************设置布局参数************/ this.setOrientation(LinearLayout.HORIZONTAL); this.setBackgroundColor(Color.WHITE); LayoutInflater inflater = LayoutInflater.from(context); LinearLayout.LayoutParams params = new LinearLayout.LayoutParams(LayoutParams.WRAP_CONTENT, LayoutParams.MATCH_PARENT); params.weight = 1.0f; params.gravity = Gravity.CENTER; /**************设置布局参数************/ int size = mLabels.length; for (int i = 0; i < size; i++) { final int index = i; // 每个tab对应的layout final View view = inflater.inflate(R.layout.tab_item, null); final TextView itemName = (TextView) view.findViewById(R.id.item_name); final ImageView itemIv=(ImageView) view.findViewById(R.id.item_pic); itemIv.setImageResource(mDrawableDFs[i]); PartnerApplication.setTextWithStyle(itemName, mLabels[i]); this.addView(view, params); // CheckedTextView设置索引作为tag,以便后续更改颜色、图片等 itemName.setTag(index); mImgs.add(itemIv); // 将CheckedTextView添加到list中,便于操作 mCheckedList.add(itemName); // 将各个tab的View添加到list mViewList.add(view); view.setOnClickListener(new OnClickListener() { @Override public void onClick(View v) { // 设置底部图片和文字的显示 setTabsDisplay(context, index); if (null != mTabListener) { // tab项被选中的回调事件 mTabListener.onTabSelected(index); } } }); // 初始化 底部菜单选中状态,默认第一个选中 if (i == 0) { itemIv.setImageResource(mDrawableCKs[i]); // itemName.setChecked(true); // itemName.setTextColor(Color.rgb(247, 88, 123)); // view.setBackgroundColor(Color.rgb(240, 241, 242)); } else { // itemName.setChecked(false); // itemName.setTextColor(Color.rgb(19, 12, 14)); // view.setBackgroundColor(Color.rgb(250, 250, 250)); } } } /** * 设置底部导航中图片显示状态和字体颜色 */ public void setTabsDisplay(Context context, int index) { int size = mCheckedList.size(); for (int i = 0; i < size; i++) { TextView checkedTextView = mCheckedList.get(i); if ((Integer) (checkedTextView.getTag()) == index) { mImgs.get(i).setImageResource(mDrawableCKs[i]); // checkedTextView.setChecked(true); // checkedTextView.setTextColor(Color.rgb(247, 88, 123)); // mViewList.get(i).setBackgroundColor(Color.rgb(240, 241, 242)); } else { mImgs.get(i).setImageResource(mDrawableDFs[i]); // checkedTextView.setChecked(false); // checkedTextView.setTextColor(Color.rgb(19, 12, 14)); // mViewList.get(i).setBackgroundColor(Color.rgb(250, 250, 250)); } } } // 回调接口,用于获取tab的选中状态 private OnTabSelectedListener mTabListener; public interface OnTabSelectedListener { void onTabSelected(int index); } public void setOnTabSelectedListener(OnTabSelectedListener listener) { this.mTabListener = listener; } }
  <com.imhuoban.partner.widget.MyTabWidget
        android:id="@+id/BottomTap"
        android:layout_width="match_parent"
        android:layout_height="@dimen/tap_height" >
    </com.imhuoban.partner.widget.MyTabWidget>
@ViewInject(R.id.BottomTap)
	MyTabWidget mBottomTab;
	private void init() {
		mFragmentManager = getSupportFragmentManager();
		mBottomTab.setLayoutParams(new LinearLayout.LayoutParams(PartnerApplication.getWindowW(),PhoneUtils.dip2px( 60)));
		mBottomTab.setOnTabSelectedListener(mContext);
	}

	private int mIndex = ContactsValues.FragmentIndex.FRAGMENT_INDEX_NEARBY;

	private FragmentManager mFragmentManager;
	// 首页4个碎片布局,注意调用前实例
	NearbyFragment mNearbyFragment;
	EmployFragment mEmployFragment;
	CapriceFragment mCapriceFragment;
	MineFragment mMineFragment;

	@Override
	public void onTabSelected(int index) {
		FragmentTransaction transaction = mFragmentManager.beginTransaction();
		hideFragments(transaction);
		switch (index) {
		case ContactsValues.FragmentIndex.FRAGMENT_INDEX_NEARBY:
			if (null == mNearbyFragment) {
				mNearbyFragment = new NearbyFragment();
				transaction.add(R.id.CenterLayout, mNearbyFragment);
			} else {
				transaction.show(mNearbyFragment);
			}
			break;
		case ContactsValues.FragmentIndex.FRAGMENT_INDEX_EMPLOY:
			if (null == mEmployFragment) {
				mEmployFragment = new EmployFragment();
				transaction.add(R.id.CenterLayout, mEmployFragment);
			} else {
				transaction.show(mEmployFragment);
			}
			break;
		case ContactsValues.FragmentIndex.FRAGMENT_INDEX_CAPRICE:
			if (null == mCapriceFragment) {
				mCapriceFragment = new CapriceFragment();
				transaction.add(R.id.CenterLayout, mCapriceFragment);
			} else {
				transaction.show(mCapriceFragment);
			}
			break;
		case ContactsValues.FragmentIndex.FRAGMENT_INDEX_MINE:
			if (null == mMineFragment) {
				mMineFragment = new MineFragment();
				transaction.add(R.id.CenterLayout, mMineFragment);
			} else {
				transaction.show(mMineFragment);
			}
			break;

		default:
			break;
		}
		mIndex = index;
		transaction.commitAllowingStateLoss();
	}

	/**
	 * 影藏所有的碎片,防止重叠
	 * @param transaction
	 */
	private void hideFragments(FragmentTransaction transaction) {
		if (null != mNearbyFragment) {
			transaction.hide(mNearbyFragment);
		}
		if (null != mEmployFragment) {
			transaction.hide(mEmployFragment);
		}
		if (null != mCapriceFragment) {
			transaction.hide(mCapriceFragment);
		}
		if (null != mMineFragment) {
			transaction.hide(mMineFragment);
		}
	}

	@Override
	protected void onResume() {
		super.onResume();
		onTabSelected(mIndex);
		mBottomTab.setTabsDisplay(this, mIndex);
	}

	@Override
	protected void onSaveInstanceState(Bundle outState) {
		// super.onSaveInstanceState(outState);
		outState.putInt("index", mIndex);
	}
	@Override
	protected void onRestoreInstanceState(Bundle savedInstanceState) {
		// super.onRestoreInstanceState(savedInstanceState);
		mIndex = savedInstanceState.getInt("index");
	}


 1633
1633


 被折叠的 条评论
为什么被折叠?
被折叠的 条评论
为什么被折叠?
 到【灌水乐园】发言


