


Why this post?
Tutorials on the page object model usually show you how to implement the page object model using a cliched login page as an example. Most online tutorials rarely show you how to modify your existing tests to use the page object model. This post is a follow up to our descriptive introduction to the page object model. In this tutorial, we provide a hands on example of how to revamp your existing test scripts to use the page object model.
A refresher
Within your web app’s UI there are areas that your tests interact with. A Page Object simply models these as objects within the test code. This reduces the amount of duplicated code and means that if the UI changes, the fix need only be applied in one place.[1]
The page object model allows us to do two things mainly:[2] 1) Encapsulate the low-level “internals” of the page – the ids of the buttons, classes of element, etc.
2) Make the client (of the Page Object) test methods more elegant by taking them to a higher level.
Test scenario
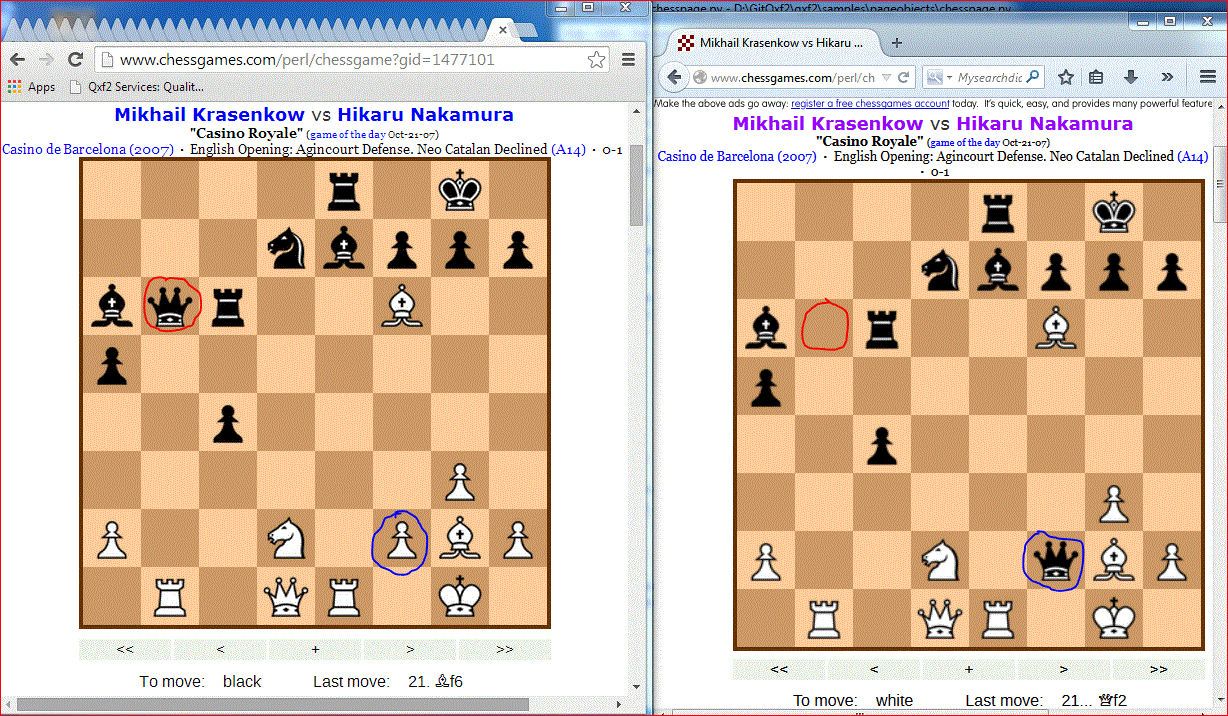
I am going to test the chess viewer widget on Chessgames.com. I am choosing to check if Black’s 21st move in the Casino Royale Chess Game is executed correctly. Black’s queen moves from the b6 square to the f2 square. We will verify that the b6 square is empty and that the f2 square has a black queen on it.
PS: Black’s 21st move in this game is the reason behind our company name Qxf2.
Implementing the page object model
For this tutorial, we will show the following:
1. Write a working test
2. Prepare to move to the page object model
3. Implement the page objects
4. Run the test
5. Compare with the first implementation
1. Write a working test
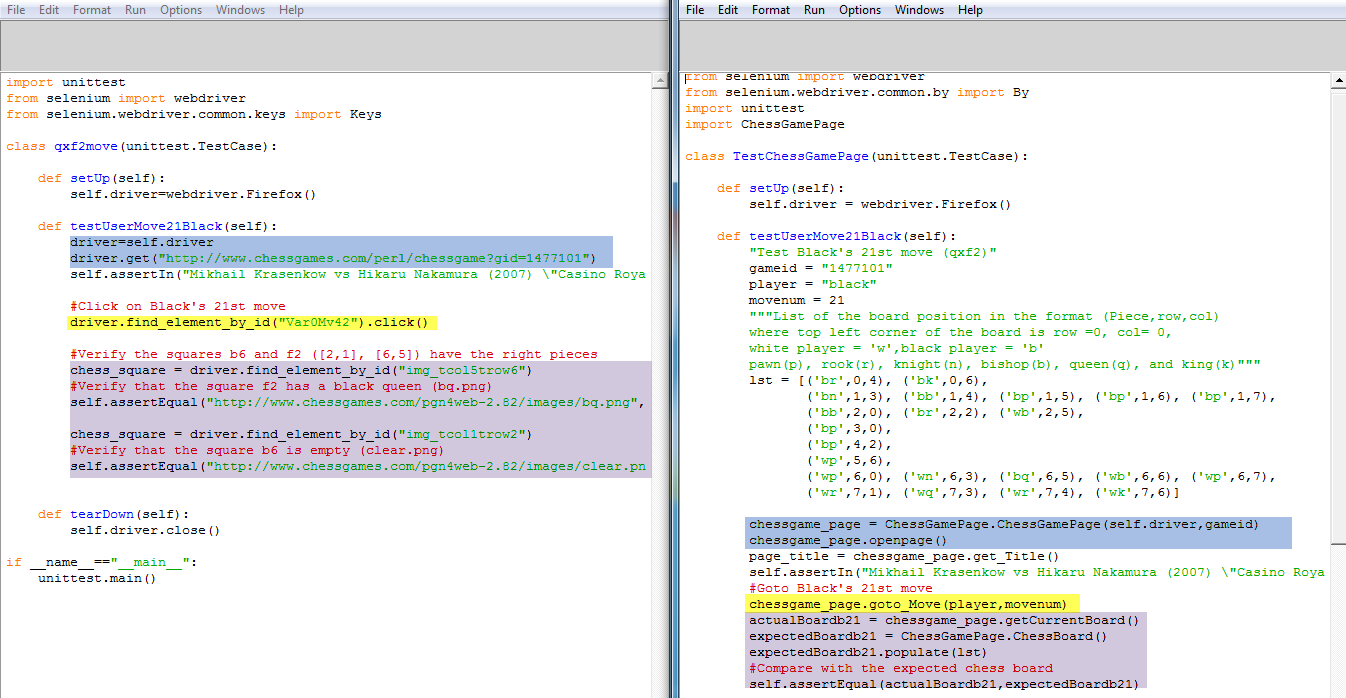
I am going to implement a working test. We will use this as a starting point. Let’s pretend that this is your existing test. I have written the following qxf2move.py
qxf2move.py
Here as you can see the test scripts contains the actual details of the attributes and ids as they appear in the page source. It is not easy to maintain these scripts in case of underlying changes. Hence we try to make the test script more readable and extendable by making a few changes.
2. Prepare to move to the page object model
– Identify the various objects and elements on the web page. Define them as objects and variables in the test script. E.g.: Title, Game_Id, Move_Str, Chess Board, Chess Piece, locators for the various objects

– Identify the various actions possible on these objects using the available elements. These actions can be defined as the methods in the test script. E.g.: get_Title, getCurrentBoard, create_mov_str, gotoMove, gotoStart, gotoEnd
3. Implement the different pages as page objects
-Separate the test case and the page objects, methods in different files. Here my test case is present in TestChessGamePage.py and the page objects, methods are present in ChessGamePage.py
TestChessGamePage.py
The above file does not contain the driver calls to get the elements in the page. For the sake of simplicity, we have not shown you how to implement a driver factory.
All the finer details are added to the files Base_Page_Object.py and ChessGamePage.py as shown below
Base_Page_Object.py
ChessGamePage.py
4. Run the test
Here is the snapshot of the test run

5. Compare with the first implementation
Let us compare the files qxf2move.py and TestChessGamePage.py
You’ll notice that using the page object model, it becomes easy to add new testcases without bothering about the details of the page elements. Also any changes to the page elements do not change the testcases – only the logic in ChessGamePage.py needs to be modified.
原文:https://qxf2.com/blog/page-object-model-selenium/#comment-1147


 1880
1880

 被折叠的 条评论
为什么被折叠?
被折叠的 条评论
为什么被折叠?
 到【灌水乐园】发言


