


本文主要讲的是如何在AS环境下通过AIDL进行IPC,而不是主要讲AIDL和IPC,这部分内容可以参考其他文章,或者官方文档http://developer.android.com/guide/components/aidl.html。因为自己在网上看到的实践都是Eclipse环境下的,所以试了下AS,分享给大家。
什么是AIDL
AIDL allows you to define the programming interface that both the client and service agree upon in order to communicate with each other using interprocess communication (IPC).
简单地说AIDL是Android实现IPC的一种方式。
Using AIDL is necessary only if you allow clients from different applications to access your service for IPC and want to handle multithreading in your service. If you do not need to perform concurrent IPC across different applications, you should create your interface by implementing a Binder or, if you want to perform IPC, but do not need to handle multithreading, implement your interface using a Messenger. Regardless, be sure that you understand Bound Services before implementing an AIDL.
只有当你需要不同应用访问你的服务并且需要处理多线程问题时,才使用AIDL,否则应该直接继承Binder或者使用Messenger。
AS环境下使用AIDL
AS version 1.2.2
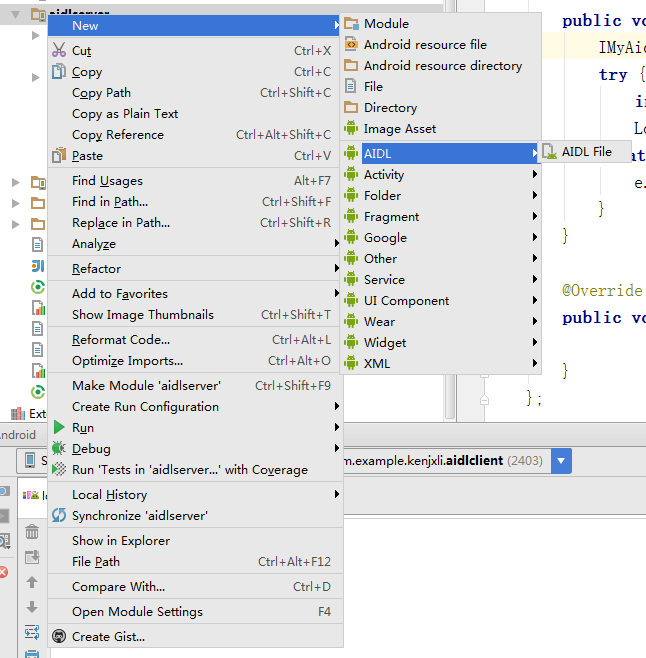
Step1:在server端新建一个aidl文件
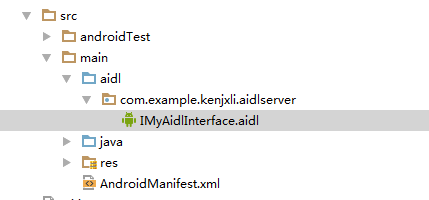
这时AS自动生成一个包和aidl文件
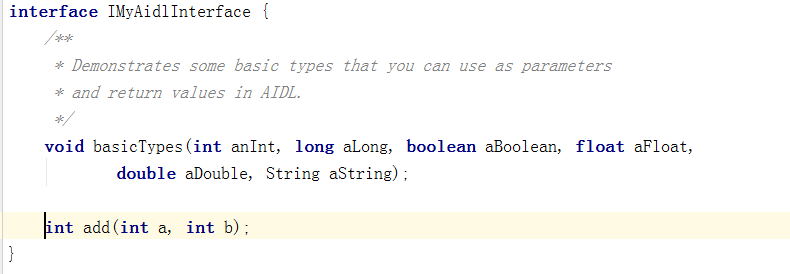
声明这个aidl文件的接口
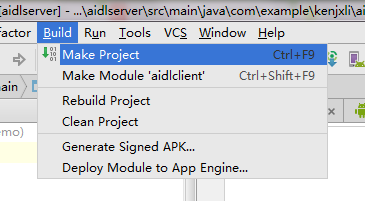
Step2:make project
Step3:写一个Service类
package com.example.kenjxli.aidlserver;

import android.app.Service;
import android.content.Intent;
import android.os.IBinder;
import android.os.RemoteException;
import android.util.Log;

public class MyService extends Service {

    private IMyAidlInterface.Stub mBinder = new IMyAidlInterface.Stub() {
        @Override
        public void basicTypes(int anInt, long aLong, boolean aBoolean, float aFloat, double aDouble, String aString) throws RemoteException {

        }

        @Override
        public int add(int a, int b) throws RemoteException {
            return a + b;
        }
    };

    public MyService() {
    }

    @Override
    public IBinder onBind(Intent intent) {
        // TODO: Return the communication channel to the service.
        Log.e("TAG","onBind");
        return mBinder;
    }

    @Override
    public void onDestroy() {
        super.onDestroy();
        Log.e("TAG", "onDestory");
    }
}
Step4:在Service节点下添加一个action节点
    <service
            android:name=".MyService">
            <intent-filter>
                <action android:name="com.example.kenjxli.aidlserver"></action>
            </intent-filter>
    </service>
step5:复制该目录到Client Module/src/main
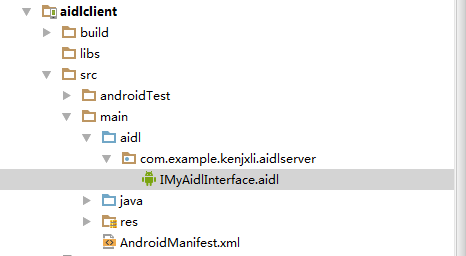
这是关键一步,直接复制Server Module在Step2中生成的aidl包到,Client Module/src/main即可。
step6:Client Module进行make project
step7:bindService for IPC
public class MainActivity extends ActionBarActivity {

    private ServiceConnection connection = new ServiceConnection() {
        @Override
        public void onServiceConnected(ComponentName name, IBinder service) {
            IMyAidlInterface aidl = IMyAidlInterface.Stub.asInterface(service);
            try {
                int result = aidl.add(1, 2);
                Log.e("TAG", result + "");
            } catch (RemoteException e) {
                e.printStackTrace();
            }
        }

        @Override
        public void onServiceDisconnected(ComponentName name) {

        }
    };

    @Override
    protected void onCreate(Bundle savedInstanceState) {
        super.onCreate(savedInstanceState);
        setContentView(R.layout.activity_main);
        Intent intent = new Intent("com.example.kenjxli.aidlserver");
        bindService(intent, connection, BIND_AUTO_CREATE);
    }
}
End


 21万+
21万+

 被折叠的 条评论
为什么被折叠?
被折叠的 条评论
为什么被折叠?
 到【灌水乐园】发言


