


流布局在实际项目中应用非常广泛,它的子控件摆放方式为:依次从左至右摆放子控件,如果这一行中剩余的空间不能够再摆放下一个控件,则进行换行。每一行的行高为该行中高度最高的子控件高度。
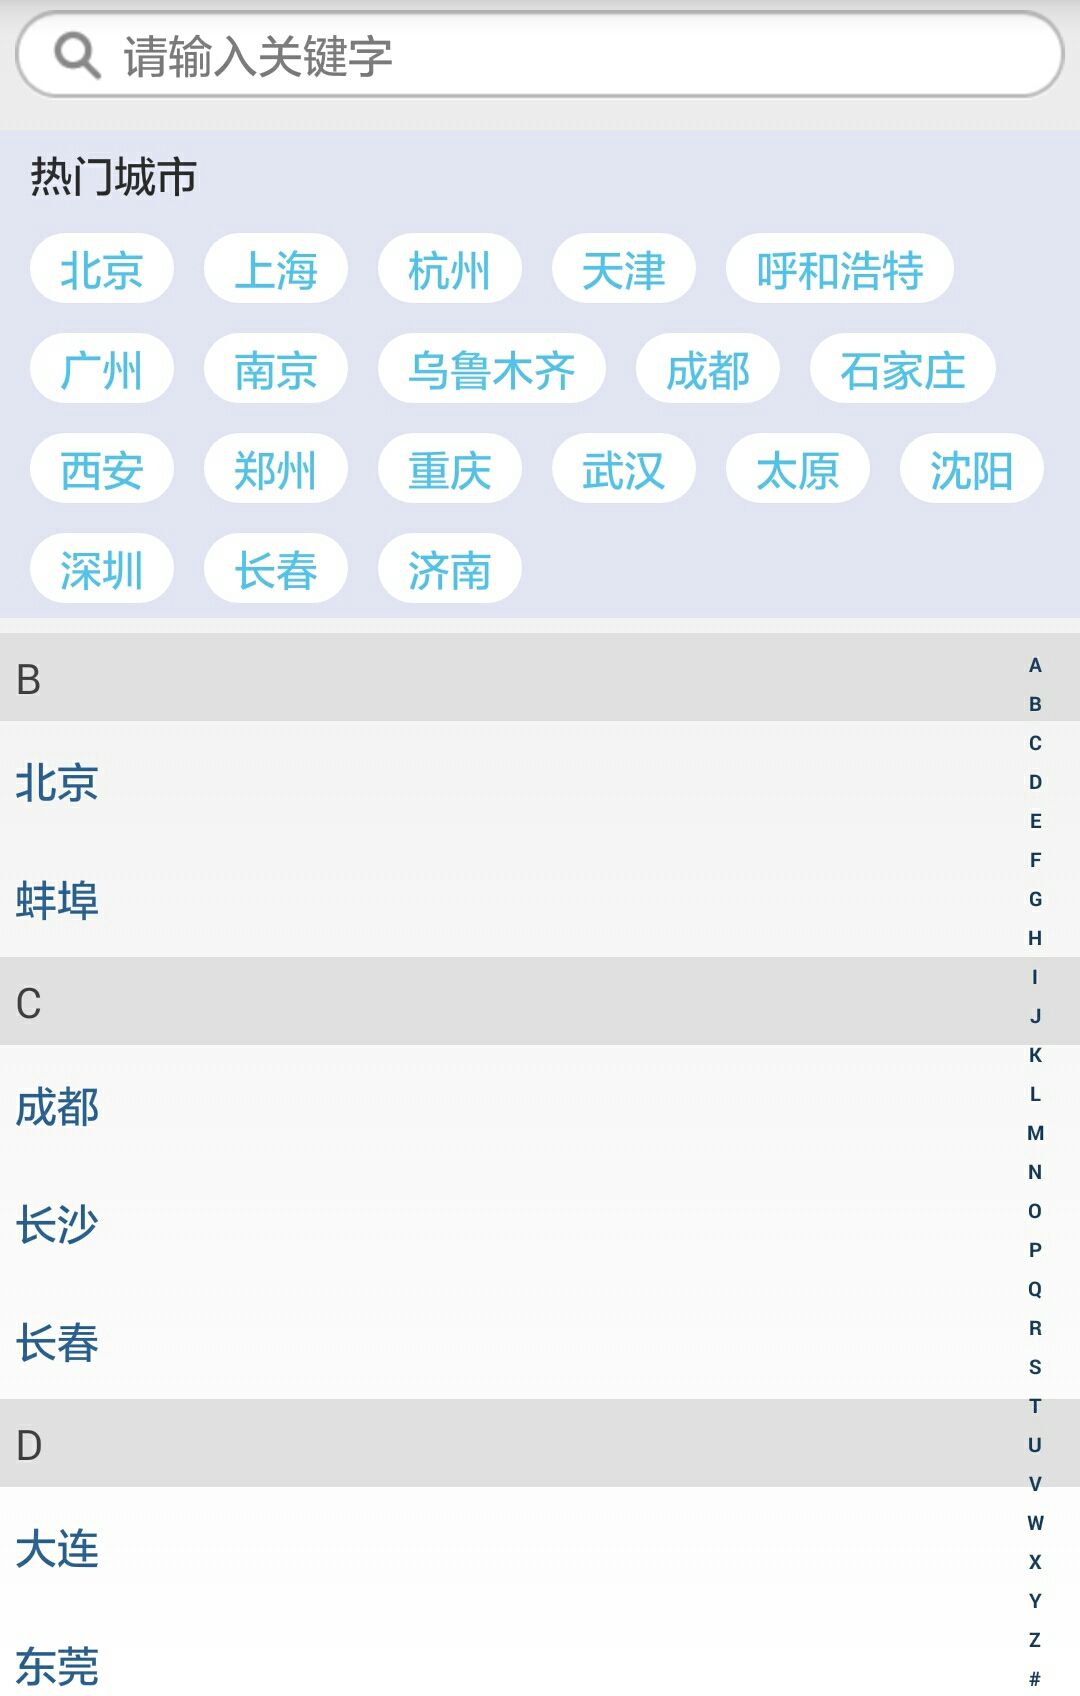
下图是一个Demo应用中某个页面的截图,其中热门城市部分是流布局的一个实现样例。
流布局的实现通过自定义ViewGroup完成,在自定义ViewGroup中,最重要的是覆写其中的onMeasure()和onLayout()两个方法。前者决定自定义ViewGroup的尺寸,后者决定了ViewGroup中每个子view的摆放。
如果能够在自定义布局中设置每个子View的margin值,那将极大扩展我们使用的灵活性,因此为了做到这一点,首先需要重写generateLayoutParams方法,并在其中返回一个MarginLayoutParams。
@Override
public LayoutParams generateLayoutParams(AttributeSet attrs)
{
    return new MarginLayoutParams(getContext(), attrs);
}
接下来实现onMeasure方法,在该方法中,我们的最终目标是得到整个ViewGroup的宽高。因此我们需要遍历所有的子控件,并根据它们的测量宽高来决定每行的宽高。
这里需要注意以下几点:
1、宽和高不能超过父控件的限制,因此换行的条件取决于父控件分给它们的最大宽度。
2、每个子控件的测量宽度,不包括它的左右margin值,测量高度不包括它的上下margin值,父控件分给它们的宽高包含了父控件的padding值。
3、Visibility为GONE的不需要显示,同样也不需要进行测量
4、整个布局的最终宽高要根据测量模式决定。
根据上面分析,onMeasure的代码如下:
@Override
protected void onMeasure(int widthMeasureSpec, int heightMeasureSpec)
{
    int widthMode = MeasureSpec.getMode(widthMeasureSpec);
    int widthSize = MeasureSpec.getSize(widthMeasureSpec);
    int heightMode = MeasureSpec.getMode(heightMeasureSpec);
    int heightSize = MeasureSpec.getSize(heightMeasureSpec);

    //实际高度时使用
    int height = 0;
    int width = 0;

    //记录每一行的宽度和高度
    int lineWidth = 0;
    int lineHeight = 0;

    //内部元素的个数
    int count = getChildCount();

    for (int i = 0; i < count; i++)
    {
        //获得子view
        View child = getChildAt(i);
        if (View.GONE == child.getVisibility())    //不需要显示
        {
            continue;
        }
        //测量子view的宽和高
        measureChild(child, widthMeasureSpec, heightMeasureSpec);

        //得到子view的param
        MarginLayoutParams mlp = (MarginLayoutParams) child.getLayoutParams();

        //子view占据的宽度和高度
        int childWidth = child.getMeasuredWidth() + mlp.leftMargin + mlp.rightMargin;
        int childHeight = child.getMeasuredHeight() + mlp.topMargin + mlp.bottomMargin;

        //当前行宽加上子view宽度 大于 容器行宽 减 内边距
        if (lineWidth + childWidth > widthSize - getPaddingLeft() - getPaddingRight())
        {
            //换行,布局行宽为 当前行宽 与 之前记录的最大行宽 中 取较大值
            width = Math.max(width, lineWidth);

            //重置 当前行宽
            lineWidth = childWidth;

            //叠加布局行高
            height += lineHeight;

            //重置行高
            lineHeight = childHeight;
        }
        else            //不换行
        {
            lineWidth += childWidth;
            lineHeight = Math.max(lineHeight, childHeight);
        }

        //到达最后一个控件,合计控件宽和高,此时得到wrap_content时的宽度和高度
        if (i == count - 1)
        {
            width = Math.max(lineWidth, width);
            height += lineHeight;
        }

    }

    //根据测量模式决定最终的宽和高
    int finalwidth = 0, finalheight = 0;

    switch (widthMode)
    {
        case MeasureSpec.EXACTLY:
            finalwidth = widthSize;
            break;
        case MeasureSpec.AT_MOST:
            finalwidth = (width + getPaddingLeft() + getPaddingRight() < widthSize ? width + getPaddingLeft() + getPaddingRight() : widthSize);
            break;
        case MeasureSpec.UNSPECIFIED:
            finalwidth = width + getPaddingLeft() + getPaddingRight();
            break;
        default:
            finalwidth = width + getPaddingLeft() + getPaddingRight();

    }
    switch (heightMode)
    {
        case MeasureSpec.EXACTLY:
            finalheight = heightSize;
            break;
        case MeasureSpec.AT_MOST:
            finalheight = (height + getPaddingTop() + getPaddingBottom() < heightSize ? height + getPaddingTop() + getPaddingBottom() : heightSize);
            break;
        case MeasureSpec.UNSPECIFIED:
            finalheight = height + getPaddingTop() + getPaddingBottom();
            break;
        default:
            finalheight = height + getPaddingTop() + getPaddingBottom();
    }

    //设置宽高值
    setMeasuredDimension(finalwidth, finalheight);

}
最后实现onLayout方法,在这个方法中,我们要决定每个子view摆放的位置。在摆放子view时,我们需要知道子view的宽高以及左上角的位置,其中宽和高都比较容易得到,左上角的位置需要我们在摆放子控件的过程中不断更新。
我这里采用的方法如下:首先遍历所有的子控件,在这个过程中,决定每一行分别要放哪些控件,并将他们存起来。此外,由于行高要在换行时才能决定,因此需要在换行时存下这一行的行高。在完成这些之后,根据刚刚记录下的信息,填充每一行的控件。这里直接把代码贴上来。
    @Override
    protected void onLayout(boolean changed, int l, int t, int r, int b)
    {
        mAllViews.clear();
        mLineHeight.clear();

        int width = getWidth();        //因为已经测量完成,所以可以直接获取

        int lineWidth = 0;
        int lineHeight = 0;

        //每一行的View
        List<View> lineViews = new ArrayList<View>();
        int count = getChildCount();

        for (int i = 0; i < count; i++)
        {
            View child = getChildAt(i);
            if (View.GONE == child.getVisibility())    //不需要显示
            {
                continue;
            }
            MarginLayoutParams mlp = (MarginLayoutParams) child.getLayoutParams();

            int childWidth = child.getMeasuredWidth();
            int childHeight = child.getMeasuredHeight();

            //需要换行
            if (childWidth + mlp.leftMargin + mlp.rightMargin + lineWidth > width - getPaddingLeft() - getPaddingRight())
            {
                //记录行高
                mLineHeight.add(lineHeight);
                //记录当前行views
                mAllViews.add(lineViews);

                //重置行宽和行高
                lineWidth = 0;
                lineHeight = mlp.topMargin + childHeight + mlp.bottomMargin;

                //重置集合,注意这里不能clear,因为已经加到队列里了
                lineViews = new ArrayList<View>();
            }

            //这里不能加else块哦
            lineHeight = Math.max(lineHeight, mlp.topMargin + childHeight + mlp.bottomMargin);
            lineWidth += childWidth + mlp.leftMargin + mlp.rightMargin;
            lineViews.add(child);


        }

        //额外处理最后一行
        mLineHeight.add(lineHeight);
        mAllViews.add(lineViews);

        //设置子view的位置

        int left = getPaddingLeft();        //view的开始位置
        int top = getPaddingTop();        //view的顶部位置

        //行数
        int lineCount = mAllViews.size();
        for (int i = 0; i < lineCount; i++)
        {
            //当前行的所有的View
            lineViews = mAllViews.get(i);
            //当前行Height
            lineHeight = mLineHeight.get(i);

            //当前行view的个数
            int lineViewCount = lineViews.size();

            for (int j = 0; j < lineViewCount; j++)
            {
                View child = lineViews.get(j);

                MarginLayoutParams mlp = (MarginLayoutParams) child.getLayoutParams();

                //控件的四个顶点
                int leftchild = left + mlp.leftMargin;
                int topchild = top + mlp.topMargin;
                int rightchild = leftchild + child.getMeasuredWidth();
                int bottomchild = topchild + child.getMeasuredHeight();

                //为子View进行布局
                child.layout(leftchild, topchild, rightchild, bottomchild);

                left += mlp.leftMargin + child.getMeasuredWidth() + mlp.rightMargin;
                //每一行内的高度起始值是一样的,因此不用改变
            }

            //行间操作
            left = getPaddingLeft();
            top += lineHeight;
        }
    }
这个过程相对来说比较冗长,不过理解起来并没有什么困难,需要注意的是一些边界条件,比如:最后一行和每行最后一个元素的处理,换行时更新控件的左上角坐标等等。
按照以往习惯,附上源代码链接:流布局源代码


 759
759


 被折叠的 条评论
为什么被折叠?
被折叠的 条评论
为什么被折叠?
 到【灌水乐园】发言


