


主要在官网给的Demo基础之上用OpenCV把特征点描绘出来了。
很早之前写过一篇配置Dlib环境的博客,现在来稍微梳理下提取特征点的使用方法。
上一篇配置环境博客地址:http://blog.csdn.net/zmdsjtu/article/details/52422847
惯例先放效果图吧:
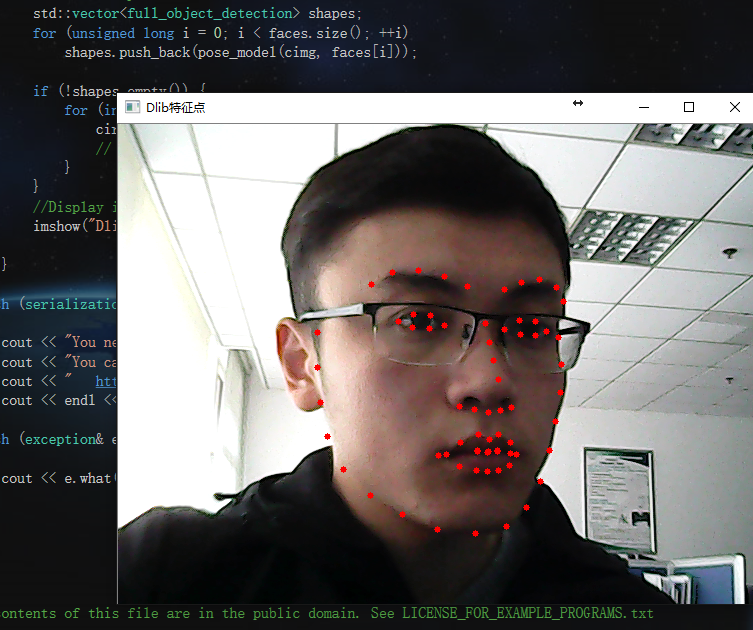
动图如下:
接着就是简单粗暴的代码:
- //@zmdsjtu@163.com
- //2016-12-4
- //http://blog.csdn.net/zmdsjtu/article/details/53454071
- #include <dlib/opencv.h>
- #include <opencv2/opencv.hpp>
- #include <dlib/image_processing/frontal_face_detector.h>
- #include <dlib/image_processing/render_face_detections.h>
- #include <dlib/image_processing.h>
- #include <dlib/gui_widgets.h>
- using namespace dlib;
- using namespace std;
- int main()
- {
- try
- {
- cv::VideoCapture cap(0);
- if (!cap.isOpened())
- {
- cerr << "Unable to connect to camera" << endl;
- return 1;
- }
- //image_window win;
- // Load face detection and pose estimation models.
- frontal_face_detector detector = get_frontal_face_detector();
- shape_predictor pose_model;
- deserialize("shape_predictor_68_face_landmarks.dat") >> pose_model;
- // Grab and process frames until the main window is closed by the user.
- while (cv::waitKey(30) != 27)
- {
- // Grab a frame
- cv::Mat temp;
- cap >> temp;
- cv_image<bgr_pixel> cimg(temp);
- // Detect faces
- std::vector<rectangle> faces = detector(cimg);
- // Find the pose of each face.
- std::vector<full_object_detection> shapes;
- for (unsigned long i = 0; i < faces.size(); ++i)
- shapes.push_back(pose_model(cimg, faces[i]));
- if (!shapes.empty()) {
- for (int i = 0; i < 68; i++) {
- circle(temp, cvPoint(shapes[0].part(i).x(), shapes[0].part(i).y()), 3, cv::Scalar(0, 0, 255), -1);
- // shapes[0].part(i).x();//68个
- }
- }
- //Display it all on the screen
- imshow("Dlib特征点", temp);
- }
- }
- catch (serialization_error& e)
- {
- cout << "You need dlib's default face landmarking model file to run this example." << endl;
- cout << "You can get it from the following URL: " << endl;
- cout << " http://dlib.net/files/shape_predictor_68_face_landmarks.dat.bz2" << endl;
- cout << endl << e.what() << endl;
- }
- catch (exception& e)
- {
- cout << e.what() << endl;
- }
- }
来看下上面那段代码,所有的需要的特征点都存储在Shapes里。仔细看看下面这行代码:
- circle(temp, cvPoint(shapes[0].part(i).x(), shapes[0].part(i).y()), 3, cv::Scalar(0, 0, 255), -1);
每个特征点的编号如下:
在上述画图的基础上加了如下一行代码:
- putText(temp, to_string(i), cvPoint(shapes[0].part(i).x(), shapes[0].part(i).y()), CV_FONT_HERSHEY_PLAIN, 1, cv::Scalar(255, 0, 0),1,4);
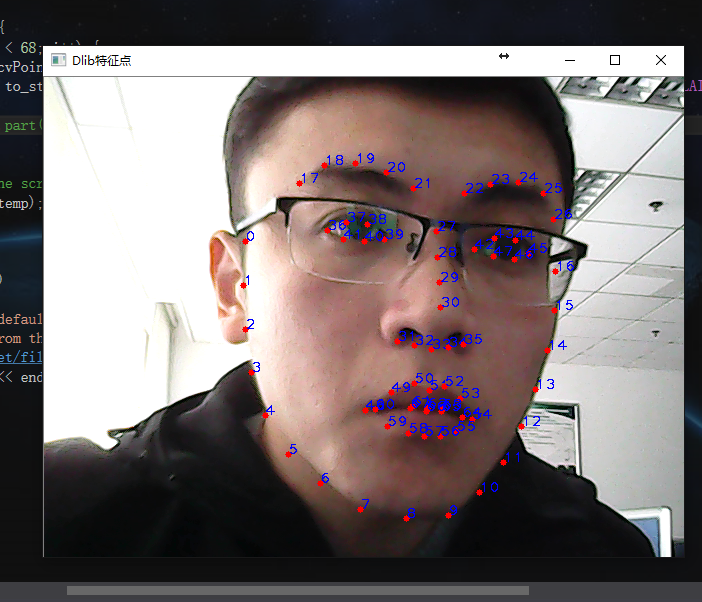
对照着上图,比如说想获取鼻尖的坐标,那么横坐标就是shapes[0].part[30].x(),其余的类似。
在这个的基础上就可以做很多有意思的事情啦,2333


 5608
5608

 被折叠的 条评论
为什么被折叠?
被折叠的 条评论
为什么被折叠?
 到【灌水乐园】发言


