


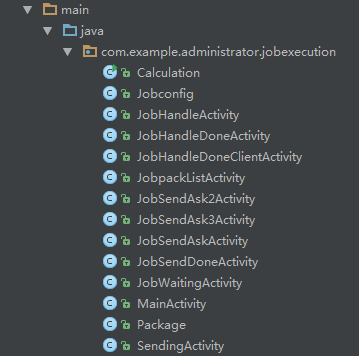
我基本上是先写xml,也就是界面,然后再完成对应的Activity类实现功能的。开发工具Android Studio 2.0.0 。这是所有的Activity类:
这是界面的xml:
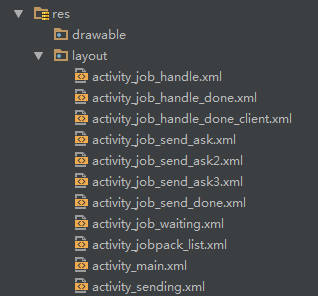
所有的Activity类在src/main/java/com.example.administrator.jobexecution文件夹下,所有的界面xml在src/main/res/layout文件夹下。
由于毕设时间紧,所以界面很简单,后面可以在UI方面进行优化,目前主要先实现再说。
一、软件起始界面(添加button)
第一个界面如下:
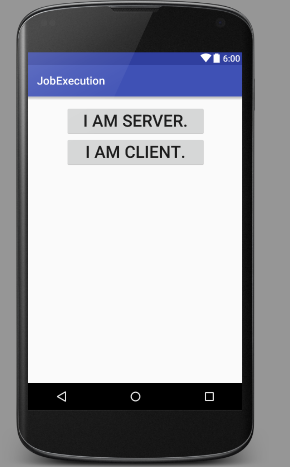
这是软件打开第一个界面,主要是对客户端和服务器端做一个区分,方便后面的操作,这个界面里面主要是两个按钮,图为AS(Android Studio)给出的预览(就是design模式),实际软件发布后上面蓝色的JobExecution的标签是没有显示的。
activity_main.xml代码如下:
<?xml version="1.0" encoding="utf-8"?>
<LinearLayout xmlns:android="http://schemas.android.com/apk/res/android"
    xmlns:tools="http://schemas.android.com/tools"
    android:layout_width="match_parent"
    android:layout_height="match_parent"
    android:paddingBottom="@dimen/activity_vertical_margin"
    android:paddingLeft="@dimen/activity_horizontal_margin"
    android:paddingRight="@dimen/activity_horizontal_margin"
    android:paddingTop="@dimen/activity_vertical_margin"
    tools:context="com.example.administrator.jobexecution.MainActivity"
    android:orientation="vertical">

    <Button
        android:layout_width="250dp"
        android:layout_height="wrap_content"
        android:text="@string/server"
        android:id="@+id/button"
        android:layout_gravity="center_horizontal"
        android:textSize="30sp" />

    <Button
        android:layout_width="250dp"
        android:layout_height="wrap_content"
        android:text="@string/client"
        android:id="@+id/button2"
        android:layout_gravity="center_horizontal"
        android:textSize="30sp" />
</LinearLayout>
默认layout为RelativeLayout(相对布局 ),RelativeLayout 允许子元素指定它们相对于其父元素或兄弟元素的位置,灵活,属性多,操作难度大,属性之间也更容易出现冲突。我使用LinearLayout(线性布局),设置其属性为vertical(垂直),如果需要水平就设置为horizontal。可以直接在xml文本里写“android:orientation=”vertical””;也可以直接在design界面设置,双击预览界面空白处,出现
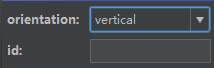
orientation选择“vertical”就行了。
接下来就是添加按钮,同样可以直接敲代码设置各属性,也可以在design界面搞定。左边会有个Palette模块,找到Widgets,选择button,拖到界面相应位置即可。双击按钮,出现

点击text框右边的省略号,出现
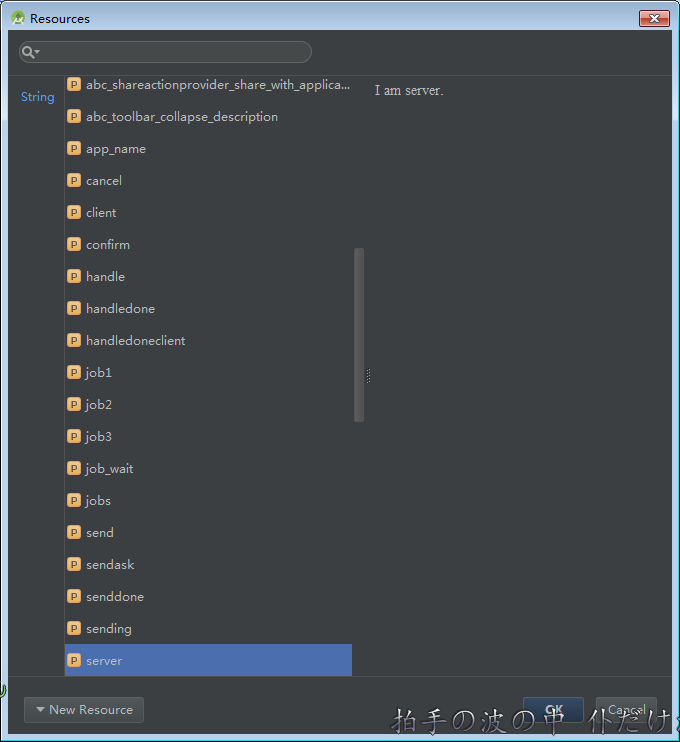
选择自己需要的文本资源,如果没有,点击左下角New Resource,点击New String value,出现
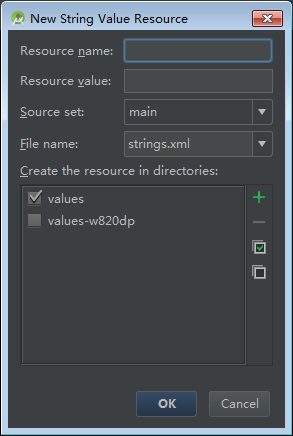
填写name(命名)和value(值),确定即可。然后确定好图5里的id,按钮的内容就设置好了。接着设置大小,在design界面的右下方找到Properties
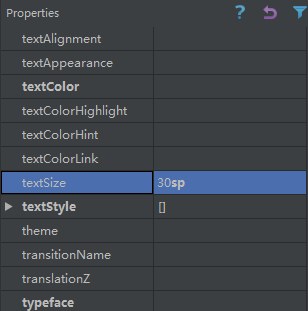
下拉找到textSize,设定适合大小,或者单击Properties栏输入textSize也可以找到。第二个按钮也是一样。界面就完成了。
二、Server起始界面(添加TextView)
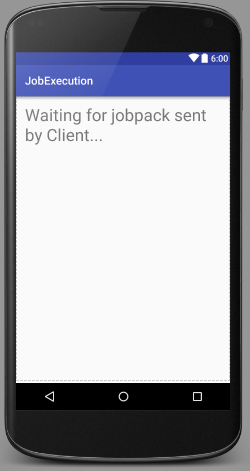
服务器端起始界面是一个等待界面,相当简单
activity_job_waiting.xml代码如下:
<?xml version="1.0" encoding="utf-8"?>
<RelativeLayout xmlns:android="http://schemas.android.com/apk/res/android"
    xmlns:tools="http://schemas.android.com/tools"
    android:layout_width="match_parent"
    android:layout_height="match_parent"
    android:paddingBottom="@dimen/activity_vertical_margin"
    android:paddingLeft="@dimen/activity_horizontal_margin"
    android:paddingRight="@dimen/activity_horizontal_margin"
    android:paddingTop="@dimen/activity_vertical_margin"
    tools:context="com.example.administrator.jobexecution.JobWaitingActivity">

    <TextView
        android:layout_width="wrap_content"
        android:layout_height="wrap_content"
        android:text="@string/job_wait"
        android:id="@+id/textView"
        android:layout_alignParentTop="true"
        android:layout_alignParentStart="true"
        android:textSize="30sp" />
    <TextView
        android:id="@+id/hahaha"
        android:layout_width="match_parent"
        android:layout_height="wrap_content" />
</RelativeLayout>
这里第二个TextView可以先不管,这是连接socket时才用到。实际上就是一个TextView,同样在Palette模块,找到Widgets,选择Plain TextView,拖到界面,然后双击TextView框,按照上述设置按钮的步骤设置好TextView的各属性即可。
三、客户端起始界面(RadioGroup&RadioButton)
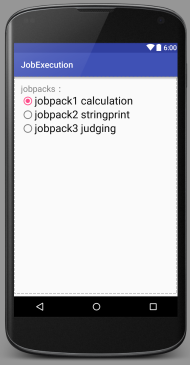
客户端起始界面是显示可以发送的jobpack列表,然而列表显示没有成功,改成了可以选择的按钮,后面这里可以改进。
activity_jobpack_list.xml代码如下:
<?xml version="1.0" encoding="utf-8"?>
<LinearLayout xmlns:android="http://schemas.android.com/apk/res/android"
    xmlns:tools="http://schemas.android.com/tools"
    android:layout_width="match_parent"
    android:layout_height="match_parent"
    android:paddingBottom="@dimen/activity_vertical_margin"
    android:paddingLeft="@dimen/activity_horizontal_margin"
    android:paddingRight="@dimen/activity_horizontal_margin"
    android:paddingTop="@dimen/activity_vertical_margin"
    tools:context="com.example.administrator.jobexecution.JobpackListActivity"
    android:orientation="vertical"
    android:id="@+id/Linear1">

    <TextView
        android:layout_width="wrap_content"
        android:layout_height="wrap_content"
        android:text="@string/jobs"
        android:textSize="20sp"
        android:id="@+id/jobs" />

    <RadioGroup
        android:layout_width="wrap_content"
        android:layout_height="wrap_content"
        android:id="@+id/jobpacks"
        android:orientation="vertical"
        android:checkedButton="@+id/radBtnJob1"
        >

    <RadioButton
        android:layout_width="wrap_content"
        android:layout_height="wrap_content"
        android:text="@string/job1"
        android:id="@+id/radBtnJob1"
        android:textSize="25sp"
        android:checked="false" />


        <RadioButton
            android:layout_width="wrap_content"
            android:layout_height="wrap_content"
            android:text="@string/job2"
            android:id="@+id/radBtnJob2"
            android:textSize="25sp"
            android:checked="false" />

        <RadioButton
            android:layout_width="wrap_content"
            android:layout_height="wrap_content"
            android:text="@string/job3"
            android:id="@+id/radBtnJob3"
            android:textSize="25sp"
            android:checked="false" />
</RadioGroup>


</LinearLayout>
可以看到,这里是一个RadioGroup,包含三个RadioButton,每一个RadioButton表示单个圆形单选框,一个RadioGroup里同时只有一个RadioButton能被选中。RadioGroup的作用是对不同的选择进行区分,因为不同的RadioGroup中的RadioButton互不相关。最上一行左边是一个TextView,内容为“jobpack”。
四、其他界面
客户端起始界面(activity_jobpack_list.xml)选择jobpack之后,跳转到确认发送界面(activity_job_send_ask.xml),确认发送跳转到发送中界面(activity_sending.xml),取消则返回起始界面,服务器端收到后返回信息,客户端收到信息显示发送成功(activity_job_send_done.xml)。
服务器端起始界面(activity_main.xml)收到客户端socket连接请求后建立连接,并自动跳转到任务执行中界面(activity_job_handle.xml),执行成功跳转到执行成功界面(activity_job_handle_done.xml),同时返回信息给客户端,客户端跳转到执行成功界面(activity_job_handle_done_client.xml)。由于这些界面用上面介绍过的东西就可以完成,故不赘述。


 375
375

 被折叠的 条评论
为什么被折叠?
被折叠的 条评论
为什么被折叠?
 到【灌水乐园】发言


