使用Node.js和npm构建脚本或命令行工具。
一、包装shell命令
第一步:创建一个npm项目
npm init;
第二步:创建一个js文件(index.js),包含要运行的脚本
!/usr/bin/env node
console.log('Hello, world!');
需要注意的是,需要添加片段标识符“!/usr/bin/env node”,告知脚本使用Node执行。
第三步:在package.json文件中补充bin部分
{
    ...
    "author": "ligang",
    "bin": {
        "hi": "./index.js"
    }
}
本示例中,使用“hi”作为外部调用的命令。
第四步:安装相关脚本,并运行测试
$ sudo npm install -g
$ hi
Hello, world!
其他:查看安装情况
$ which hi
/usr/local/bin/hi
$ readlink /usr/local/bin/hi
../lib/node_modules/commander_test/test/index.js
$ sudo npm link
/usr/local/bin/hi -> /usr/local/lib/node_modules/commander_test/test/index.js
/usr/local/lib/node_modules/commander_test -> /Users/ligang/myworkspace/commander_test
二、解析命令行选项
有时需要根据用户输入进行交互,最常用的方式是传递给命令行一些有价值的参数。
可以通过“process.argv”将参数传递给Node脚本,可以使用commander;大多数依赖回调或promise等待用户输入,我们可以使用co-prompt利用ES6的yield关键字。
第一步:安装commander、co-prompt
--
-- -
第二步:定义选项
#!/usr/bin/env node --harmony
var co = require('co');
var prompt = require('co-prompt');
var program = require('commander');
program
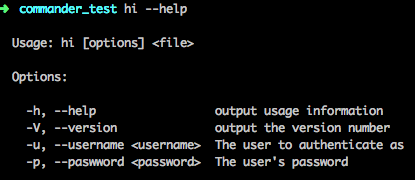
.version('0.0.2')
.arguments('<file>')
.option('-u, --username <username>', 'The user to authenticate as')
.option('-p, --paswword <password>', 'The user\'s password')
.action(function(file){
co(function *(){
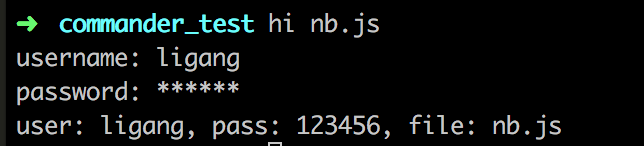
var username = yield prompt('username: ');
var password = yield prompt.password('password: ');
console.log('user: %s pass: %s file: %s',
username, password, file);
});
})
.parse(process.argv);
- 1
- 2
- 3
- 4
- 5
- 6
- 7
- 8
- 9
- 10
- 11
- 12
- 13
- 14
- 15
- 16
- 17
- 18
第三步:测试
$ sudo npm install -g
$ hi nb.js
$ hi --help
注意:yield是ES6命令,所以需要Node 4.0.0+。但是可以通过添加--harmony标记来兼容0.11.2。
三、实现npm init
通过npm init命令可以初始化package.json。
$ npm init
通过Node实现:
#!/usr/bin/env node --harmony
var co = require('co');
var prompt = require('co-prompt');
var program = require('commander');
var fs = require('fs');
var jsonfile = require('jsonfile');
var defaultConf = {
name: process.env.PWD.split("/").pop(),
version: "1.0.0",
description: "",
main: "index.js",
directories: {
"test": "test"
},
dependencies: {},
devDependencies: {},
scripts: {
"test": "echo \"Error: no test specified\" && exit 1"
},
author: "",
license: "ISC"
};
program
.command('init')
.description('run the given remote command')
.action(function () {
co(function*() {
var params = {};
params.name = yield prompt('name: (' + process.env.PWD.split("/").pop() +')');
params.version = yield prompt('version: (1.0.0)');
params.description = yield prompt('description: ');
params.repository = yield prompt('git repository: ');
params.keywords = yield prompt('keywords: ');
params.author = yield prompt('author: ');
params.license = yield prompt('license: (ISC)');
var result = fileTemplate(params);
console.info(result);
var agree = yield prompt('Is this ok? (yes)');
if(agree != "no"){
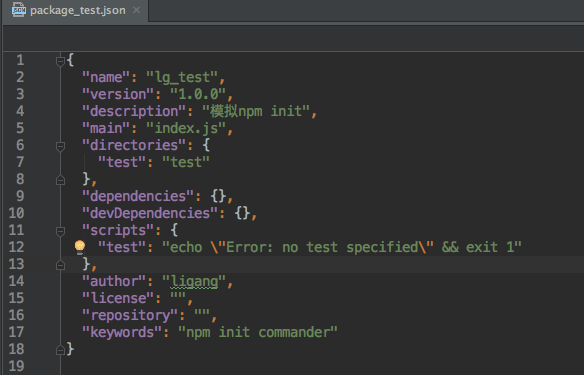
jsonfile.writeFileSync("package_test.json", result, {spaces: 2});
}
process.exit(0);
});
});
program.parse(process.argv);
function fileTemplate(params) {
return Object.assign(defaultConf, params);
}
- 1
- 2
- 3
- 4
- 5
- 6
- 7
- 8
- 9
- 10
- 11
- 12
- 13
- 14
- 15
- 16
- 17
- 18
- 19
- 20
- 21
- 22
- 23
- 24
- 25
- 26
- 27
- 28
- 29
- 30
- 31
- 32
- 33
- 34
- 35
- 36
- 37
- 38
- 39
- 40
- 41
- 42
- 43
- 44
- 45
- 46
- 47
- 48
- 49
- 50
- 51
- 52
- 53
- 54
- 55
- 56
- 57
- 58
测试:
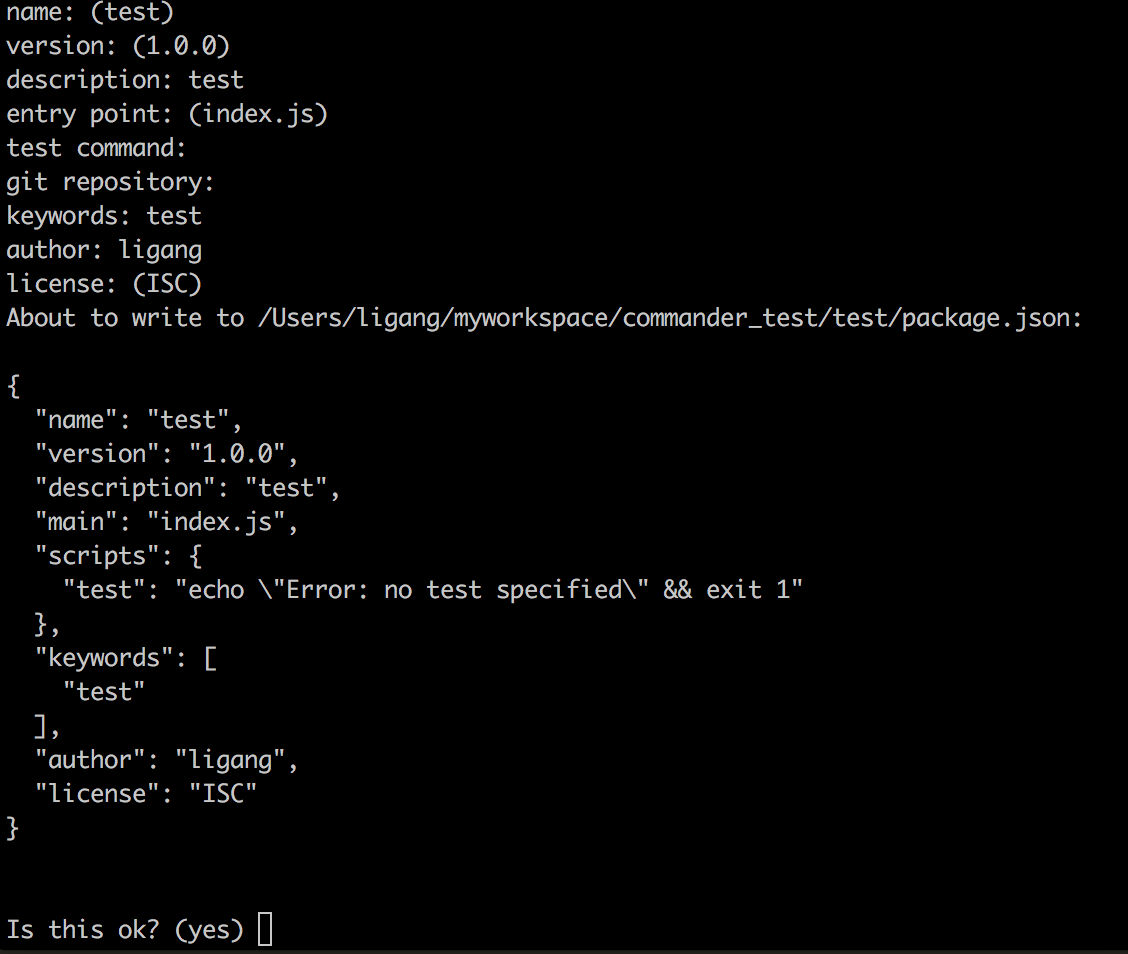
$ lg init
name: (commander_test)lg_test
version: (1.0.0)1.0.0
description: 模拟npm init
git repository:
keywords: npm init commander
author: ligang
license: (ISC)
{ name: 'lg_test',
  version: '1.0.0',
  description: '模拟npm init',
  main: 'index.js',
  directories: { test: 'test' },
  dependencies: {},
  devDependencies: {},
  scripts: { test: 'echo "Error: no test specified" && exit 1' },
  author: 'ligang',
  license: '',
  repository: '',
  keywords: 'npm init commander' }
Is this ok? (yes)yes
- 1
- 2
- 3
- 4
- 5
- 6
- 7
- 8
- 9
- 10
- 11
- 12
- 13
- 14
- 15
- 16
- 17
- 18
- 19
- 20
- 21
参考地址:https://developer.atlassian.com/blog/2015/11/scripting-with-node/#packaging-shell-commands


 4932
4932


 被折叠的 条评论
为什么被折叠?
被折叠的 条评论
为什么被折叠?
 到【灌水乐园】发言


