修改Adapter实现GridView列表中的增加按钮

本文介绍了如何在GridView列表中添加一个用于增加图片的按钮,避免改动原始数据列表。推荐的方法是在Adapter内部通过调整getItemCount()并判断位置来插入按钮视图,实现了在列表末尾显示加号图标的功能,并提供了点击事件的处理。
摘要由CSDN通过智能技术生成
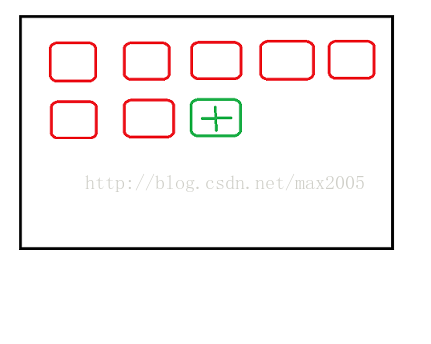
如下是常见的GridView,红色是显示的图片,绿色加号是增加图片的按钮,如何实现这样的效果?

第一个思路,是在数据list最后位置增加一个加号图片数据,但这样改动原始list数据的方法显然不好,牵扯很多。
第二个思路,是在Adapter里面的数据list最后一个位置增加加号图片数据,但是,为了显示一个按钮而变动正常数据list总是不妥的。再有一点,Adapter中数据list的头指针是自己的,list里面的items数据项可能和外面的list共享的,也即可能是同一体。可能是这样,这点我没细看。
第三个思路是我推荐的,其方法是在Adapter比对View和数据item时偷偷插入一环,

public class RvAdapterCollectPic extends Adapter<RvAdapterCollectPic.ViewHolder> {
     List<LvRowFile> listItems;

     pu
以下是一个简单的Android Studio登录代码,登录成功后跳转到课程表界面: ### LoginActivity.java ``` public class LoginActivity extends AppCompatActivity { private EditText etUsername, etPassword; private Button btnLogin; @Override protected void onCreate(Bundle savedInstanceState) { super.onCreate(savedInstanceState); setContentView(R.layout.activity_login); etUsername = findViewById(R.id.et_username); etPassword = findViewById(R.id.et_password); btnLogin = findViewById(R.id.btn_login); btnLogin.setOnClickListener(new View.OnClickListener() { @Override public void onClick(View view) { String username = etUsername.getText().toString(); String password = etPassword.getText().toString(); // TODO: 进行登录验证 Intent intent = new Intent(LoginActivity.this, CourseActivity.class); startActivity(intent); finish(); } }); } } ``` ### activity_login.xml ``` <RelativeLayout xmlns:android="http://schemas.android.com/apk/res/android" android:layout_width="match_parent" android:layout_height="match_parent"> <EditText android:id="@+id/et_username" android:layout_width="match_parent" android:layout_height="wrap_content" android:hint="用户名" android:inputType="text" /> <EditText android:id="@+id/et_password" android:layout_width="match_parent" android:layout_height="wrap_content" android:layout_below="@id/et_username" android:hint="密码" android:inputType="textPassword" /> <Button android:id="@+id/btn_login" android:layout_width="match_parent" android:layout_height="wrap_content" android:layout_below="@id/et_password" android:text="登录" /> </RelativeLayout> ``` 接下来是课程表界面的布局和代码: ### CourseActivity.java ``` public class CourseActivity extends AppCompatActivity { private GridView gridView; private Button btnAdd, btnModify, btnDelete; private List<Course> courseList; private CourseAdapter adapter; @Override protected void onCreate(Bundle savedInstanceState) { super.onCreate(savedInstanceState); setContentView(R.layout.activity_course); gridView = findViewById(R.id.grid_view); btnAdd = findViewById(R.id.btn_add); btnModify = findViewById(R.id.btn_modify); btnDelete = findViewById(R.id.btn_delete); courseList = new ArrayList<>(); adapter = new CourseAdapter(this, courseList); gridView.setAdapter(adapter); // TODO: 加载课程表数据 btnAdd.setOnClickListener(new View.OnClickListener() { @Override public void onClick(View view) { // TODO: 打开添加课程界面 } }); btnModify.setOnClickListener(new View.OnClickListener() { @Override public void onClick(View view) { // TODO: 打开修改课程界面 } }); btnDelete.setOnClickListener(new View.OnClickListener() { @Override public void onClick(View view) { // TODO: 删除选课程 } }); } } ``` ### activity_course.xml ``` <RelativeLayout xmlns:android="http://schemas.android.com/apk/res/android" android:layout_width="match_parent" android:layout_height="match_parent"> <GridView android:id="@+id/grid_view" android:layout_width="match_parent" android:layout_height="wrap_content" android:numColumns="5" android:horizontalSpacing="1dp" android:verticalSpacing="1dp" android:stretchMode="columnWidth" /> <LinearLayout android:layout_width="match_parent" android:layout_height="wrap_content" android:layout_below="@id/grid_view" android:orientation="horizontal"> <Button android:id="@+id/btn_add" android:layout_width="0dp" android:layout_height="wrap_content" android:layout_weight="1" android:text="添加" /> <Button android:id="@+id/btn_modify" android:layout_width="0dp" android:layout_height="wrap_content" android:layout_weight="1" android:text="修改" /> <Button android:id="@+id/btn_delete" android:layout_width="0dp" android:layout_height="wrap_content" android:layout_weight="1" android:text="删除" /> </LinearLayout> </RelativeLayout> ``` 最后是课程表的适配器和数据模型: ### CourseAdapter.java ``` public class CourseAdapter extends BaseAdapter { private Context context; private List<Course> courseList; public CourseAdapter(Context context, List<Course> courseList) { this.context = context; this.courseList = courseList; } @Override public int getCount() { return courseList.size(); } @Override public Object getItem(int position) { return courseList.get(position); } @Override public long getItemId(int position) { return position; } @Override public View getView(int position, View convertView, ViewGroup parent) { if (convertView == null) { convertView = LayoutInflater.from(context).inflate(R.layout.item_course, parent, false); } TextView tvName = convertView.findViewById(R.id.tv_name); TextView tvTime = convertView.findViewById(R.id.tv_time); TextView tvLocation = convertView.findViewById(R.id.tv_location); Course course = courseList.get(position); tvName.setText(course.getName()); tvTime.setText(course.getTime()); tvLocation.setText(course.getLocation()); return convertView; } } ``` ### Course.java ``` public class Course { private String name; private String time; private String location; public Course(String name, String time, String location) { this.name = name; this.time = time; this.location = location; } public String getName() { return name; } public void setName(String name) { this.name = name; } public String getTime() { return time; } public void setTime(String time) { this.time = time; } public String getLocation() { return location; } public void setLocation(String location) { this.location = location; } } ``` 希望这份代码能够帮到你。
评论
添加红包

请填写红包祝福语或标题

红包个数最小为10个

红包金额最低5元

当前余额3.43前往充值 >
需支付:10.00
成就一亿技术人!
领取后你会自动成为博主和红包主的粉丝 规则
hope_wisdom
发出的红包
实付
使用余额支付
点击重新获取
扫码支付
钱包余额 0

抵扣说明:

1.余额是钱包充值的虚拟货币,按照1:1的比例进行支付金额的抵扣。
2.余额无法直接购买下载,可以购买VIP、付费专栏及课程。

余额充值