


- 1:安装 myeclipse
- 2:下载解压 tomcat7.55
- 3:下载解压 maven
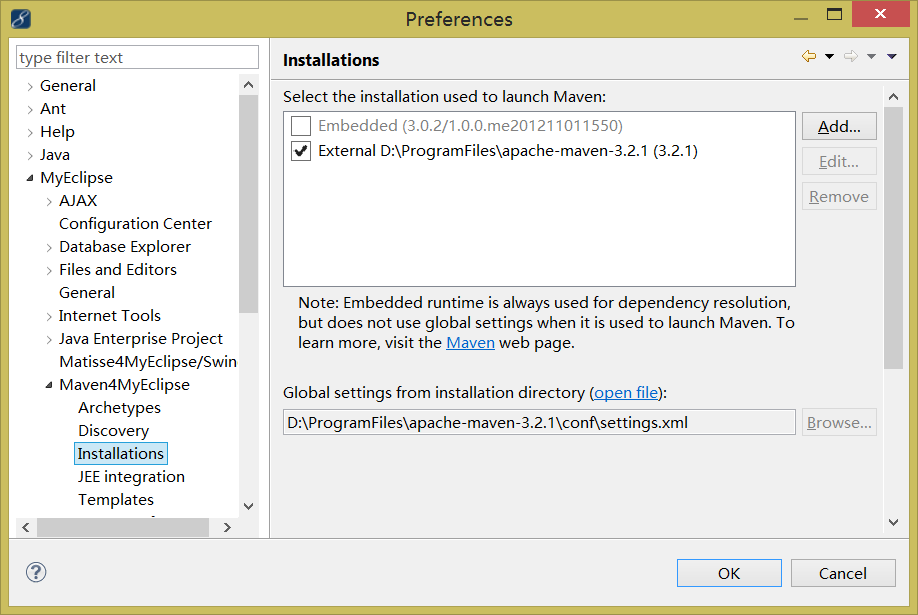
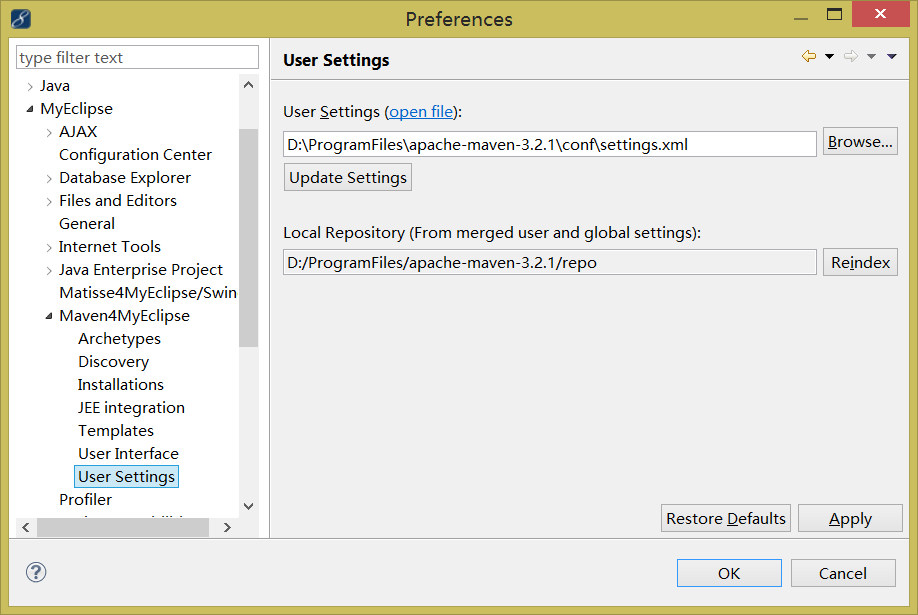
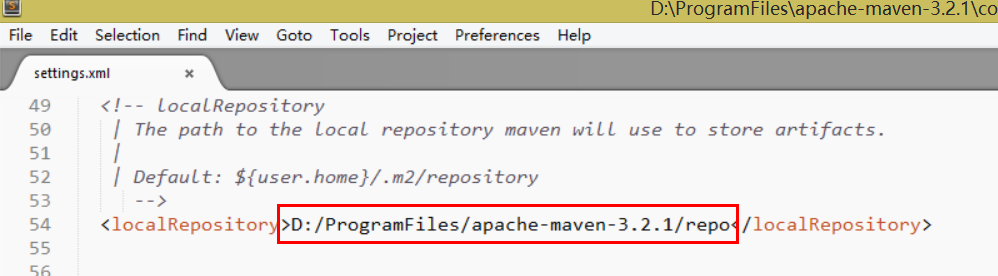
- 4:配置maven,之所以用maven 是因为 maven管理项目很方便,之所以重新配置maven 是因为本地maven版本低,功能具有局限性
- 右击项目 run as maven clean 下载必要的文件
- 5:新建 maven 项目 ,选择 webapp
- 6:加载 spring,要想用spring,首先就是要有spring
pom.xml<project xmlns="http://maven.apache.org/POM/4.0.0" xmlns:xsi="http://www.w3.org/2001/XMLSchema-instance"xsi:schemaLocation="http://maven.apache.org/POM/4.0.0 http://maven.apache.org/maven-v4_0_0.xsd"><modelVersion>4.0.0</modelVersion><groupId>com.mdevil</groupId><artifactId>server</artifactId><packaging>war</packaging><version>0.0.1-SNAPSHOT</version><name>server Maven Webapp</name><url>http://maven.apache.org</url><dependencies><dependency><groupId>junit</groupId><artifactId>junit</artifactId><version>4.10</version><scope>test</scope></dependency><dependency><groupId>org.springframework</groupId><artifactId>spring-context</artifactId><version>3.2.10.RELEASE</version></dependency><dependency><groupId>org.springframework</groupId><artifactId>spring-webmvc</artifactId><version>3.2.10.RELEASE</version></dependency></dependencies><build><finalName>server</finalName></build></project>
web.xml,程序第一步,加载 “上下文加载器,加载时的参数为 下面的 <context-param>,以便在程序启动之初,初始化spring,经大神指导,未经初始化的spring不可用”<?xml version="1.0" encoding="UTF-8"?><web-app id="WebApp_9" version="2.4" xmlns="http://java.sun.com/xml/ns/j2ee"xmlns:xsi="http://www.w3.org/2001/XMLSchema-instance"xsi:schemaLocation="http://java.sun.com/xml/ns/j2ee http://java.sun.com/xml/ns/j2ee/web-app_2_4.xsd"><context-param><param-name>contextConfigLocation</param-name><param-value>classpath:applicationContext.xml</param-value></context-param><listener><listener-class>org.springframework.web.context.ContextLoaderListener</listener-class></listener></web-app>
      applicationContext.xml,该文件即上文 “上下文加载器”需要加载的 上下文文件,该文件实现了对spring的初始化配置,开启了多个特性,具体特性是干什么的,我也不知道,格式固定。


      <?xml version="1.0" encoding="UTF-8"?>


      <beans xmlns="http://www.springframework.org/schema/beans"


          xmlns:xsi="http://www.w3.org/2001/XMLSchema-instance" xmlns:context="http://www.springframework.org/schema/context"


          xmlns:aop="http://www.springframework.org/schema/aop" xmlns:tx="http://www.springframework.org/schema/tx"


          xsi:schemaLocation="http://www.springframework.org/schema/beans


                 http://www.springframework.org/schema/beans/spring-beans-3.2.xsd


                 http://www.springframework.org/schema/context


                 http://www.springframework.org/schema/context/spring-context-3.2.xsd">


          <context:annotation-config />


      </beans>
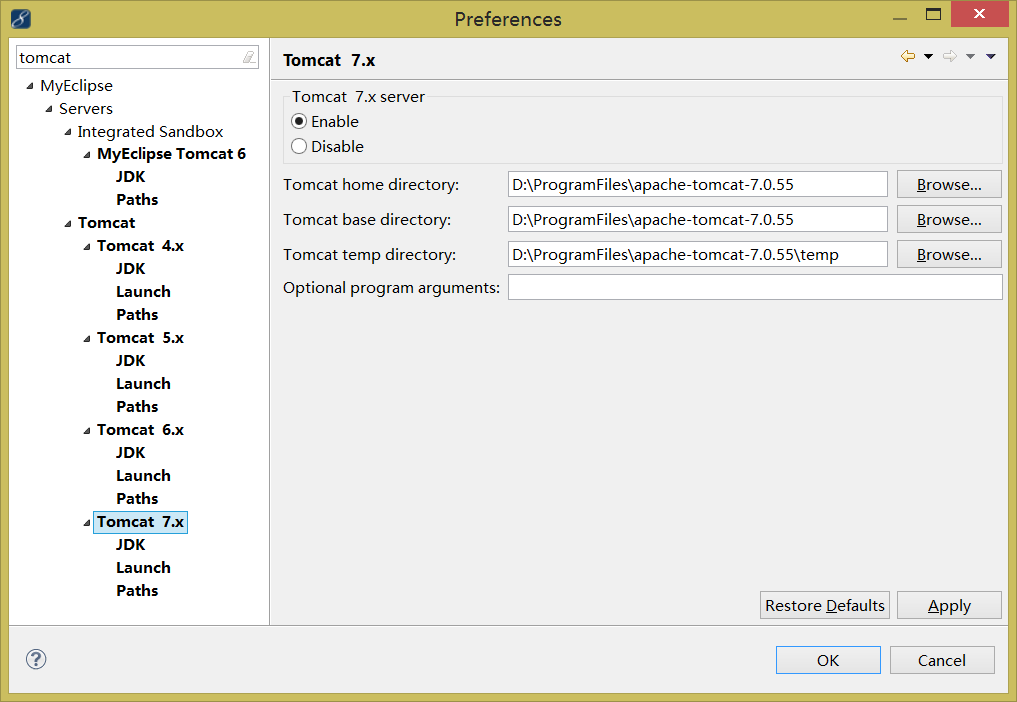
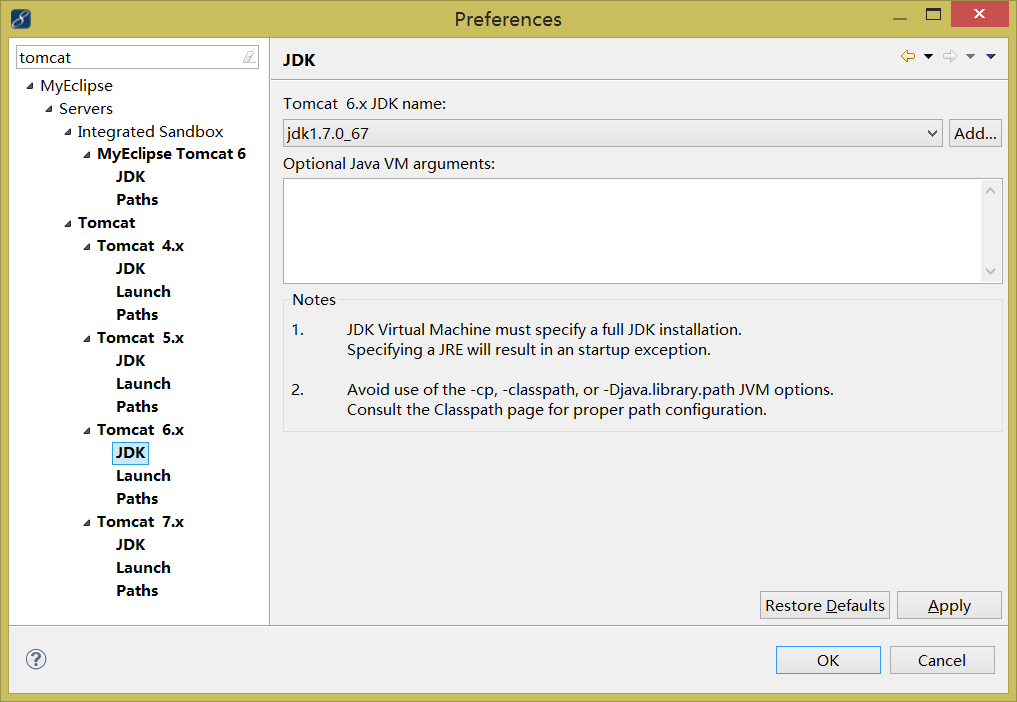
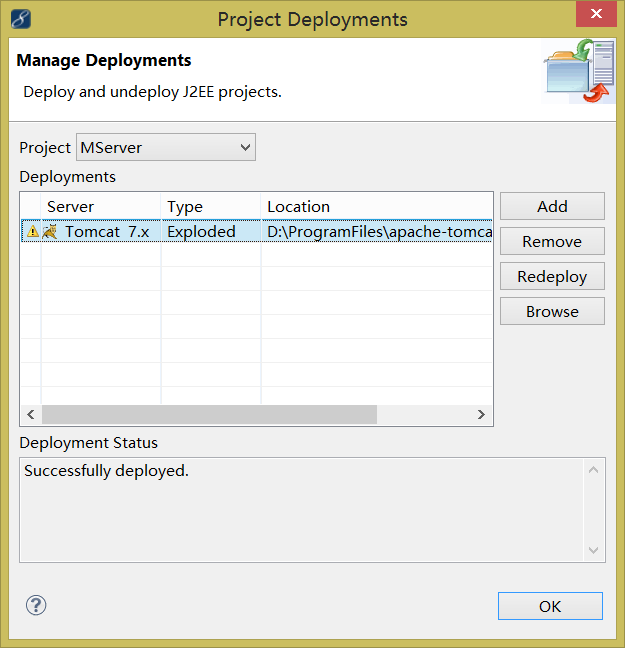
- 7:配置tomcat,用自己下载的tomcat,方便管理,控制
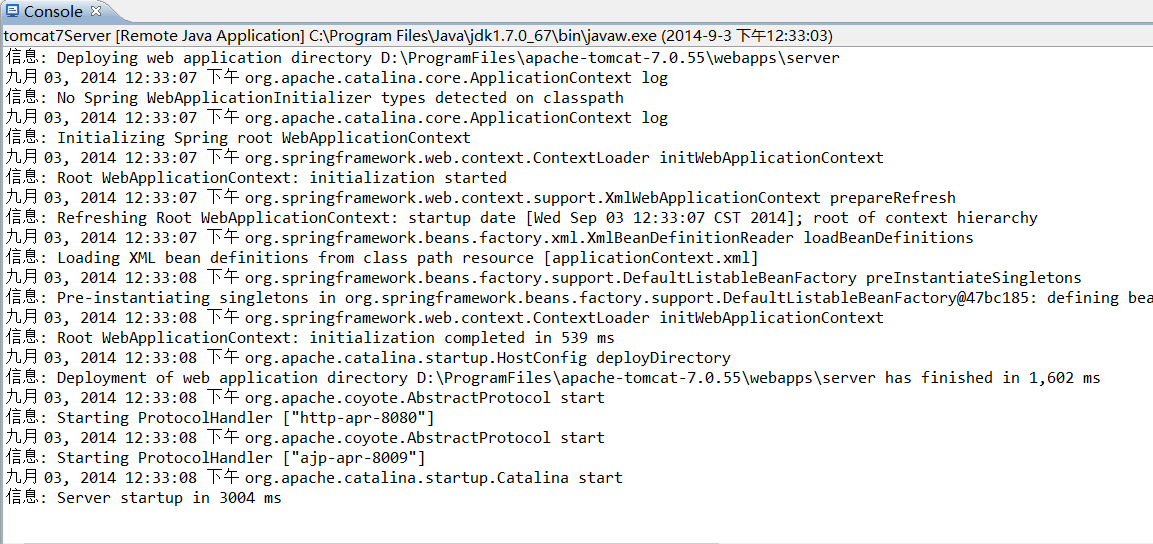
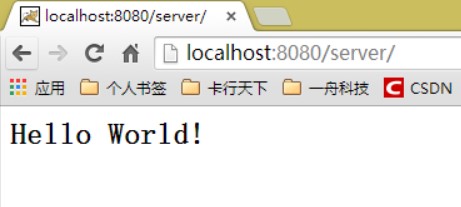
- 8:在浏览器中输入 http://localhost:8080/server/


 1545
1545

 被折叠的 条评论
为什么被折叠?
被折叠的 条评论
为什么被折叠?
 到【灌水乐园】发言


