


前言
如果要给很多台客户端主机安装操作系统,要是每一台都拿张安装光盘一台一台主机的去装系统那就太浪费时间和精力了。在生产环境中也不实际。
今天我这里准备了三种方式应对少量和大量机器安装系统的方法:
- 全自动化安装ISO镜像
- PXE自动化安装CentOS
- cobbler自动化安装CentOS
如果只是安装那么几台机器,可以考虑使用全自动化安装ISO镜像,
如果是上百台这种数量级的,可以使用PXE或是cobbler来自动化安装。
制作全自动化安装ISO光盘
在开始之前,我首先简要介绍一下系统光盘中isolinux目录列表
    solinux.bin:光盘引导程序,在mkisofs的选项中需要明确给 出文件路径,这个文件属于SYSLINUX项目
    isolinux.cfg:isolinux.bin的配置文件,当光盘启动后(即运行isolinux.bin),会自动去找isolinux.cfg文件
    vesamenu.c32:是光盘启动后的安装图形界面,也属于 SYSLINUX项目,menu.c32版本是纯文本的菜单
    Memtest:内存检测,这是一个独立的程序
    splash.jgp:光盘启动界面的背景图
    vmlinuz是内核映像
    initrd.img是ramfs (先cpio,再gzip压缩)
准备kickstart文件
创建kickstart文件的方式:
1.直接手动编辑
2.依据某模版修改
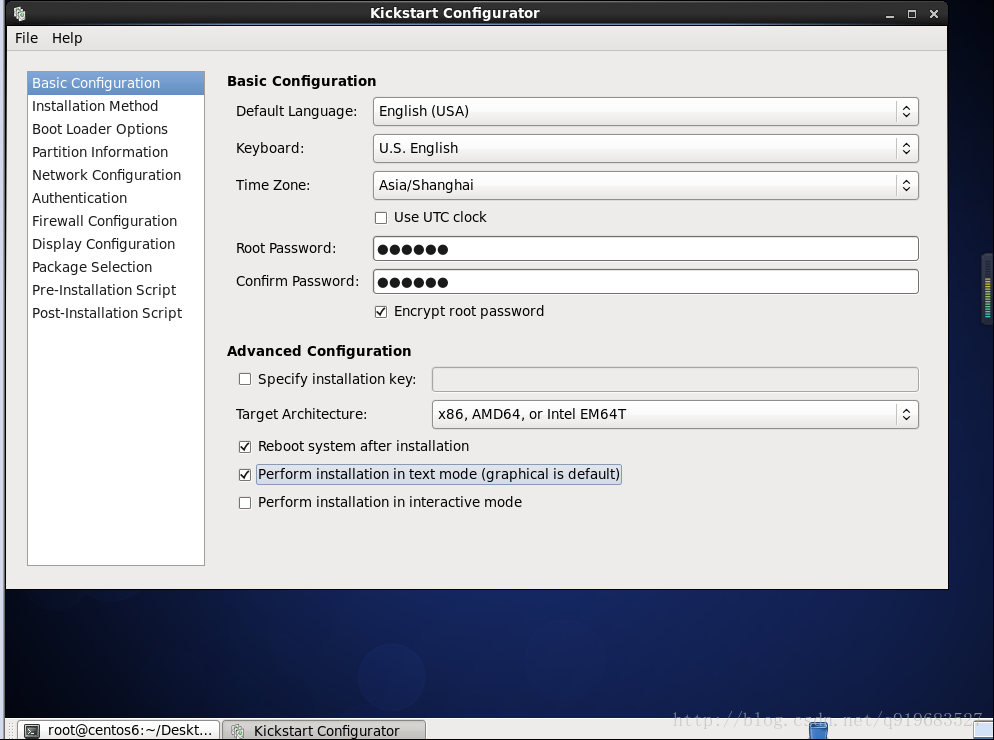
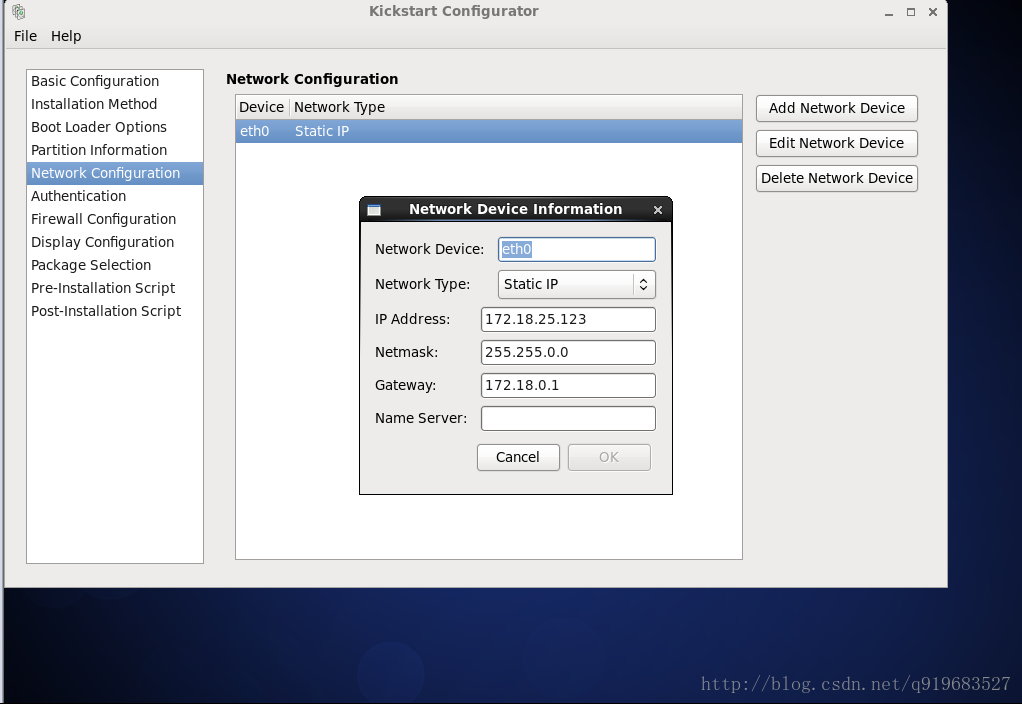
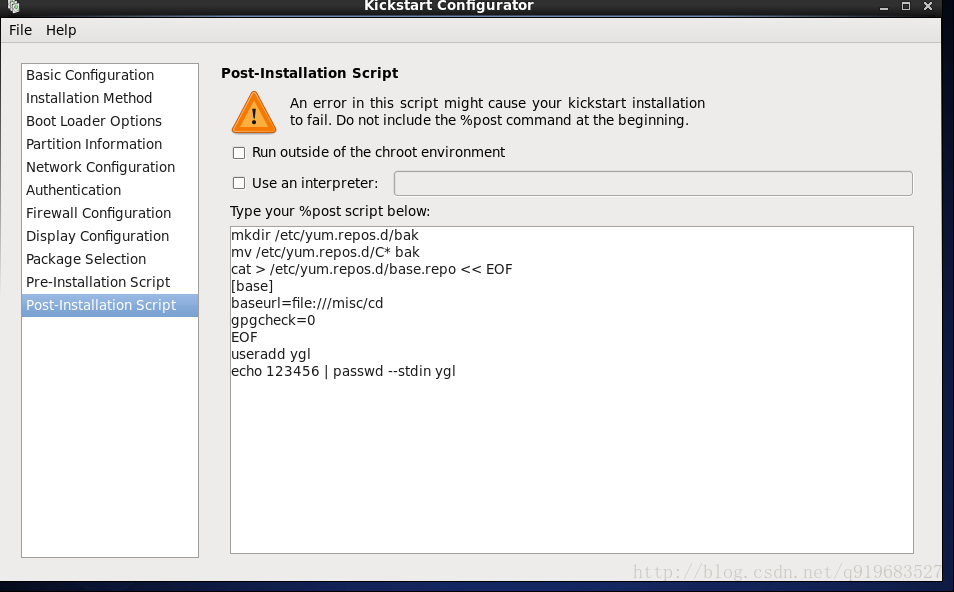
3.可使用创建工具:system-config-kickstart这里我选择的是第三种方式system-config-kickstart来生成kickstart文件
第一步
准备一台有图形界面的机器,我这里准备的是centos6
先把这个小工具安装到虚拟机上
[ root@ygl ~ ]# yum install system-config-kickstart输入命令
[ root@ygl ~ ]# system-config-kickstart弹出一个可输入配置界面
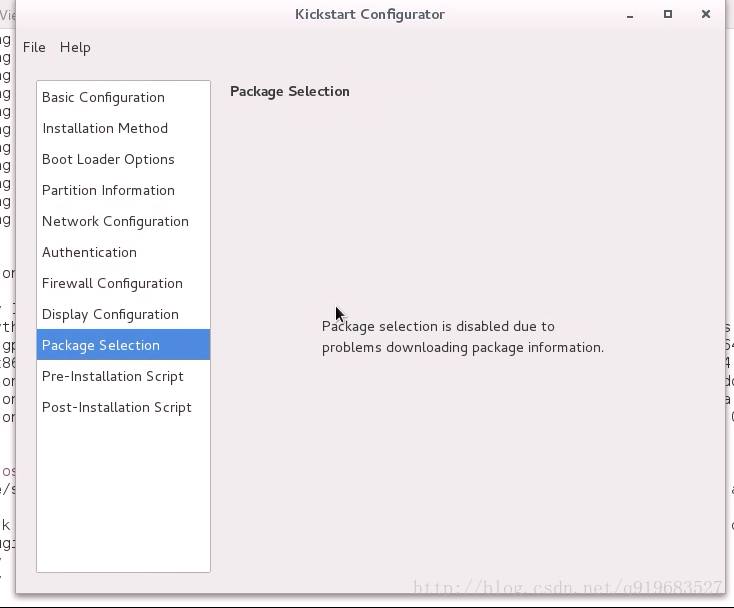
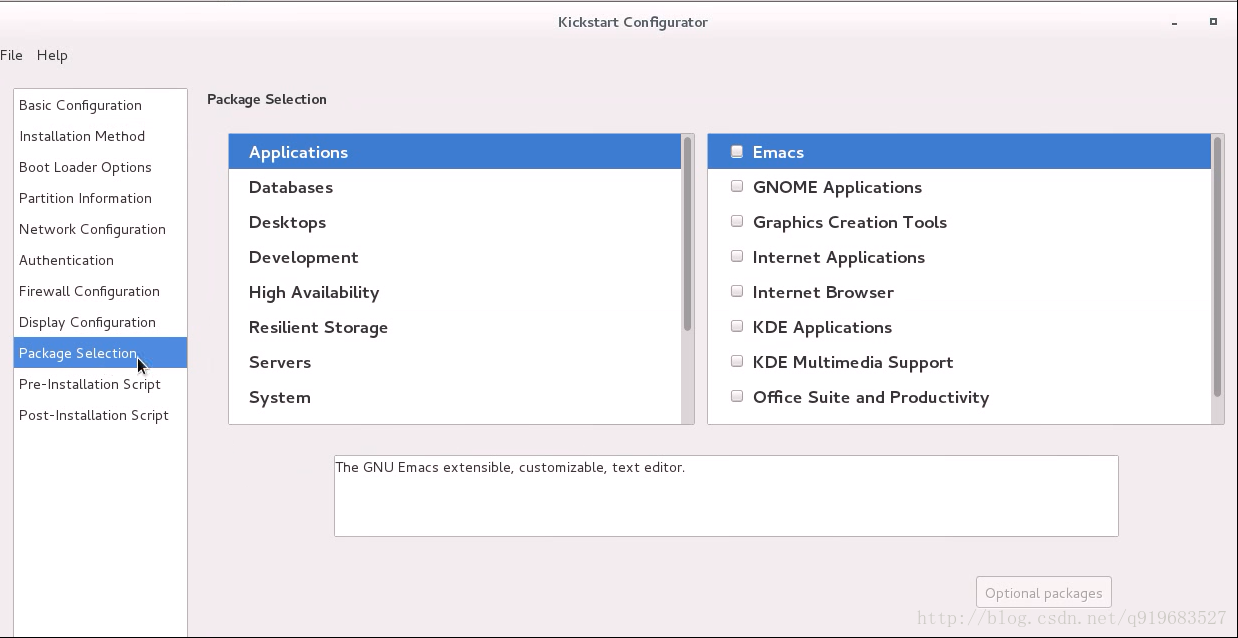
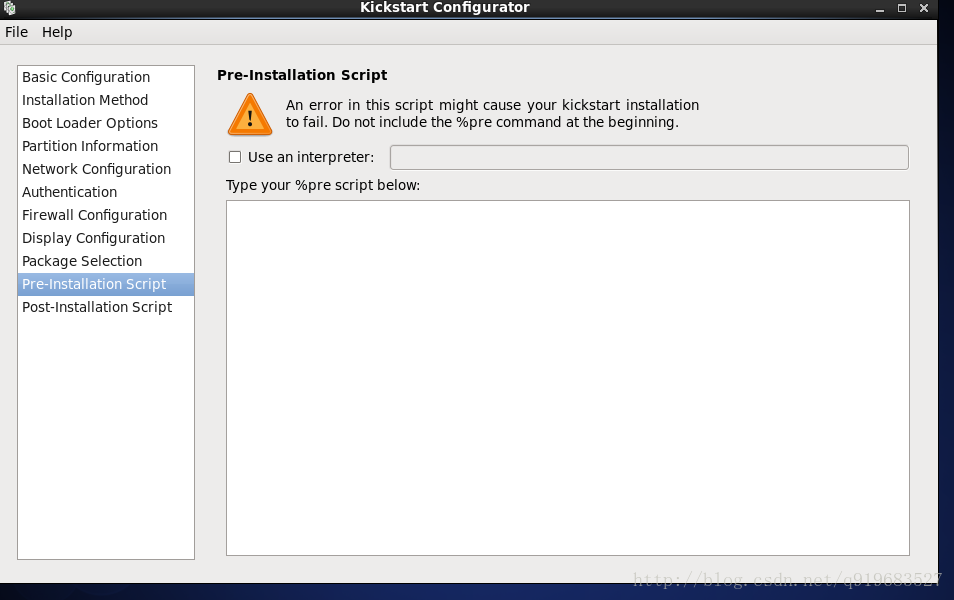
下面这几步,我用图片我做实验时的图片来代替
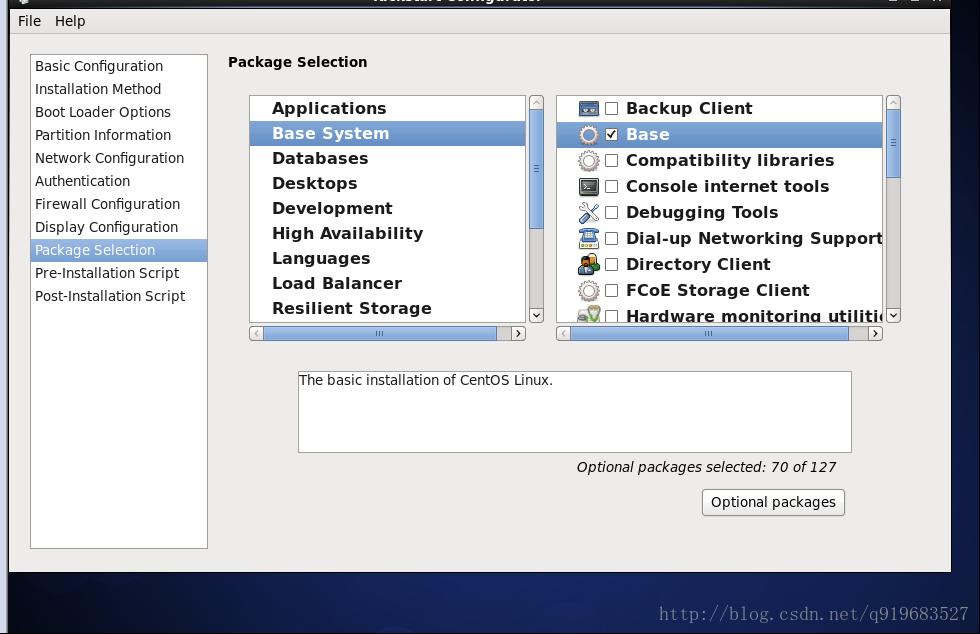
注意:下面放的两张图是在7上实验时会遇见的坑,6和7的包选择那里是不一样的。
7的时候要把我们的yum源的配置文件里面的base源名字设置为development才能看见包选择,不然是看不到界面的。
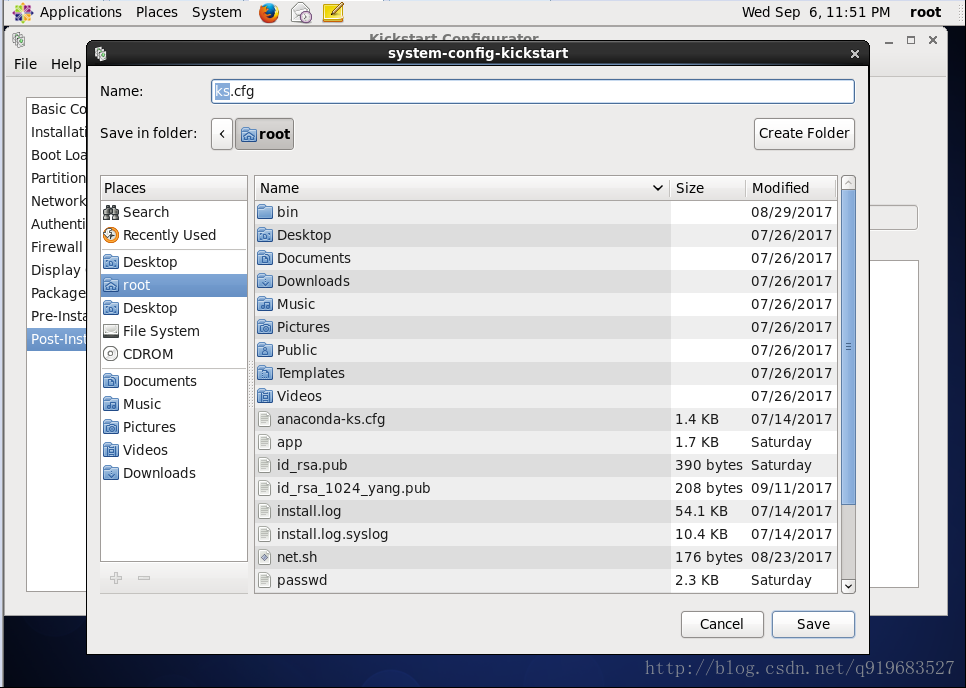
最后我把文件保存在root家目录下,生成了一个ks.cfg文件
[ root@centos6 ~ ]# cat ks.cfg
#platform=x86, AMD64, or Intel EM64T
#version=DEVEL
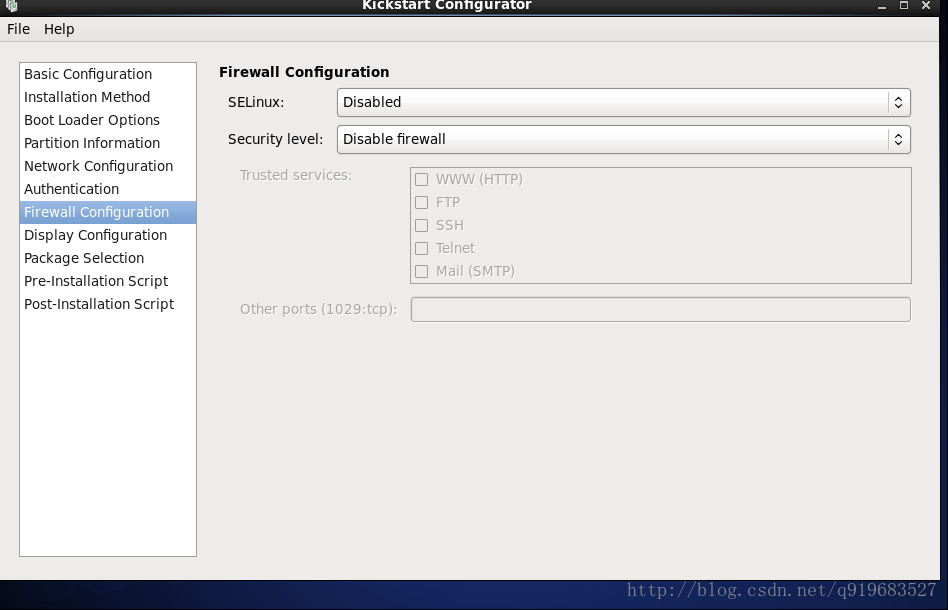
# Firewall configuration
firewall --disabled
# Install OS instead of upgrade
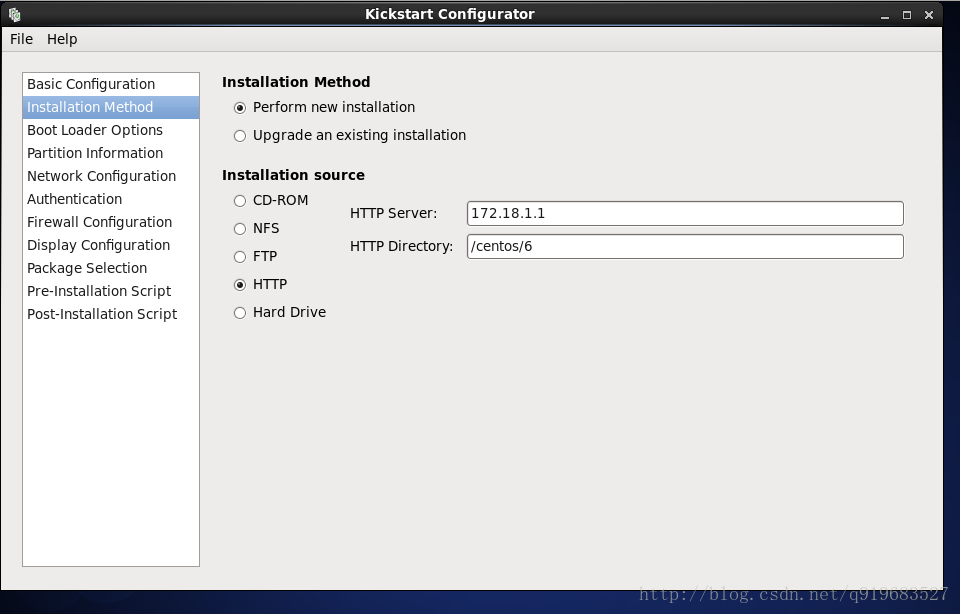
install
# Use network installation
url --url="http://172.18.1.1/centos/6"
# Root password
rootpw --iscrypted $1$TUQuZZcF$pdMUhBTFzd/xSZPQ08OXB0
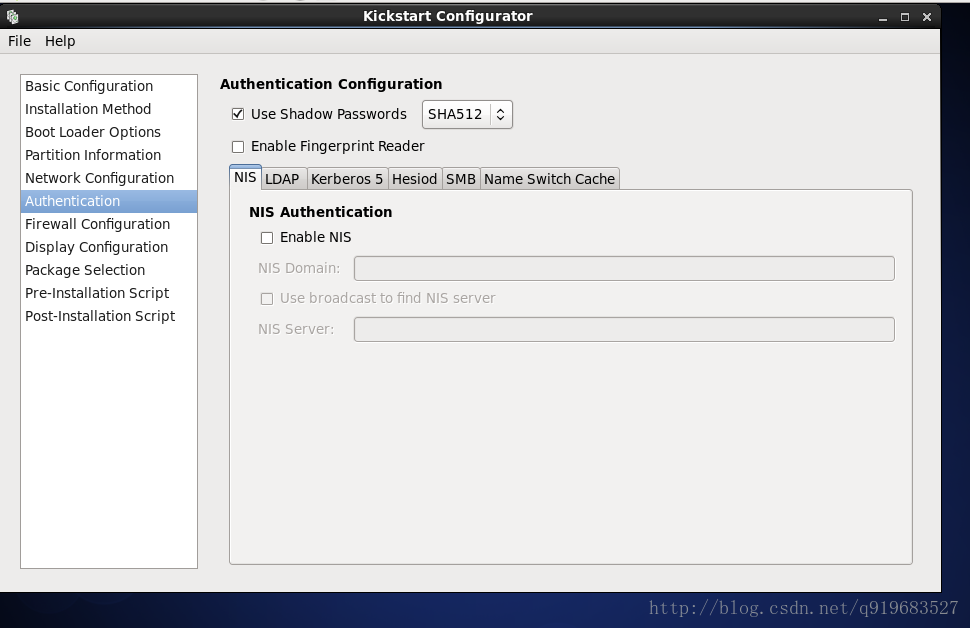
# System authorization information
auth --useshadow --passalgo=sha512
# Use text mode install
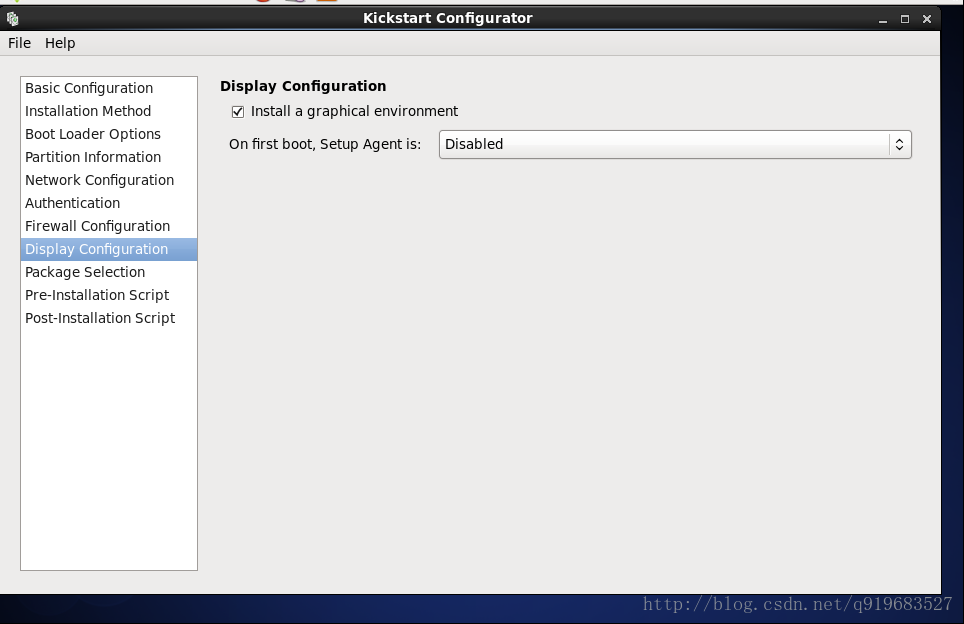
text
firstboot --disable
# System keyboard
keyboard us
# System language
lang en_US
# SELinux configuration
selinux --disabled
# Installation logging level
logging --level=info
# Reboot after installation
reboot
# System timezone
timezone Asia/Shanghai
# Network information
network --bootproto=static --device=eth0 --gateway=172.18.0.1 --ip=172.18.25.123 --netmask=255.255.0.0 --onboot=on
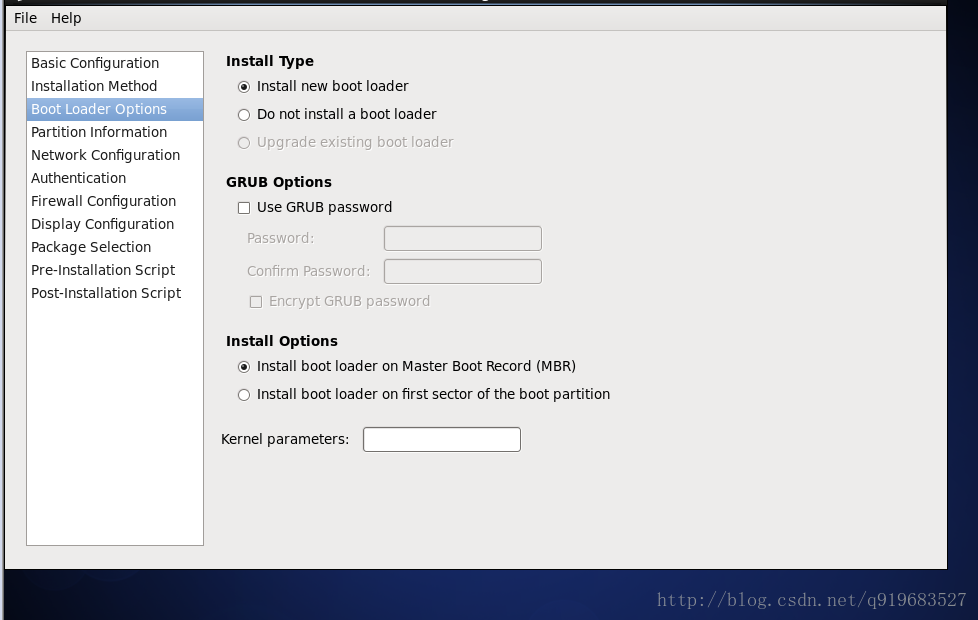
# System bootloader configuration
bootloader --location=mbr
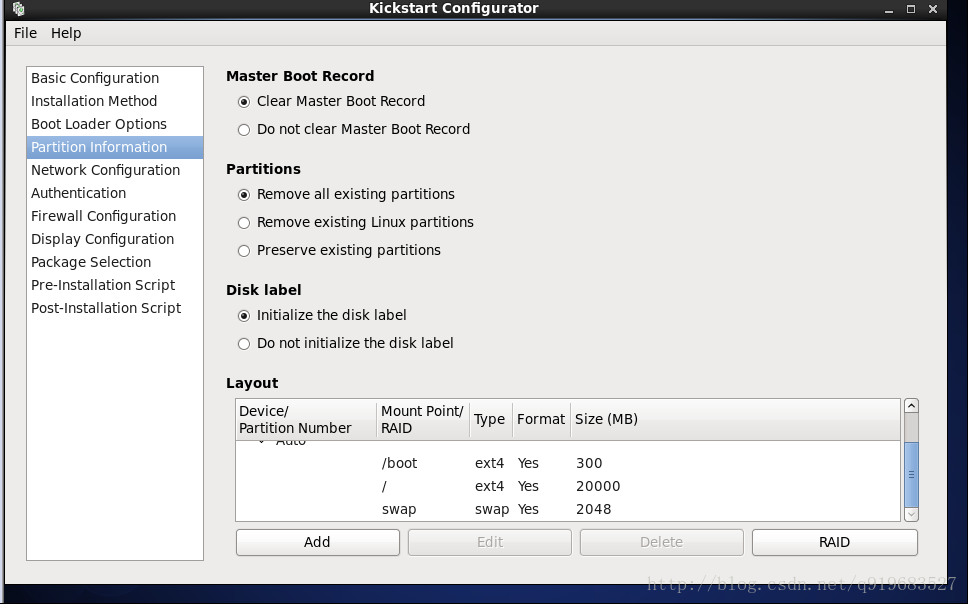
# Clear the Master Boot Record
zerombr
# Partition clearing information
clearpart --all --initlabel
# Disk partitioning information
part /boot --fstype="ext4" --size=300
part / --fstype="ext4" --size=20000
part swap --fstype="swap" --size=2048
%post
mkdir /etc/yum.repos.d/bak
mv /etc/yum.repos.d/*repo bak
cat > /etc/yum.repos.d/base.repo << EOF
[base]
baseurl=file:///misc/cd
gpgcheck=0
EOF
useradd ygl
echo 123456 | passwd --stdin ygl
%end
%packages
@base
@core
@workstation-policy
@server-policy
vim
autofs
%endcore
一些基本的包组是我自己加进去的
@core
@workstation-policy
@server-policy
vim
autofs比如,刚好你要做一个kickstart文件,直接复制我上面的代码拿去修改就好了。
注意:kickstart文件配置好了,要使用命令查错。
[ root@centos6 ~ ]# ksvalidator ks.cfg如果上面这些都准备好了,就可以进行下一步的操作了。
镜像制作前准备
首先,要确定你的机器已经挂载了光盘,比如,我要做的是6的自动化安装镜像,那么我这里挂载的光盘就是6的镜像文件。
1.把所挂载的光盘里的所有文件全部复制出来,放到一个你指定的地方,我放在了/test/fulliso下面。
注意哦:有两个是隐藏文件,别忘了复制出来哦。
[ root@ygl /misc/cd ]# cp -r * /test/fulliso/
[ root@ygl /misc/cd ]# cp .discinfo .treeinfo /test/fulliso/
2.删除所有的TRANS.TBL文件
[ root@ygl /misc/cd ]# cd /test/fulliso/
[ root@ygl /test/fulliso ]# find -name TRANS.TBL -exec rm {} \;
3.删除repodata文件,再把光盘里的的源信息文件复制过来
注意:我这里是拿的6.9版本的系统做的实验,每个版本的名字可能都不同,
这个文件是,repodata目录下的,以x86_64-comps结尾的文件,文件名老长老长的那个。
[ root@ygl /test/fulliso ]# rm -rf repodata
[ root@ygl /test/fulliso ]# mkdir repodata
[ root@ygl /test/fulliso ]# cp /misc/cd/repodata/43d8fd* repodata/
4.再自己生成源文件
[ root@ygl /test/fulliso ]# createrepo -g repodata/43d8fd068164b0f042845474d6a22262798b9f0d1f49ad1bf9f95b953089777d-c6-x86_64-comps.xml ./5.修改kickstart文件。
之前生成的kickstart文件是通用版的,现在我们进行修改成自己需要的。
我准备了两个版本,最小需求版,和完整版。
这是一个最小化安装的kickstart文件
[ root@ygl /test/fulliso ]# cat ks6-mini.cfg
#platform=x86, AMD64, or Intel EM64T
#version=DEVEL
# Firewall configuration
firewall --disabled
# Install OS instead of upgrade
install
# Use CDROM installation media
cdrom
# Root password
rootpw --iscrypted $1$TUQuZZcF$pdMUhBTFzd/xSZPQ08OXB0
# System authorization information
auth  --useshadow  --passalgo=sha512
# Use text mode install
text
firstboot --disable
# System keyboard
keyboard us
# System language
lang en_US
# SELinux configuration
selinux --disabled
# Installation logging level
logging --level=info
# Reboot after installation
reboot
# System timezone
timezone  Asia/Shanghai
# Network information
network  --bootproto=static --device=eth0 --gateway=172.18.0.1 --ip=172.18.25.123 --netmask=255.255.0.0 --onboot=on
# System bootloader configuration
bootloader --location=mbr
# Clear the Master Boot Record
zerombr
# Partition clearing information
clearpart --all --initlabel
# Disk partitioning information
part /boot --fstype="ext4" --size=300
part / --fstype="ext4" --size=20000
part swap --fstype="swap" --size=2048

%post
rm -f /etc/yum.repo.d/*cat > /etc/yum.repos.d/base.repo << EOF
[base]
baseurl=file:///misc/cd
gpgcheck=0
EOF
useradd ygl
echo 123456 | passwd --stdin ygl
%end

%packages
@base
@core
vim
autofs
%end
这是一个完整版的kickstart文件
[ root@ygl /test/fulliso ]# cat ks6.cfg
#platform=x86, AMD64, or Intel EM64T
#version=DEVEL
# Firewall configuration
firewall --disabled
# Install OS instead of upgrade
install
# Use CDROM installation media
cdrom
# Root password
rootpw --iscrypted $1$TUQuZZcF$pdMUhBTFzd/xSZPQ08OXB0
# System authorization information
auth  --useshadow  --passalgo=sha512
# Use text mode install
text
firstboot --disable
# System keyboard
keyboard us
# System language
lang en_US
# SELinux configuration
selinux --disabled
# Installation logging level
logging --level=info
# Reboot after installation
reboot
# System timezone
timezone  Asia/Shanghai
# Network information
network  --bootproto=static --device=eth0 --gateway=172.18.0.1 --ip=172.18.25.123 --netmask=255.255.0.0 --onboot=on
# System bootloader configuration
bootloader --location=mbr
# Clear the Master Boot Record
zerombr
# Partition clearing information
clearpart --all --initlabel
# Disk partitioning information
part /boot --fstype="ext4" --size=300
part / --fstype="ext4" --size=20000
part swap --fstype="swap" --size=2048

%post
rm -f /etc/yum.repo.d/*
cat > /etc/yum.repos.d/base.repo << EOF
[base]
baseurl=file:///misc/cd
gpgcheck=0
EOF
useradd ygl
echo 123456 | passwd --stdin ygl
%end

%packages
@base
@core
@debugging
@basic-desktop
@desktop-debugging
@desktop-platform
@directory-client
@fonts
@general-desktop
@graphical-admin-tools
@input-methods
@internet-applications
@internet-browser
@java-platform
@kde-desktop
@legacy-x
@network-file-system-client
@office-suite
@print-client
@remote-desktop-clients
@server-platform
@x11
mtools
pax
python-dmidecode
oddjob
wodim
sgpio
genisoimage
device-mapper-persistent-data
abrt-gui
qt-mysql
samba-winbind
certmonger
pam_krb5
krb5-workstation
xterm
xorg-x11-xdm
libXmu
rdesktop
autofs
%end
6.我们可以专门创建一个目录来放kickstart文件
[ root@ygl /test/fulliso ]# mkdir kickstart
[ root@ygl /test/fulliso ]# mv ks6.cfg ks6-mini.cfg kickstart/
7.接下来制作启动菜单
[ root@ygl /test/fulliso ]# cd isolinux/
[ root@ygl /test/fulliso/isolinux ]# vim isolinux.cfg
[ root@ygl /test/fulliso/isolinux ]# cat isolinux.cfg
default vesamenu.c32
#prompt 1
timeout 600

display boot.msg

menu background splash.jpg
menu title Welcome to CentOS 6 Automatic Install!
menu color border 0 #ffffffff #00000000
menu color sel 7 #ffffffff #ff000000
menu color title 0 #ffffffff #00000000
menu color tabmsg 0 #ffffffff #00000000
menu color unsel 0 #ffffffff #00000000
menu color hotsel 0 #ff000000 #ffffffff
menu color hotkey 7 #ffffffff #ff000000
menu color scrollbar 0 #ffffffff #00000000

label desktop
  menu label Install ^desktop system
  kernel vmlinuz
  append initrd=initrd.img ks=cdrom:/kickstart/ks6.cfg
label mini
  menu label Install an m^ini system
  kernel vmlinuz
  append initrd=initrd.img ks=cdrom:/kickstart/ks6-mini.cfg
label manual
  menu label ^Manual install an system
  kernel vmlinuz
  append initrd=initrd.img
label local
  menu label Boot from ^local drive
  menu default
  localboot 0xffff
到这里我们前面的准备工作都做好了。
制作光盘镜像
注意:这条命令有点长…注意别写错了…
[ root@ygl ~ ]# mkisofs -R -J -T -v --no-emul-boot --boot-load-size 4 --boot-info-table -V "CentOS 6.9 autoinstall" -b isolinux/isolinux.bin -c isolinux/boot.cat -o /root/centos6_boot.iso /test/fulliso/到这里,全自动化安装镜像制作完成了,导出来放在U盘里,
去哪都可以开心的全自动化安装了,但是这只适合安装一台或少数几台的安装。
如果成百上前呢?
那么就要看接下来的两种安装方法了…
PXE
国际惯例,我先介绍一下PXE
PXE:
Preboot Excution Environment 预启动执行环境
Intel公司研发
基于Client/Server的网络模式,支持远程主机通过网络从远端服务器下载映像,并由此支持通过网络启动操作系统
PXE可以引导和安装Windows,linux等多种操作系统
再介绍一下PXE工作原理
Client向PXE Server上的DHCP发送IP地址请求消息,DHCP检测Client是 否合法(主要是检测Client的网卡MAC地址),如果合法则返回Client的 IP地址,同时将启动文件pxelinux.0的位置信息一并传送给Client
Client向PXE Server上的TFTP发送获取pxelinux.0请求消息,TFTP接收 到消息之后再向Client发送pxelinux.0大小信息,试探
Client是否满意,当 TFTP收到Client发回的同意大小信息之后,正式向Client发送pxelinux.0
Client执行接收到的pxelinux.0文件
Client向TFTP Server发送针对本机的配置信息文件(在TFTP 服务的 pxelinux.cfg目录下),TFTP将配置文件发回Client,继而Client根据配 置文件执行后续操作。
Client向TFTP发送Linux内核请求信息,TFTP接收到消息之后将内核文件 发送给Client
Client向TFTP发送根文件请求信息,TFTP接收到消息之后返回Linux根文 件系统
Client启动Linux内核
Client下载安装源文件,读取自动化安装脚本
步入正题。
实验准备部分
关闭防火墙和SELINUX
[ root@ygl ~ ]# systemctl stop iptables
[ root@ygl ~ ]# setenforce 0
安装软件包
[ root@ygl ~ ]# yum install httpd tftp-server dhcp syslinux system-config-kickstart -y
[ root@ygl ~ ]# systemctl start httpd
配置dhcp
把dhcp自带的模版文件复制过来,在进行修改
[ root@ygl ~ ]# cp /usr/share/doc/dhcp-4.2.5/dhcpd.conf.example /etc/dhcp/dhcpd.conf
cp: overwrite ‘/etc/dhcp/dhcpd.conf’? y
[ root@ygl ~ ]# vim /etc/dhcp/dhcpd.conf
主要是对这一段进行修改
# DHCP server to understand the network topology.
subnet 172.18.1.0 netmask 255.255.255.0 {
        range 172.18.1.50 172.18.1.100;
        next-server 172.18.1.1;
        filename "pxelinux.0";
}
准备yum源文件和应答文件
创建一系列的目录,准备待会放文件
[ root@ygl ~ ]# cd /var/www/html
[ root@ygl /var/www/html ]# mkdir centos/
[ root@ygl /var/www/html ]# cd centos
[ root@ygl /var/www/html ]# mkdir 6 7 ks6 ks7
[ root@ygl ~ ]# mount /dev/sr0 /var/www/html/centos/7
现在在准备kickstart文件,我就直接拿之前的kickstart文件来做了。
但是有个地方是必须要修改的。
# Use CDROM installation media
cdrom
上面这一段改成下面这一段
# Use net install
url --url=http://172.18.1.1/centos/7
然后在tftp上面放东西
[ root@ygl ~ ]# cd /var/lib/tftpboot/
[ root@ygl /var/lib/tftpboot ]# rm -f * -r  (有东西就删了,没东西就不用删了)
[ root@ygl /var/lib/tftpboot ]# mkdir pxelinux.cfg
[ root@ygl /var/lib/tftpboot ]# cp /usr/share/syslinux/pxelinux.0 /var/lib/tftpboot/
[ root@ygl /var/lib/tftpboot ]# cp /usr/share/syslinux/menu.c32 /var/lib/tftpboot/
[ root@ygl /var/lib/tftpboot ]# cp /misc/cd/isolinux/{vmlinuz,initrd.img} .
[ root@ygl /var/lib/tftpboot ]# ls
initrd.img  menu.c32  pxelinux.0  pxelinux.cfg  vmlinuz
[ root@ygl /var/lib/tftpboot ]# cp /misc/cd/isolinux/isolinux.cfg  pxelinux.cfg/default
[ root@ygl /var/lib/tftpboot ]# tree
.
├── initrd.img
├── menu.c32
├── pxelinux.0
├── pxelinux.cfg
│   └── default
└── vmlinuz

1 directory, 5 files
现在再修改一下pxelinux.cfg目录下的default文件
[ root@ygl /var/lib/tftpboot ]# vim pxelinux.cfg/default
[ root@ygl /var/lib/tftpboot ]# cat pxelinux.cfg/default
default menu.c32
timeout 600

menu title  CentOS linux 7 PXE Install

label desktop
  menu label Auto Install CentOS Linux 7 ^Desktop
  kernel vmlinuz
  append initrd=initrd.img ks=http://172.18.1.1/ks7/ks7.cfg

label mini
  menu label Auto Install CentOS Linux 7 ^Mini
  kernel vmlinuz
  append initrd=initrd.img ks=http://172.18.1.1/ks7/ks7mini.cfg

label manual
 menu label ^Auto Install CentOS Linux 7
 kernel vmlinuz
 append initrd=initrd.img inst.repo=http://172.18.1.1/centos/7

label label
  menu default
  menu label Boot from ^local drive
  localboot 0xffff


menu end
删掉了所有多余的,到时候菜单会显得很简洁。
PXE总结
注意,权限很重要,真的很重要。把东西挂上去后一定要试一下,能不能看到。
新建一台虚拟机,选择dhcp相同网段就可以开机实验一下,(我已经实验过了,没问题…)
是不是开机自动跳到选择安装类型的菜单上了。
我这个只是做了把自动化安装7的PXE,其实我们还可以再挂载一个6的光盘当yum源,再做几份6的kickstart文件,全部做在一个菜单里面就好了。
这个PXE安装,做完了后感觉步骤很简单,说的简单点,
就是把各种各样的文件挂到网上,重点是kickstart文件,配置好dhcp服务。
思路一定要清晰。配置文件一定要仔细!!!
cobbler
国际惯例,我介绍一下这个工具
Cobbler:
    快速网络安装linux操作系统的服务,支持众多的Linux发行版:Red Hat、Fedora、CentOS、Debian、Ubuntu和SuSE,也可以支持网络安装windows
    PXE的二次封装,将多种安装参数封装到一个菜单
    Python编写
    提供了CLI和Web的管理形式
cobbler 工作流程
client裸机配置了从网络启动后,开机后会广播包请求DHCP服务器(cobbler server)发送其分配好的一个IP
DHCP服务器(cobbler server)收到请求后发送responese,包括其ip地址
client裸机拿到ip后再向cobbler server发送请求OS引导文件的请求
cobbler server告诉裸机OS引导文件的名字和TFTP server的ip和port
client裸机通过上面告知的TFTP server地址通信,下载引导文件
client裸机执行执行该引导文件,确定加载信息,选择要安装的os,期间会再向cobbler server请求kickstart文件和os image
cobbler server发送请求的kickstart和os iamge
client裸机加载kickstart文件
client裸机接收os image,安装该os imagecobbler 各种配置目录说明
配置文件目录 /etc/cobbler
    /etc/cobbler/settings : cobbler 主配置文件
    /etc/cobbler/iso/: iso模板配置文件
    /etc/cobbler/pxe: pxe模板文件
    /etc/cobbler/power: 电源配置文件
    /etc/cobbler/user.conf: web服务授权配置文件
    /etc/cobbler/users.digest: web访问的用户名密码配置文件
    /etc/cobbler/dhcp.template : dhcp服务器的的配置末班
    /etc/cobbler/dnsmasq.template : dns服务器的配置模板
    /etc/cobbler/tftpd.template : tftp服务的配置模板
    /etc/cobbler/modules.conf : 模块的配置文件
好了准备开始实验了。
安装开启服务
首先,肯定是先安装cobbler。和启动其他的服务。
[ root@ygl ~ ]# yum install cobbler
[ root@ygl ~ ]# systemctl start start cobblerd
[ root@ygl ~ ]# systemctl enble cobblerd
[ root@ygl ~ ]# systemctl enable tftp
[ root@ygl ~ ]# systemctl start tftp
[ root@ygl ~ ]# systemctl start httpd
核对当前设置是否有问题
[ root@ygl ~ ]# cobbler check
The following are potential configuration items that you may want to fix:

1 : The 'server' field in /etc/cobbler/settings must be set to something other than localhost, or kickstarting features will not work.  This should be a resolvable hostname or IP for the boot server as reachable by all machines that will use it.
2 : For PXE to be functional, the 'next_server' field in /etc/cobbler/settings must be set to something other than 127.0.0.1, and should match the IP of the boot server on the PXE network.
3 : change 'disable' to 'no' in /etc/xinetd.d/tftp
4 : some network boot-loaders are missing from /var/lib/cobbler/loaders, you may run 'cobbler get-loaders' to download them, or, if you only want to handle x86/x86_64 netbooting, you may ensure that you have installed a *recent* version of the syslinux package installed and can ignore this message entirely.  Files in this directory, should you want to support all architectures, should include pxelinux.0, menu.c32, elilo.efi, and yaboot. The 'cobbler get-loaders' command is the easiest way to resolve these requirements.
5 : enable and start rsyncd.service with systemctl
6 : debmirror package is not installed, it will be required to manage debian deployments and repositories
7 : The default password used by the sample templates for newly installed machines (default_password_crypted in /etc/cobbler/settings) is still set to 'cobbler' and should be changed, try: "openssl passwd -1 -salt 'random-phrase-here' 'your-password-here'" to generate new one
8 : fencing tools were not found, and are required to use the (optional) power management features. install cman or fence-agents to use them

Restart cobblerd and then run 'cobbler sync' to apply changes.
注意:别慌,看起来爆出来的问题很多,其实没有几个。比如这一步还有可能会爆出,httpd没有开启,SELINUX是开启状态,按顺序处理就好了
按提示顺序解决问题
[ root@ygl ~ ]# vim /etc/cobbler/settings
 # this is the address of the cobbler server -- as it is used
 # by systems during the install process, it must be the address
 # or hostname of the system as those systems can see the server.
 # if you have a server that appears differently to different subnets
 # (dual homed, etc), you need to read the --server-override section
 # of the manpage for how that works.
 server: 172.18.1.1
就是修改server这一行,把IP改成自己的本机IP。不然别人不能访问我的…
按提示我们要重启服务,还有同步cobbler
这里有个坑,我做实验的时候,要分开写,不能把重启服务和同步写到一条命令里。
重启服务,同步cobbler
[ root@ygl ~ ]# systemctl restart cobblerd
[ root@ygl ~ ]# cobbler sync
task started: 2017-09-18_100845_sync
task started (id=Sync, time=Mon Sep 18 10:08:45 2017)
running pre-sync triggers
cleaning trees
removing: /var/lib/tftpboot/pxelinux.cfg/default
removing: /var/lib/tftpboot/grub/images
copying bootloaders
trying hardlink /usr/share/syslinux/pxelinux.0 -> /var/lib/tftpboot/pxelinux.0
copying: /usr/share/syslinux/pxelinux.0 -> /var/lib/tftpboot/pxelinux.0
trying hardlink /usr/share/syslinux/menu.c32 -> /var/lib/tftpboot/menu.c32
copying: /usr/share/syslinux/menu.c32 -> /var/lib/tftpboot/menu.c32
trying hardlink /usr/share/syslinux/memdisk -> /var/lib/tftpboot/memdisk
copying distros to tftpboot
copying images
generating PXE configuration files
generating PXE menu structure
rendering TFTPD files
generating /etc/xinetd.d/tftp
cleaning link caches
running post-sync triggers
running python triggers from /var/lib/cobbler/triggers/sync/post/*
running python trigger cobbler.modules.sync_post_restart_services
running shell triggers from /var/lib/cobbler/triggers/sync/post/*
running python triggers from /var/lib/cobbler/triggers/change/*
running python trigger cobbler.modules.scm_track
running shell triggers from /var/lib/cobbler/triggers/change/*
*** TASK COMPLETE ***
再次使用cobbler check检查
少了两个提示,只有六个了…
[ root@ygl ~ ]# cobbler check
The following are potential configuration items that you may want to fix:

1 : For PXE to be functional, the 'next_server' field in /etc/cobbler/settings must be set to something other than 127.0.0.1, and should match the IP of the boot server on the PXE network.
2 : some network boot-loaders are missing from /var/lib/cobbler/loaders, you may run 'cobbler get-loaders' to download them, or, if you only want to handle x86/x86_64 netbooting, you may ensure that you have installed a *recent* version of the syslinux package installed and can ignore this message entirely.  Files in this directory, should you want to support all architectures, should include pxelinux.0, menu.c32, elilo.efi, and yaboot. The 'cobbler get-loaders' command is the easiest way to resolve these requirements.
3 : enable and start rsyncd.service with systemctl
4 : debmirror package is not installed, it will be required to manage debian deployments and repositories
5 : The default password used by the sample templates for newly installed machines (default_password_crypted in /etc/cobbler/settings) is still set to 'cobbler' and should be changed, try: "openssl passwd -1 -salt 'random-phrase-here' 'your-password-here'" to generate new one
6 : fencing tools were not found, and are required to use the (optional) power management features. install cman or fence-agents to use them

Restart cobblerd and then run 'cobbler sync' to apply changes.
提示的是修改tftp服务器的地址,我们还是进入刚刚那个配置文件取进行修改。
[ root@ygl ~ ]# vim /etc/cobbler/settings
# if using cobbler with manage_dhcp, put the IP address
# of the cobbler server here so that PXE booting guests can find it
# if you do not set this correctly, this will be manifested in TFTP open timeouts.
next_server: 172.18.1.1
注意:和之前修改的类似,这里是修改next_server的IP地址,说的简单点就是把tftp服务器的地址写进去。
还是和之前一样的步骤,先重启服务,同步,在检查文件。
[ root@ygl ~ ]# systemctl restart cobblerd
[ root@ygl ~ ]# cobbler sync
task started: 2017-09-18_101845_sync
task started (id=Sync, time=Mon Sep 18 10:18:45 2017)
running pre-sync triggers
cleaning trees
removing: /var/lib/tftpboot/pxelinux.cfg/default
removing: /var/lib/tftpboot/grub/images
removing: /var/lib/tftpboot/grub/efidefault
removing: /var/lib/tftpboot/s390x/profile_list
copying bootloaders
trying hardlink /usr/share/syslinux/pxelinux.0 -> /var/lib/tftpboot/pxelinux.0
copying: /usr/share/syslinux/pxelinux.0 -> /var/lib/tftpboot/pxelinux.0
trying hardlink /usr/share/syslinux/menu.c32 -> /var/lib/tftpboot/menu.c32
copying: /usr/share/syslinux/menu.c32 -> /var/lib/tftpboot/menu.c32
copying distros to tftpboot
copying images
generating PXE configuration files
generating PXE menu structure
rendering TFTPD files
generating /etc/xinetd.d/tftp
cleaning link caches
running post-sync triggers
running python triggers from /var/lib/cobbler/triggers/sync/post/*
running python trigger cobbler.modules.sync_post_restart_services
running shell triggers from /var/lib/cobbler/triggers/sync/post/*
running python triggers from /var/lib/cobbler/triggers/change/*
running python trigger cobbler.modules.scm_track
running shell triggers from /var/lib/cobbler/triggers/change/*
*** TASK COMPLETE ***
[ root@ygl ~ ]# cobbler check
The following are potential configuration items that you may want to fix:

1 : some network boot-loaders are missing from /var/lib/cobbler/loaders, you may run 'cobbler get-loaders' to download them, or, if you only want to handle x86/x86_64 netbooting, you may ensure that you have installed a *recent* version of the syslinux package installed and can ignore this message entirely.  Files in this directory, should you want to support all architectures, should include pxelinux.0, menu.c32, elilo.efi, and yaboot. The 'cobbler get-loaders' command is the easiest way to resolve these requirements.
2 : enable and start rsyncd.service with systemctl
3 : debmirror package is not installed, it will be required to manage debian deployments and repositories
4 : The default password used by the sample templates for newly installed machines (default_password_crypted in /etc/cobbler/settings) is still set to 'cobbler' and should be changed, try: "openssl passwd -1 -salt 'random-phrase-here' 'your-password-here'" to generate new one
5 : fencing tools were not found, and are required to use the (optional) power management features. install cman or fence-agents to use them

Restart cobblerd and then run 'cobbler sync' to apply changes.
只有五个问题了…
继续继续…
这一步,有两种方法处理,你的机器联网没,联网可以偷懒.执行他说的命令,
直接从网上把这些配置文件从网上直接下来,
如果没网,可以只复制两个必须的文件到tftp的目录下就可以了。
 网络偷懒版:
[ root@ygl /var/lib/tftpboot ]# cobbler get-loaders
task started: 2017-09-18_103044_get_loaders
task started (id=Download Bootloader Content, time=Mon Sep 18 10:30:44 2017)
path /var/lib/cobbler/loaders/README already exists, not overwriting existing content, use --force if you wish to update
...
苦逼没网手动复制版:
[ root@ygl /var/lib/cobbler/loaders ]# cp /var/lib/tftpboot/{pxelinux.0,menu.c32} .
[ root@ygl /var/lib/cobbler/loaders ]# ls
menu.c32 pxelinux.0注意:最终我还是偷懒了,只复制了两个必须的文件,
追求完美的话,其他的文件也应该按提示都复制过来。
再次重复重启服务,同步,检查。
[ root@ygl /var/lib/cobbler/loaders ]# systemctl restart cobblerd
[ root@ygl /var/lib/cobbler/loaders ]# cobbler sync
task started: 2017-09-18_104122_sync
task started (id=Sync, time=Mon Sep 18 10:41:22 2017)
running pre-sync triggers
cleaning trees
removing: /var/lib/tftpboot/pxelinux.cfg/default
removing: /var/lib/tftpboot/grub/images
removing: /var/lib/tftpboot/grub/efidefault
removing: /var/lib/tftpboot/s390x/profile_list
copying bootloaders
trying hardlink /var/lib/cobbler/loaders/pxelinux.0 -> /var/lib/tftpboot/pxelinux.0
copying: /var/lib/cobbler/loaders/pxelinux.0 -> /var/lib/tftpboot/pxelinux.0
trying hardlink /var/lib/cobbler/loaders/menu.c32 -> /var/lib/tftpboot/menu.c32
copying: /var/lib/cobbler/loaders/menu.c32 -> /var/lib/tftpboot/menu.c32
copying distros to tftpboot
copying images
generating PXE configuration files
generating PXE menu structure
rendering TFTPD files
generating /etc/xinetd.d/tftp
cleaning link caches
running post-sync triggers
running python triggers from /var/lib/cobbler/triggers/sync/post/*
running python trigger cobbler.modules.sync_post_restart_services
running shell triggers from /var/lib/cobbler/triggers/sync/post/*
running python triggers from /var/lib/cobbler/triggers/change/*
running python trigger cobbler.modules.scm_track
running shell triggers from /var/lib/cobbler/triggers/change/*
*** TASK COMPLETE ***
[ root@ygl /var/lib/cobbler/loaders ]# cobbler check
The following are potential configuration items that you may want to fix:

1 : some network boot-loaders are missing from /var/lib/cobbler/loaders, you may run 'cobbler get-loaders' to download them, or, if you only want to handle x86/x86_64 netbooting, you may ensure that you have installed a *recent* version of the syslinux package installed and can ignore this message entirely.  Files in this directory, should you want to support all architectures, should include pxelinux.0, menu.c32, elilo.efi, and yaboot. The 'cobbler get-loaders' command is the easiest way to resolve these requirements.
2 : enable and start rsyncd.service with systemctl
3 : debmirror package is not installed, it will be required to manage debian deployments and repositories
4 : The default password used by the sample templates for newly installed machines (default_password_crypted in /etc/cobbler/settings) is still set to 'cobbler' and should be changed, try: "openssl passwd -1 -salt 'random-phrase-here' 'your-password-here'" to generate new one
5 : fencing tools were not found, and are required to use the (optional) power management features. install cman or fence-agents to use them

Restart cobblerd and then run 'cobbler sync' to apply changes.
注意:虽然还是五个提示,但是第一个提示的必须文件已经复制过来了,可以忽略了…强迫症重度患者可以按要求都复制完成….
继续接下里的步骤
[ root@ygl /var/lib/cobbler/loaders ]# yum install rsync
[ root@ygl /var/lib/cobbler/loaders ]# systemctl start rsyncd
[ root@ygl /var/lib/cobbler/loaders ]# systemctl restart cobblerd
[ root@ygl /var/lib/cobbler/loaders ]# systemctl enable rsyncd
继续重启服务,同步,检查
[ root@ygl /var/lib/cobbler/loaders ]# cobbler check
The following are potential configuration items that you may want to fix:

1 : some network boot-loaders are missing from /var/lib/cobbler/loaders, you may run 'cobbler get-loaders' to download them, or, if you only want to handle x86/x86_64 netbooting, you may ensure that you have installed a *recent* version of the syslinux package installed and can ignore this message entirely.  Files in this directory, should you want to support all architectures, should include pxelinux.0, menu.c32, elilo.efi, and yaboot. The 'cobbler get-loaders' command is the easiest way to resolve these requirements.
2 : debmirror package is not installed, it will be required to manage debian deployments and repositories
3 : The default password used by the sample templates for newly installed machines (default_password_crypted in /etc/cobbler/settings) is still set to 'cobbler' and should be changed, try: "openssl passwd -1 -salt 'random-phrase-here' 'your-password-here'" to generate new one
4 : fencing tools were not found, and are required to use the (optional) power management features. install cman or fence-agents to use them

Restart cobblerd and then run 'cobbler sync' to apply changes.
革命还在继续,同志任努力,
debmirror package is not installed这一行的提示可以忽略,
也就说只有两个提示了.
也就说下一个提示是要我没改默认口令
先准备好你的口令
[ root@ygl ~ ]# openssl passwd -1
Password: 123456
Verifying - Password: 123456
$1$VvgAVIDh$Ug0WXzHN1Acj1loV.JBBl/
接下来修改配置文件
[ root@ygl /var/lib/cobbler/loaders ]# !vim
vim /etc/cobbler/settings

# cobbler has various sample kickstart templates stored
# in /var/lib/cobbler/kickstarts/.  This controls
# what install (root) password is set up for those
# systems that reference this variable.  The factory
# default is "cobbler" and cobbler check will warn if
# this is not changed.
# The simplest way to change the password is to run
# openssl passwd -1
# and put the output between the "" below.
default_password_crypted: "$1$VvgAVIDh$Ug0WXzHN1Acj1loV.JBBl/"
只是修改默认密码…
继续重启服务,同步,检查
[ root@ygl /var/lib/cobbler/loaders ]# systemctl restart cobblerd
[ root@ygl /var/lib/cobbler/loaders ]# cobbler sync
[ root@ygl /var/lib/cobbler/loaders ]# cobbler check
The following are potential configuration items that you may want to fix:

1 : some network boot-loaders are missing from /var/lib/cobbler/loaders, you may run 'cobbler get-loaders' to download them, or, if you only want to handle x86/x86_64 netbooting, you may ensure that you have installed a *recent* version of the syslinux package installed and can ignore this message entirely.  Files in this directory, should you want to support all architectures, should include pxelinux.0, menu.c32, elilo.efi, and yaboot. The 'cobbler get-loaders' command is the easiest way to resolve these requirements.
2 : debmirror package is not installed, it will be required to manage debian deployments and repositories
3 : fencing tools were not found, and are required to use the (optional) power management features. install cman or fence-agents to use them

Restart cobblerd and then run 'cobbler sync' to apply changes.
这三个提示,第一个我们把必须的已经复制过去了,第二个和第三个可以忽略,到这里我们按提示都修改完成了…接下来我们就要借助cobbler配置dhcp服务
配置dhcpd
[ root@ygl /var/lib/cobbler/loaders ]# vim /etc/cobbler/settings
# set to 1 to enable Cobbler's DHCP management features.
# the choice of DHCP management engine is in /etc/cobbler/modules.conf
manage_dhcp: 1  (这个地方从0改为1)
[ root@ygl /var/lib/cobbler/loaders ]# systemctl restart cobblerd
设置成1就是用cobbler管理dhcp的配置文件,重启cobbler服务,同步。
[ root@ygl /var/lib/cobbler/loaders ]# vim /etc/cobbler/dhcp.template
subnet 172.18.1.0 netmask 255.255.255.0 {
     option subnet-mask         255.255.255.0;
     range dynamic-bootp        172.18.1.50 172.18.1.100;
     default-lease-time         21600;
路由啊什么都不需要,我们只是装一个系统,配下子网网关,还有我分配的地址就好了
[ root@ygl /var/lib/cobbler/loaders ]# systemctl restart cobblerd
[ root@ygl /var/lib/cobbler/loaders ]# cobbler sync

[ root@ygl /var/lib/cobbler/loaders ]# cat /etc/dhcp/dhcpd.conf
# ******************************************************************
# Cobbler managed dhcpd.conf file
# generated from cobbler dhcp.conf template (Mon Sep 18 22:47:03 2017)
# Do NOT make changes to /etc/dhcpd.conf. Instead, make your changes
# in /etc/cobbler/dhcp.template, as /etc/dhcpd.conf will be
# overwritten.
# ******************************************************************

ddns-update-style interim;

allow booting;
allow bootp;

ignore client-updates;
set vendorclass = option vendor-class-identifier;

option pxe-system-type code 93 = unsigned integer 16;

subnet 172.18.1.0 netmask 255.255.255.0 {
     option subnet-mask         255.255.255.0;
     range dynamic-bootp        172.18.1.50 172.18.1.100;
     default-lease-time         21600;
     max-lease-time             43200;
     next-server                172.18.1.1;
     class "pxeclients" {
          match if substring (option vendor-class-identifier, 0, 9) = "PXEClient";
          if option pxe-system-type = 00:02 {
                  filename "ia64/elilo.efi";
          } else if option pxe-system-type = 00:06 {
                  filename "grub/grub-x86.efi";
          } else if option pxe-system-type = 00:07 {
                  filename "grub/grub-x86_64.efi";
          } else {
                  filename "pxelinux.0";
          }
     }

}

# group for Cobbler DHCP tag: default
group {
}
可以看到cobbler已经帮dhcp把配置文件直接生成了…
准备yum源
这是7的系统,本来就挂载了7.3的光盘,再加一个光驱,挂载6.9的光盘。挂载在/media/cdrom目录上
用cobbler导入yum源
[ root@ygl /misc/cd ]# cobbler import --path=/misc/cd --name=centos7.3
[ root@ygl ~ ]# cobbler import --path=/media/cdrom --name=centos6.9
我们用命令看一下有哪些已经可以自动安装的版本
[ root@ygl /misc/cd ]# cobbler distro list
   centos7.3-x86_64
   centos6.9-x86_64
生成kickstart文件
这里可以使用之前准备好的kickstart文件,默认的也可以…
[ root@ygl /var/www/html/ks7 ]# cp ks7mini.cfg /var/lib/cobbler/kickstarts/
[ root@ygl /var/www/html/ks6 ]# cp ks6mini.cfg /var/lib/cobbler/kickstarts/

[ root@ygl /var/lib/cobbler/kickstarts ]# cobbler profile add --name=centos7.3-x86_64-mini --distro=centos7.3-x86_64 --kickstart=/var/lib/cobbler/kickstarts/ks7mini.cfg
[ root@ygl /var/lib/cobbler/kickstarts ]# cobbler profile add --name=centos6.9-x86_64-mini --distro=centos6.9-x86_64 --kickstart=/var/lib/cobbler/kickstarts/ks6mini.cfg
[ root@ygl /var/lib/cobbler/kickstarts ]# cobbler sync
记得各项服务都要开启,然后实验到这里就结束了,我试验的时候确认可以安装。
这个cobbler服务,其实就是起一个”王”的作用,
他来统一调配各项服务,实际上底层工作的还是各项小服务,
可以理解成给PXE上面加了一个二次封装。
结尾
终于…终于…这三个实验做完了,
因为篇幅太长太长,很多实验做的步骤都是最最基本的,必须的。
其他的地方还可以细细的打磨,
但是,最起码已经能够最基本的自动安装了,批量的哦…
再有什么其他的需求,就需要再去根据要求一点一点的修改了。
自动化运维的第一步,自动化安装、批量安装已经完成了。
今天就到这里吧。
ღ ღ ღ 如果觉得文章对您有用,不妨赞一下ღ ღ ღ


 8263
8263


 被折叠的 条评论
为什么被折叠?
被折叠的 条评论
为什么被折叠?
 到【灌水乐园】发言


