----------------------------------------------------------------------------------------------------------------------------------------------------------
原文作者:Google
原文地址:http://developer.android.com/wear/notifications/creating.html
原文版权:Creative Commons 2.5 Attribution License
译文作者:Jianan - qinxiandiqi@foxmail.com
版本信息:本文基于2014-06-20版本翻译
译文版权:CC BY-NC-ND 4.0,允许复制转载,但必须保留译文作者署名及译文链接,不得演绎和用于商业用途
----------------------------------------------------------------------------------------------------------------------------------------------------------
前言
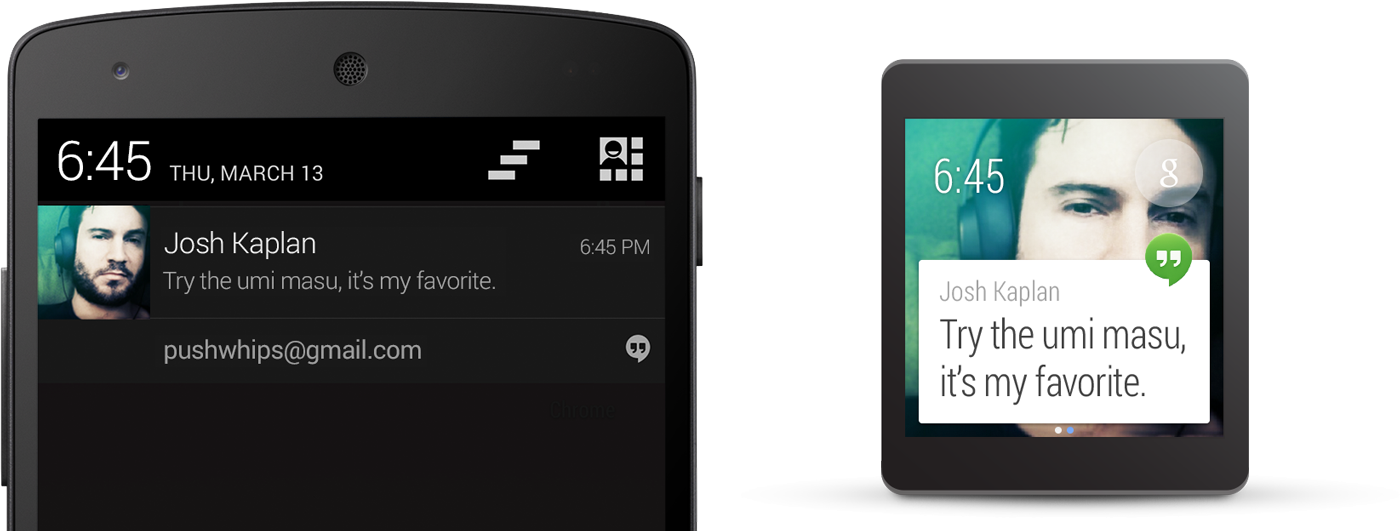
当一个Android设备(比如手机或者平板)被连接到一部Android穿戴设备上,默认会将所有通知在设备之间共享。在Android穿戴设备上,每一条通知都会作为一张卡片出现在上下文信息流中。
不需要做任何处理,你的应用通知就能在Android Wear上提供给用户。但是,你可以通过一些途径来提高用户体验。例如,如果用户能通过输入文字来响应一个通知,那么对于回复信息,你可以添加功能让用户能够直接在穿戴设备上通过语音进行回复。
为了帮助你在Android Wear上为你的通知提供最好的用户体验,本篇指南将为你展示如何使用NotificationCompat.Builder APIs里面的标准模板创建通知,再加上如何扩展你的通知功能来提升穿戴设备用户的体验。
注意:通知使用的RemoteViews被剥离了自定义视图 功能,系统只能使用Notification对象中的文字和icon显示在通知卡片上。但是,即将发布的正式版Android Wear SDK将支持自定义卡片布局。
Import the Necessary Classes(导入需要的类)
在开始开发之前,你必须先完成Get Started with the Developer Preview文档中的步骤。正如文档中提到的,你的应用需要包含v4 support Library和Developer Preview support Library。所以在开始之前,你应该在你的项目代码中进行以下导入:
import android.preview.support.wearable.notifications.*;
import android.preview.support.v4.app.NotificationManagerCompat;
import android.support.v4.app.NotificationCompat;CreateNotifications with the Notification Builder(使用Notification Builder创建通知)
v4 support library允许你使用最新的通知功能(比如操作按钮和大图标等)来创建通知,并且能够兼容Android 1.6及更高版本。
例如,下面的代码使用了NotificationCompat API组合新的NotificationManagerCompat API来创建和报告一个通知:
int notificationId = 001;
// Build intent for notification content
Intent viewIntent = new Intent(this, ViewEventActivity.class);
viewIntent.putExtra(EXTRA_EVENT_ID, eventId);
PendingIntent viewPendingIntent =
        PendingIntent.getActivity(this, 0, viewIntent, 0);

NotificationCompat.Builder notificationBuilder =
        new NotificationCompat.Builder(this)
        .setSmallIcon(R.drawable.ic_event)
        .setContentTitle(eventTitle)
        .setContentText(eventLocation)
        .setContentIntent(viewPendingIntent);

// Get an instance of the NotificationManager service
NotificationManagerCompat notificationManager =
        NotificationManagerCompat.from(this);

// Build the notification and issues it with notification manager.
notificationManager.notify(notificationId, notificationBuilder.build());Add Action Buttons
除了使用setContentIntent()方法定义的主要内容action之外,你也可以通过传递一个PendingIntent到addAction()方法来添加其他的action。
例如,下面的代码与上面代码中的通知类型一样,但是添加了一个action去地图上查看事件中的地点。
// Build an intent for an action to view a map
Intent mapIntent = new Intent(Intent.ACTION_VIEW);
Uri geoUri = Uri.parse("geo:0,0?q=" + Uri.encode(location));
mapIntent.setData(geoUri);
PendingIntent mapPendingIntent =
        PendingIntent.getActivity(this, 0, mapIntent, 0);

NotificationCompat.Builder notificationBuilder =
        new NotificationCompat.Builder(this)
        .setSmallIcon(R.drawable.ic_event)
        .setContentTitle(eventTitle)
        .setContentText(eventLocation)
        .setContentIntent(viewPendingIntent)
        .addAction(R.drawable.ic_map,
getString(R.string.map), mapPendingIntent);提示:如果你的通知包含一个“回复”按钮(例如信息应用),你可以直接在Android穿戴设备上用语音回复来增强这个功能。更多信息,可以参考Receiving Voice Input from a Notification。
更多关于action按钮的设计(包括图标规格),可以参考 Design Principles of Android Wear。
Add a Big View
你可以通过为你的通知添加一个“big view”类型来插入扩展的文字内容。在手持设备上,用户可以通过展开通知来查看big view的内容。但是在Android穿戴设备上,big view的内容将会按照默认显示。
为你的通知添加扩展内容,调用NotificationCompat.Builder对象的setStyle()方法,传递给它一个BigTextStyle或者InboxStyle实例。
例如,下面代码添加了一个NotificationCompat.BigTextStyle实例到事件通知中,以包含事件完成的描述(里面包含了比setContentText()提供的能够填满空间还要多的文字)。
// Specify the 'big view' content to display the long
// event description that may not fit the normal content text.
BigTextStyle bigStyle = new NotificationCompat.BigTextStyle();
bigStyle.bigText(eventDescription);

NotificationCompat.Builder notificationBuilder =
        new NotificationCompat.Builder(this)
        .setSmallIcon(R.drawable.ic_event)
        .setLargeIcon(BitmapFractory.decodeResource(
                getResources(), R.drawable.notif_background))
        .setContentTitle(eventTitle)
        .setContentText(eventLocation)
        .setContentIntent(viewPendingIntent)
        .addAction(R.drawable.ic_map,
                getString(R.string.map), mapPendingIntent)
.setStyle(bigStyle);Add New Features for Wearables
Android Wear预览版支持库提供了一些新API来帮助提升穿戴设备上的用户通知体验。例如,你可以添加额外的内容页面让用户向左滑动来查看,或者为用户添加使用语音输入来回复你的应用程序的文字响应功能。
使用这些新API,需要传递你的NotificationCompat.Builder实例到WearableNotifications.Builder()构造方法中。然后你可以使用WearableNotifications.Builder的方法来为你的通知添加新功能特性。例如:
// Create a NotificationCompat.Builder for standard notification features
NotificationCompat.Builder notificationBuilder =
        new NotificationCompat.Builder(mContext)
        .setContentTitle("New mail from " + sender.toString())
        .setContentText(subject)
        .setSmallIcon(R.drawable.new_mail);

// Create a WearablesNotification.Builder to add special functionality for wearables
Notification notification =
        new WearableNotifications.Builder(notificationBuilder)
        .setHintHideIcon(true)
.build();当你想要提供你的通知,请确定使用的是NotificationManagerCompat的API:
// Get an instance of the NotificationManager service
NotificationManagerCompat notificationManager =
        NotificationManagerCompat.from(this);

// Build the notification and issues it with notification manager.
notificationManager.notify(notificationId, notification);在穿戴设备上使用WearableNotifications.Builder或者其它预览版支持库中的API来继续增强你的通知功能,请参考一下开发指南:
Receiving Voice Input from a Notification
添加一个接收语音输入的操作并且转发输入的信息给你的应用程序。
Adding Pages to a Notification
添加一个额外的信息页面让用户可以通过向左滑动来查看。
Stacking Notifications
归档你的应用程序中所有类似的通知到一个栈中,使得可以在不添加多个卡片到卡片信息流的情况下逐个查看。
You Might Also Want to Read(你可能也想要阅读):
学习更多关于如何创建通知。
学习所有你需要了解的关于Intent的API,用于通知的Action。


 2342
2342


 被折叠的 条评论
为什么被折叠?


