


 本文详细介绍了Android中TabLayout组件的使用方法,包括静态配置、动态添加tab及默认选中tab并平滑滚动到可见区域的技术要点。
Android之TabLayout使用和默认选中+移动
文章链接:http://blog.csdn.net/qq_16628781/article/details/62430662
知识点:
1、TabLayout的静态使用;
2、TabLayout动态加入tab;
3、默认选中某一个tab,并移动到选中的tab位置;
4、新名词记录
{
Tab
smoothScrollTo()/scrollTo():滚动的方法
.getResources().getDisplayMetrics().density:获取屏幕密度
}
关于MD设计,估计大家已经听说不少了吧。我在这里就不多讲了。有兴趣的大家去搜索看看。
这里要讲的是TabLayout的介绍和使用。tab在APP中随处可见,实现这个有N多的方法。在5.0之后,Google看到很多很好的控件,已将它们纳入自己的门下,放到支持包中共开发者使用,tablayout就是其中一个,然后Google优化了下他,加入了5.0控件响应的效果,反正是好看多了。下面我们来看看如何使用
要使用TabLayout控件,需要在build.gradle文件的dependencies{}下加入以下代码:
compile ‘com.android.support:design:24.0.0'这个控件在android.support.design.widget.TabLayout包下面,使用方法也是有两种,一个是在XML中设置,另外一个就是代码动态加入。下面我们分别来看。
首先是布局中使用,我们只要关注他们的属性就可以了,当然这个只是适用于tab数量固定的情况。但是对于我们想要动态的加入呢,这个也是很简单的。
<?xml version="1.0" encoding="utf-8"?>
<LinearLayout xmlns:android="http://schemas.android.com/apk/res/android"
xmlns:app="http://schemas.android.com/apk/res-auto"
android:layout_width="match_parent"
android:layout_height="match_parent"
android:orientation="vertical">
<!--是否可以滚动,默认fixed:app:tabMode="scrollable/fixed"-->
<!--指示器高度:app:tabIndicatorHeight="4dp"-->
<!--底部的横杆指示器的颜色:app:tabIndicatorColor="#3381f5"-->
<!--tab被选中的字体颜色:app:tabSelectedTextColor="#f00"-->
<!--tab默认的字体颜色:app:tabTextColor="#c4bfbf"-->
<!--tab字体的样式:app:tabTextAppearance="@style/MyCustomTabTextAppearance"-->
<!--tablayout的背景色:app:tabBackground="@color/greenLight" 和android:backgroud是一样的效果-->
<!--下面都是tab的padding设置:-->
<!--app:tabPadding="5dp"-->
<!--app:tabPaddingBottom="5dp"-->
<!--app:tabPaddingEnd="5dp"-->
<!--app:tabPaddingStart="5dp"-->
<!--app:tabPaddingTop="5dp"-->
<!--TabLayout布局的位置:app:tabGravity="center/fill" center:整体居中显示;fill:占满父布局,当然还和layout_width相关-->
<!--tablayout距离start的距离:app:tabContentStart="100dp"-->
<!--tab的最大宽度:app:tabMaxWidth="100dp"-->
<!--tab的最小宽度:app:tabMinWidth="50dp"-->
<android.support.design.widget.TabLayout
android:id="@+id/tl_fTabP"
android:layout_width="match_parent"
android:layout_height="40dp"
app:tabBackground="@color/greenLight"
app:tabContentStart="100dp"
app:tabGravity="fill"
app:tabIndicatorColor="#3381f5"
app:tabIndicatorHeight="4dp"
app:tabMaxWidth="100dp"
app:tabMinWidth="50dp"
app:tabMode="scrollable"
app:tabPadding="5dp"
app:tabPaddingBottom="5dp"
app:tabPaddingEnd="5dp"
app:tabPaddingStart="5dp"
app:tabPaddingTop="5dp"
app:tabSelectedTextColor="#f00"
app:tabTextAppearance="@style/MyCustomTabTextAppearance"
app:tabTextColor="#c4bfbf">
<android.support.design.widget.TabItem
android:id="@+id/ti_fTabList"
android:layout_width="match_parent"
android:layout_height="wrap_content"
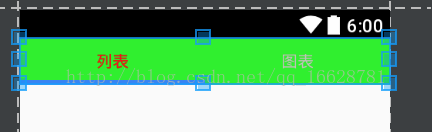
android:text="列表" />
<android.support.design.widget.TabItem
android:id="@+id/ti_fTabChart"
android:layout_width="wrap_content"
android:layout_height="wrap_content"
android:text="图表" />
</android.support.design.widget.TabLayout>
</LinearLayout>
效果图如下
代码来控制tab的加入,以及其它使用方法。
这里我遇到了一个问题,那就是我的tab的数量动态加入了M个,但需要选中第N个的tab,选是选中了{TabLayout.getTabAt(index).select()},
BUT选中的那个tab无法移动可见的区域中来。我查看了API源码,发现Google没有给我们一个类似于TabLayout.selectTabAtPosition(int position)这样可以选择position位置的函数(这是怎么回事???都提供了这么方便的一个控件,为毛不提供多一个方法,多方便啊!!!)。
说多了都是泪,最后还是找到了一个方法,自己来计算要移动的距离。
基本思路是:获取选中的tab的下标index,然后计算从第一个tab到第index个tab的距离,然后调用smoothScrollTo()/scrollTo()方法。OK搞定。具体的操作都在代码里头有解释了,请查看代码。
private void addNewTab() {
        //TabLayout tl_fTabChartP = findViewById(...);

        /*新增tab有以下几个方法:
        public void addTab(@NonNull Tab tab) {}
        public void addTab(@NonNull Tab tab, boolean setSelected) {}
        public void addTab(@NonNull Tab tab, int position, boolean setSelected) {}
        参数tab:要加入的tab
        参数setSelected:是否选中此tab
        参数position:在position的位置加入此tab
        */
        /*Tab属性:
        TabLayout.Tab tab = tl_fTabChartP.newTab();
        tab.setText("图表");
        tab.setCustomView(); //设置自定义的视图
        tab.setIcon(); //设置icon
        tab.setTag(); //设置tag
        * */
        /*TabLayout属性:
        tl_fTabChartP.removeAllTabs(); //移除所有的tab
        tl_fTabChartP.getTabAt(0); //根据index得到tab
        tl_fTabChartP.getSelectedTabPosition(); //得到选中的tab的position
        tl_fTabChartP.addView(); //加入view
        * */
        TabLayout.Tab tab = tl_fTabChartP.newTab();
        tab.setText("图表");
        tl_fTabChartP.addTab(tab);
        tl_fTabChartP.addTab(tl_fTabChartP.newTab().setText("图表"));
        tl_fTabChartP.getTabCount(); //返回当前加入到tablayout的tab的数量
        tl_fTabChartP.getChildCount(); //返回在tablayout中的view的数量,和getTabCount()的区别尚待考察,只要先知道getTabCount()的就好了
        //增加监听方法
        tl_fTabChartP.addOnTabSelectedListener(new TabLayout.OnTabSelectedListener() {
            @Override
            public void onTabSelected(TabLayout.Tab tab) {
                //新的tab被选中是做的操作
                tab.getPosition(); //获取点击的tab所在的position,可以用来做index的依据
            }

            @Override
            public void onTabUnselected(TabLayout.Tab tab) {
                //点击下一个tab之后,上一个tab退出被选中状态之前需要做的动作
            }

            @Override
            public void onTabReselected(TabLayout.Tab tab) {
                //当同一个tab被重新点击是触发的方法
            }
        });

        /**
         * 我想讲的是这里,
         * 这里设想一种情况,我们从后台返回了30个词条,然后都需要加入到tablayout中,作为一个tab供用户选择,
         * 利用for循环依次取出,再new tab.settext(),在add()进去就OK了。
         * 然后我们想要固定选择第N个tab,这时候,我们该如何来做呢?
         * 在tablayout里头,我没有看到直接让我们选中某一个的方法,真的看死了都没有看到。
         *
         * 但是,tablayout里头提供了一个方法.scrollTo(x, y)/.smoothScrollTo()
         * 这个方法说的是:我们可以是tablayout滚动并固定在一个view(tab)的边界
         * 参数1:x轴方向需要滚动的距离
         * 参数2:y轴方向需要滚动的距离
         * 但是这里有一个问题,我们如何知道应该要滚动多少的距离呢?
         * 思路:首先得知道应该滚动到tab的下标,然后计算这个距离,这个距离是和第1个tab的距离,
         * 最后调用这个方法,滚动到计算好的位置去,就实现了。
         *
         * 下面是这边的方法
         */
        int currentSelectPos = 1; //自己写的一个
        int index = currentSelectPos - 1;
        recomputeTlOffset1(index);
    }


/**
     * 重新计算需要滚动的距离
     *
     * @param index 选择的tab的下标
     */
    private void recomputeTlOffset1(int index) {
        if (tl_fTabChartP.getTabAt(index) != null) tl_fTabChartP.getTabAt(index).select();
        final int width = (int) (getTablayoutOffsetWidth(index) * mFinanceActivity.getResources().getDisplayMetrics().density);
        tl_fTabChartP.post(new Runnable() {
            @Override
            public void run() {
                tl_fTabChartP.smoothScrollTo(width, 0);
            }
        });
    }


//重中之重是这个计算偏移量的方法,各位看官看好了。
/**
     * 根据字符个数计算偏移量
     *
     * @param index 选中tab的下标
     * @return 需要移动的长度
     */
    private int getTablayoutOffsetWidth(int index) {
        String str = "";
        for (int i = 0; i < index; i++) {
            //channelNameList是一个List<String>的对象,里面转载的是30个词条
            //取出直到index的tab的文字,计算长度
            str += channelNameList.get(i);
        }
        return str.length() * 14 + index * 12;
}如有任何疑问,请及时与我联系,谢谢!


 579
579

 被折叠的 条评论
为什么被折叠?
被折叠的 条评论
为什么被折叠?
 到【灌水乐园】发言


