


Android实训案例(九)——答题系统的思绪,自己设计一个题库的体验,一个思路清晰的答题软件制作过程
项目也是偷师的,决心研究一下数据库。所以写的还是很详细的,各位看官,耐着性子看完,实现结果不重要,思路一定要清晰,我们做一个简单的项目,所以也就设计的比较简陋了,首先新建一个项目——AnswerSystem
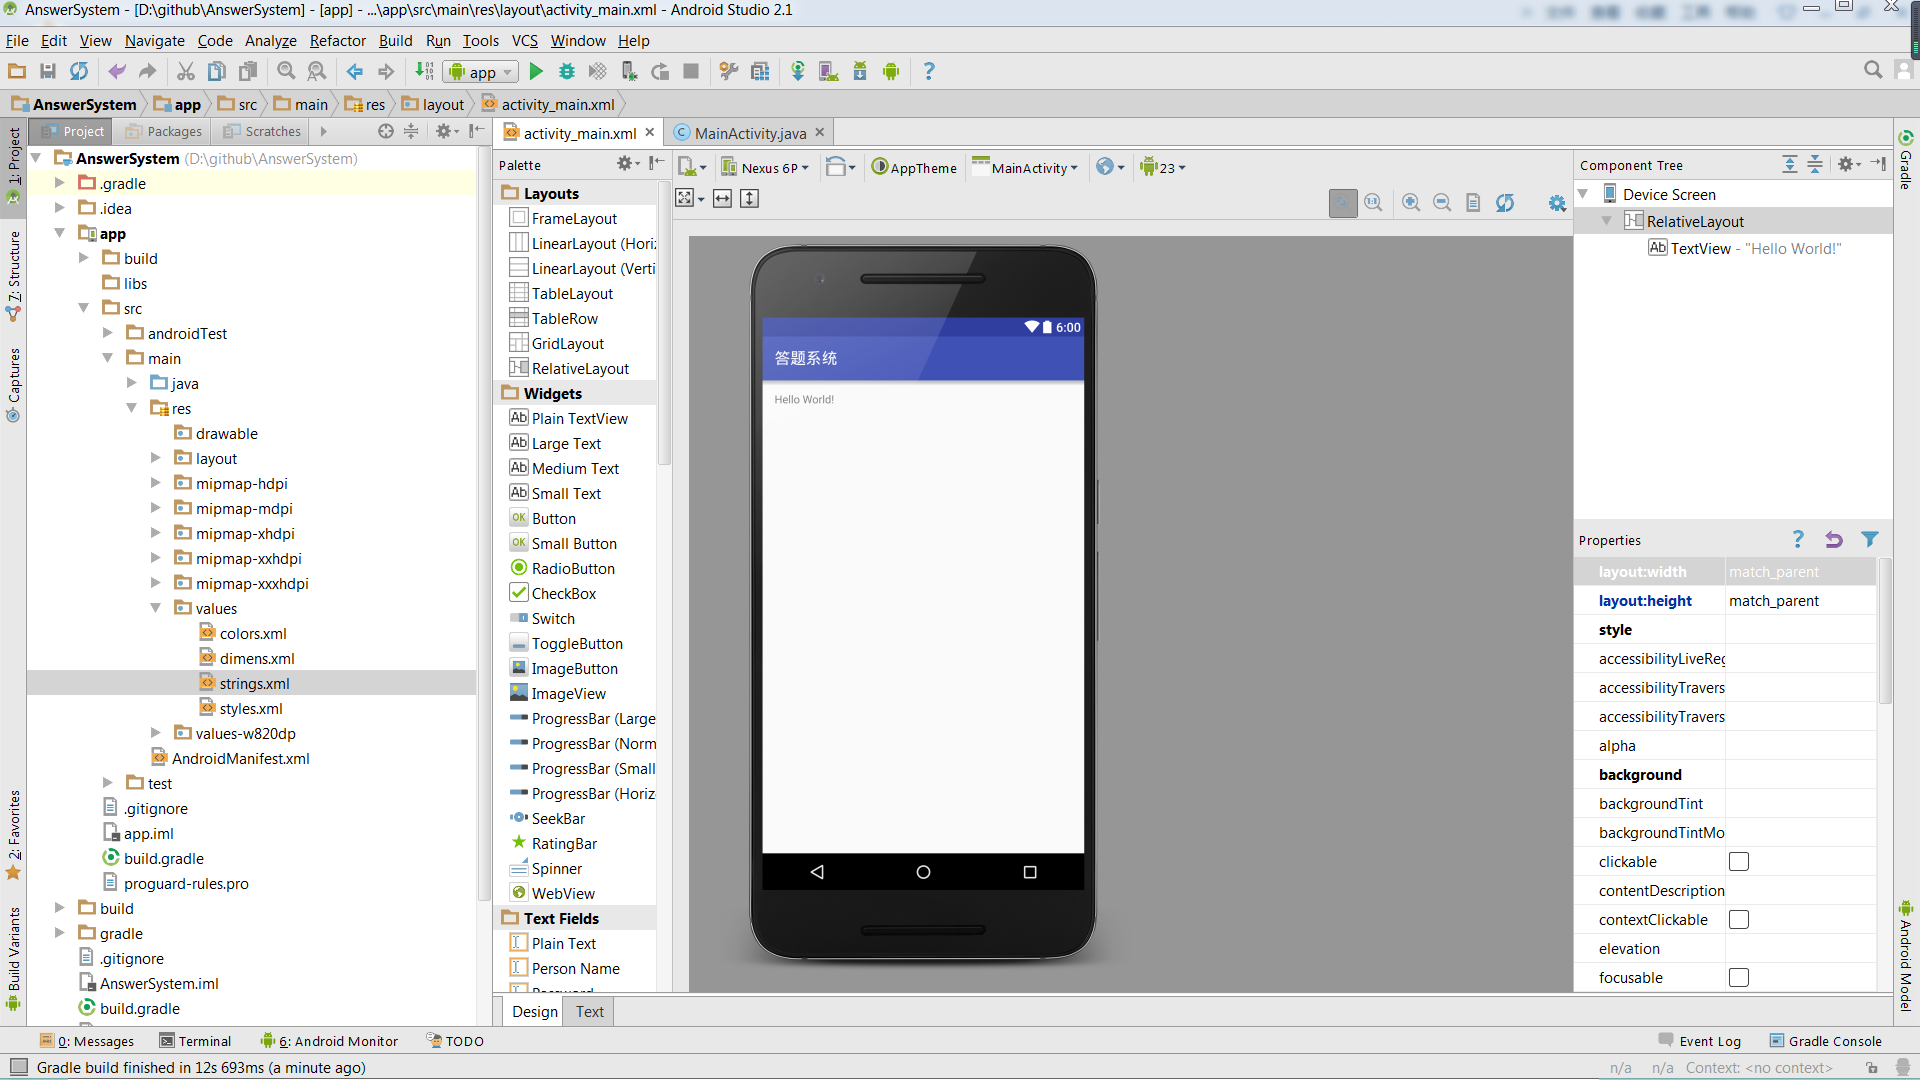
一.实现项目框架
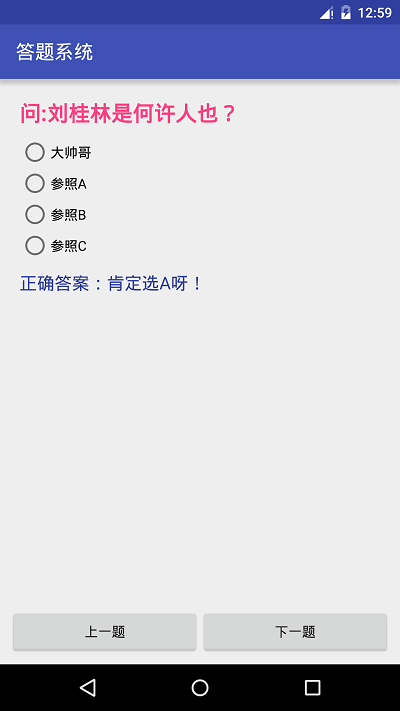
主页面就是一个问题,四个答案,还有一个正确答案,最后就是翻页了,正确答案默认是隐藏的,所以我们的layout_mian.xml是这样实现的
<?xml version="1.0" encoding="utf-8"?>
<LinearLayout xmlns:android="http://schemas.android.com/apk/res/android"
    xmlns:tools="http://schemas.android.com/tools"
    android:layout_width="match_parent"
    android:layout_height="match_parent"
    android:orientation="vertical">


    <ScrollView
        android:layout_width="match_parent"
        android:layout_height="0dp"
        android:layout_weight="1">

        <LinearLayout
            android:layout_width="match_parent"
            android:layout_height="match_parent"
            android:orientation="vertical"
            android:padding="20dp">

            <TextView
                android:id="@+id/tv_title"
                android:layout_width="match_parent"
                android:layout_height="wrap_content"
                android:text="问:刘桂林是何许人也?"
                android:textColor="@color/colorAccent"
                android:textSize="22sp"
                android:textStyle="bold" />

            <RadioGroup
                android:id="@+id/mRadioGroup"
                android:layout_width="match_parent"
                android:layout_height="wrap_content"
                android:layout_marginTop="10dp">


                <!--四个选项-->

                <RadioButton
                    android:id="@+id/RadioA"
                    android:layout_width="match_parent"
                    android:layout_height="wrap_content"
                    android:text="大帅哥" />

                <RadioButton
                    android:id="@+id/RadioB"
                    android:layout_width="match_parent"
                    android:layout_height="wrap_content"
                    android:text="参照A" />

                <RadioButton
                    android:id="@+id/RadioC"
                    android:layout_width="match_parent"
                    android:layout_height="wrap_content"
                    android:text="参照B" />

                <RadioButton
                    android:id="@+id/RadioD"
                    android:layout_width="match_parent"
                    android:layout_height="wrap_content"
                    android:text="参照C" />

                <!--正确答案,默认是隐藏的-->

                <TextView
                    android:visibility="invisible"
                    android:id="@+id/tv_result"
                    android:layout_width="match_parent"
                    android:layout_height="wrap_content"
                    android:layout_marginTop="10dp"
                    android:text="正确答案:肯定选A呀!"
                    android:textColor="@color/colorPrimaryDark"
                    android:textSize="18sp" />

            </RadioGroup>

        </LinearLayout>


    </ScrollView>

    <!--切换题目-->
    <LinearLayout
        android:layout_width="match_parent"
        android:layout_height="wrap_content"
        android:layout_margin="10dp"
        android:orientation="horizontal">


        <Button
            android:id="@+id/btn_up"
            android:layout_width="match_parent"
            android:layout_height="wrap_content"
            android:layout_weight="1"
            android:text="上一题" />

        <Button
            android:id="@+id/btn_down"
            android:layout_width="match_parent"
            android:layout_height="wrap_content"
            android:layout_weight="1"
            android:text="下一题" />

    </LinearLayout>


</LinearLayout>
我们来预览一下
二.数据库的设计
数据库的话,我们采用一个轻量级数据库编辑器去编辑Sqlite Database Browser
- 官网地址(墙外面的世界):http://sqlitebrowser.org/
当然,你也可直接搜索这个软件也是可以下载到的,然后点击安装,一步步安装就可以完成了
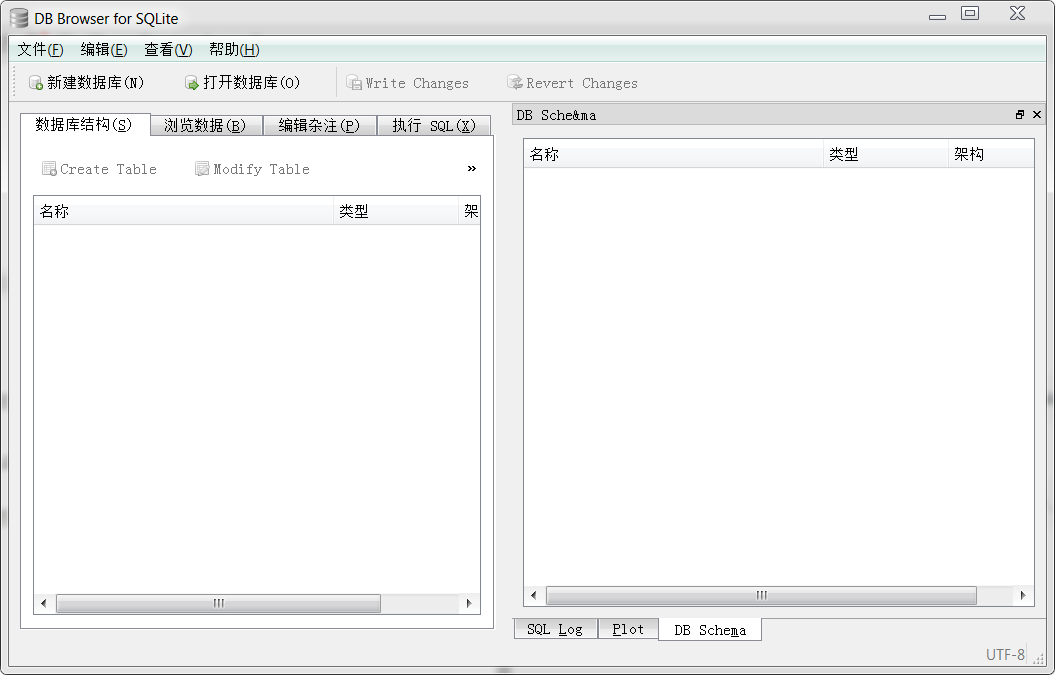
我们在这里就点击新建数据库——question.db,然后就添加了一些参数,主要就是编号和问题,四个选项,答案,解析等
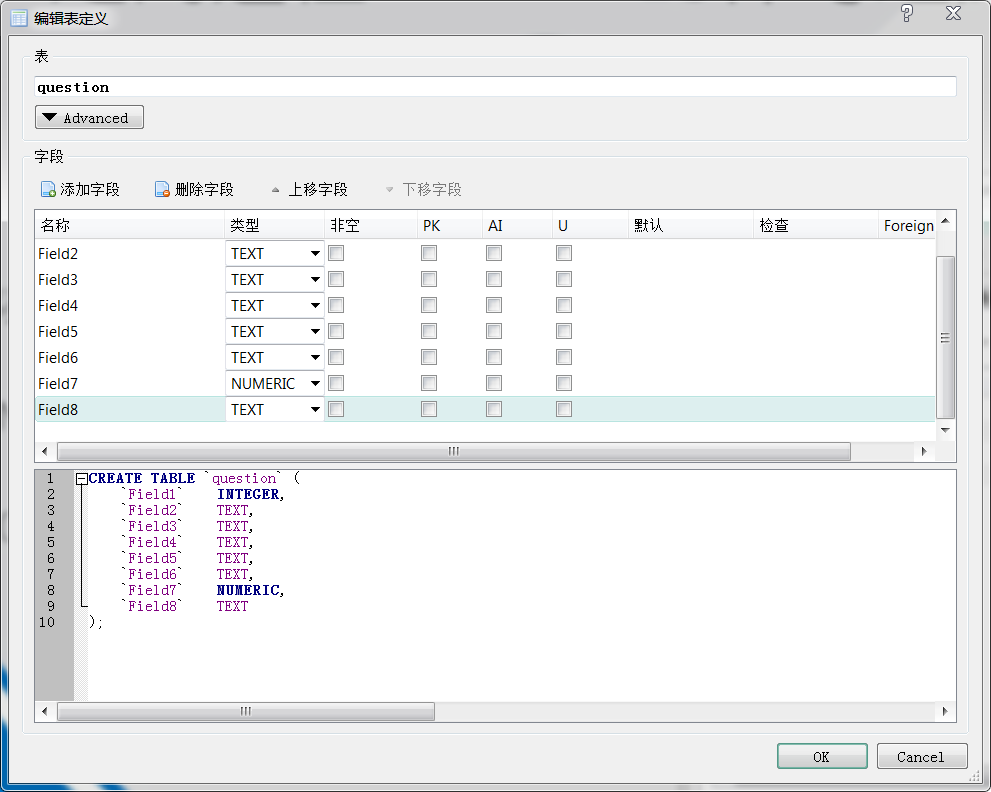
然后我们点击浏览数据,这里我们可以看到我这里设置的表明对应的说明

既然这样,那我们就多写几个问题吧

紧接着,我们要考虑的一个问题就是,把这个数据库放到软件的数据库里面,所以我先把question.db放在assets目录下,然后通过以下的方法区拷贝到app目录
/**
     * 将数据库拷贝到相应目录
     */
    private void initFile() {
        //判断数据库是否拷贝到相应的目录下
        if (new File(DB_PATH + DB_NAME).exists() == false) {
            File dir = new File(DB_PATH);
            if (!dir.exists()) {
                dir.mkdir();
            }

            //复制文件
            try {
                InputStream is = getBaseContext().getAssets().open(DB_NAME);
                OutputStream os = new FileOutputStream(DB_PATH + DB_NAME);

                //用来复制文件
                byte[] buffer = new byte[1024];
                //保存已经复制的长度
                int length;

                //开始复制
                while ((length = is.read(buffer)) > 0) {
                    os.write(buffer, 0, length);
                }

                //刷新
                os.flush();
                //关闭
                os.close();
                is.close();

            } catch (IOException e) {
                e.printStackTrace();
            }

        }
    }
三.答题功能实现
当这个方法执行了之后,你运行了软件,你在data/data/包名/database目录下就可以看到这个数据库了,这样我们就可以先去定义一个类专门用来存储数据——Question
package com.lgl.answersystem;

/**
 * 保存数据库数据
 * Created by LGL on 2016/6/4.
 */
public class Question {

    /**
     * 对应的就是Filter1-7  还有一个选中答案
     */

    //编号
    public int ID;
    //问题
    public String question;
    //四个选项
    public String answerA;
    public String answerB;
    public String answerC;
    public String answerD;
    //答案
    public int answer;
    //详情
    public String explaination;

    //用户选中的答案
    public int selectedAnswer;

}
紧接着,我们写一个数据库的类,专门连接数据库和获取数据——DBService
package com.lgl.answersystem;

import android.database.Cursor;
import android.database.sqlite.SQLiteDatabase;

import java.util.ArrayList;
import java.util.List;

/**
 * 连接数据库
 * Created by LGL on 2016/6/4.
 */
public class DBService {

    private SQLiteDatabase db;

    //构造方法
    public DBService() {
        //连接数据库
        db = SQLiteDatabase.openDatabase("/data/data/com.lgl.answersystem/databases/question.db", null, SQLiteDatabase.OPEN_READWRITE);

    }

    //获取数据库的数据
    public List<Question> getQuestion() {
        List<Question> list = new ArrayList<>();
        //执行sql语句
        Cursor cursor = db.rawQuery("select * from question", null);
        if (cursor.getCount() > 0) {
            cursor.moveToFirst();
            int count = cursor.getCount();
            //遍历
            for (int i = 0; i < count; i++) {
                cursor.moveToPosition(i);
                Question question = new Question();
                //ID
                question.ID = cursor.getInt(cursor.getColumnIndex("Field1"));
                //问题
                question.question = cursor.getString(cursor.getColumnIndex("Field2"));
                //四个选择
                question.answerA = cursor.getString(cursor.getColumnIndex("Field3"));
                question.answerB = cursor.getString(cursor.getColumnIndex("Field4"));
                question.answerC = cursor.getString(cursor.getColumnIndex("Field5"));
                question.answerD = cursor.getString(cursor.getColumnIndex("Field6"));
                //答案
                question.answer = cursor.getInt(cursor.getColumnIndex("Field7"));
                //解析
                question.explaination = cursor.getString(cursor.getColumnIndex("Field8"));
                //设置为没有选择任何选项
                question.selectedAnswer = -1;
                list.add(question);
            }
        }
        return list;

    }

}
OK,到这里,我们的数据库算是写好了一大半了,我们这里可以看到,其实就是查询我们的数据库然后封装在这个实体类中,紧接着,我们可以先初始化一些控件
    /**
     * 初始化View
     */
    private void initView() {
        tv_title = (TextView) findViewById(R.id.tv_title);

        mRadioButton[0] = (RadioButton) findViewById(R.id.RadioA);
        mRadioButton[1] = (RadioButton) findViewById(R.id.RadioB);
        mRadioButton[2] = (RadioButton) findViewById(R.id.RadioC);
        mRadioButton[3] = (RadioButton) findViewById(R.id.RadioD);

        btn_down = (Button) findViewById(R.id.btn_down);
        btn_up = (Button) findViewById(R.id.btn_up);

        tv_result = (TextView) findViewById(R.id.tv_result);

        mRadioGroup = (RadioGroup) findViewById(R.id.mRadioGroup);
    }
接着就开始实现我们的答题系统了
    /**
     * 初始化数据库服务
     */
    private void initDB() {
        DBService dbService = new DBService();
        final List<Question> list = dbService.getQuestion();

        count = list.size();
        corrent = 0;

        Question q = list.get(0);
        tv_title.setText(q.question);

        mRadioButton[0].setText(q.answerA);
        mRadioButton[1].setText(q.answerB);
        mRadioButton[2].setText(q.answerC);
        mRadioButton[3].setText(q.answerD);

        //上一题
        btn_up.setOnClickListener(new View.OnClickListener() {
            @Override
            public void onClick(View v) {
                if (corrent > 0) {
                    corrent--;

                    Question q = list.get(corrent);

                    tv_title.setText(q.question);

                    mRadioButton[0].setText(q.answerA);
                    mRadioButton[1].setText(q.answerB);
                    mRadioButton[2].setText(q.answerC);
                    mRadioButton[3].setText(q.answerD);

                    tv_result.setText(q.explaination);

                    mRadioGroup.clearCheck();

                    //设置选中
                    if (q.selectedAnswer != -1) {
                        mRadioButton[q.selectedAnswer].setChecked(true);
                    }
                }

            }
        });

        //下一题
        btn_down.setOnClickListener(new View.OnClickListener() {
            @Override
            public void onClick(View v) {
                //判断是否为最后一题
                if (corrent < count - 1) {
                    corrent++;
                    Question q = list.get(corrent);

                    tv_title.setText(q.question);

                    mRadioButton[0].setText(q.answerA);
                    mRadioButton[1].setText(q.answerB);
                    mRadioButton[2].setText(q.answerC);
                    mRadioButton[3].setText(q.answerD);

                    tv_result.setText(q.explaination);

                    mRadioGroup.clearCheck();

                    //设置选中
                    if (q.selectedAnswer != -1) {
                        mRadioButton[q.selectedAnswer].setChecked(true);
                    }
                } else {
                    Toast.makeText(MainActivity.this, "最后一题啦!", Toast.LENGTH_SHORT).show();
                }
            }
        });

        //答案选中
        mRadioGroup.setOnCheckedChangeListener(new RadioGroup.OnCheckedChangeListener() {
            @Override
            public void onCheckedChanged(RadioGroup group, int checkedId) {
                for (int i = 0; i <4 ; i ++){
                    if(mRadioButton[i].isChecked() == true){
                        list.get(corrent).selectedAnswer = i;
                        break;
                    }
                }
            }
        });
    }
现在的逻辑还是非常的简单的,我们连接数据库拿到数据,点击上一题和下一题的时候,就开始切换数据,我们并没有对他进行什么很难的处理,我们运行一下
四.答错解析
我们在上面实现了答题的功能,同时,也实现了保存选项的功能,拿这样的话,我们就可以再来实现一个判断错误的方法
     /**
     * 判断是否答题正确
     * @param list
     * @return
     */
    private List<Integer> checkAnswer(List<Question>list){
        List<Integer>wrongList= new ArrayList<>();
        for(int i = 0 ; i<list.size();i++){
            //判断对错
            for (list.get(i).answer != list.get(i).selectedAnswer){
                wrongList.add(i);
            }
        }
        return wrongList;
    }
然后我们就可以在点击按钮到最后一题的时候判断是否正确了
//没有题目了,开始检测正确性
                    final List<Integer> wrongList = checkAnswer(list);

                    if(wrongList.size() == 0){
                        new AlertDialog.Builder(MainActivity.this).setTitle("提示").setMessage("你好厉害,答对了所有题!")
                                .setPositiveButton("确定", new DialogInterface.OnClickListener() {
                                    @Override
                                    public void onClick(DialogInterface dialog, int which) {
                                        finish();
                                    }
                                }).setNegativeButton("取消",null).show();
                    }

                    //窗口提示
                    new AlertDialog.Builder(MainActivity.this).setTitle("恭喜,答题完成!")
                            .setMessage("答对了" + (list.size() - wrongList.size()) + "道题" + "\n"
                                    + "答错了" + wrongList.size() + "道题" + "\n" + "是否查看错题?").setPositiveButton("确定", new DialogInterface.OnClickListener() {
                        @Override
                        public void onClick(DialogInterface dialog, int which) {
                            wrongMode = true;
                            List<Question> newList = new ArrayList<Question>();
                            for (int i = 0; i < wrongList.size(); i++) {
                                newList.add(list.get(wrongList.get(i)));
                            }
                            list.clear();
                            for (int i = 0; i < newList.size(); i++) {
                                list.add(newList.get(i));
                            }
                            corrent = 0;
                            count = list.size();

                            //更新当前显示的内容
                            Question q = list.get(corrent);

                            tv_title.setText(q.question);

                            mRadioButton[0].setText(q.answerA);
                            mRadioButton[1].setText(q.answerB);
                            mRadioButton[2].setText(q.answerC);
                            mRadioButton[3].setText(q.answerD);

                            tv_result.setText(q.explaination);
                            //显示结果
                            tv_result.setVisibility(View.VISIBLE);
                        }
                    }).setNegativeButton("取消", new DialogInterface.OnClickListener() {
                        @Override
                        public void onClick(DialogInterface dialog, int which) {
                            finish();
                        }
                    }).show();
这里,开始是一个判断你全答对的情况下,那就直接提示你正确,否则的话,也就开始进行处理了,同时,你要查看错题的话,你就的切换错题模式,我们就重新加载数据了,这里还会有几个情况,比如当我们查看错题有点击到最后一题的时候,我们可以直接弹提示
        else if (corrent == count - 1 && wrongMode == true) {

                    new AlertDialog.Builder(MainActivity.this).setTitle("提示").setMessage("已经到达最后一道题,是否退出?")
                            .setPositiveButton("确定", new DialogInterface.OnClickListener() {
                                @Override
                                public void onClick(DialogInterface dialog, int which) {
                                    finish();
                                }
                            }).setNegativeButton("取消",null).show();
这样,我们简单的答题系统就差不多完成了,我们来运行一下
这个实现起来还是比较清晰脱俗的,我们可以点击在数据库里面任意的添加题目,这都是OK的,项目我上传到了Github上,有兴趣的可以看一下哦!
Github:https://github.com/LiuGuiLinAndroid/AnswerSystem
欢迎加群:555974449一起讨论技术兴趣!
’


 2383
2383

 被折叠的 条评论
为什么被折叠?
被折叠的 条评论
为什么被折叠?
 到【灌水乐园】发言


