


Android移动开发教学app案例之校园地图
一、项目介绍
基于展示用户位置这一Android特性设计的入门教学案例
项目结构如图所示

mipmap中的图片资源如下(注意名称不能出现中文、大写字母)

二、开发环境
软件环境: Android Studio 4.1.3 + JDK1.8
API版本:API 16
操作系统:Windows 10
三、功能设计
- 显示地图
- 在地图上显示当前手机定位
- 能够显示校园内标志建筑物的介绍
- 在地图上用符号标记出标志建筑物所在点
四、获取百度地图 API Key
基于位置的服务简称LBS,主要的工作原理是利用无线电通讯网络或 GPS 等定位方式来确定出移动设备所在的位置。
本次项目使用的是百度地图在 LBS 方面提供的一些功能。
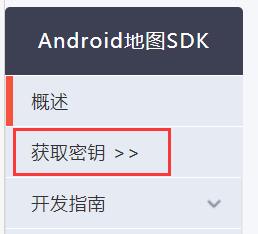
打开百度地图开放平台 http://lbsyun.baidu.com/ ,选择开发文档 - Android 地图SDK
百度地图 Android SDK是一套基于Android 4.0及以上版本设备的应用程序接口。 您可以使用该套 SDK开发适用于Android系统移动设备的地图应用,通过调用地图SDK接口,您可以轻松访问百度地图服务和数据,构建功能丰富、交互性强的地图类应用程序。
点击获取密钥,需要登录百度账号
进入后需要验证个人信息
然后到控制台看板 - 应用管理 - 我的应用 - 创建应用

填写一个应用名称,应用类型选择 Android SDK
发布版SHA1 为发布签名版正式apk时,签名文件中的SHA1
PackageName为你的Project中的包名,此处我的为com.example.mymap

开发版SHA1:可以从界面右端 gradle - app - Tasks - android - 双击signingReport
可以在控制台得到gradle自动生成的用于debug的SHA1

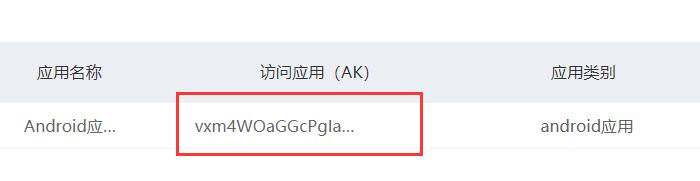
然后就能在我的应用中获得API Key
下面下载百度地图的Android SDK
找到产品下载
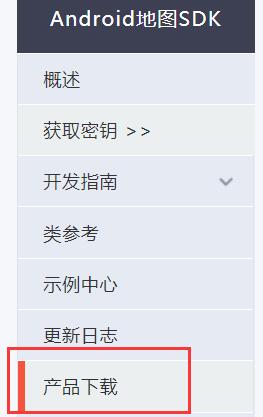
点击自定义下载

根据需要选择功能,如果后续需要编写更丰富的功能可以选择包含较多服务的SDK

配置 选择AAR包、标准开发包

关于AAR文件和JAR文件的区别
jar文件:
只包含class文件和清单文件,不包含资源文件,比如图片等所有的 res下的资源文件
aar文件:
class以及res下的所有的资源文件全部包含
五、Android Studio工程配置百度地图
创建一个新的Project,命名为MyMap
默认选择创建一个Empty Activity
将下载的BaiduLBS_AndroidSDK_Lib.aar,拷贝到MyMap - app - libs 目录下
然后打开Gradle Scriptus - build.gradle配置文件,在android{}中增加
repositories {
        flatDir {
            dirs 'libs'
        }
    }
在dependencies{}中增加
implementation fileTree(include: ['*.jar'], dir: 'libs')
implementation(name: 'BaiduLBS_AndroidSDK_Lib', ext: 'aar')
配置完成后点击Build - Rebuild Project重新编译一次项目
六、显示地图
首先配置AndroidManifest.xml文件
打开manifests - AndroidManifest.xml
在application中配置开发密钥(AK)
<application>
    <meta-data
        android:name="com.baidu.lbsapi.API_KEY"
        android:value="开发者 key" />
</application>
在application的外部添加权限声明
Android 6.0后还需要在java代码中动态声明
<!-- 访问网络,进行地图相关业务数据请求,包括地图数据,路线规划,POI检索等 -->
<uses-permission android:name="android.permission.INTERNET" />
<!-- 获取网络状态,根据网络状态切换进行数据请求网络转换 -->
<uses-permission android:name="android.permission.ACCESS_NETWORK_STATE" />

<!-- 读取外置存储。如果开发者使用了so动态加载功能并且把so文件放在了外置存储区域,则需要申请该权限,否则不需要 -->
<uses-permission android:name="android.permission.READ_EXTERNAL_STORAGE" />
<!-- 写外置存储。如果开发者使用了离线地图,并且数据写在外置存储区域,则需要申请该权限 -->
<uses-permission android:name="android.permission.WRITE_EXTERNAL_STORAGE" />
编写布局文件 activity_main.xml
切换至 Code工具,添加百度地图容器,设置id为themapView,按照默认的设置占满屏幕,点击Infer Constraints快速创建约束
<com.baidu.mapapi.map.MapView
    android:id="@+id/themapView"
    android:layout_width="match_parent"
    android:layout_height="match_parent"
    android:clickable="true" />
然后是MainActivity的编写
先实现显示地图,只需要以下代码
public class MainActivity extends AppCompatActivity implements View.OnClickListener{
    private MapView mMapView = null;

    //消息传递
    private Intent mIntent = null;
    @Override
    protected void onCreate(Bundle savedInstanceState) {
        super.onCreate(savedInstanceState);
        //初始化地图必须放在布局初始化之前
        //地图初始化方法中任选一种
        SDKInitializer.initialize(getApplicationContext());
        setContentView(R.layout.activity_main);
         //获取地图控件
        mMapView = findViewById(R.id.themapView);
    }

    //实现地图生命周期管理
    @Override
    protected void onResume() {
        super.onResume();
        //在activity执行onResume时执行mMapView. onResume (),实现地图生命周期管理
        mMapView.onResume();
    }
    @Override
    protected void onPause() {
        super.onPause();
        //在activity执行onPause时执行mMapView. onPause (),实现地图生命周期管理
        mMapView.onPause();
    }
    @Override
    protected void onDestroy() {
        super.onDestroy();
        //在activity执行onDestroy时执行mMapView.onDestroy(),实现地图生命周期管理
        mMapView.onDestroy();
    }

}
七、显示定位
在显示地图的基础上,展示用户当前所在位置的定位点
配置AndroidManifest.xml
<!-- 这个权限用于进行网络定位 -->
<uses-permission android:name="android.permission.ACCESS_COARSE_LOCATION" />
<!-- 这个权限用于访问GPS定位 -->
<uses-permission android:name="android.permission.ACCESS_FINE_LOCATION" />
在Application标签中声明定位的service组件
<service android:name="com.baidu.location.f"
    android:enabled="true"
    android:process=":remote"/>
构造地图数据
//重写onReceieveLocation方法获取定位数据,并传给mapview
    public class MyLocationListener extends BDAbstractLocationListener {
        @Override
        public void onReceiveLocation(BDLocation location) {
            //mapView 销毁后不在处理新接收的位置
            if (location == null || mMapView == null){
                return;
            }

            // 如果是第一次定位
            LatLng ll = new LatLng(location.getLatitude(), location.getLongitude());
            if (isFirstLocate) {
                isFirstLocate = false;
                //给地图设置状态
                MapStatusUpdate update = MapStatusUpdateFactory.newLatLng(ll);
                mBaiduMap.animateMapStatus(update);
                update = MapStatusUpdateFactory.zoomTo(18f);//层级选择
                mBaiduMap.animateMapStatus(update);
            }

            MyLocationData locData = new MyLocationData.Builder()
                    .accuracy(location.getRadius())
                    // 此处设置开发者获取到的方向信息,顺时针0-360
                    .direction(location.getDirection()).latitude(location.getLatitude())
                    .longitude(location.getLongitude()).build();
            mBaiduMap.setMyLocationData(locData);
        }
    }
动态申请定位所需权限的函数如下
 //申请权限
    public void showContacts(){
        if (ActivityCompat.checkSelfPermission(this, Manifest.permission.ACCESS_COARSE_LOCATION)
                != PackageManager.PERMISSION_GRANTED
                || ActivityCompat.checkSelfPermission(this, Manifest.permission.ACCESS_FINE_LOCATION)
                != PackageManager.PERMISSION_GRANTED
                || ActivityCompat.checkSelfPermission(this, Manifest.permission.READ_PHONE_STATE)
                != PackageManager.PERMISSION_GRANTED) {
            //Toast.makeText(getApplicationContext(),"没有权限,请手动开启定位权限",Toast.LENGTH_SHORT).show();
            // 申请一个(或多个)权限,并提供用于回调返回的获取码(用户定义)
            ActivityCompat.requestPermissions(MainActivity.this,new String[]{Manifest.permission.ACCESS_COARSE_LOCATION, Manifest.permission.ACCESS_FINE_LOCATION, Manifest.permission.READ_PHONE_STATE}, BAIDU_READ_PHONE_STATE);
        }else{
            init();
        }
    }

    //Android6.0申请权限的回调方法
    @Override
    public void onRequestPermissionsResult(int requestCode, String[] permissions, int[] grantResults) {
        super.onRequestPermissionsResult(requestCode, permissions, grantResults);
        switch (requestCode) {
            // requestCode即所声明的权限获取码,在checkSelfPermission时传入
            case BAIDU_READ_PHONE_STATE:
                if (grantResults[0] == PackageManager.PERMISSION_GRANTED) {
                    // 获取到权限,作相应处理(调用定位SDK应当确保相关权限均被授权,否则可能引起定位失败)
                    init();
                } else {
                    // 没有获取到权限,做特殊处理
                    Toast.makeText(getApplicationContext(), "获取位置权限失败,请手动开启", Toast.LENGTH_SHORT).show();
                }
                break;
            default:
                break;
        }
    }
之后在原先的获取地图之后,加上开启定位图层的代码,以及对定位图层的设置
//获取地图控件
 mMapView = findViewById(R.id.themapView);
//得到地图
 mBaiduMap = mMapView.getMap();
//开启定位图层
 mBaiduMap.setMyLocationEnabled(true);

 //定位初始化
mLocationClient = new LocationClient(this);

 //通过LocationClientOption设置LocationClient相关参数
LocationClientOption option = new LocationClientOption();
option.setOpenGps(true); // 打开gps
option.setCoorType("bd09ll"); // 设置坐标类型
option.setScanSpan(5000);//五秒返回一次位置
// 可选,设置地址信息
option.setIsNeedAddress(true);
//可选,设置是否需要地址描述
option.setIsNeedLocationDescribe(true);

//设置locationClientOption
mLocationClient.setLocOption(option);

//注册LocationListener监听器
MyLocationListener myLocationListener = new MyLocationListener();
        mLocationClient.registerLocationListener(myLocationListener);
//开启地图定位图层
mLocationClient.start();
如果要更改为跟随FOLLOWING模式,在后面添加以下代码
locationMode = MyLocationConfiguration.LocationMode.FOLLOWING;
 // 定位模式、是否开启方向、设置自定义定位图标、精度圈填充颜色以及精度圈边框颜色5个属性(此处只设置了前三个)。
MyLocationConfiguration mLocationConfiguration = new MyLocationConfiguration(locationMode,true,null);
// 使自定义的配置生效
mBaiduMap.setMyLocationConfiguration(mLocationConfiguration);
显示定位的MainActivity.java 完整代码如下
public class MainActivity extends AppCompatActivity implements View.OnClickListener{
    private MapView mMapView = null;
    private BaiduMap mBaiduMap = null;//定位图层
    private LocationClient mLocationClient = null;
    // 当前定位模式
    private MyLocationConfiguration.LocationMode locationMode;
    //是否是第一次定位
    private boolean isFirstLocate = true;
    //当前定位模式
    private MyLocationConfiguration.LocationMode mLocationMode;
    private static final int BAIDU_READ_PHONE_STATE =100;
    @Override
    protected void onCreate(Bundle savedInstanceState) {
        super.onCreate(savedInstanceState);
        //初始化地图必须放在布局初始化之前
        //地图初始化方法中任选一种
        SDKInitializer.initialize(getApplicationContext());

        setContentView(R.layout.activity_main);

        //获取定位权限后初始化
        showContacts();

    }

    private void init(){
        //获取地图控件
        mMapView = findViewById(R.id.themapView);
        //得到地图
        mBaiduMap = mMapView.getMap();

        //开启定位图层
        mBaiduMap.setMyLocationEnabled(true);

        //定位初始化
        mLocationClient = new LocationClient(this);

        //通过LocationClientOption设置LocationClient相关参数
        LocationClientOption option = new LocationClientOption();
        option.setOpenGps(true); // 打开gps
        option.setCoorType("bd09ll"); // 设置坐标类型
        option.setScanSpan(5000);//五秒返回一次位置
        // 可选,设置地址信息
        option.setIsNeedAddress(true);
        //可选,设置是否需要地址描述
        option.setIsNeedLocationDescribe(true);

        //设置locationClientOption
        mLocationClient.setLocOption(option);

        //注册LocationListener监听器
        MyLocationListener myLocationListener = new MyLocationListener();
        mLocationClient.registerLocationListener(myLocationListener);
        //开启地图定位图层
        mLocationClient.start();
        //如果要改为FOLLOWING模式
        //locationMode = MyLocationConfiguration.LocationMode.FOLLOWING;
        // 定位模式、是否开启方向、设置自定义定位图标、精度圈填充颜色以及精度圈边框颜色5个属性(此处只设置了前三个)。
        //MyLocationConfiguration mLocationConfiguration = new MyLocationConfiguration(locationMode,true,null);
        // 使自定义的配置生效
        //mBaiduMap.setMyLocationConfiguration(mLocationConfiguration);

    }

    //重写onReceieveLocation方法获取定位数据,并传给mapview
    public class MyLocationListener extends BDAbstractLocationListener {
        @Override
        public void onReceiveLocation(BDLocation location) {
            //mapView 销毁后不在处理新接收的位置
            if (location == null || mMapView == null){
                return;
            }

            // 如果是第一次定位
            LatLng ll = new LatLng(location.getLatitude(), location.getLongitude());
            if (isFirstLocate) {
                isFirstLocate = false;
                //给地图设置状态
                MapStatusUpdate update = MapStatusUpdateFactory.newLatLng(ll);
                mBaiduMap.animateMapStatus(update);
                update = MapStatusUpdateFactory.zoomTo(18f);
                mBaiduMap.animateMapStatus(update);
            }

            MyLocationData locData = new MyLocationData.Builder()
                    .accuracy(location.getRadius())
                    // 此处设置开发者获取到的方向信息,顺时针0-360
                    .direction(location.getDirection()).latitude(location.getLatitude())
                    .longitude(location.getLongitude()).build();
            mBaiduMap.setMyLocationData(locData);
        }
    }

    //申请权限
    public void showContacts(){
        if (ActivityCompat.checkSelfPermission(this, Manifest.permission.ACCESS_COARSE_LOCATION)
                != PackageManager.PERMISSION_GRANTED
                || ActivityCompat.checkSelfPermission(this, Manifest.permission.ACCESS_FINE_LOCATION)
                != PackageManager.PERMISSION_GRANTED
                || ActivityCompat.checkSelfPermission(this, Manifest.permission.READ_PHONE_STATE)
                != PackageManager.PERMISSION_GRANTED) {
             //Toast.makeText(getApplicationContext(),"没有权限,请手动开启定位权限",Toast.LENGTH_SHORT).show();
            // 申请一个(或多个)权限,并提供用于回调返回的获取码(用户定义)
            ActivityCompat.requestPermissions(MainActivity.this,new String[]{Manifest.permission.ACCESS_COARSE_LOCATION, Manifest.permission.ACCESS_FINE_LOCATION, Manifest.permission.READ_PHONE_STATE}, BAIDU_READ_PHONE_STATE);
        }else{
            init();
        }
    }

    //Android6.0申请权限的回调方法
    @Override
    public void onRequestPermissionsResult(int requestCode, String[] permissions, int[] grantResults) {
        super.onRequestPermissionsResult(requestCode, permissions, grantResults);
        switch (requestCode) {
            // requestCode即所声明的权限获取码,在checkSelfPermission时传入
            case BAIDU_READ_PHONE_STATE:
                if (grantResults[0] == PackageManager.PERMISSION_GRANTED) {
                    // 获取到权限,作相应处理(调用定位SDK应当确保相关权限均被授权,否则可能引起定位失败)
                    init();
                } else {
                    // 没有获取到权限,做特殊处理
                    Toast.makeText(getApplicationContext(), "获取位置权限失败,请手动开启", Toast.LENGTH_SHORT).show();
                }
                break;
            default:
                break;
        }
    }

    //实现地图生命周期管理
    @Override
    protected void onResume() {
        super.onResume();
        //在activity执行onResume时执行mMapView. onResume (),实现地图生命周期管理
        mMapView.onResume();
    }
    @Override
    protected void onPause() {
        super.onPause();
        //在activity执行onPause时执行mMapView. onPause (),实现地图生命周期管理
        mMapView.onPause();
    }
    @Override
    protected void onDestroy() {
        super.onDestroy();
        //在activity执行onDestroy时执行mMapView.onDestroy(),实现地图生命周期管理
        mMapView.onDestroy();
    }

}
八、添加地图标点
地图标点可以使用百度地图提供的绘制“点标记”来实现
点标记用来在地图上标记任何位置,例如用户位置、车辆位置、店铺位置等一切带有位置属性的事物。
地图 SDK 提供的点标记功能包含两大部分,一部分是点(俗称 Marker)同时,SDK 对 Marker 封装了大量的触发事件,例如点击事件、长按事件、拖拽事件。
用户可以自定义Marker,常用的属性有

百度地图SDK还提供了一次性向地图添加大批量Overlay的接口
此处我们一次性添加三个Marker,需要的经纬度可以通过百度地图官网搜索获得
		//设置地图标点
        //创建OverlayOptions的集合
        List<OverlayOptions> options = new ArrayList<OverlayOptions>();
        //构造坐标数据
        //经纬度可以通过百度地图官网进行搜索获得
        LatLng p_library = new LatLng(36.674945, 117.144168);
        LatLng p_teach = new LatLng(36.673717, 117.145928);
        LatLng p_dining = new LatLng(36.672553, 117.147145);
	//自定义Marker的图标
	BitmapDescriptor bitmap = BitmapDescriptorFactory
               .fromResource(R.mipmap.icon_mark);
	//创建OverlayOptions属性
	OverlayOptions option1 =  new MarkerOptions()
                .position(p_library)
                .icon(bitmap);
	OverlayOptions option2 =  new MarkerOptions()
                .position(p_teach)
                .icon(bitmap);
	OverlayOptions option3 =  new MarkerOptions()
                .position(p_dining)
                .icon(bitmap);
	//将OverlayOptions添加到list
	options.add(option1);
	options.add(option2);
	options.add(option3);

	//在地图上批量添加
	mBaiduMap.addOverlays(options);
九、标志地点的介绍
对功能进行分析,我们需要编写:
- 三个地点的跳转按钮
- 点击会跳转到三个地点的介绍页面
首先编写activity_main.xml

在原先的地图容器中添加三个TextView和三个ImageButton
文字设为上下居中且靠左
 android:gravity="center_vertical|left"
 android:paddingLeft="35dp"
 android:textSize="18sp"
文字颜色可以通过android:textColor=来设置
完整的Activity_main.xml 代码如下
<?xml version="1.0" encoding="utf-8"?>
<androidx.constraintlayout.widget.ConstraintLayout xmlns:android="http://schemas.android.com/apk/res/android"
    xmlns:app="http://schemas.android.com/apk/res-auto"
    xmlns:tools="http://schemas.android.com/tools"
    android:layout_width="match_parent"
    android:layout_height="match_parent"
    tools:context=".MainActivity">

    <com.baidu.mapapi.map.MapView
        android:id="@+id/themapView"
        android:layout_width="0dp"
        android:layout_height="0dp"
        android:clickable="true"
        android:focusable="true"
        app:layout_constraintBottom_toBottomOf="parent"
        app:layout_constraintEnd_toEndOf="parent"
        app:layout_constraintHorizontal_bias="1.0"
        app:layout_constraintStart_toStartOf="parent"
        app:layout_constraintTop_toTopOf="parent"
        app:layout_constraintVertical_bias="1.0">

    </com.baidu.mapapi.map.MapView>

    <TextView
        android:id="@+id/locate_library"
        android:layout_width="250dp"
        android:layout_height="55dp"
        android:background="@color/white"
        android:gravity="center_vertical|left"
        android:paddingLeft="35dp"
        android:text="@string/library_name"
        android:textColor="@color/blue"
        android:textSize="18sp"
        app:layout_constraintBottom_toTopOf="@+id/locate_tech"
        app:layout_constraintEnd_toEndOf="parent"
        app:layout_constraintStart_toStartOf="parent" />

    <ImageButton
        android:id="@+id/btn_library"
        android:layout_width="35dp"
        android:layout_height="35dp"
        android:layout_marginEnd="20dp"
        android:layout_marginRight="20dp"
        android:background="@mipmap/round"
        android:src="@mipmap/right_arrow"
        app:layout_constraintBottom_toBottomOf="@+id/locate_library"
        app:layout_constraintEnd_toEndOf="@+id/locate_library"
        app:layout_constraintTop_toTopOf="@+id/locate_library" />

    <TextView
        android:id="@+id/locate_tech"
        android:layout_width="250dp"
        android:layout_height="55dp"
        android:background="@color/white"
        android:gravity="center_vertical|left"
        android:paddingLeft="35dp"
        android:text="@string/tech_name"
        android:textColor="@color/blue"
        android:textSize="18sp"
        app:layout_constraintBottom_toTopOf="@+id/locate_dining"
        app:layout_constraintStart_toStartOf="@+id/locate_library" />

    <TextView
        android:id="@+id/locate_dining"
        android:layout_width="250dp"
        android:layout_height="55dp"
        android:background="@color/white"
        android:gravity="center_vertical|left"
        android:paddingLeft="35dp"
        android:text="@string/dining_name"
        android:textColor="@color/blue"
        android:textSize="18sp"
        app:layout_constraintBottom_toBottomOf="parent"
        app:layout_constraintStart_toStartOf="@+id/locate_library" />

    <ImageButton
        android:id="@+id/btn_tech"
        android:layout_width="35dp"
        android:layout_height="35dp"
        android:layout_marginEnd="20dp"
        android:layout_marginRight="20dp"
        android:background="@mipmap/round"
        app:layout_constraintBottom_toBottomOf="@+id/locate_tech"
        app:layout_constraintEnd_toEndOf="@+id/locate_tech"
        app:layout_constraintTop_toTopOf="@+id/locate_tech"
        app:srcCompat="@mipmap/right_arrow" />

    <ImageButton
        android:id="@+id/btn_dining"
        android:layout_width="35dp"
        android:layout_height="35dp"
        android:layout_marginEnd="20dp"
        android:layout_marginRight="20dp"
        android:background="@mipmap/round"
        app:layout_constraintBottom_toBottomOf="@+id/locate_dining"
        app:layout_constraintEnd_toEndOf="@+id/locate_dining"
        app:layout_constraintTop_toBottomOf="@+id/locate_tech"
        app:srcCompat="@mipmap/right_arrow" />

</androidx.constraintlayout.widget.ConstraintLayout>
然后新建一个布局文件activity_description.xml作为地点介绍的页面布局
页面效果如下

包含两个TextView,一个ImageView和一个ImageButton
采用Constraintlayout布局
完整代码如下
<?xml version="1.0" encoding="utf-8"?>
<androidx.constraintlayout.widget.ConstraintLayout xmlns:android="http://schemas.android.com/apk/res/android"
    xmlns:app="http://schemas.android.com/apk/res-auto"
    xmlns:tools="http://schemas.android.com/tools"
    android:layout_width="match_parent"
    android:layout_height="match_parent"
    tools:context=".DescriptionActivity">

    <TextView
        android:id="@+id/place_name"
        android:layout_width="wrap_content"
        android:layout_height="45dp"
        android:layout_marginStart="50dp"
        android:layout_marginLeft="50dp"
        android:layout_marginTop="90dp"
        android:text="图书馆"
        android:textColor="@color/blue"
        android:textSize="36sp"
        app:layout_constraintStart_toStartOf="parent"
        app:layout_constraintTop_toTopOf="parent" />

    <TextView
        android:id="@+id/place_des"
        android:layout_width="0dp"
        android:layout_height="wrap_content"
        android:layout_marginTop="160dp"
        android:layout_marginEnd="50dp"
        android:layout_marginRight="50dp"
        android:text="软件园校区图书馆位于校区东北角一隅,面积1446平米,拥有232个阅览座位。"
        android:textColor="@color/blue"
        android:textSize="20sp"
        app:layout_constraintEnd_toEndOf="parent"
        app:layout_constraintStart_toStartOf="@+id/place_name"
        app:layout_constraintTop_toTopOf="parent" />

    <ImageView
        android:id="@+id/place_pic"
        android:layout_width="350dp"
        android:layout_height="0dp"
        android:layout_marginBottom="20dp"
        app:layout_constraintBottom_toBottomOf="parent"
        app:layout_constraintEnd_toEndOf="parent"
        app:layout_constraintStart_toStartOf="parent"
        app:srcCompat="@drawable/pic_library" />

    <ImageButton
        android:id="@+id/btn_place_return"
        android:layout_width="40dp"
        android:layout_height="40dp"
        android:layout_marginStart="13dp"
        android:layout_marginLeft="13dp"
        android:layout_marginTop="10dp"
        android:background="#00FFFFFF"
        android:onClick="back_onclick"
        app:layout_constraintStart_toStartOf="parent"
        app:layout_constraintTop_toTopOf="parent"
        app:srcCompat="@mipmap/backward_arrowsmall" />
</androidx.constraintlayout.widget.ConstraintLayout>
然后在res - values文件夹下的strings.xml中编写地点名称和介绍
之后可以直接采用R.string.tech_name等来引用
app_name为APP显示的名字
<resources>
    <string name="app_name">校园地图</string>
    <string name="library_name">图书馆</string>
    <string name="tech_name">教学楼</string>
    <string name="dining_name">食堂</string>
    <string name="library_des">软件园校区图书馆位于校区东北角一隅,面积1446平米,拥有232个阅览座位。</string>
    <string name="tech_des">教学楼包括一区至六区共六个区域。教学楼内有自助售货机、饮水机和休闲区</string>
    <string name="dining_des">食堂共有两个,分别为1号餐厅与2号风味餐厅</string>
</resources>
然后编写一个类来存放地点信息
新建一个Java Class命名为Place_info.java
//存放地点的信息
public class Place_Info {
    private int name;//地名id
    private int descreption;//地点描述id
    private int picname;//图片id

    public Place_Info(int name, int descreption, int picname){
        this.name = name;
        this.descreption = descreption;
        this.picname = picname;
    }

    public Place_Info(){}

    public int getName() {
        return name;
    }

    public void setName(int name) {
        this.name = name;
    }

    public int getDescreption() {
        return descreption;
    }

    public void setDescreption(int descreption) {
        this.descreption = descreption;
    }

    public int getPicname() {
        return picname;
    }

    public void setPicname(int picname) {
        this.picname = picname;
    }
}
在MainActivity中初始化地点信息
//地点信息
    private Place_Info tech_info = new Place_Info(R.string.tech_name, R.string.tech_des, R.drawable.pic_tech);
    private Place_Info library_info = new Place_Info(R.string.library_name, R.string.library_des, R.drawable.pic_library);
    private Place_Info dining_info = new Place_Info(R.string.dining_name, R.string.dining_des, R.drawable.pic_dining);
同时为按钮绑定点击监听事件
通过Bundle来传递int类型的数据(地名、描述等id)
 //按钮点击监听器
    @Override
    public void onClick(View v){
        if(v.getId() == R.id.btn_library){
            mIntent = new Intent(MainActivity.this, DescriptionActivity.class);
            //使用Bundle来传递Int类型的数据
            Bundle bundle = new Bundle();
            bundle.putInt("name", library_info.getName());
            bundle.putInt("des",library_info.getDescreption());
            bundle.putInt("picname", library_info.getPicname());
            mIntent.putExtras(bundle);
            startActivity(mIntent);
        }else if(v.getId() == R.id.btn_tech){
            mIntent = new Intent(MainActivity.this, DescriptionActivity.class);
            Bundle bundle = new Bundle();
            bundle.putInt("name", tech_info.getName());
            bundle.putInt("des",tech_info.getDescreption());
            bundle.putInt("picname", tech_info.getPicname());
            mIntent.putExtras(bundle);
            startActivity(mIntent);
        }else if(v.getId() == R.id.btn_dining){
            mIntent = new Intent(MainActivity.this, DescriptionActivity.class);
            Bundle bundle = new Bundle();
            bundle.putInt("name", dining_info.getName());
            bundle.putInt("des",dining_info.getDescreption());
            bundle.putInt("picname", dining_info.getPicname());
            mIntent.putExtras(bundle);
            startActivity(mIntent);
        }

    }
新建一个Activity命名为DescriptionActivity.java来显示标志地点介绍
获取Bundle从MainActivity传来的信息
 		//获取从MainActivity传输过来的数据
        Bundle bd = mIntent.getExtras();
        //地名
        int nameid = bd.getInt("name");
        place_name.setText(nameid);
        //描述
        int desid = bd.getInt("des");
        place_des.setText(desid);
        //图片
        int picid = bd.getInt("picname");
        place_pic.setImageResource(picid);
DescriptionActivity.java 完整代码如下
public class DescriptionActivity extends AppCompatActivity {
    private ImageButton btn_des_back;
    private TextView place_name, place_des;
    private ImageView place_pic;
    Intent mIntent;

    @Override
    protected void onCreate(Bundle savedInstanceState) {
        super.onCreate(savedInstanceState);
        setContentView(R.layout.activity_description);
        mIntent = getIntent();
        init();
    }

    private void init(){
        place_name = (TextView)findViewById(R.id.place_name);
        place_des = (TextView)findViewById(R.id.place_des);
        place_pic = (ImageView)findViewById(R.id.place_pic);
        //获取从MainActivity传输过来的数据
        Bundle bd = mIntent.getExtras();
        //地名
        int nameid = bd.getInt("name");
        place_name.setText(nameid);
        //描述
        int desid = bd.getInt("des");
        place_des.setText(desid);
        //图片
        int picid = bd.getInt("picname");
        place_pic.setImageResource(picid);

    }

    //绑定返回按钮的点击事件
    public void back_onclick(View v){
        Intent mIntent2 = new Intent();
        mIntent2.setClass(DescriptionActivity.this, MainActivity.class);
        startActivity(mIntent2);
    }
}
MainActivity.java 完整代码如下
public class MainActivity extends AppCompatActivity implements View.OnClickListener{
    private MapView mMapView = null;
    private BaiduMap mBaiduMap = null;//定位图层
    private LocationClient mLocationClient = null;
    // 当前定位模式
    private MyLocationConfiguration.LocationMode locationMode;
    //是否是第一次定位
    private boolean isFirstLocate = true;
    //当前定位模式
    private MyLocationConfiguration.LocationMode mLocationMode;
    private static final int BAIDU_READ_PHONE_STATE =100;
    //声明文本框
    private TextView library_des, tech_des, dining_des = null;
    //地点信息
    private Place_Info tech_info = new Place_Info(R.string.tech_name, R.string.tech_des, R.drawable.pic_tech);
    private Place_Info library_info = new Place_Info(R.string.library_name, R.string.library_des, R.drawable.pic_library);
    private Place_Info dining_info = new Place_Info(R.string.dining_name, R.string.dining_des, R.drawable.pic_dining);
    //消息传递
    private Intent mIntent = null;
    @Override
    protected void onCreate(Bundle savedInstanceState) {
        super.onCreate(savedInstanceState);
        //初始化地图必须放在布局初始化之前
        //地图初始化方法中任选一种
        SDKInitializer.initialize(getApplicationContext());

        setContentView(R.layout.activity_main);

        //获取定位权限后初始化
        showContacts();

    }

    private void init(){
        //获取地图控件
        mMapView = findViewById(R.id.themapView);
        //得到地图
        mBaiduMap = mMapView.getMap();

        //开启定位图层
        mBaiduMap.setMyLocationEnabled(true);

        //绑定按钮监听事件
        findViewById(R.id.btn_library).setOnClickListener(this);
        findViewById(R.id.btn_tech).setOnClickListener(this);
        findViewById(R.id.btn_dining).setOnClickListener(this);

        //设置地图标点
        //创建OverlayOptions的集合
        List<OverlayOptions> options = new ArrayList<OverlayOptions>();
        //构造坐标数据
        //经纬度可以通过百度地图官网进行搜索获得
        LatLng p_library = new LatLng(36.674945, 117.144168);
        LatLng p_teach = new LatLng(36.673717, 117.145928);
        LatLng p_dining = new LatLng(36.672553, 117.147145);

        //自定义Marker的图标
        BitmapDescriptor bitmap = BitmapDescriptorFactory
                .fromResource(R.mipmap.icon_mark);
        //创建OverlayOptions属性
        OverlayOptions option1 =  new MarkerOptions()
                .position(p_library)
                .icon(bitmap);
        OverlayOptions option2 =  new MarkerOptions()
                .position(p_teach)
                .icon(bitmap);
        OverlayOptions option3 =  new MarkerOptions()
                .position(p_dining)
                .icon(bitmap);
        //将OverlayOptions添加到list
        options.add(option1);
        options.add(option2);
        options.add(option3);

        //设置mark覆盖物点击监听器
       // mBaiduMap.setOnMarkerClickListener(new MyMarkerClickListener());
        //在地图上批量添加
        mBaiduMap.addOverlays(options);

        //定位初始化
        mLocationClient = new LocationClient(this);

        //通过LocationClientOption设置LocationClient相关参数
        LocationClientOption option = new LocationClientOption();
        option.setOpenGps(true); // 打开gps
        option.setCoorType("bd09ll"); // 设置坐标类型
        option.setScanSpan(5000);//五秒返回一次位置
        // 可选,设置地址信息
        option.setIsNeedAddress(true);
        //可选,设置是否需要地址描述
        option.setIsNeedLocationDescribe(true);

        //设置locationClientOption
        mLocationClient.setLocOption(option);

        //注册LocationListener监听器
        MyLocationListener myLocationListener = new MyLocationListener();
        mLocationClient.registerLocationListener(myLocationListener);
        //开启地图定位图层
        mLocationClient.start();
        //如果要改为FOLLOWING模式
        //locationMode = MyLocationConfiguration.LocationMode.FOLLOWING;
        // 定位模式、是否开启方向、设置自定义定位图标、精度圈填充颜色以及精度圈边框颜色5个属性(此处只设置了前三个)。
        //MyLocationConfiguration mLocationConfiguration = new MyLocationConfiguration(locationMode,true,null);
        // 使自定义的配置生效
        //mBaiduMap.setMyLocationConfiguration(mLocationConfiguration);

    }

    //重写onReceieveLocation方法获取定位数据,并传给mapview
    public class MyLocationListener extends BDAbstractLocationListener {
        @Override
        public void onReceiveLocation(BDLocation location) {
            //mapView 销毁后不在处理新接收的位置
            if (location == null || mMapView == null){
                return;
            }

            // 如果是第一次定位
            LatLng ll = new LatLng(location.getLatitude(), location.getLongitude());
            if (isFirstLocate) {
                isFirstLocate = false;
                //给地图设置状态
                MapStatusUpdate update = MapStatusUpdateFactory.newLatLng(ll);
                mBaiduMap.animateMapStatus(update);
                update = MapStatusUpdateFactory.zoomTo(18f);
                mBaiduMap.animateMapStatus(update);
            }

            MyLocationData locData = new MyLocationData.Builder()
                    .accuracy(location.getRadius())
                    // 此处设置开发者获取到的方向信息,顺时针0-360
                    .direction(location.getDirection()).latitude(location.getLatitude())
                    .longitude(location.getLongitude()).build();
            mBaiduMap.setMyLocationData(locData);
        }
    }


    //按钮点击监听器
    @Override
    public void onClick(View v){
        if(v.getId() == R.id.btn_library){
            mIntent = new Intent(MainActivity.this, DescriptionActivity.class);
            //使用Bundle来传递Int类型的数据
            Bundle bundle = new Bundle();
            bundle.putInt("name", library_info.getName());
            bundle.putInt("des",library_info.getDescreption());
            bundle.putInt("picname", library_info.getPicname());
            mIntent.putExtras(bundle);
            startActivity(mIntent);
        }else if(v.getId() == R.id.btn_tech){
            mIntent = new Intent(MainActivity.this, DescriptionActivity.class);
            Bundle bundle = new Bundle();
            bundle.putInt("name", tech_info.getName());
            bundle.putInt("des",tech_info.getDescreption());
            bundle.putInt("picname", tech_info.getPicname());
            mIntent.putExtras(bundle);
            startActivity(mIntent);
        }else if(v.getId() == R.id.btn_dining){
            mIntent = new Intent(MainActivity.this, DescriptionActivity.class);
            Bundle bundle = new Bundle();
            bundle.putInt("name", dining_info.getName());
            bundle.putInt("des",dining_info.getDescreption());
            bundle.putInt("picname", dining_info.getPicname());
            mIntent.putExtras(bundle);
            startActivity(mIntent);
        }

    }

    //申请权限
    public void showContacts(){
        if (ActivityCompat.checkSelfPermission(this, Manifest.permission.ACCESS_COARSE_LOCATION)
                != PackageManager.PERMISSION_GRANTED
                || ActivityCompat.checkSelfPermission(this, Manifest.permission.ACCESS_FINE_LOCATION)
                != PackageManager.PERMISSION_GRANTED
                || ActivityCompat.checkSelfPermission(this, Manifest.permission.READ_PHONE_STATE)
                != PackageManager.PERMISSION_GRANTED) {
             //Toast.makeText(getApplicationContext(),"没有权限,请手动开启定位权限",Toast.LENGTH_SHORT).show();
            // 申请一个(或多个)权限,并提供用于回调返回的获取码(用户定义)
            ActivityCompat.requestPermissions(MainActivity.this,new String[]{Manifest.permission.ACCESS_COARSE_LOCATION, Manifest.permission.ACCESS_FINE_LOCATION, Manifest.permission.READ_PHONE_STATE}, BAIDU_READ_PHONE_STATE);
        }else{
            init();
        }
    }

    //Android6.0申请权限的回调方法
    @Override
    public void onRequestPermissionsResult(int requestCode, String[] permissions, int[] grantResults) {
        super.onRequestPermissionsResult(requestCode, permissions, grantResults);
        switch (requestCode) {
            // requestCode即所声明的权限获取码,在checkSelfPermission时传入
            case BAIDU_READ_PHONE_STATE:
                if (grantResults[0] == PackageManager.PERMISSION_GRANTED) {
                    // 获取到权限,作相应处理(调用定位SDK应当确保相关权限均被授权,否则可能引起定位失败)
                    init();
                } else {
                    // 没有获取到权限,做特殊处理
                    Toast.makeText(getApplicationContext(), "获取位置权限失败,请手动开启", Toast.LENGTH_SHORT).show();
                }
                break;
            default:
                break;
        }
    }

    //实现地图生命周期管理
    @Override
    protected void onResume() {
        super.onResume();
        //在activity执行onResume时执行mMapView. onResume (),实现地图生命周期管理
        mMapView.onResume();
    }
    @Override
    protected void onPause() {
        super.onPause();
        //在activity执行onPause时执行mMapView. onPause (),实现地图生命周期管理
        mMapView.onPause();
    }
    @Override
    protected void onDestroy() {
        super.onDestroy();
        //在activity执行onDestroy时执行mMapView.onDestroy(),实现地图生命周期管理
        mMapView.onDestroy();
    }

}
项目完成
若想修改APP默认的主题颜色,可以修改res - values - themes文件夹下的xml文件

第二个文件代表夜间模式主题


 3934
3934


 被折叠的 条评论
为什么被折叠?
被折叠的 条评论
为什么被折叠?
 到【灌水乐园】发言


