


开始前的准备工作:
1.全局安装composer
curl -sS https://getcomposer.org/installer | php
mv composer.phar /usr/local/bin/composer
2.创建你想要放置项目的文件夹
3.在上个目录下利用composer命令安装Laravel
composer create-project laravel/laravel . --prefer-dist
4.通过修改.env文件设置和获取环境变量
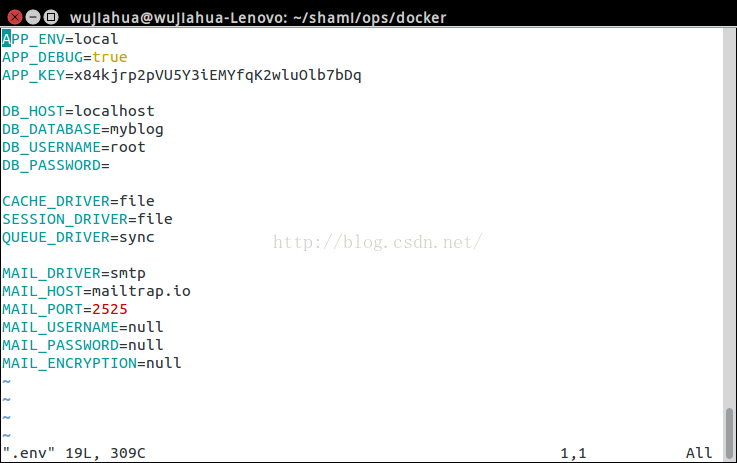
至此,准备工作完成!
创建文章(Posts)表
首先创建Posts的模型
php artisan make:model --migration Post
这条命令做了两件事:
1.创建了一个app\Post.php的模型类
2.创建了一个数据迁移用于创建Post表,此迁移在database/migrations文件夹下
(2015_03_22_210207_create_posts_table.php)
修改此数据迁移,如下:
|
1
2
3
4
5
6
7
8
9
10
11
12
13
14
15
16
17
18
19
20
21
22
23
24
25
26
27
|
<?php
use
Illuminate\Database\Schema\Blueprint;
use
Illuminate\Database\Migrations\Migration;
class
CreatePostsTable
extends
Migration
{
/**
* Run the migrations.
*/
public
function
up()
{
Schema::create(
'posts'
,
function
(Blueprint
$table
) {
$table
->increments(
'id'
);
$table
->string(
'slug'
)->unique();
$table
->string(
'title'
);
$table
->text(
'content'
);
$table
->timestamps();
$table
->timestamp(
'published_at'
)->index();
});
}
/**
* Reverse the migrations.
*/
public
function
down()
{
Schema::drop(
'posts'
);
}
}
|
数据迁移已经被修改,现在运行迁移来生成表
php artisan migrate
修改app\Post.php
<?php
namespace
App;
use
Illuminate\Database\Eloquent\Model;
class
Post
extends
Model
{
protected
$dates
= [
'published_at'
];
public
function
setTitleAttribute(
$value
)
{
$this
->attributes[
'title'
] =
$value
;
if
(!
$this
->exists) {
$this
->attributes[
'slug'
] = str_slug(
$value
);
}
}
}
向Posts表中填充测试数据
在database/factories/ModelFactory.php中添加以下代码:
$factory
->define(App\Post::
class
,
function
(
$faker
) {
return
[
'title'
=>
$faker
->sentence(mt_rand(3, 10)),
'content'
=> join(
"\n\n"
,
$faker
->paragraphs(mt_rand(3, 6))),
'published_at'
=>
$faker
->dateTimeBetween(
'-1 month'
,
'+3 days'
),
];
});
接着编辑database/seeds/DatabaseSeeder.php:
<?php
use
Illuminate\Database\Seeder;
use
Illuminate\Database\Eloquent\Model;
class
DatabaseSeeder
extends
Seeder
{
/**
* Run the database seeds.
*/
public
function
run()
{
Model::unguard();
$this
->call(
'PostTableSeeder'
);
}
}
class
PostTableSeeder
extends
Seeder
{
public
function
run()
{
App\Post::truncate();
factory(App\Post::
class
, 20)->create();
}
}
最终要想将这些随机数据存进数据库,我们需要使用artisan命令来进行填充:
php artisan db:seed
创建配置项
创建config/blog.php , 添加如下代码:
<?php
return
[
'title'
=>
'My Blog'
,
'posts_per_page'
=> 5
];
创建路由(Route)和控制器(Controller)
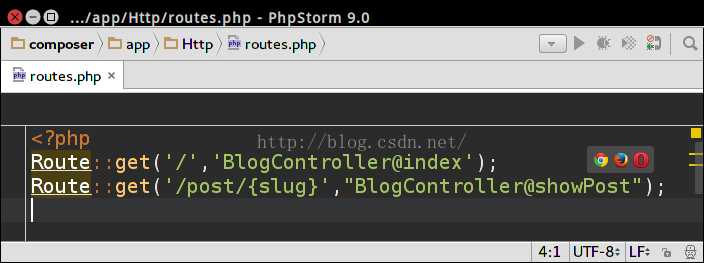
编辑app/Http/routes.php:
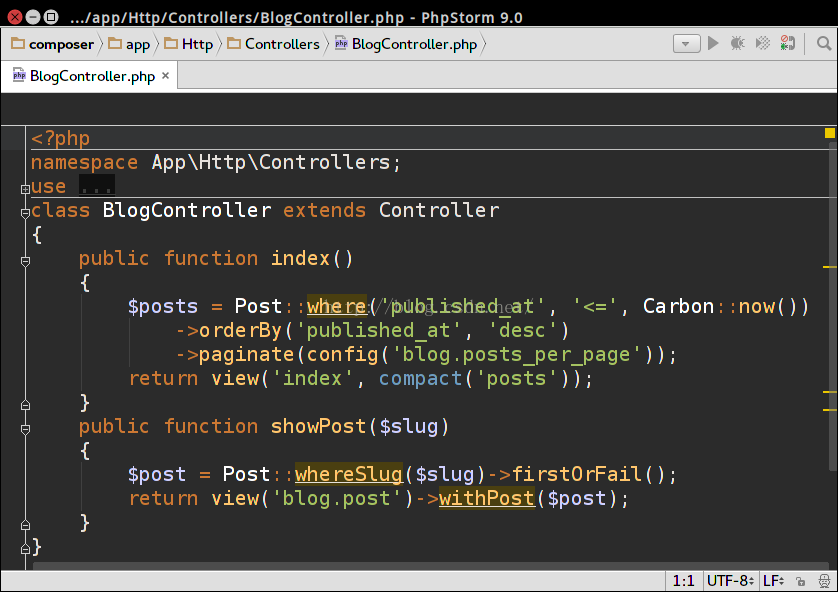
接着我们要创建BlogController,使用artisan命令创建一个空controller:
php artisan make:controller BlogController --plain
BlogController.php将会被创建在app/Http/Controllers文件夹下
你可以使用以下命令检查项目的路由表:
php artisan route:list
创建视图(views)
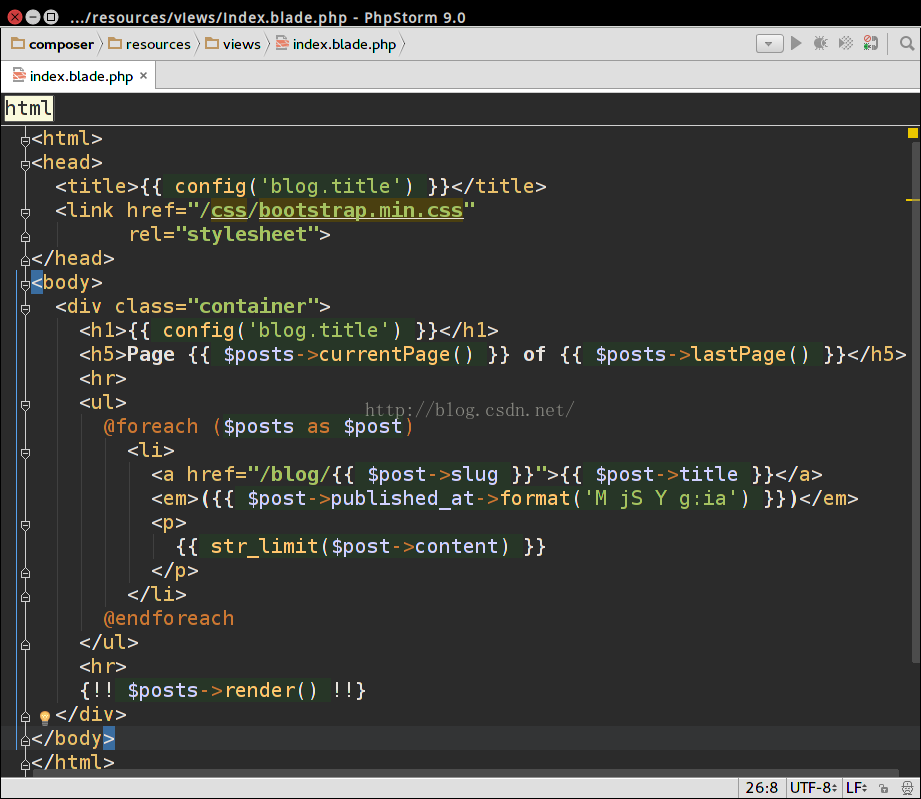
创建resources/views/文件夹,接着在此文件夹下创建index.blade.php
index.blade.php内容如下:
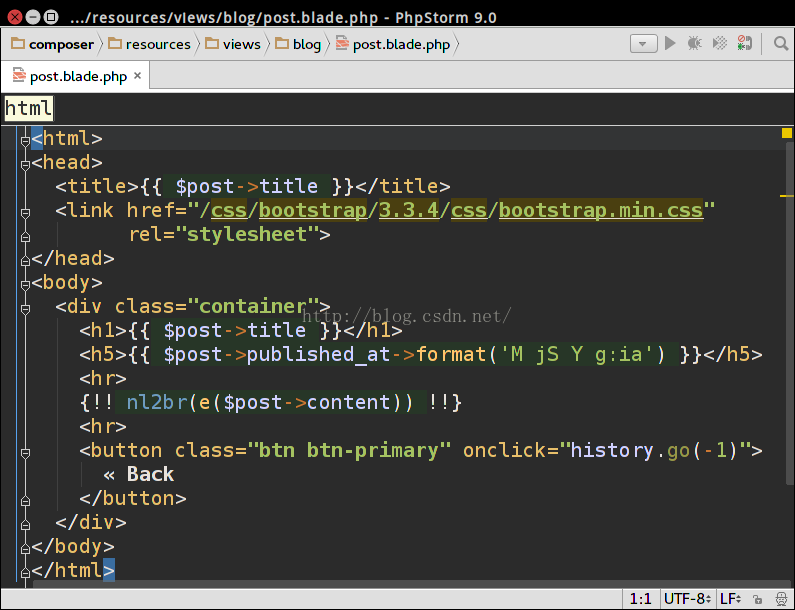
最后的步骤是创建视图用于显示单篇文章,创建resources/views/blog/post.blade.php:
最后一步国外站点文件本地化
进入public/css文件夹下面,执行命令:
curl Http://maxcdn.bootstrapcdn.com/boostrap/3.3.4/css/bootstrap.min.css -O
然后你会发现在该文件夹下面多了一个bootstrap.min.css文件
至此所有项目代码已经写完!
环境配置:
进入DOCKER
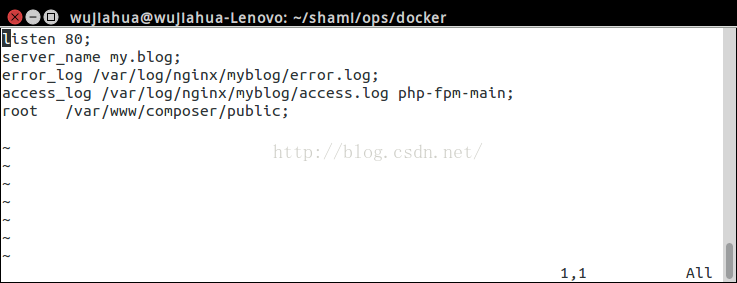
在etc/nginx/conf.d增加项目配置文件myblog.app
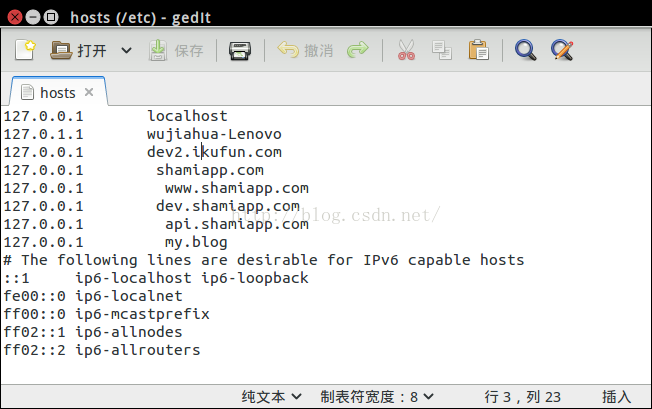
在宿主机环境,进入etc/文件夹下面,修改hosts文件
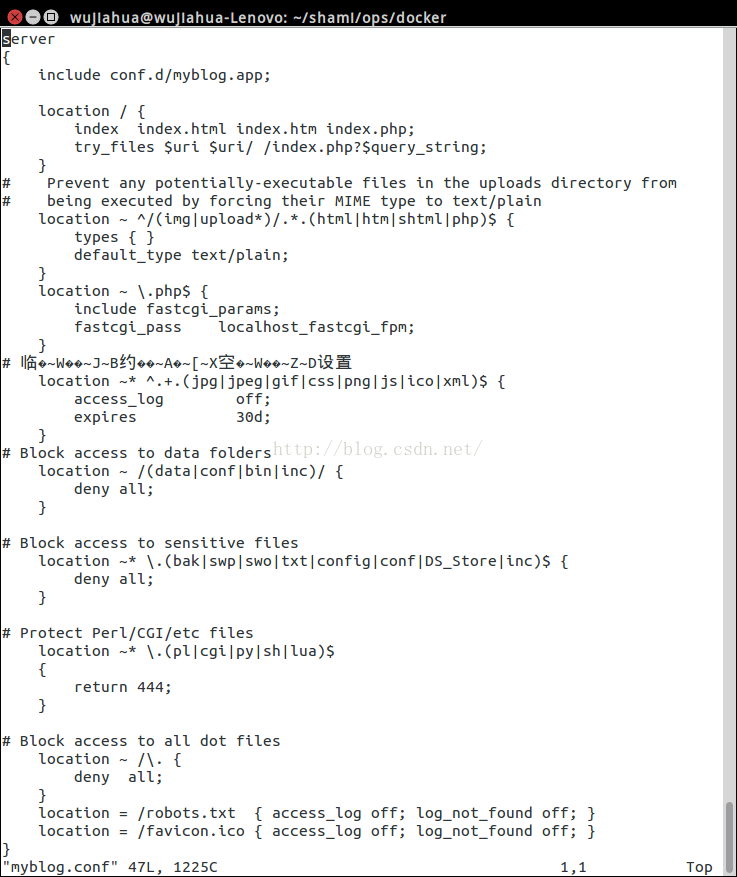
进入DOCKER,在etc/nginx/sites-available下面添加myblog.conf文件
进入/etc/nginx/sites-enable下面,创建软链接
sudo ln -s /etc/nginx/sites-available/myblog.conf myblog.conf
为了保证代码正常运行,务必确保/storage目录对于当前web server和php-fpm进程是可写的.
sudo chown -R www-data:www-data storage
sudo chown -R www-data:www-data storage


 167
167


 被折叠的 条评论
为什么被折叠?
被折叠的 条评论
为什么被折叠?
 到【灌水乐园】发言


