


一、安装Nginx:
1、解决依赖关系
编译安装nginx需要事先需要安装开发包组"Development Tools"和 "Development Libraries"。同时,还需要专门安装pcre-devel包:
# yum groupinstall -y "Development Tools" "Server Platform Development"
2、安装
首先添加用户nginx,实现以之运行nginx服务进程:
# groupadd -r nginx
# useradd -r -g nginx nginx
调整系统当前时间
# date -s "04/07/2016 10:40:00"
# tar xf nginx-1.8.1.tar.gz
# cd nginx-1.8.1
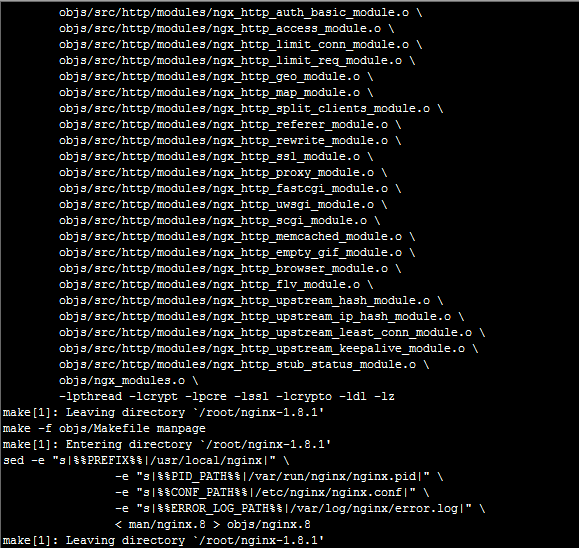
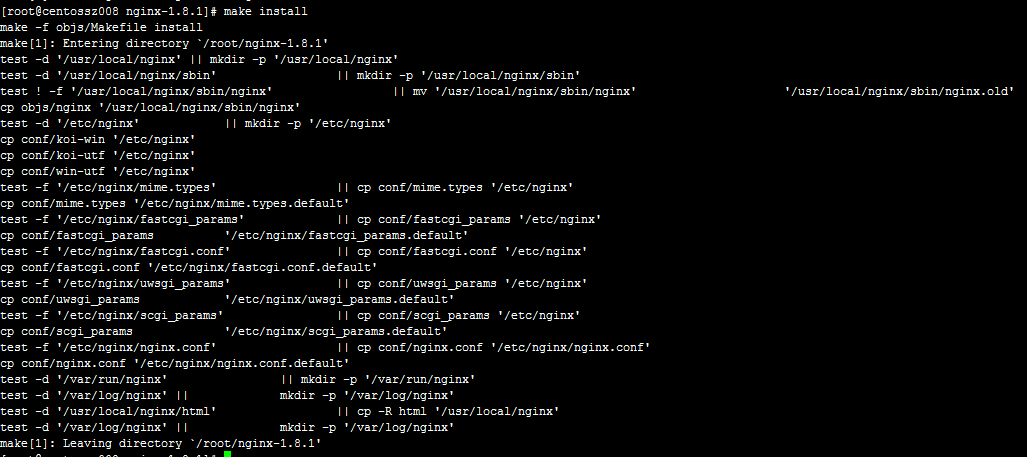
接着开始编译和安装:
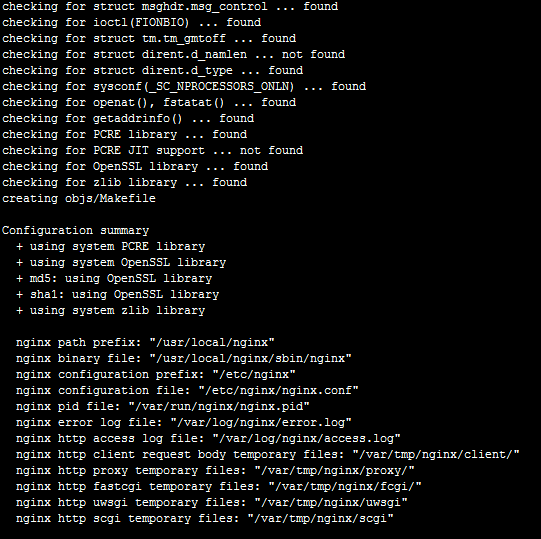
# ./configure \
--prefix=/usr/local/nginx \
--sbin-path=/usr/local/nginx/sbin/nginx \
--conf-path=/etc/nginx/nginx.conf \
--error-log-path=/var/log/nginx/error.log \
--http-log-path=/var/log/nginx/access.log \
--pid-path=/var/run/nginx/nginx.pid \
--lock-path=/var/lock/nginx.lock \
--user=nginx \
--group=nginx \
--with-http_ssl_module \
--with-http_flv_module \
--with-http_stub_status_module \
--with-http_gzip_static_module \
--http-client-body-temp-path=/var/tmp/nginx/client/ \
--http-proxy-temp-path=/var/tmp/nginx/proxy/ \
--http-fastcgi-temp-path=/var/tmp/nginx/fcgi/ \
--http-uwsgi-temp-path=/var/tmp/nginx/uwsgi \
--http-scgi-temp-path=/var/tmp/nginx/scgi \
--with-pcre \
--with-file-aio
3、为nginx提供SysV init脚本:
新建文件/etc/rc.d/init.d/nginx,内容如下:#!/bin/bash
# nginx Startup script for the Nginx HTTP Server
# it is v.0.0.2 version.
# chkconfig: - 85 15
# description: Nginx is a high-performance web and proxy server.
# It has a lot of features, but it's not for everyone.
# processname: nginx
# pidfile: /var/run/nginx/nginx.pid
# config: /etc/nginx/nginx.conf
nginxd=/usr/local/nginx/sbin/nginx
nginx_config=/etc/nginx/nginx.conf
nginx_pid=/var/run/nginx/nginx.pid
RETVAL=0
prog="nginx"
# Source function library.
. /etc/rc.d/init.d/functions
# Source networking configuration.
. /etc/sysconfig/network
# Check that networking is up.
[ ${NETWORKING} = "no" ] && exit 0
[ -x $nginxd ] || exit 0
# Start nginx daemons functions.
start() {
if [ -e $nginx_pid ];then
echo "nginx already running...."
exit 1
fi
echo -n $"Starting $prog: "
daemon $nginxd -c ${nginx_config}
RETVAL=$?
echo
[ $RETVAL = 0 ] && touch /var/lock/subsys/nginx
return $RETVAL
}
# Stop nginx daemons functions.
stop() {
echo -n $"Stopping $prog: "
killproc $nginxd
RETVAL=$?
echo
[ $RETVAL = 0 ] && rm -f /var/lock/subsys/nginx /var/run/nginx/nginx.pid
}
# reload nginx service functions.
reload() {
echo -n $"Reloading $prog: "
#kill -HUP `cat ${nginx_pid}`
killproc $nginxd -HUP
RETVAL=$?
echo
}
# See how we were called.
case "$1" in
start)
start
;;
stop)
stop
;;
reload)
reload
;;
restart)
stop
start
;;
status)
status $prog
RETVAL=$?
;;
*)
echo $"Usage: $prog {start|stop|restart|reload|status|help}"
exit 1
esac
exit $RETVAL
而后为此脚本赋予执行权限:
# chmod +x /etc/rc.d/init.d/nginx
添加至服务管理列表,并让其开机自动启动:
# chkconfig --add nginx
# chkconfig nginx on
而后就可以启动服务并测试了:
# service nginx start
报错:
Starting nginx: nginx: [emerg] mkdir() "/var/tmp/nginx/client/" failed (2: No such file or directory)
[FAILED]
# mkdir -pv /var/tmp/nginx/client/
二、安装mysql-5.5.42
1、安装cmake编译工具及依赖软件
# yum install -y gcc-c++# yum install -y cmake
# yum install -y git
# yum install -y readline-devel zlib-devel openssl-devel
# yum install -y bison
再次编译即通过
2、编译安装mysql-5.5.48
# tar xf mysql-5.5.48.tar.gz# cd mysql-5.5.48
# cmake . -DCMAKE_INSTALL_PREFIX=/usr/local/mysql -DMYSQL_DATADIR=/data/mydata -DSYSCONFDIR=/etc -DWITH_INNOBASE_STORAGE_ENGINE=1 -DWITH_ARCHIVE_STORAGE_ENGINE=1 -DWITH_BLACKHOLE_STORAGE_ENGINE=1 -DWITH_READLINE=1 -DWITH_SSL=system -DWITH_ZLIB=system -DWITH_LIBWRAP=0 -DMYSQL_UNIX_ADDR=/tmp/mysql.sock -DDEFAULT_CHARSET=utf8 -DDEFAULT_COLLATION=utf8_general_ci
3、创建Mysql用户
添加mysql用户指定组id和用户id为306# groupadd -r -g 306 mysql
# useradd -g mysql -r -g 306 -s /sbin/nologin mysql
# id mysql
uid=994(mysql) gid=306(mysql) groups=306(mysql)
改变数据存储目录和安装目录的权限
# cd /usr/local/mysql
添加存放日志的目录
# mkdir /data/binlogs
# mkdir /data/mydata
# chown -R mysql.mysql /data/
4、启动脚本初始化数据库
# scripts/mysql_install_db --user=mysql --datadir=/data/mydata为mysql提供sysv服务脚本:
# cp support-files/mysql.server /etc/rc.d/init.d/mysqld
# cp support-files/my-large.cnf /etc/my.cnf
5、编辑/etc/my.cnf配置,加入以下内容
innodb_file_per_table = 1
datadir = /data/mydata
log-bin=/data/binlogs/mysql-bin
注意:
经过实际测试innodb_file_per_table = ON这条参数需要innodb_file_per_table = 1 才能生效,具体可以通过mysql> show variables like '%per_table%';来查询
并修改此文件中thread_concurrency的值为你的CPU个数乘以2,比如这里使用如下行:
thread_concurrency = 2
而后就可以启动服务测试使用了。
为了使用mysql的安装符合系统使用规范,并将其开发组件导出给系统使用,这里还需要进行如下步骤:
6、输出mysql的man手册至man命令的查找路径:
编辑/etc/man.config,添加如下行即可:
MANPATH /usr/local/mysql/man
7、输出mysql的头文件至系统头文件路径/usr/include:
这可以通过简单的创建链接实现:
# ln -sv /usr/local/mysql/include /usr/include/mysql
8、输出mysql的库文件给系统库查找路径:
# echo '/usr/local/mysql/lib' > /etc/ld.so.conf.d/mysql.conf而后让系统重新载入系统库:
# ldconfig
9、修改PATH环境变量,让系统可以直接使用mysql的相关命令
vim /etc/profile.d/mysql.sh加入
export PATH=/usr/local/mysql/bin:$PATH
三、编译安装php-5.2.17
1、解决依赖关系:# yum -y groupinstall "Desktop Platform Development"
# yum install -y bzip2-devel libmcrypt-devel
# yum install -y libcurl-devel
# yum install -y libmcrypt-devel
Loaded plugins: fastestmirror, security
Loading mirror speeds from cached hostfile
* base: mirror.bit.edu.cn
* extras: centos.ustc.edu.cn
* updates: centos.ustc.edu.cn
Setting up Install Process
No package libmcrypt-devel available.
Error: Nothing to do
升级一下yum源,重新查找即可
# yum install -y epel-release
编译安装PHP 5.2.14所需的支持库:
# tar zxvf libiconv-1.13.1.tar.gz
# cd libiconv-1.13.1/
# ./configure --prefix=/usr/local/libiconv
# make
# make install
cd ../
2、解压编译
# tar xf php-5.2.17.tar.gz
# gzip -cd php-5.2.17-fpm-0.5.14.diff.gz | patch -d php-5.2.17 -p1
# cd php-5.2.17
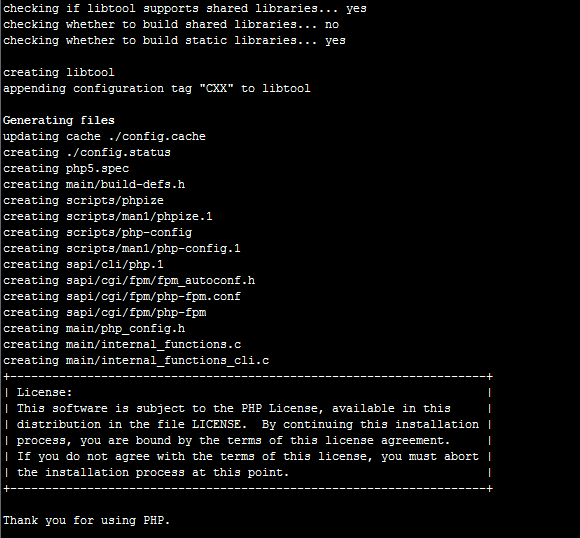
# ./configure --prefix=/usr/local/php \
--with-config-file-path=/etc \
--with-mysql=/usr/local/mysql \
--with-mysqli=/usr/local/mysql/bin/mysql_config \
--with-iconv-dir=/usr/local/libiconv \
--with-freetype-dir \
--with-jpeg-dir \
--with-png-dir \
--with-zlib \
--with-zlib-dir \
--with-libxml-dir=/usr \
--enable-xml \
--disable-rpath \
--enable-discard-path \
--enable-bcmath \
--enable-shmop \
--enable-sysvsem \
--enable-sysvshm \
--enable-inline-optimization \
--with-curl --with-curlwrappers \
--enable-mbregex \
--enable-fastcgi \
--enable-fpm \
--enable-force-cgi-redirect \
--enable-mbstring --with-mcrypt \
--with-gd --enable-gd-native-ttf \
--with-openssl \
--with-mhash \
--enable-pcntl \
--enable-sockets \
--with-ldap \
--with-ldap-sasl \
--with-xmlrpc \
--enable-zip \
--enable-soap \
--with-bz2
合成一行
# ./configure --prefix=/usr/local/php --with-config-file-path=/etc --with-mysql=/usr/local/mysql --with-mysqli=/usr/local/mysql/bin/mysql_config --with-iconv-dir=/usr/local/libiconv --with-freetype-dir --with-jpeg-dir --with-png-dir --with-zlib --with-zlib-dir --with-libxml-dir=/usr --enable-xml --disable-rpath --enable-discard-path --enable-bcmath --enable-shmop --enable-sysvsem --enable-sysvshm --enable-inline-optimization --with-curl --with-curlwrappers --enable-mbregex --enable-fastcgi --enable-fpm --enable-force-cgi-redirect --enable-mbstring --with-mcrypt --with-gd --enable-gd-native-ttf --with-openssl --with-mhash --enable-pcntl --enable-sockets --with-ldap --with-ldap-sasl --with-xmlrpc --enable-zip --enable-soap --with-bz2
说明:如果前面第1步解决依赖关系时安装mcrypt相关的两个rpm包,此./configure命令还可以带上--with-mcrypt选项以让php支持mycrpt扩展。--with-snmp选项则用于实现php的SNMP扩展,但此功能要求提前安装net-snmp相关软件包。
配置参数说明:
--prefix=[path]: 设定安装路径
--disable-debug: 编译时禁止加入调试符号
--enable-shmop: 启用shmop模块。Shmop is an easy to use set of functions that allows PHP to read, write, create and delete Unix shared memory segments.
--with-gd: 增加GD库的支持。GD库,是php处理图形的扩展库。
--with-jpeg-dir=[DIR]: GD库中jpeg lib的安装路径的prefix
'--with-png-dir=/usr/lib64' '--with-libxml-dir=/usr/lib64' '--with-zlib-dir=/usr/lib64': 与--with-jpeg-dir类似
--with-mysqli=FILE: 包含mysqli的支持。如果DIR取值为mysqlnd,则 the MySQL native driver will be used mysql_config
--with-mysql=DIR: 包含mysql的支持。如果DIR取值为mysqlnd,则 the MySQL native driver will be used /usr/local
--with-pdo-mysql=DIR: 支持PDO Mysql扩展模块。PDO扩展为PHP访问数据库定义了一个轻量级的、一致性的接口,它提供了一个数据访问抽象层,这样,无论使用什么数据库,都可以通过一致的函数执行查询和获取数据。如果DIR取值为mysqlnd,则 the MySQL native driver will be used /usr/local
--enable-sockets: 增加socket支持
--with-iconv-dir=DIR: 激活iconv,iconv是默认激活的,会到默认路径中区搜索。iconv函数库能够完成各种字符集间的转换,是php编程中不可缺少的基础函数库。
--enable-mbstring: Enable multibyte string support
--enable-mbregex:该选项默认开启。 MBSTRING: enable multibyte regex(正则表达式) support
--enable-ftp: Enable FTP support
--enable-gd-native-ttf: GD: Enable TrueType string function (ttf: TrueType string)
--with-curl=[DIR]: Include cURL support
--enable-fpm: Enable building of the fpm SAPI executable (非常重要的一个选项,用来开启FPM的支持)
--enable-pcntl: Enable pcntl support (CLI/CGI only) (php进程控制扩展)
--enable-sysvmsg: Enable sysvmsg support. 即System V消息队列
--enable-sysvsem: Enable sysvsem support. 即System V信号量
-enable-sysvshm: Enable sysvshm support. 即System V共享内存
php中对共享内存段的操作有两组函数:System V IPC和Shared Memory。 其中System V IPC系列函数能够更方便的操作数据,无需像Shared Memory那样必须自己掌握读写时的偏移量、长度等,也不用序列化/反序列化来回转换(因为Shared Memory函数只支持字符串格式的数据参数)。但是System V IPC系列不支持Windows,所以如果要在win环境下使用,只能选Shared Memory。
'--enable-zip': Include Zip read/write support
--with-freetype-dir=DIR: GD库相关。 GD: Set the path to FreeType 2 install prefix
--------------------------------------------------------------------------------------------
报错1:
configure: error: libjpeg.(a|so) not found.
configure: error: libpng.(a|so) not found.
处理:
# ln -s /usr/lib64/libjpeg.so /usr/lib/
# ln -s /usr/lib64/libpng.so /usr/lib/
报错2:
configure: error: Cannot find ldap libraries in /usr/lib.:
# rpm -qa | grep ldap
python-ldap-2.3.10-1.el6.x86_64
openldap-2.4.40-7.el6_7.x86_64
openldap-devel-2.4.40-7.el6_7.x86_64
处理
# cp -frp /usr/lib64/libldap* /usr/lib/
configure: error: Please reinstall libmhash - I cannot find mhash.h
# yum list all | grep mhash
mhash.i686 0.9.9.9-3.el6 epel
mhash.x86_64 0.9.9.9-3.el6 epel
mhash-devel.i686 0.9.9.9-3.el6 epel
mhash-devel.x86_64 0.9.9.9-3.el6 epel
# yum install -y mhash-devel
报错3:
/usr/bin/ld: cannot find -lltdl
collect2: ld returned 1 exit status
make: *** [sapi/cgi/php-cgi] Error 1
# yum install -y *ltdl*
安装libtool-ltdl-devel
报错4:
error while loading shared libraries: libiconv.so.2: cannot open shared object file: No such file or directory
解决办法如下:
1.在/etc/ld.so.conf中加一行/usr/local/lib,
2.然后运行/sbin/ldconfig,文件解决,没有报错
报错5:
ext/iconv/iconv.o: In function `_php_iconv_strpos':
/root/php-5.2.17/ext/iconv/iconv.c:851: undefined reference to `libiconv_open'
/root/php-5.2.17/ext/iconv/iconv.c:879: undefined reference to `libiconv'
/root/php-5.2.17/ext/iconv/iconv.c:993: undefined reference to `libiconv_close'
ext/iconv/iconv.o: In function `_php_iconv_mime_encode':
/root/php-5.2.17/ext/iconv/iconv.c:1043: undefined reference to `libiconv_open'
/root/php-5.2.17/ext/iconv/iconv.c:1057: undefined reference to `libiconv_open'
/root/php-5.2.17/ext/iconv/iconv.c:1176: undefined reference to `libiconv'
/root/php-5.2.17/ext/iconv/iconv.c:1128: undefined reference to `libiconv'
/root/php-5.2.17/ext/iconv/iconv.c:1160: undefined reference to `libiconv'
/root/php-5.2.17/ext/iconv/iconv.c:1319: undefined reference to `libiconv_close'
/root/php-5.2.17/ext/iconv/iconv.c:1228: undefined reference to `libiconv'
/root/php-5.2.17/ext/iconv/iconv.c:1259: undefined reference to `libiconv'
/root/php-5.2.17/ext/iconv/iconv.c:1316: undefined reference to `libiconv_close'
/root/php-5.2.17/ext/iconv/iconv.c:1303: undefined reference to `libiconv'
ext/iconv/iconv.o: In function `php_iconv_stream_filter_dtor':
/root/php-5.2.17/ext/iconv/iconv.c:2465: undefined reference to `libiconv_close'
ext/iconv/iconv.o: In function `php_iconv_stream_filter_append_bucket':
/root/php-5.2.17/ext/iconv/iconv.c:2616: undefined reference to `libiconv'
/root/php-5.2.17/ext/iconv/iconv.c:2615: undefined reference to `libiconv'
/root/php-5.2.17/ext/iconv/iconv.c:2537: undefined reference to `libiconv'
ext/iconv/iconv.o: In function `php_iconv_stream_filter_ctor':
/root/php-5.2.17/ext/iconv/iconv.c:2491: undefined reference to `libiconv_open'
ext/xmlrpc/libxmlrpc/encodings.o: In function `convert':
/root/php-5.2.17/ext/xmlrpc/libxmlrpc/encodings.c:73: undefined reference to `libiconv_open'
/root/php-5.2.17/ext/xmlrpc/libxmlrpc/encodings.c:81: undefined reference to `libiconv'
/root/php-5.2.17/ext/xmlrpc/libxmlrpc/encodings.c:101: undefined reference to `libiconv_close'
collect2: ld returned 1 exit status
make: *** [sapi/cgi/php-cgi] Error 1
# make ZEND_EXTRA_LIBS='-liconv'
重新编译的时候需要
# make clean
--------------------------------------------------------------------------------------------
# make
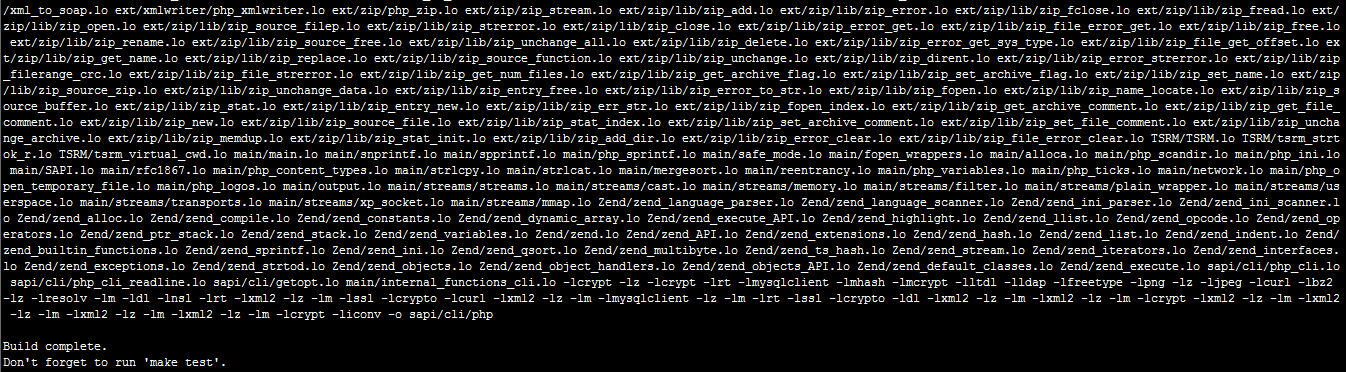
collect2: ld returned 1 exit status
make: *** [sapi/cgi/php-cgi] Error 1
通过make ZEND_EXTRA_LIBS='-liconv'命令即可
# make ZEND_EXTRA_LIBS='-liconv'
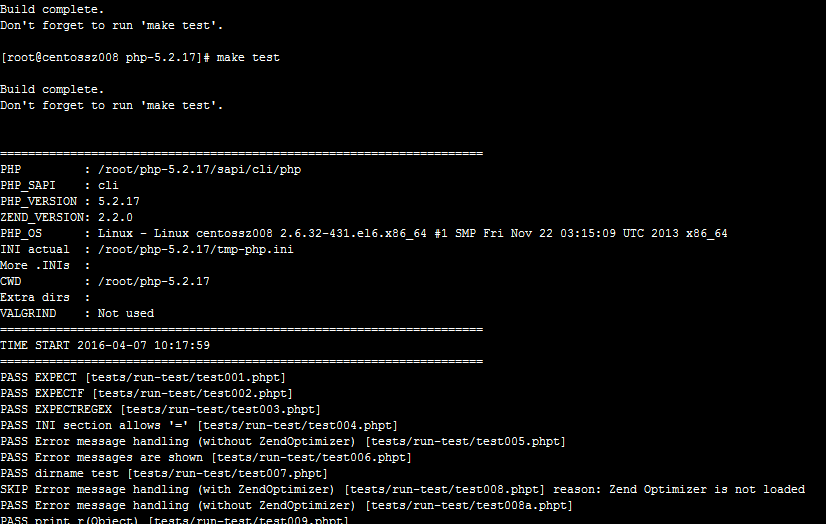
# make test
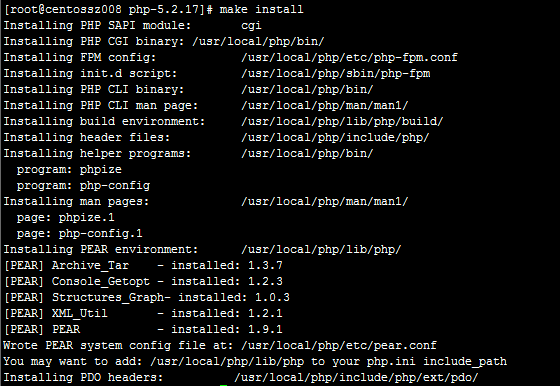
为php提供配置文件:
# cp php.ini-dist /etc/php.ini
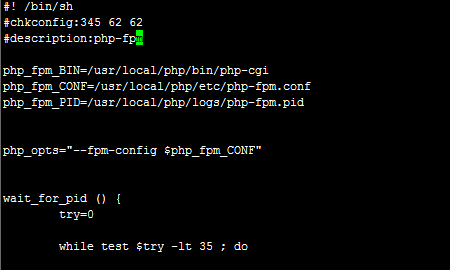
为php-fpm提供Sysv init脚本,并将其添加至服务列表:
# cp /usr/local/php/sbin/php-fpm /etc/rc.d/init.d/php-fpm
编辑 /etc/rc.d/init.d/php-fpm
在#!/bin/bash下面添加两行
#chkconfig:345 62 62
#description:php-fpm
# chmod +x /etc/rc.d/init.d/php-fpm
开机启动
# chkconfig --add php-fpm
# chkconfig php-fpm on
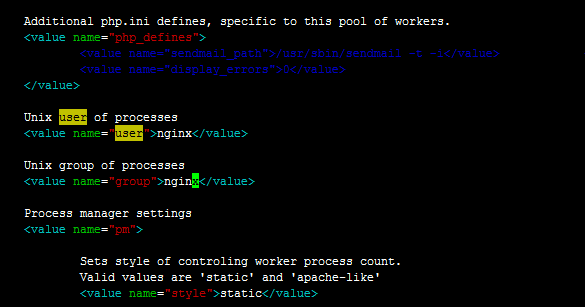
编辑/usr/local/php/etc/php-fpm.conf
1、使用nginx用户
把下面两行的注释去掉
Unix user of processes
<value name="user">nginx</value>
Unix group of processes
<value name="group">nginx</value>
2、对fpm参数做调整,并启用pid文件(如下最后一行):
<value name="max_children">150</value>
<value name="StartServers">20</value>
<value name="MinSpareServers">5</value>
<value name="MaxSpareServers">35</value>
接下来就可以启动php-fpm了:
# service php-fpm start
使用如下命令来验正(如果此命令输出有中几个php-fpm进程就说明启动成功了):
# ps aux | grep php-fpm
四、整合nginx和php
创建Nginx日志目录
# mkdir -p /web/logs
# mkdir -p /web/htdocs
赋权限
# chown -R nginx:nginx /web/
1、编辑/etc/nginx/nginx.conf,启用如下选项:
user nginx nginx;
worker_processes 8;
error_log /var/log/nginx/error.log;
pid /usr/local/nginx/nginx.pid;
events {
worker_connections 1024;
}
http {
include mime.types;
default_type application/octet-stream;
sendfile on;
keepalive_timeout 65;
server {
listen 80;
server_name localhost;
index index.html index.php;
access_log /var/log/nginx/host.access.log;
location / {
root /web/htdocs;
}
error_page 500 502 503 504 /50x.html;
location = /50x.html {
root html;
}
location ~ \.php$ {
root /web/htdocs;
fastcgi_pass 127.0.0.1:9000;
fastcgi_index index.php;
fastcgi_param SCRIPT_FILENAME $document_root$fastcgi_script_name;
include fastcgi_params;
}
}
}
并在所支持的主页面格式中添加php格式的主页,类似如下:
location / {
root /web/htdocs;
index index.php index.html index.htm;
}
而后重新载入nginx的配置文件:
# service nginx reload
3、在/usr/html新建index.php的测试页面,测试php是否能正常工作:
# vim /web/htdocs/index.php
<?php
phpinfo();
?>
接着就可以通过浏览器访问此测试页面了。
五、安装xcache,为php加速:
1、安装# tar xf xcache-3.2.0.tar.gz
# cd xcache-3.2.0
# /usr/local/php/bin/phpize
Configuring for:
PHP Api Version: 20041225
Zend Module Api No: 20060613
Zend Extension Api No: 220060519
# ./configure --enable-xcache --with-php-config=/usr/local/php/bin/php-config
# make && make install
安装结束时,会出现类似如下行:
Installing shared extensions: /usr/local/php/lib/php/extensions/no-debug-non-zts-20060613/
2、编辑php.ini,整合php和xcache:
首先将xcache提供的样例配置导入php.ini
# mkdir /etc/php.d
# cp xcache.ini /etc/php.d
说明:xcache.ini文件在xcache的源码目录中。
接下来编辑/etc/php.d/xcache.ini,找到extension开头的行,修改为如下行:
extension = /usr/local/php/lib/php/extensions/no-debug-non-zts-20060613/xcache.so
3、创建xcache缓存文件
touch /tmp/xcache #创建文件
chmod 777 /tmp/xcache #设置权限
4、创建xcache管理员密码为123456
echo -n "123456" | md5sum #记住类似下面一行代码(md5加密之后的密码),后面会用到
e10adc3949ba59abbe56e057f20f883e
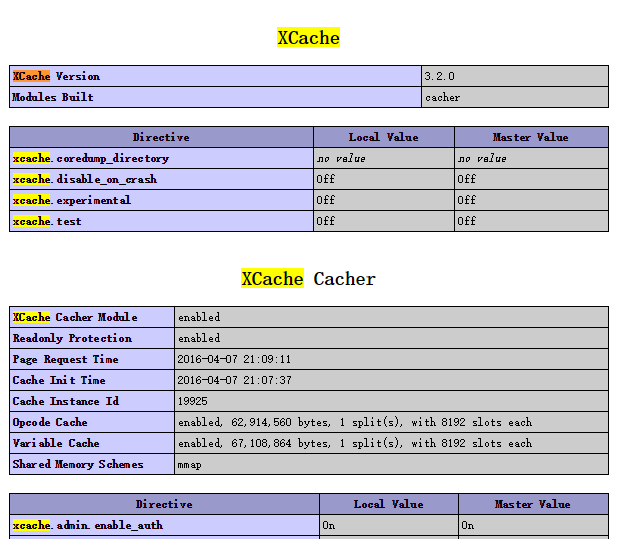
5、配置php支持xcache
vi /etc/php.ini #编辑配置文件,在最后一行添加以下内容
[xcache-common]
extension = /usr/local/php/lib/php/extensions/no-debug-non-zts-20060613/xcache.so
[xcache.admin]
xcache.admin.enable_auth = On
xcache.admin.user = "xcache"
xcache.admin.pass = "e10adc3949ba59abbe56e057f20f883e"
[xcache]
xcache.shm_scheme ="mmap"
xcache.size=60M
xcache.count =1
xcache.slots =8K
xcache.ttl=0
xcache.gc_interval =0
xcache.var_size=64M
xcache.var_count =1
xcache.var_slots =8K
xcache.var_ttl=0
xcache.var_maxttl=0
xcache.var_gc_interval =300
xcache.test =Off
xcache.readonly_protection = On
xcache.mmap_path ="/tmp/xcache"
xcache.coredump_directory =""
xcache.cacher =On
xcache.stat=On
xcache.optimizer =Off
[xcache.coverager]
xcache.coverager =On
xcache.coveragedump_directory =""
6、重新启动php-fpm
# service php-fpm restart
通过phpinfo()函数看是否启用了xcache
六、安装加速器Zendoptimizer
# tar xf ZendOptimizer-3.3.9-linux-glibc23-x86_64.tar.gz# cd ZendOptimizer-3.3.9-linux-glibc23-x86_64
进入data文件夹后,在此进入你php对应的版本目录(so文件是对应版本的,要看好PHP版本再安装)
# cd data
# ls
4_2_0_comp 4_2_x_comp 4_3_x_comp 4_4_x_comp 5_0_x_comp 5_1_x_comp 5_2_x_comp poweredbyoptimizer.gif
# mkdir /usr/local/zend
# cp 5_2_x_comp/ZendOptimizer.so /usr/local/zend/
配置Zend optimizer
vi /etc/php.ini #编辑文件
在最后位置添加以下内容
[Zend Optimizer]
zend_optimizer.optimization_level=15
zend_extension="/usr/local/zend/ZendOptimizer.so"


 9万+
9万+


 被折叠的 条评论
为什么被折叠?
被折叠的 条评论
为什么被折叠?
 到【灌水乐园】发言


