


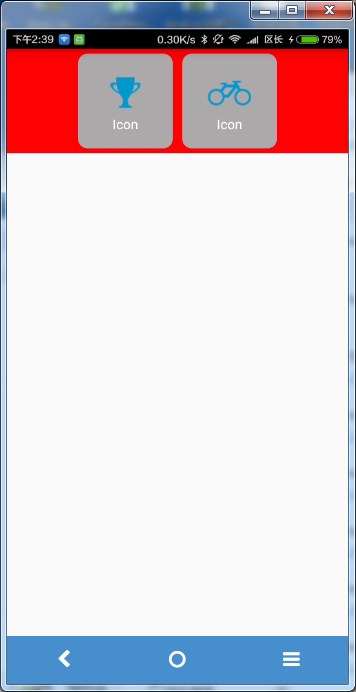
假设我们现在有这么一个需求,就是自定义一个组件,该组件由一个小图标和图标的文字说明组成,并且带有背景色,背景色可设置,宽度高度可设置。如下图所示正是两个这样的组件所组成。
首先,在index.android.js目录下新建一个js文件,命名为item.js,在里面输入模板代码
/**
* Sample React Native App
* https://github.com/facebook/react-native
*/
'use strict';

var React = require('react-native');

var {
  StyleSheet,
  Text,
  View,
  Image,
} = React;


var Item = React.createClass({
  render: function() {

    return (
      <View>

      </View>
    );
  },
});

var styles = StyleSheet.create({

});

module.exports = Item;注意最后的一句module.exports = Item;,将组件导出。
我们的组件最外围应该是一个View,View里面嵌套了一个Image和Text,并且View,Image,Text都有对应的样式,图片地址还要可以设置,文本内容可设置,而View的背景色,高度,宽度等样式应该由外部传入,并且与组件内部的样式联合作用,这一点可以使用样式数组实现,即style={[style1,style2,style3]},最终,render函数中返回的信息如下。
<View style={[styles.item,outStyle]}>
    <Image style={styles.image} source={{uri:img}}/>
    <Text style={styles.text}>{text}</Text>
</View>
现在我们拿到外部设置的属性值
var outStyle={
  width:parseInt(this.props.width),
  height:parseInt(this.props.height),
  backgroundColor:this.props.color,
}
var img=this.props.img;
var text=this.props.text;
所以最终的代码是这样的
var Item = React.createClass({
  render: function() {
    var outStyle={
      width:parseInt(this.props.width),
      height:parseInt(this.props.height),
      backgroundColor:this.props.color,
    }
    var img=this.props.img;
    var text=this.props.text;
    return (
      <View style={[styles.item,outStyle]}>
        <Image style={styles.image} source={{uri:img}}/>
        <Text style={styles.text}>{text}</Text>
      </View>
    );
  },
});
在内部我们还要对其进行样式化
var styles = StyleSheet.create({
  item:{
    justifyContent:'center',
    alignItems:'center',
    borderRadius:10,
    marginLeft:5,
    marginRight:5,
    marginTop:5,
    marginBottom:5,
  },
  image:{
    width:48,
    height:48,
  },
  text:{
    color:'#ffffff',
    alignItems:'center'
  }
});
当然,这个View还可以提取很多属性为自定义的属性,本例子只是为了演示,所以提取了几个个别的属性
如何使用?
也很简单,要使用的文件中引入该组件,使用定义的标签,并设置对应的属性即可。
引入组件
var Item = require('./item');使用组件
var AwesomeProject = React.createClass({
  render: function() {
    return (
        <View style={styles.container}>
        <Item style={styles.item1} color='#aaa' width='100' height='100' text='Icon' img='https://raw.githubusercontent.com/lizhangqu/androidicons/master/assets/blue_dark/xhdpi/ic_action_achievement.png'></Item>
        <Item style={styles.item2} color='#aaa' width='100' height='100' text='Icon' img='https://raw.githubusercontent.com/lizhangqu/androidicons/master/assets/blue_dark/xhdpi/ic_action_bike.png'></Item>
      </View>
    );
  },
});

var styles = StyleSheet.create({
    container:{
    flexDirection:'row',
    justifyContent:'center',
    alignItems:'center',
    backgroundColor:'#ff0000'
  },
  item1:{
    marginLeft:100,
  },
  item2:{
    marginLeft:100,
  }
});可以看到我们在render函数中使用了Item标签,并在该标签中设置了自定义的属性,最终这些属性会被设置到我们的组件上去。


 247
247


 被折叠的 条评论
为什么被折叠?
被折叠的 条评论
为什么被折叠?
 到【灌水乐园】发言


