


上节课我们主要讲解了我们是怎么一步一步把自定义cell打通的,主要方法就是引入了MVVM视图模型,这样我们就可以利用视图模型就提前把各个子控件的frame都计算好了。今天我们就是讲如何计算子控件frame,以及补全原创微博和转发微博的设计。
本节内容
- 计算cell子控件frame
- YGStatusCell代码补全
- 原创微博YGOriginalView代码补全
- 转发微博YGRetweetView 代码补全
本节资料
12.1 计算cell子控件frame
在YGStatusFrame视图模型执行文件内,我们重写setStatus方法,表明一接到YGStatus数据模型,我们就把各个子控件计算好,代码如下:
- (void)setStatus:(YGStatus *)status
{
    _status = status;

    // 计算原创微博
    [self setUpOriginalViewFrame];

    CGFloat toolBarY = CGRectGetMaxY(_originalViewFrame);

    if (status.retweeted_status) {

        // 计算转发微博
        [self setUpRetweetViewFrame];

        toolBarY = CGRectGetMaxY(_retweetViewFrame);
    }
    // 计算工具条
    CGFloat toolBarX = 0;
    CGFloat toolBarW = YGScreenW;
    CGFloat toolBarH = 35;
    _toolBarFrame = CGRectMake(toolBarX, toolBarY, toolBarW, toolBarH);

    // 计算cell高度
    _cellHeight = CGRectGetMaxY(_toolBarFrame);

}
我们首先计算了原创微博子控件的frame,然后判断微博是否有转发微博,如果有转发微博,我们就计算转发微博子控件的frame。最后计算工具条的纵坐标Y值时,也要考虑是否有转发微博。
下面就贴上原创微博怎么设置frame的:
#pragma mark - 计算原创微博
- (void)setUpOriginalViewFrame
{
    // 头像
    CGFloat imageX = YGStatusCellMargin;
    CGFloat imageY = imageX;
    CGFloat imageWH = 35;
    _originalIconFrame = CGRectMake(imageX, imageY, imageWH, imageWH);

    // 昵称
    CGFloat nameX = CGRectGetMaxX(_originalIconFrame) + YGStatusCellMargin;
    CGFloat nameY = imageY;
    CGSize nameSize = [_status.user.name sizeWithFont:YGNameFont];
    _originalNameFrame = (CGRect){{nameX,nameY},nameSize};

    // vip
    if (_status.user.vip) {
        CGFloat vipX = CGRectGetMaxX(_originalNameFrame) + YGStatusCellMargin;
        CGFloat vipY = nameY;
        CGFloat vipWH = 14;
        _originalVipFrame = CGRectMake(vipX, vipY, vipWH, vipWH);

    }

    // 时间
    CGFloat timeX = nameX;
    CGFloat timeY = CGRectGetMaxY(_originalNameFrame) + YGStatusCellMargin * 0.5;
    CGSize timeSize = [_status.created_at sizeWithFont:YGTimeFont];
    _originalTimeFrame = (CGRect){{timeX,timeY},timeSize};

    // 来源
    CGFloat sourceX = CGRectGetMaxX(_originalTimeFrame) + YGStatusCellMargin;
    CGFloat sourceY = timeY;
    CGSize sourceSize = [_status.source sizeWithFont:YGSourceFont];
    _originalSourceFrame = (CGRect){{sourceX,sourceY},sourceSize};

    // 正文
    CGFloat textX = imageX;
    CGFloat textY = CGRectGetMaxY(_originalIconFrame) + YGStatusCellMargin;

    CGFloat textW = YGScreenW - 2 * YGStatusCellMargin;
    CGSize textSize = [_status.text sizeWithFont:YGTextFont constrainedToSize:CGSizeMake(textW, MAXFLOAT)];
    _originalTextFrame = (CGRect){{textX,textY},textSize};

    // 原创微博的frame
    CGFloat originX = 0;
    //设置间隙
    CGFloat originY = 10;
    CGFloat originW = YGScreenW;
    CGFloat originH = CGRectGetMaxY(_originalTextFrame) + YGStatusCellMargin;
    _originalViewFrame = CGRectMake(originX, originY, originW, originH);

}
这里需要说明的是:在计算会员属性的frame时,需要判断用户是否是会员,但是以前我们设计的YGUser模型里没有VIP属性,所以我们现在在YGUser增加几个属性,用来接受返回的数据,然后判断是否是vip,头文件增加如下代码:
/** 会员类型 > 2代表是会员 */
@property (nonatomic, assign) int mbtype;
/** 会员等级 */
@property (nonatomic, assign) int mbrank;

@property (nonatomic, assign,getter=isVip) BOOL vip;
执行文件增加如下代码:
- (void)setMbtype:(int)mbtype
{
    _mbtype = mbtype;
    _vip = mbtype > 2;
}
这里的意思就是当返回的数据mbtype大于2时,用户就是VIP,具体会员等级由mbrank决定。
如何计算转发微博frame:
#pragma mark - 计算转发微博
- (void)setUpRetweetViewFrame
{
    // 昵称frame
    // 昵称
    CGFloat nameX = YGStatusCellMargin;
    CGFloat nameY = nameX;
    // 注意:一定要是转发微博的用户昵称
    CGSize nameSize = [_status.retweeted_status.user.name sizeWithFont:YGNameFont];
    _retweetNameFrame = (CGRect){{nameX,nameY},nameSize};

    // 正文
    CGFloat textX = nameX;
    CGFloat textY = CGRectGetMaxY(_retweetNameFrame) + YGStatusCellMargin;

    CGFloat textW = YGScreenW - 2 * YGStatusCellMargin;
    // 注意:一定要是转发微博的正文
    CGSize textSize = [_status.retweeted_status.text sizeWithFont:YGTextFont constrainedToSize:CGSizeMake(textW, MAXFLOAT)];
    _retweetTextFrame = (CGRect){{textX,textY},textSize};

    // 原创微博的frame
    CGFloat retweetX = 0;
    CGFloat retweetY = CGRectGetMaxY(_originalViewFrame);
    CGFloat retweetW = YGScreenW;
    CGFloat retweetH = CGRectGetMaxY(_retweetTextFrame) + YGStatusCellMargin;
    _retweetViewFrame = CGRectMake(retweetX, retweetY, retweetW, retweetH);

}
以上代码所用的宏定义我们设置在了weibo.pch文件内了:
/*        cell            */

#define YGStatusCellMargin 10
#define YGNameFont [UIFont systemFontOfSize:13]
#define YGTimeFont [UIFont systemFontOfSize:12]
#define YGSourceFont YGTimeFont
#define YGTextFont [UIFont systemFontOfSize:15]
#define YGScreenW [UIScreen mainScreen].bounds.size.width
12.2 YGStatusCell代码补全
重写setStatusFrame方法,设置cell内三个子控件的位置和大小:
- (void)setStatusFrame:(YGStatusFrame *)statusFrame{
    _statusFrame = statusFrame;

    // 设置原创微博frame
    _originalView.frame = statusFrame.originalViewFrame;
    _originalView.statusFrame = statusFrame;

    // 设置原创微博frame
    _retweetView.frame = statusFrame.retweetViewFrame;
    _retweetView.statusFrame = statusFrame;

    // 设置工具条frame
    _toolBar.frame = statusFrame.toolBarFrame;
}
这里不要忘记给YGOriginalView 和YGRetweetView添加YGStatus Frame属性,以便传递视图模型。
12.3 原创微博YGOriginalView代码补全
这里我们在取得视图模型后,要重写setStatusFrame方法,来设置原创微博子控件的大小位置以及内容:
-(void)setStatusFrame:(YGStatusFrame *)statusFrame
{
    _statusFrame = statusFrame;
    // 设置frame
    [self setUpFrame];
    // 设置data
    [self setUpData];
}
这里我们抽取两给方法,一个专门设置子控件位置和大小,一盒专门设置内容,设置frame代码如下:
- (void)setUpFrame
{
    // 头像
    _iconView.frame = _statusFrame.originalIconFrame;

    // 昵称
    _nameView.frame = _statusFrame.originalNameFrame;

    // vip
    if (_statusFrame.status.user.vip) { // 是vip
        _vipView.hidden = NO;
        _vipView.frame = _statusFrame.originalVipFrame;
    }else{
        _vipView.hidden = YES;
    }
    // 时间
    _timeView.frame = _statusFrame.originalTimeFrame;

    // 来源
    _sourceView.frame = _statusFrame.originalSourceFrame;

    // 正文
    _textView.frame = _statusFrame.originalTextFrame;

}
设置子控件内容如下:
- (void)setUpData
{
    YGStatus *status = _statusFrame.status;
    // 头像
    [_iconView sd_setImageWithURL:status.user.profile_image_url placeholderImage:[UIImage imageNamed:@"timeline_image_placeholder"]];

    // 昵称
    if (status.user.vip) {
        _nameView.textColor = [UIColor redColor];
    }else{
        _nameView.textColor = [UIColor blackColor];
    }
    _nameView.text = status.user.name;

    // vip
    NSString *imageName = [NSString stringWithFormat:@"common_icon_membership_level%d",status.user.mbrank];
    UIImage *image = [UIImage imageNamed:imageName];

    _vipView.image = image;

    // 时间
    _timeView.text = status.created_at;

    // 来源

    _sourceView.text = status.source;

    // 正文
    _textView.text = status.text;
}
最后还有几点需要注意,我们要给昵称,来源,时间和正文设置合适的字体大小和颜色,正文还要设置跨行,具体请参考资料代码。
12.4 转发微博YGRetweetView 代码补全
转发微博的子控件设置原理就跟原创微博一样了,首先,重写initWithFrame方法:
- (instancetype)initWithFrame:(CGRect)frame
{
    if (self = [super initWithFrame:frame]) {

        // 添加所有子控件
        [self setUpAllChildView];
    }
    return self;
}
然后抽取的添加所有子控件的方法为:
// 添加所有子控件
- (void)setUpAllChildView
{

    // 昵称
    UILabel *nameView = [[UILabel alloc] init];
    nameView.font = YGNameFont;
    [self addSubview:nameView];
    _nameView = nameView;


    // 正文
    UILabel *textView = [[UILabel alloc] init];
    textView.font = YGTextFont;
    textView.numberOfLines = 0;
    [self addSubview:textView];
    _textView = textView;
}
这里只需要添加两个子控件,比原创微博的要简单些。
最后就是重写setStatusFrame方法,设置其子控件大小位置和内容:
- (void)setStatusFrame:(YGStatusFrame *)statusFrame
{
    _statusFrame = statusFrame;


    YGStatus *status = statusFrame.status;
    // 昵称
    _nameView.frame = statusFrame.retweetNameFrame;
    _nameView.text = status.retweeted_status.user.name;

    // 正文
    _textView.frame = statusFrame.retweetTextFrame;
    _textView.text = status.retweeted_status.text;
}
是不是感觉这些代码敲起来巨爽,直接用点语法赋值即可,但愿你此时可以深刻理解到面向对象编程思想是多么方便。
这里还有两点需要说明:
第一:我们为了设置原创微博和转发微博子控件的背景图片,需要把两者继承的类改为UIImageView,这样才能设置图片。然后在各自的初始化方法里,添加其背景图片,并把用户交互打开,代码如下:
- (instancetype)initWithFrame:(CGRect)frame
{
    if (self = [super initWithFrame:frame]) {

        // 添加所有子控件
        [self setUpAllChildView];
        self.userInteractionEnabled = YES;
        self.image = [UIImage imageWithStretchableName:@"timeline_card_top_background"];
    }
    return self;
}
第二:为了让cell产生间隙效果,我们这里把原始微博的纵坐标往下移了10point。仔细在代码资源里找找在那里设置的吧。
第三:我在写代码的时候,不小心产生了一个错误叫(null): Linker command failed with exit code 1 (use -v to see invocation) 这个错误我找了好半天才找到,原来是我在某个地方错误的引用了.m文件引起的,这里指出来希望对大家有所帮助。而且以后在开发中,注意多保存文件,一个功能建立一个文件,多运行,这样就能缩小bug的寻找范围。
这节课就到这里吧,如果你运行项目就会看到我们已经得到了下图所示的微博效果啦。
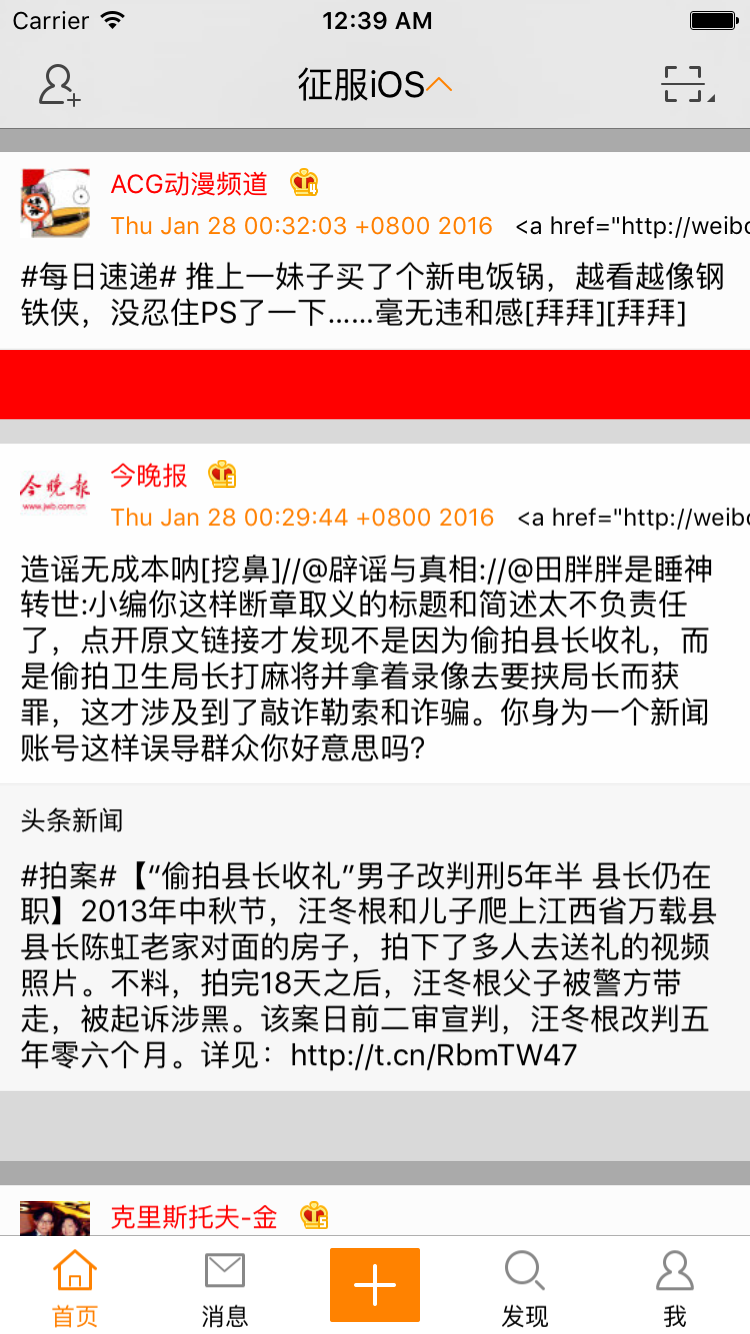
是不是感觉有点像样了,下节课我们将会讲解如何对时间和来源处理,以及增加微博工具栏的处理。


 2164
2164

 被折叠的 条评论
为什么被折叠?
被折叠的 条评论
为什么被折叠?
 到【灌水乐园】发言


