


Fragment + LinearLayout + TextView 实现底部导航栏的切换(一)
知识点
先看效果图:
项目结构图:
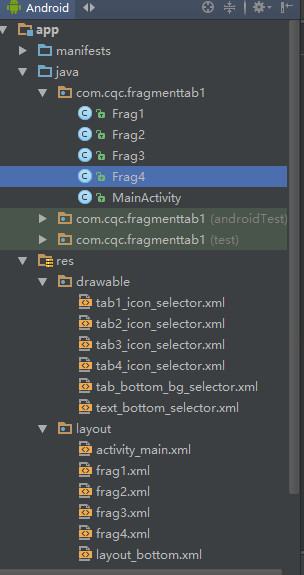
实现逻辑:
顶部是LinearLayout,里面放了TextView;底部是LinearLayout,里面水平放置了4个TextView,比例是1:1:1:1;其余是FrameLayout填充满剩余空间。点击底部的tab,用4个Fragement替换FrameLayout,同时tab的文字+图片+背景色改变
tab文字的改变:
用selector改变字体颜色
<?xml version="1.0" encoding="utf-8"?>
<selector xmlns:android="http://schemas.android.com/apk/res/android">
    <item android:state_selected="true" android:color="@color/colorAccent"/>
    <item android:color="@color/colorBlack"/>
</selector>
tab背景色的改变:
用selector改变背景颜色
<?xml version="1.0" encoding="utf-8"?>
<selector xmlns:android="http://schemas.android.com/apk/res/android">
    <item android:drawable="@color/tabBottomBg" android:state_selected="true"/>
    <item android:drawable="@color/transparent"/>
</selector>
tab图片的改变:
用selector改变图片
<?xml version="1.0" encoding="utf-8"?>
<selector xmlns:android="http://schemas.android.com/apk/res/android">
    <item android:drawable="@mipmap/chats_light" android:state_selected="true"/>
    <item android:drawable="@mipmap/chats"/>
</selector>
步骤:
- 通过findViewById()找到所有view,并给4个tab设置点击监听,获取FragmentManager
- 在监听中先创建FragmentTransaction,hide()所有的fragment + tab的selector设置为false
- 在每个case中判断对应的Fragment==null,是:创建并add();并显示show()
- switch后记得commit()
下面上具体的代码:
onCreate(…)
@Override
protected void onCreate(Bundle savedInstanceState) {
    super.onCreate(savedInstanceState);
    supportRequestWindowFeature(Window.FEATURE_NO_TITLE);
    setContentView(R.layout.activity_main);
    fm = getSupportFragmentManager();
    findViews();
    initView();
    tab1.performClick();//Call this view's OnClickListener
}
findViews()
private void findViews() {
    tab1 = (TextView) findViewById(R.id.tab1);
    tab2 = (TextView) findViewById(R.id.tab2);
    tab3 = (TextView) findViewById(R.id.tab3);
    tab4 = (TextView) findViewById(R.id.tab4);

    framgLayout = (FrameLayout) findViewById(R.id.framgLayout);
}
initView();
private void initView() {
    tab1.setOnClickListener(this);
    tab2.setOnClickListener(this);
    tab3.setOnClickListener(this);
    tab4.setOnClickListener(this);
}
onClick()
@Override
public void onClick(View view) {
    transaction = fm.beginTransaction();
    hideAllFragment();
    switch (view.getId()) {
        case R.id.tab1:
            setSelectorAllFalse();//这个最好放在4个tab的每个case中,因为如果还有其他的点击,就会导致tab全变成灰色
            tab1.setSelected(true);
            if (frag1 == null) {
                frag1 = new Frag1();
                transaction.add(R.id.framgLayout, frag1, "Frag1");
            }
            transaction.show(frag1);
            break;
        case R.id.tab2:
            setSelectorAllFalse();
            tab2.setSelected(true);
            if (frag2 == null) {
                frag2 = new Frag2();
                transaction.add(R.id.framgLayout, frag2, "Frag2");
            }
            transaction.show(frag2);
            break;
        case R.id.tab3:
            setSelectorAllFalse();
            tab3.setSelected(true);
            if (frag3 == null) {
                frag3 = new Frag3();
                transaction.add(R.id.framgLayout, frag3, "Frag3");
            }
            transaction.show(frag3);
            break;
        case R.id.tab4:
            setSelectorAllFalse();
            tab4.setSelected(true);
            if (frag4 == null) {
                frag4 = new Frag4();
                transaction.add(R.id.framgLayout, frag4, "Frag4");
            }
            transaction.show(frag4);
            break;
    }
    transaction.commit();
}
hideAllFragment()
private void hideAllFragment() {
    if (frag1 != null) {
        transaction.hide(frag1);
    }
    if (frag2 != null) {
        transaction.hide(frag2);
    }
    if (frag3 != null) {
        transaction.hide(frag3);
    }
    if (frag4 != null) {
        transaction.hide(frag4);
    }
}
frag1.xml
其他3个都一样
<?xml version="1.0" encoding="utf-8"?>
<RelativeLayout xmlns:android="http://schemas.android.com/apk/res/android"
                android:layout_width="match_parent"
                android:layout_height="match_parent">

    <TextView
        android:layout_width="match_parent"
        android:layout_height="match_parent"
        android:gravity="center"
        android:text="微信"
        android:textSize="30sp"/>
</RelativeLayout>
源码:https://github.com/s1168805219/Fragment-LinearLayout-TextView-


 1332
1332

 被折叠的 条评论
为什么被折叠?
被折叠的 条评论
为什么被折叠?
 到【灌水乐园】发言


