


网上搜了好多,都是xib拖得,手写的几乎没有,作为一个手写党,不能忍受啊!于是乎,写了一个自认为可以的创建方法 。求各位swift大神指点
(Xcode版本6.4)
代码:在tableview里面的使用
import UIKit

class CustomCellTestController: UIViewController, UITableViewDelegate, UITableViewDataSource {

    var tableView:UITableView!
    var dataArray = NSMutableArray()

    override func viewDidLoad() {
        super.viewDidLoad()

        self.title = "代码自定义cell"

        self.initDatas()
        self.view.backgroundColor = UIColor.whiteColor()

        self.tableView = UITableView(frame: CGRectMake(0.0, 0.0, KLScreenWidth, KLScreenHeight), style: UITableViewStyle.Plain)
        self.tableView.delegate = self
        self.tableView.dataSource = self
        self.tableView.tableFooterView = UIView()
        self.tableView.rowHeight = 80

        // 注册Cell
        self.tableView.registerClass(CustomWriteCell.classForCoder(), forCellReuseIdentifier: CustomWriteCell.cellID())

        self.view.addSubview(self.tableView)
    }
    // 初始化数据
    func initDatas(){

        let array:NSArray = ["要是能重来 我要选李白 几百年前做的好坏 没那么多人猜",
            "要是能重来 我要选李白 至少我还能写写诗来澎湃 逗逗女孩",
            "要是能重来 我要选李白 创作也能到那么高端 被那么多人崇拜",
            "一天宛如一年 一年宛如一天 任时光流转 我还是我",
            "一遍用了千遍 千遍只为一遍 当回忆久远 初心始现",
            "一天宛如一年 一年宛如一天 任时光流转 我还是我 一遍用了千遍 千遍只为一遍 当回忆久远 初心始现 我做了那么多改变 只是为了我心中不变 默默地深爱着你无论相见不相见 我做了那么多改变 只是为了我心中不变 我多想你看见",
            "《李白》 AND 《我变了 我没变》"]

        for var i = 0; i < array.count; i++ {
            let  tempModel:TestModel = TestModel()
            tempModel.name = (array[i] as? String)!
            tempModel.headUrl = "IMG_0542.jpg"
            self.dataArray .addObject(tempModel)
        }
    }

    // 返回的行数
    func tableView(tableView: UITableView, numberOfRowsInSection section: Int) -> Int {
        return self.dataArray.count
    }

    // 重用cell
    func tableView(tableView: UITableView, cellForRowAtIndexPath indexPath: NSIndexPath) -> UITableViewCell {
        let  cell = tableView.dequeueReusableCellWithIdentifier(CustomWriteCell.cellID(), forIndexPath: indexPath) as! CustomWriteCell
        let model:TestModel = (self.dataArray[indexPath.row] as? TestModel)!
        cell.cellForModel(model)

        return cell
    }

    // 返回cell高度 (高度固定时,不用这样写)
//    func tableView(tableView: UITableView, heightForRowAtIndexPath indexPath: NSIndexPath) -> CGFloat {
//        return CustomWriteCell.cellHeight()
//    }

    // 选中cell时的处理
    func tableView(tableView: UITableView, didSelectRowAtIndexPath indexPath: NSIndexPath) {
        tableView.deselectRowAtIndexPath(indexPath, animated: true)
        println("点击的是第\(indexPath.row)行")
    }


    override func didReceiveMemoryWarning() {
        super.didReceiveMemoryWarning()

    }

}
代码:cell的创建
//  代码自定义Cell

import UIKit

private let  KLMargin:CGFloat  = 10
private let  imgSize:CGFloat = 60
private let  titleWidth:CGFloat = KLScreenWidth - 3.0*KLMargin - imgSize

class CustomWriteCell: UITableViewCell {

    var  titleLabel : UILabel!
    var  headImageView : UIImageView!

    // 初始化cell
    override init(style: UITableViewCellStyle, reuseIdentifier: String?) {

        super.init(style: UITableViewCellStyle.Default, reuseIdentifier: CustomWriteCell.cellID())

        // 头像img
        headImageView = UIImageView(frame: CGRectMake(KLMargin, KLMargin, imgSize, imgSize))
        self.contentView.addSubview(headImageView)
         <pre name="code" class="objc">        // 内容
        titleLabel = UILabel(frame: CGRectMake(CGRectGetMaxY(headImageView.frame) + KLMargin, KLMargin, titleWidth, imgSize))
        titleLabel.font = UIFont.systemFontOfSize(15)
        titleLabel.numberOfLines = 0
        self.contentView.addSubview(titleLabel)

    }

    // 类方法 重用标识符
    class func cellID () -> String {
        return "CustomWriteCell"
    }

    // 类方法 返回高度
    class func cellHeight() -> CGFloat {

        return 80
    }

    // 根据model 填充Cell
    func cellForModel(model: TestModel?){
        if let tempModel = model {

            titleLabel.text = tempModel.name
            headImageView.image = UIImage(named: tempModel.headUrl!);
        }
    }


    required init(coder aDecoder: NSCoder) {
        fatalError("init(coder:) has not been implemented")
    }

    override func setSelected(selected: Bool, animated: Bool) {
        super.setSelected(selected, animated: animated)

        // Configure the view for the selected state
    }

}
代码:简单的model
// model类
import UIKit
class TestModel: NSObject {
// 目前测试 两种写法都行 第二种用的时候不要忘记解包(!)
var name = String()
var headUrl: String?
}
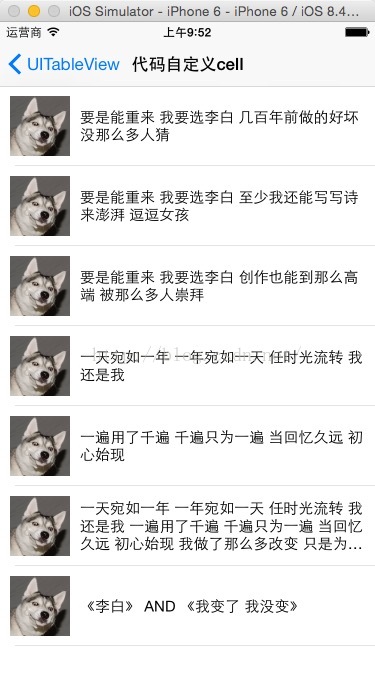
效果如图:


 329
329


 被折叠的 条评论
为什么被折叠?
被折叠的 条评论
为什么被折叠?
 到【灌水乐园】发言


