


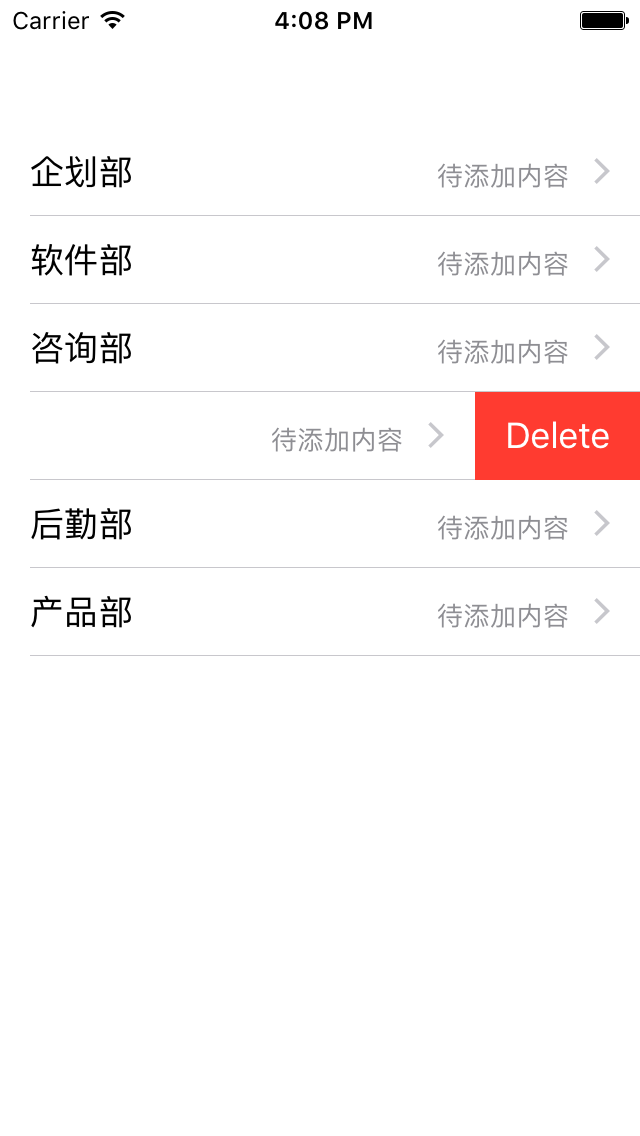
最近这个月估计要一直设计新的项目天天开会苦不堪言啊~ 新的项目要用swift来写,从零开始还是很有乐趣的,简单总结了下table的使用,一起学习下吧。
直接上代码了
<span style="font-family:Microsoft YaHei;font-size:14px;">//
//  ViewController.swift
//  SwiftTable
//
//  Created by a111 on 16/10/19.
//  Copyright © 2016年 司小文. All rights reserved.
//
// MARK: -

import UIKit

var kSize=UIScreen.main.bounds;

var dataTable:UITableView!
var itemStringArr=["企划部","软件部","咨询部","人事部","后勤部","产品部"]


class ViewController: UIViewController, UITableViewDataSource, UITableViewDelegate {

    override func viewDidLoad() {
        super.viewDidLoad()

        //调用table方法
        makeTable()

        // Do any additional setup after loading the view, typically from a nib.
    }

    // MARK: -table
    func makeTable (){
        dataTable=UITableView.init(frame: CGRect(x: 0.0, y: 64, width: kSize.width, height: kSize.height-64), style:.plain)
        dataTable.delegate=self;//实现代理
        dataTable.dataSource=self;//实现数据源
        dataTable.showsVerticalScrollIndicator = false
        dataTable.showsHorizontalScrollIndicator = false
        self.view.addSubview(dataTable)

        //tableFooter
        dataTable.tableFooterView = UIView.init()
    }

    // MARK: -table代理

    //段数
    func numberOfSections(in tableView: UITableView) -> Int {
        return 1;
    }

    //行数
    func tableView(_ tableView: UITableView, numberOfRowsInSection section: Int) -> Int {
        return itemStringArr.count
    }

    //行高
    func tableView(_ tableView: UITableView, heightForRowAt indexPath: IndexPath) -> CGFloat{
        return 80
    }

    /*
    //头部高度
    func tableView(_ tableView: UITableView, heightForHeaderInSection section: Int) -> CGFloat {
        return 0.01
    }

    //底部高度
    func tableView(_ tableView: UITableView, heightForFooterInSection section: Int) -> CGFloat {
        return 0.01
    }
    */

    //cell
    func tableView(_ tableView: UITableView, cellForRowAt indexPath: IndexPath) -> UITableViewCell {

         /*
        let indentifier = "CellA"
        var cell:TableViewCellA! = tableView.dequeueReusableCell(withIdentifier: indentifier) as? TableViewCellA
        if cell == nil {
            cell=TableViewCellA(style: .default, reuseIdentifier: indentifier)
        }


        return cell!
         */

        let identifier="identtifier";
        var cell=tableView.dequeueReusableCell(withIdentifier: identifier)
        if(cell == nil){
            cell=UITableViewCell(style: UITableViewCellStyle.value1, reuseIdentifier: identifier);
        }

        cell?.textLabel?.text = itemStringArr[indexPath.row];
        cell?.detailTextLabel?.text = "待添加内容";
        cell?.detailTextLabel?.font = UIFont .systemFont(ofSize: CGFloat(13))
        cell?.accessoryType=UITableViewCellAccessoryType.disclosureIndicator

        return cell!
    }

    //选中cell时触发这个代理
    public func tableView(_ tableView: UITableView, didSelectRowAt indexPath: IndexPath){
        print("indexPath.row = SelectRow第\(indexPath.row)行")
    }

    //取消选中cell时,触发这个代理
    public func tableView(_ tableView: UITableView, didDeselectRowAt indexPath: IndexPath){
        print("indexPath.row = DeselectRow第\(indexPath.row)行")
    }

    //允许编辑cell
    func tableView(_ tableView: UITableView, canEditRowAt indexPath: IndexPath) -> Bool {
        return true
    }

    //右滑触发删除按钮
    func tableView(_ tableView: UITableView, editingStyleForRowAt indexPath: IndexPath) -> UITableViewCellEditingStyle {
        return UITableViewCellEditingStyle.init(rawValue: 1)!
    }

    //点击删除cell时触发
    func tableView(_ tableView: UITableView, commit editingStyle: UITableViewCellEditingStyle, forRowAt indexPath: IndexPath) {
        print("indexPath.row = editingStyle第\(indexPath.row)行")

    }

    override func didReceiveMemoryWarning() {
        super.didReceiveMemoryWarning()
        // Dispose of any resources that can be recreated.
    }


}</span>
感谢观看,学以致用更感谢哦~


 3361
3361

 被折叠的 条评论
为什么被折叠?
被折叠的 条评论
为什么被折叠?
 到【灌水乐园】发言


