自定义CoordinatorLayout的Behavior实现知乎和简书快速返回效果

Design lib里面的CoordinatorLayout是一个非常强大的控件,它接管了child组件之间的交互。让你滑动交互使用更加方便简单,效果也更加强大,不需要向以前那样自己处理一坨什么乱七八槽的滑动 事件传递之类的恶心东西了。

比如常见的顶部工具栏随内容滑动消失和显示,这个官方已经支持了Toolbar,但是有时候我们想让自己的组件也可以和滑动交互,这个时候我们就需要自定义一个我们自己的Behavior了

知乎效果

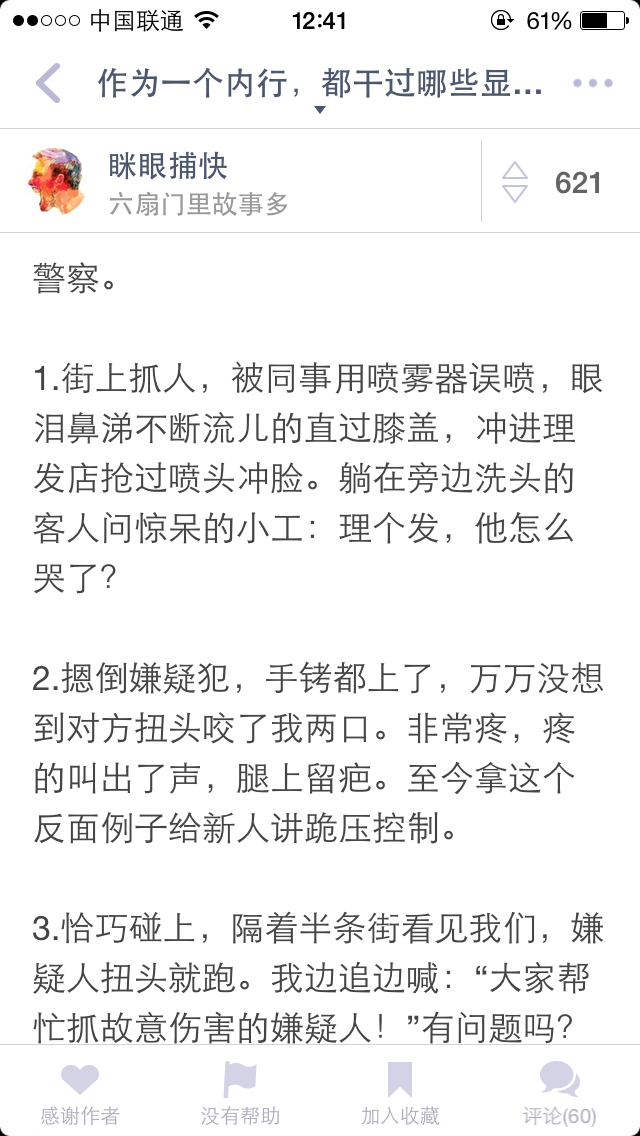
知乎的效果是顶部不动,底部随内容滑动 显示和隐藏
可以先看一下知乎的底部快速返回效果(sorry 静态图)
知乎效果

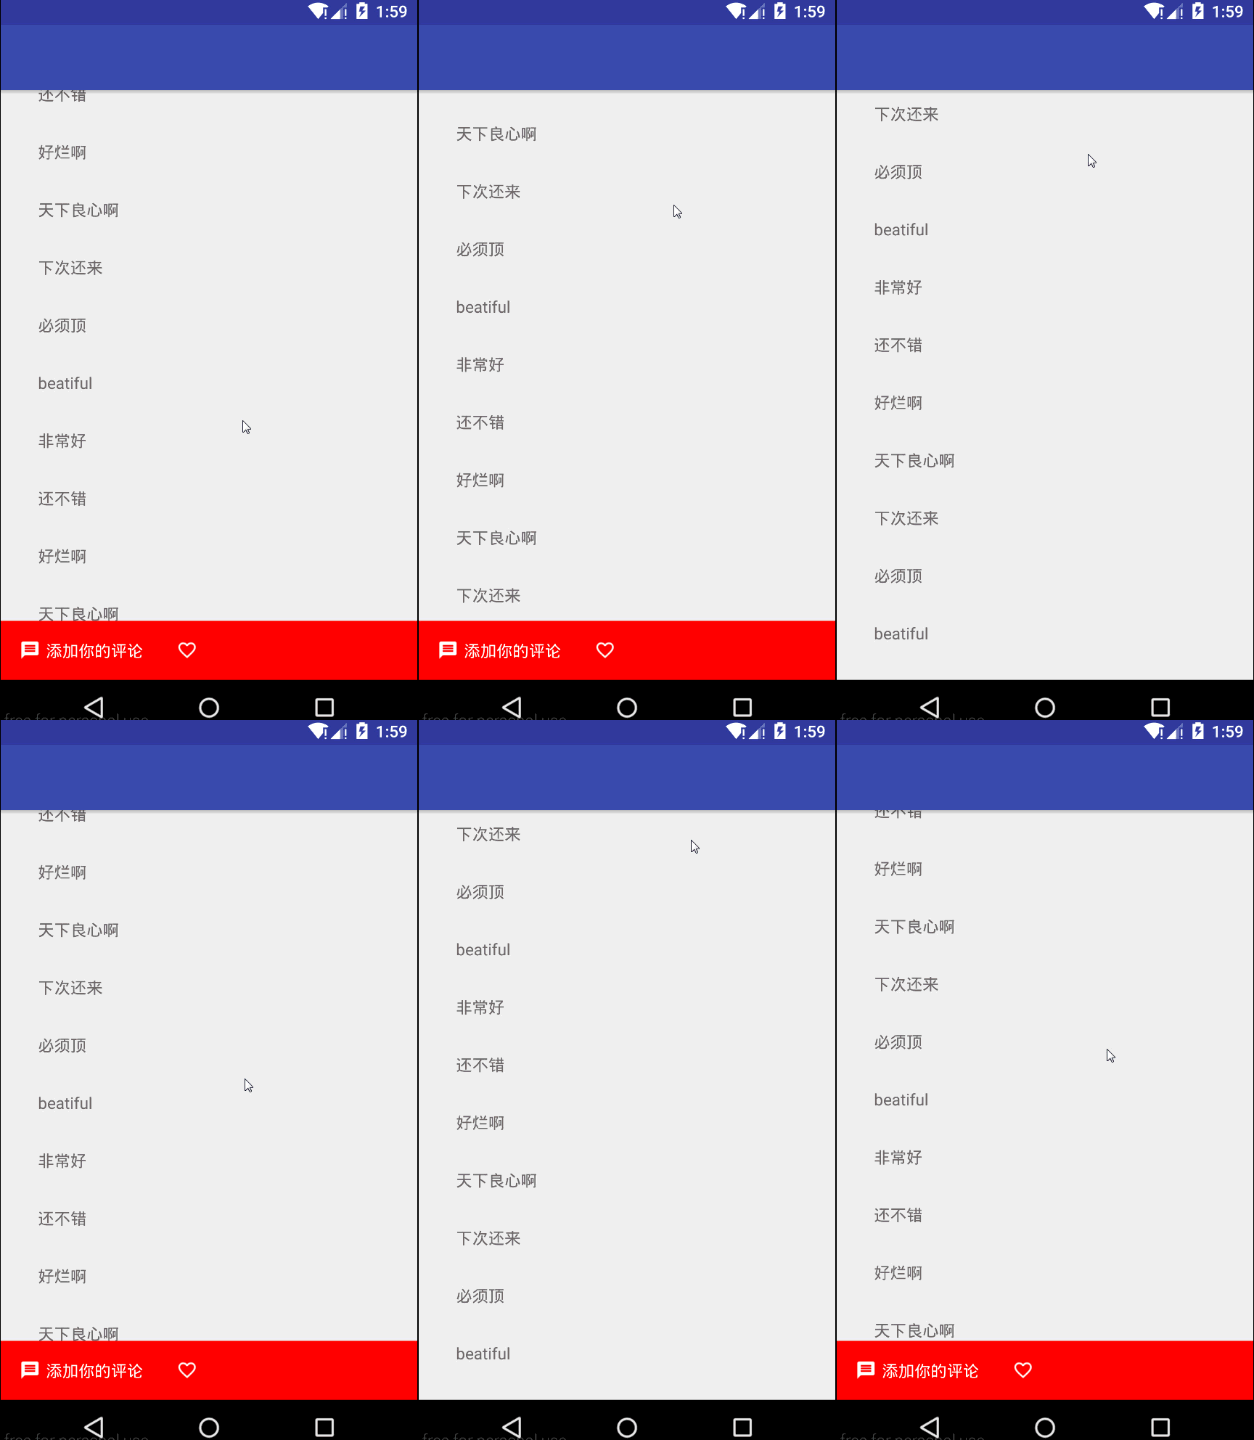
看下我们实现的效果

模仿知乎效果

先看下我们的布局

<?xml version="1.0" encoding="utf-8"?>
<android.support.design.widget.CoordinatorLayout xmlns:android="http://schemas.android.com/apk/res/android"
    xmlns:app="http://schemas.android.com/apk/res-auto"
    android:layout_width="match_parent"
    android:layout_height="match_parent">
    <!--toolbar-->
    <android.support.design.widget.AppBarLayout
        android:layout_width="match_parent"
        android:layout_height="wrap_content">

        <android.support.v7.widget.Toolbar
            android:layout_width="match_parent"
            android:layout_height="wrap_content"
            />

    </android.support.design.widget.AppBarLayout>

    <android.support.v7.widget.RecyclerView
        android:id="@+id/rv_behavior"
        android:layout_width="match_parent"
        android:layout_height="match_parent" />


    <!--底部操作栏-->
    <LinearLayout
        android:layout_width="match_parent"
        android:layout_height="wrap_content"
        android:layout_gravity="bottom"
        android:background="@color/red"
        android:orientation="horizontal"
        android:padding="16dp"
        android:gravity="center_vertical"
        app:layout_behavior="com.example.lwp.design.behavior.FooterBehavior">

        <TextView
            android:layout_width="wrap_content"
            android:layout_height="wrap_content"
            android:text="添加你的评论"
            android:drawablePadding="5dp"
            android:drawableLeft="@mipmap/ic_message"
            android:textColor="@android:color/white" />


        <ImageView
            android:layout_marginLeft="29dp"
            android:layout_width="wrap_content"
            android:layout_height="wrap_content"
            android:src="@mipmap/ic_favorite"/>

    </LinearLayout>


</android.support.design.widget.CoordinatorLayout>

布局很简单就三个内容 toolbar,RecyclerView,footer(LinearLayout)
注意底部操作栏最外层的 LinearLayout我们加上了

app:layout_behavior=”com.example.lwp.design.behavior.FooterBehavior”

FooterBehavior就是我们要自定义的behavior,让它和滑动交互,内容向上滑动时消失,向下滑动时显示
实现我们自己的Behavior其实很简单 ,就是几行代码的事,主要就是根据滑动距离来显示和隐藏footer

public class FooterBehavior extends CoordinatorLayout.Behavior<View> {

    private static final Interpolator INTERPOLATOR = new FastOutSlowInInterpolator();


    private int sinceDirectionChange;


    public FooterBehavior(Context context, AttributeSet attrs) {
        super(context, attrs);
    }

//1.判断滑动的方向 我们需要垂直滑动
    @Override
    public boolean onStartNestedScroll(CoordinatorLayout coordinatorLayout, View child, View directTargetChild, View target, int nestedScrollAxes) {
        return (nestedScrollAxes & ViewCompat.SCROLL_AXIS_VERTICAL) != 0;
    }

//2.根据滑动的距离显示和隐藏footer view
    @Override
    public void onNestedPreScroll(CoordinatorLayout coordinatorLayout, View child, View target, int dx, int dy, int[] consumed) {
        if (dy > 0 && sinceDirectionChange < 0 || dy < 0 && sinceDirectionChange > 0) {
            child.animate().cancel();
            sinceDirectionChange = 0;
        }
        sinceDirectionChange += dy;
        if (sinceDirectionChange > child.getHeight() && child.getVisibility() == View.VISIBLE) {
            hide(child);
        } else if (sinceDirectionChange < 0 && child.getVisibility() == View.GONE) {
            show(child);
        }
    }


    private void hide(final View view) {
        ViewPropertyAnimator animator = view.animate().translationY(view.getHeight()).setInterpolator(INTERPOLATOR).setDuration(200);
        animator.setListener(new Animator.AnimatorListener() {
            @Override
            public void onAnimationStart(Animator animator) {

            }

            @Override
            public void onAnimationEnd(Animator animator) {
                view.setVisibility(View.GONE);
            }

            @Override
            public void onAnimationCancel(Animator animator) {
                show(view);
            }

            @Override
            public void onAnimationRepeat(Animator animator) {

            }
        });
        animator.start();
    }


    private void show(final View view) {
        ViewPropertyAnimator animator = view.animate().translationY(0).setInterpolator(INTERPOLATOR).setDuration(200);
        animator.setListener(new Animator.AnimatorListener() {
            @Override
            public void onAnimationStart(Animator animator) {

            }

            @Override
            public void onAnimationEnd(Animator animator) {
                view.setVisibility(View.VISIBLE);
            }

            @Override
            public void onAnimationCancel(Animator animator) {
                hide(view);
            }

            @Override
            public void onAnimationRepeat(Animator animator) {

            }
        });
        animator.start();

    }

简书效果

简书效果有点类似全屏 就是滑动的时候顶部和底部的都消失,提供更好的阅读体验

简书效果

看下我们实现的效果
模仿简书效果

布局还是原来的布局,只需要改2个小地方,一个是让Toolbar支持隐藏,第二个底部的behavior改成我们接下来实现的behavior名称: FooterBehaviorDependAppBar

...
<android.support.v7.widget.Toolbar
            android:layout_width="match_parent"
            android:layout_height="wrap_content"
            app:layout_scrollFlags="scroll|enterAlways"  //1.加上这个
            />

...

<LinearLayout
        android:layout_width="match_parent"
        android:layout_height="wrap_content"
        android:layout_gravity="bottom"
        android:background="@color/red"
        android:orientation="horizontal"
        android:padding="16dp"
        android:gravity="center_vertical"
        //2.修改behavior为我们第二个要实现的behavior
        app:layout_behavior="com.example.lwp.design.behavior.FooterBehaviorDependAppBar">
...

从效果来看,第一眼感觉会比实现知乎效果要麻烦,其实比第一个behavior实现更加简单,几乎只用了一行代码实现 child.setTranslationY(translationY);

public class FooterBehaviorDependAppBar extends CoordinatorLayout.Behavior<View> {


    public FooterBehaviorDependAppBar(Context context, AttributeSet attrs) {
        super(context, attrs);
    }

    @Override
    public boolean layoutDependsOn(CoordinatorLayout parent, View child, View dependency) {
         return dependency instanceof AppBarLayout;
    }


    @Override
    public boolean onDependentViewChanged(CoordinatorLayout parent, View child, View dependency) {
        float translationY = Math.abs(dependency.getTranslationY());
        child.setTranslationY(translationY);
        return true;
    }
}

现在可以看到实现自己的Behavior是多么的方便和简单了吧,这样你就可以在滑动交互中实现更复杂和酷炫的交互效果了
赶紧去试试吧!

  • 16
    点赞
  • 41
    收藏
    觉得还不错? 一键收藏
  • 17
    评论

“相关推荐”对你有帮助么?

  • 非常没帮助
  • 没帮助
  • 一般
  • 有帮助
  • 非常有帮助
提交
评论 17
添加红包

请填写红包祝福语或标题

红包个数最小为10个

红包金额最低5元

当前余额3.43前往充值 >
需支付:10.00
成就一亿技术人!
领取后你会自动成为博主和红包主的粉丝 规则
hope_wisdom
发出的红包
实付
使用余额支付
点击重新获取
扫码支付
钱包余额 0

抵扣说明:

1.余额是钱包充值的虚拟货币,按照1:1的比例进行支付金额的抵扣。
2.余额无法直接购买下载,可以购买VIP、付费专栏及课程。

余额充值