


github地址:https://github.com/traex/
如果你相自己实现,可以看我的另一篇文章: 一步一步带你实现ListView动画展开布局, ExpandableLayout实现
效果:
如图,如果我们向实现点击ListView的Item,在item下面展示一个view,可以使用ExpandableLayout来实现。
项目结构
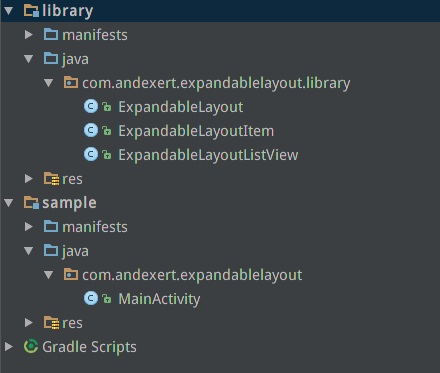
在library下面,定义了ExpandableLayout的源码。我们来看
ExpandableLayout: 继承自RelativeLayout,实现了点击view向下出现要弹出的view的效果
ExpandableLayoutItem: ExpandableLayoutListView的item的view的类型
ExpandableLayoutListView: 实现了一个ListView,点击item会弹出一个下拉视图,在点击一次视图会收缩回去。
我们先来看ExpandableLayout.java的实现:
ExpandableLayout的实现
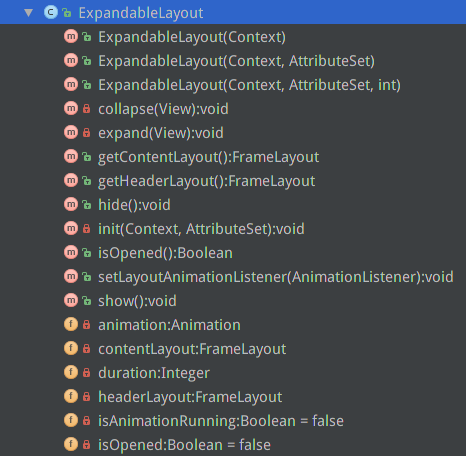
ExpandableLayout有几个重要的方法:
1.collapse(final View v):下拉视图消失
2.expand(final View v):展开下拉视图
3.getContentLayout():得到下拉视图
4.getHeaderLayout():得到item视图
5.hide():隐藏下拉视图,内部调用了collapse(final View v)函数
6.show():展开下拉视图,内部调用了expand(final View v)函数
好了,现在我们从构造函数来一步一步的看
构造函数:
  public ExpandableLayout(Context context)
    {
        super(context);
    }

    public ExpandableLayout(Context context, AttributeSet attrs)
    {
        super(context, attrs);
        init(context, attrs);
    }

    public ExpandableLayout(Context context, AttributeSet attrs, int defStyle)
    {
        super(context, attrs, defStyle);
        init(context, attrs);
    }
可以看到,在构造中,调用了init()方法,我们来看一下init做了什么
init()方法:
 private void init(final Context context, AttributeSet attrs)
    {
        final View rootView = View.inflate(context, R.layout.view_expandable, this);
        headerLayout = (FrameLayout) rootView.findViewById(R.id.view_expandable_headerlayout);
        final TypedArray typedArray = context.obtainStyledAttributes(attrs, R.styleable.ExpandableLayout);
        final int headerID = typedArray.getResourceId(R.styleable.ExpandableLayout_el_headerLayout, -1);
        final int contentID = typedArray.getResourceId(R.styleable.ExpandableLayout_el_contentLayout, -1);
        contentLayout = (FrameLayout) rootView.findViewById(R.id.view_expandable_contentLayout);

        if (headerID == -1 || contentID == -1)
            throw new IllegalArgumentException("HeaderLayout and ContentLayout cannot be null!");

        if (isInEditMode())
            return;

        duration = typedArray.getInt(R.styleable.ExpandableLayout_el_duration, getContext().getResources().getInteger(android.R.integer.config_shortAnimTime));
        final View headerView = View.inflate(context, headerID, null);
        headerView.setLayoutParams(new ViewGroup.LayoutParams(LayoutParams.MATCH_PARENT, LayoutParams.WRAP_CONTENT));
        headerLayout.addView(headerView);
        final View contentView = View.inflate(context, contentID, null);
        contentView.setLayoutParams(new ViewGroup.LayoutParams(LayoutParams.WRAP_CONTENT, LayoutParams.WRAP_CONTENT));
        contentLayout.addView(contentView);
        contentLayout.setVisibility(GONE);
        headerLayout.setOnClickListener(new OnClickListener()
        {
            @Override
            public void onClick(View v)
            {
                if (!isAnimationRunning)
                {
                    if (contentLayout.getVisibility() == VISIBLE)
                        collapse(contentLayout);
最低0.47元/天 解锁文章


 1678
1678


 被折叠的 条评论
为什么被折叠?
被折叠的 条评论
为什么被折叠?
 到【灌水乐园】发言


