原文:http://blog.csdn.net/jdsjlzx/article/details/49511215
Android新特性之CardView的简单使用
在上篇文章中,我们学习了RecyclerView的简单使用,这边文章我们学习下Android 5.0的另一个新增加的控件CardView。首先讲解写CardView的基本使用,然后在结合RecyclerView使用CardView进行填充写个小实例。
环境配置
一、在Eclipse的环境中配置同上篇文章,引入android.support.v7包进行使用。参照文章:RecyclerView的简单使用。
二、在Android Studio中进行使用,我们需要只需要在Gradle中添加CardView包的依赖即可进行使用。
- compile 'com.android.support:cardview-v7:21.0.+'
基本使用
CardView是一个新增加的UI控件,我们先在代码中定义一个CardView的变量,然后查看源码看看这是个什么玩意。话说Android Studio中查看源码特方便,比Eclipse强很多。源码先:
- public class CardView extends FrameLayout implements CardViewDelegate {
- ...
- }
从源码看,CardView继承FrameLayout,所以CardView是一个ViewGroup,我们可以在里面添加一些控件进行布局。既然CardView继承FrameLayout,而且Android中早已有了FrameLayout布局,为什么还有使用CardView这个布局控件呢?我们先来看看官网对此类的注释
A FrameLayoutwitha rounded corner background and shadow.
这个FrameLayout特殊点就是有rounded corner(圆角)和shadow(阴影),这个就是它的特殊之处,回首往日,我们需要自定义shape文件进行实现圆角和阴影的设计,现在google的大牛已经把它设计为CardView的属性供我们设置进行使用。下面我们看看CardView新增了哪些属性:
- CardView_cardBackgroundColor 设置背景色
- CardView_cardCornerRadius 设置圆角大小
- CardView_cardElevation 设置z轴阴影
- CardView_cardMaxElevation 设置z轴最大高度值
- CardView_cardUseCompatPadding 是否使用CompadPadding
- CardView_cardPreventCornerOverlap 是否使用PreventCornerOverlap
- CardView_contentPadding 内容的padding
- CardView_contentPaddingLeft 内容的左padding
- CardView_contentPaddingTop 内容的上padding
- CardView_contentPaddingRight 内容的右padding
- CardView_contentPaddingBottom 内容的底padding
card_view:cardUseCompatPadding 设置内边距,V21+的版本和之前的版本仍旧具有一样的计算方式
card_view:cardPreventConrerOverlap 在V20和之前的版本中添加内边距,这个属性为了防止内容和边角的重叠
下面开始简单的进行使用:
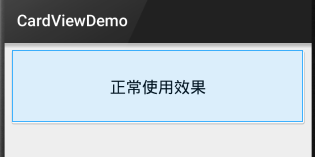
1、普通使用效果
- <android.support.v7.widget.CardView
- android:layout_width="match_parent"
- android:layout_height="wrap_content">
- <TextView
- android:layout_width="match_parent"
- android:layout_height="70dp"
- android:text="正常使用效果"
- android:gravity="center_horizontal|center_vertical"
- android:textColor="#000000"
- android:textSize="20sp"
- android:padding="10dp"
- android:layout_margin="10dp"/>
- </android.support.v7.widget.CardView>
效果图:
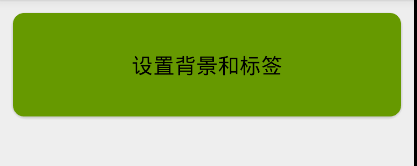
2、增加背景色和圆角的效果,注意我们此时使用background属性是没效果的:
- <android.support.v7.widget.CardView
- android:layout_width="match_parent"
- android:layout_height="wrap_content"
- app:cardBackgroundColor="#669900"
- app:cardCornerRadius="10dp">
- ...
- </android.support.v7.widget.CardView>
效果图:
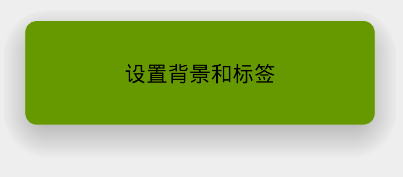
3、设置z轴阴影
<android.support.v7.widget.CardView
    android:layout_width="match_parent"
    android:layout_height="wrap_content"
    app:cardBackgroundColor="#669900"
    app:cardElevation="20dp"
    app:cardCornerRadius="10dp">
    ...
</android.support.v7.widget.CardView>
效果图:
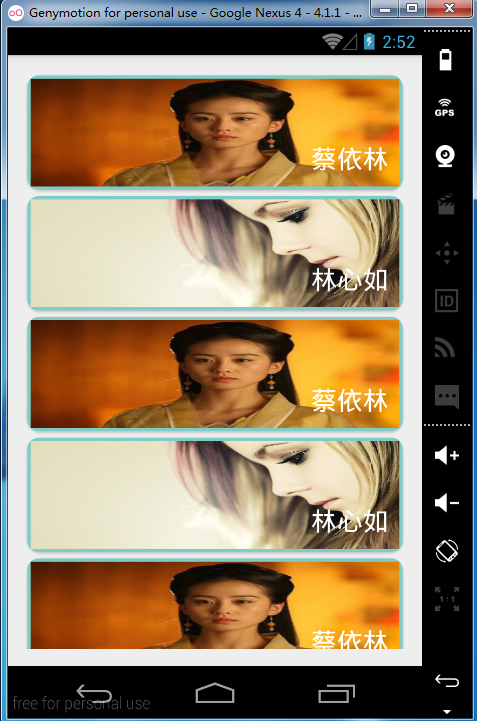
通过上面的演示,我们发现CardView的卡片布局效果很不错,如果用在ListView、RecyclerView中一定也有不错的效果,那么现在我们来使用下。
首先定义RecyclerView的item的布局:
- <android.support.v7.widget.CardView xmlns:android="http://schemas.android.com/apk/res/android"
- xmlns:app="http://schemas.android.com/apk/res-auto"
- app:cardBackgroundColor="#80cbc4"
- app:cardCornerRadius="10dp"
- app:cardPreventCornerOverlap="true"
- app:cardUseCompatPadding="true"
- android:layout_width="match_parent"
- android:layout_height="wrap_content">
- <RelativeLayout
- android:layout_width="match_parent"
- android:layout_height="100dp"
- android:padding="5dp">
- <ImageView
- android:id="@+id/picture"
- android:layout_width="match_parent"
- android:layout_height="match_parent"
- android:layout_centerInParent="true"
- android:scaleType="centerCrop" />
- <TextView
- android:clickable="true"
- android:id="@+id/name"
- android:layout_width="match_parent"
- android:layout_height="match_parent"
- android:layout_marginBottom="10dp"
- android:layout_marginRight="10dp"
- android:gravity="right|bottom"
- android:textColor="@android:color/white"
- android:textSize="24sp" />
- </RelativeLayout>
-
- </android.support.v7.widget.CardView>
然后定义一个交互的实体:
- package com.example.dsw.cardviewdemo;
-
- /**
- * Created by dsw on 2015/9/30.
- */
- public class ImageInfor {
- private String name;
- private int imageId;
-
- public ImageInfor(int imageId, String name) {
- this.imageId = imageId;
- this.name = name;
- }
-
- public int getImageId() {
- return imageId;
- }
-
- public void setImageId(int imageId) {
- this.imageId = imageId;
- }
-
- public String getName() {
- return name;
- }
-
- public void setName(String name) {
- this.name = name;
- }
- }
然后我们直接在MainActivity中进行处理。
- public class MainActivity extends Activity {
- private RecyclerView mRecyclerView;
- @Override
- protected void onCreate(Bundle savedInstanceState) {
- super.onCreate(savedInstanceState);
- setContentView(R.layout.activity_main);
- mRecyclerView = (RecyclerView) findViewById(R.id.recycler_view);
- List<ImageInfor> list = new ArrayList<>();
- list.add(new ImageInfor(R.mipmap.caiyilin, "蔡依林"));
- list.add(new ImageInfor(R.mipmap.ulinxinru, "林心如"));
- list.add(new ImageInfor(R.mipmap.caiyilin,"蔡依林"));
- list.add(new ImageInfor(R.mipmap.ulinxinru, "林心如"));
- list.add(new ImageInfor(R.mipmap.caiyilin,"蔡依林"));
- list.add(new ImageInfor(R.mipmap.ulinxinru, "林心如"));
-
-
- RecyclerView.LayoutManager manager = new LinearLayoutManager(this);
- mRecyclerView.setLayoutManager(manager);
- mRecyclerView.setItemAnimator(new DefaultItemAnimator());
- MyAdapter myAdapter = new MyAdapter(list);
- mRecyclerView.setAdapter(myAdapter);
- myAdapter.setOnItemClick(new OnItemClick(){
- @Override
- public void onItemClick(View view, int position) {
- Toast.makeText(getApplication(),"点击了:" + position,Toast.LENGTH_SHORT).show();
- }
- });
- }
-
- class MyAdapter extends RecyclerView.Adapter<MyAdapter.MyViewHolder>{
- private List<ImageInfor> list;
- public MyAdapter(List<ImageInfor> list){
- this.list = list;
- }
- @Override
- public MyViewHolder onCreateViewHolder(ViewGroup viewGroup, int i) {
- View view = LayoutInflater.from(viewGroup.getContext()).inflate(R.layout.carditem,viewGroup,false);
- return new MyViewHolder(view);
- }
-
- @Override
- public void onBindViewHolder(MyViewHolder myViewHolder, int i) {
- myViewHolder.iv_backgroud.setBackgroundResource(list.get(i).getImageId());
- myViewHolder.tv_title.setText(list.get(i).getName());
- final int position = i;
- myViewHolder.itemView.setOnClickListener(new View.OnClickListener() {
- @Override
- public void onClick(View view) {
- if(onItemClick != null){
- onItemClick.onItemClick(view,position);
- }
- }
- });
- }
-
- @Override
- public int getItemCount() {
- return list.size();
- }
-
- class MyViewHolder extends RecyclerView.ViewHolder {
- private ImageView iv_backgroud;
- private TextView tv_title;
- public MyViewHolder(View itemView) {
- super(itemView);
- iv_backgroud = (ImageView) itemView.findViewById(R.id.picture);
- tv_title = (TextView) itemView.findViewById(R.id.name);
- }
- }
-
- private OnItemClick onItemClick;
-
- public void setOnItemClick(OnItemClick onItemClick) {
- this.onItemClick = onItemClick;
- }
- }
- }
使用就是RecyclerView的简单使用中的讲解,我们只是把itemview换成cardview。直接看效果图吧!
源码下载地址 http://download.csdn.NET/detail/mr_dsw/9153845


 900
900


 被折叠的 条评论
为什么被折叠?
被折叠的 条评论
为什么被折叠?
 到【灌水乐园】发言


