


一. 引言
3.0以前,Android动画主要采用Tween Animation实现,在android3.0中又引入了一个新的动画系统:Property Animator(属性动画官方文档),二者相比,属性动画有以下优势:
- 属性动画对对象进行了扩展,可以对任意对象做动画,而不仅仅是View。它可以在指定的时间内完成一个对象从初始值到终值得改变。因此,相比较Tween动画而言,属性动画几乎无所不能了,它不仅可以改变透明度、位移、旋转角度,还可以实现背景颜色渐变、Y轴旋转角度等等,甚至也可以用在一些其他的有动态效果的场合中(如自定义组件的一些渐变效果),而这些扩展功能,Tween动画是难以做到的;
allows you to animate almost anything. You can define an animation to change any object property over time, regardless of whether it draws to the screen or not. A property animation changes a property’s (a field in an object) value over a specified length of time. To animate something, you specify the object property that you want to animate, such as an object’s position on the screen, how long you want to animate it for, and what values you want to animate between.
对View而言,Teen动画做的是“虚假”的改动,它改变的只是View绘制的参数,并没有改变一个View的真实属性。这样会造成这样一种现象:一个Button平移到一个位置,而真实的位置没有改变,点击移动后的Button,点击事件是无法响应的!因为真实的位置没有变,而属性动画就可以解决这个问题。
Another disadvantage of the view animation system is that it only modified where the View was drawn, and not the actual View itself. For instance, if you animated a button to move across the screen, the button draws correctly, but the actual location where you can click the button does not change, so you have to implement your own logic to handle this.
属性动画支持变化规律自定义,这样可以轻松实现一个动画的非线性效果,如加速度、阻尼衰减、指数衰减等等。
Evaluators tell the property animation system how to calculate values for a given property. They take the timing data that is provided by an Animator class, the animation’s start and end value, and calculate the animated values of the property based on this data.
引入(AnimatorSet)轻松支持组合动画,包括子动画的播放顺序(同时、顺序、延迟)。
Provides a mechanism to group animations together so that they run in relation to one another. You can set animations to play together, sequentially, or after a specified delay. See the section about Choreographing multiple animations with Animator Sets for more information.
二.入门API范例
- 对任意对象的属性做”动画”,注意这里的对象需要属性访问器(getter/setter方法)。
测试Model类:
public class Model {
    float x;

    public void setX(float x){
        this.x = x;
        Log.e("Model", "setX == "+x);
    }

    public float getX(){
        Log.e("Model", "getX == "+x);
        return x;
    }
}
ValueAnimator构建:
        Model model = new Model();
        ValueAnimator animator = ObjectAnimator.ofFloat(model, "x", 1, 10);
        animator.setDuration(1000);
        animator.setInterpolator(new OvershootInterpolator());
        animator.addUpdateListener(new ValueAnimator.AnimatorUpdateListener() {
            @Override
            public void onAnimationUpdate(ValueAnimator animation) {
                float x = (float) animation.getAnimatedValue("x");
                Log.e("Model", x+"");
            }
        });
核心代码有两个:
1> animator = ObjectAnimator.ofFloat(model, “x”, 1, 10),这里的model为动画绑定的对象;”x”为属性名称,注意这里的属性名称必须与Model类的成员变量名保持一致;1和10分别为初始值和最终值。
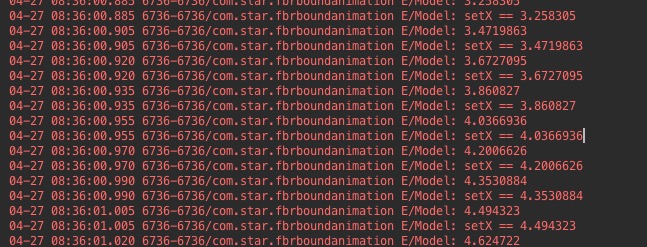
2>.animator.addUpdateListener方法为动画设置监听,在回调方法里面可以拿到当前的属性值,在这里就可以做很多事情了!比如可以改变View的背景色、透明度、缩放比等等,实现动画效果。下面是log输出:
2.ObjectAnimator及PropertyValuesHolder的使用。
最简单的单属性动画代码:
ObjectAnimator anim = ObjectAnimator.ofFloat(view, "alpha", 0f, 1f);
anim.setDuration(1000);
anim.start();
这段代码是对view对象做透明度变化的动画。那么如果一个View的多种属性需要同时变化 该怎么做呢,这就需要对象属性持有类—PropertyValuesHolder,先看看它的描述:

它在动画播放过程中持有了变化的属性,最重要的是最后一句话:它使属性动画支持多种属性并行变化!先看看单个属性变化,下面是项目中的一个Z轴旋转动画的工具方法:
    /**
     *Z轴旋转动画
     * @param view 做动画的View
     * @param repeatCount 重复次数
     * @param duration 时间
     * @param listener 动画监听
     * @param angles 角度变化
     */
    public static void startRotationZAnim(View view, int repeatCount, int duration, Animator.AnimatorListener listener,float... angles) {
        PropertyValuesHolder phRotation = PropertyValuesHolder.ofFloat("rotation",angles);
        ObjectAnimator animator = ObjectAnimator.ofPropertyValuesHolder(view, phRotation);
        animator.setRepeatCount(repeatCount);
        if(listener != null){
            animator.addListener(listener);
        }
        animator.setDuration(duration).start();
    }
可以看到PropertyValuesHolder.ofFloat方法支可变参数列表,这是什么意思呢?通过测试发现,可变参数values确定了一组指定时刻的属性值,比如代码中的angels为 [0,20f],那么在事件duration内的初始值和终值为0何20度,如果中间插了一个15呢?就是在动画的前半段,角度由0变化到15度,后半段由15度变化到20。至于更多属性值的情况依次类推。由此可见,在时间维度上PropertyValuesHolder可以确定关键时间点的值,这样的好处是什么呢?举个例子:忽大忽小心跳动画,用PropertyValuesHolder就很方便实现,scales可以设置从数值波动的数组(eg:[1.0f, 1.2f,1.0f,0.8f])。
那么如何实现多熟悉的并发动画呢?也很简单,下面的代码实现了view的垂直位移、缩放和透明度的并行动画。当然每个PropertyValuesHolder,你也可以设置多个可变参数,实现更动感的动画效果。
public static void startStarAnimator(View view, int duration, boolean isShow ,Animator.AnimatorListener listener){
        PropertyValuesHolder phTranslationY = null;
        PropertyValuesHolder phAlpha = null;
        PropertyValuesHolder phScaleX = null;
        PropertyValuesHolder phScaleY = null;
        if(isShow){
            phTranslationY = PropertyValuesHolder.ofFloat("translationY",-view.getMeasuredHeight()*1.6f, 0);
            phAlpha = PropertyValuesHolder.ofFloat("alpha",0.2f,1.0f);
            phScaleX = PropertyValuesHolder.ofFloat("scaleX", 1.2f, 1.0f);
            phScaleY = PropertyValuesHolder.ofFloat("scaleY",1.2f,1.0f);
        }else{
            phTranslationY = PropertyValuesHolder.ofFloat("translationY", 0, -view.getMeasuredHeight()*1.6f);
            phAlpha = PropertyValuesHolder.ofFloat("alpha",1.0f,0f);
            phScaleX = PropertyValuesHolder.ofFloat("scaleX",1.0f,1.2f);
            phScaleY = PropertyValuesHolder.ofFloat("scaleY",1.0f,1.2f);
        }

        ObjectAnimator animator = ObjectAnimator.ofPropertyValuesHolder(view, phTranslationY, phAlpha, phScaleX,phScaleY);
        if(listener != null){
            animator.addListener(listener);
        }
        animator.setDuration(duration).start();
    }
3.组合动画神器:AnimatorSet。很多情况下,动画元素的播放有前后依赖关系,假如采用Tween动画,需要设置很多的动画监听器,代码显得很臃肿,而AnimatorSet就像一个导演,通过它你可以制定动画的播放规则。废话不多说,先看看官网上的入门代码:
AnimatorSet bouncer = new AnimatorSet();
bouncer.play(bounceAnim).before(squashAnim1);
bouncer.play(squashAnim1).with(squashAnim2);
bouncer.play(squashAnim1).with(stretchAnim1);
bouncer.play(squashAnim1).with(stretchAnim2);
bouncer.play(bounceBackAnim).after(stretchAnim2);
ValueAnimator fadeAnim = ObjectAnimator.ofFloat(newBall, "alpha", 1f, 0f);
fadeAnim.setDuration(250);
AnimatorSet animatorSet = new AnimatorSet();
animatorSet.play(bouncer).before(fadeAnim);
animatorSet.start();
这里的动画规则:
1) 先播放bounceAnim;
2) 然后是squashAnim1、squashAnim2、stretchAnim1、stretchAnim2同时播放;
3) 播放bounceBackAnim;
4) 最后播放fadeAnim.
关于组合动画的使用,后面会有典型例子给大家参考。
三.属性动画实现组合动画
前面已经介绍了AnimatorSet的基本使用方法,这一小节我们继续深入学习一下如何通过它实现组合动画。现在要实现一个类似Path的动画,点击一个菜单按钮,按钮旋转,同时子菜单依照各自的方向弹射出来,平移过程中伴随着透明度变化和缩放效果。下面直接上代码。
/**
     * path展开动画
     */
    public void startMenuExpandAnimators(){
        //Menu入口的旋转动画配置
        PropertyValuesHolder phRotation = PropertyValuesHolder.ofFloat("rotation", 0, 225);
        ObjectAnimator rotationAnimator = ObjectAnimator.ofPropertyValuesHolder(mMenuToggleView, phRotation);
        //子Menu的透明度、缩放的变化
        PropertyValuesHolder phAlpha = PropertyValuesHolder.ofFloat("alpha", 0.2f, 1.0f);
        PropertyValuesHolder phScaleX = PropertyValuesHolder.ofFloat("scaleX", 0.8f, 1.0f);
        PropertyValuesHolder phScaleY = PropertyValuesHolder.ofFloat("scaleY", 0.8f, 1.0f);

        //Menu1的平移,方向右下45度
        PropertyValuesHolder phTransationX1 = PropertyValuesHolder.ofFloat("translationX", 0, 200);
        PropertyValuesHolder phTransationY1 = PropertyValuesHolder.ofFloat("translationY", 0, 200);
        ObjectAnimator transtionAnimator1 = ObjectAnimator.ofPropertyValuesHolder(mMenuView1, phTransationX1, phTransationY1,phAlpha,phScaleX,phScaleY);

        //Menu2的平移,方向水平向右
        PropertyValuesHolder phTransationX2 = PropertyValuesHolder.ofFloat("translationX", 0, 200);
        PropertyValuesHolder phTransationY2 = PropertyValuesHolder.ofFloat("translationY", 0, 0);
        ObjectAnimator transtionAnimator2 = ObjectAnimator.ofPropertyValuesHolder(mMenuView2, phTransationX2, phTransationY2,phAlpha,phScaleX,phScaleY);

        //Menu3的平移,方向水平向垂直向下
        PropertyValuesHolder phTransationX3 = PropertyValuesHolder.ofFloat("translationX", 0, 0);
        PropertyValuesHolder phTransationY3 = PropertyValuesHolder.ofFloat("translationY", 0, 200);
        ObjectAnimator transtionAnimator3 = ObjectAnimator.ofPropertyValuesHolder(mMenuView3, phTransationX3, phTransationY3,phAlpha,phScaleX,phScaleY);
        //动画导演类
        AnimatorSet animators = new AnimatorSet();
        animators.playTogether(rotationAnimator, transtionAnimator1, transtionAnimator2, transtionAnimator3);
        animators.setDuration(500);
        //监听
        animators.addListener(new AnimatorListenerAdapter() {
            @Override
            public void onAnimationEnd(Animator animation) {
                mIsExpand = true;
            }
        });
        animators.start();
    }
这里需要注意的是:角度的范围是0-360,正方向为顺时针;AnimatorListenerAdapter为接口AnimatorListener的空实现类。这段代码的位移变化没有引入角度的参量,也没有考虑可扩展性(如MenuItem的动态添加,各个Item位移角度的动态调整),这里仅做读者参考使用。反过来,menu的收缩动画实现就自然水到渠成,只需把各个属性变化反转就行了。
四.自定义估值器
想让一个View做抛物线、自由落体、阻尼振动动画吗?估值器(TypeEvaluator)帮你实现人生理想,走上人生巅峰。下面看看官方对估值器的说明吧:
If you want to animate a type that is unknown to the Android system, you can create your own evaluator by implementing the TypeEvaluator interface. The types that are known by the Android system are int, float, or a color, which are supported by the IntEvaluator, FloatEvaluator, and ArgbEvaluator type evaluators.There is only one method to implement in the TypeEvaluator interface, the evaluate() method. This allows the animator that you are using to return an appropriate value for your animated property at the current point of the animation.
可以得知,实现自定义估值器只需实现一个evaluate方法,这个方法返回当前时间点的属性值。下面是一个线性估值器的实现:
public class FloatEvaluator implements TypeEvaluator {
    public Object evaluate(float fraction, Object startValue, Object endValue) {
        float startFloat = ((Number) startValue).floatValue();
        return startFloat + fraction * (((Number) endValue).floatValue() - startFloat);
    }
}
fraction为时间流逝占比(范围[0,1]),估值函数为y(t) = a + t(b-a),其中b为endValue, a为startValue, t为时间流逝比例(下同)。
1.加速度估值器。下面是加速度变化的估值函数:y(t) = a + t*t*(b - a),具体实现代码:
/**
 * 加速度估值器
 */
public class ParabolaTypeEvaluator implements TypeEvaluator {
    @Override
    public Object evaluate(float fraction, Object startValue, Object endValue) {
        float evaluate = (float)startValue+fraction*fraction*(((float) endValue - (float)startValue));
        Log.e("Model", "估值器"+evaluate);
        return evaluate;
    }
}
结合前面的Model虚拟动画,这里的估值器用法如下:
    Model model = new Model();
    animator = ObjectAnimator.ofFloat(model, "x", 0, 200);
    animator.setDuration(1000);
    animator.setEvaluator(new ParabolaTypeEvaluator());
    animator.addUpdateListener(new ValueAnimator.AnimatorUpdateListener() {
            @Override
            public void onAnimationUpdate(ValueAnimator animation) {
                float x = (float) animation.getAnimatedValue("x");
                Log.e("Model", x+"");
               findViewById(R.id.img).setTranslationX(x);
            }
        });
这里通过估值器和AnimatorUpdateListener就把Mode的虚拟动画反映到View动画上了。估值器的估值规律就规定了View的运动轨迹。
2.模拟阻尼振动的估值器。那么要实现简谐振动(或者阻尼振动)的动画,怎么做呢?关键还是估值函数的确定。正弦波动函数:y(t) = amp(t)*sin(2*PI*theta(t));amp(t)为振幅,theta(t)为弧度。下面是一个简单的振幅衰减的正弦振动估值器:
/**
 * 正弦衰减波动估值器
 */
public class SinTypeEvaluator implements TypeEvaluator {
    @Override
    public Object evaluate(float fraction, Object startValue, Object endValue) {
        double angel = (float) (5*Math.PI*fraction);//角度*周期
        double amp = (float)(endValue)/2;//简单模拟线性衰减,实际过程为指数衰减,代码的衰减函数通过模拟指数函数的傅里叶形式实现
        amp = amp*(1 -fraction);
        return amp*Math.sin(angel);
    }
}
此估值器可以实现振幅衰减的振动动画。这里只是对振幅做简单线性衰减,实际上的阻尼振动是指数衰减的,具体的实现需要通过模拟指数函数的傅里叶形式实现。可以看到,自定义估值器的最大好处是定制性强,我的地盘听我的。


 505
505


 被折叠的 条评论
为什么被折叠?
被折叠的 条评论
为什么被折叠?
 到【灌水乐园】发言


