


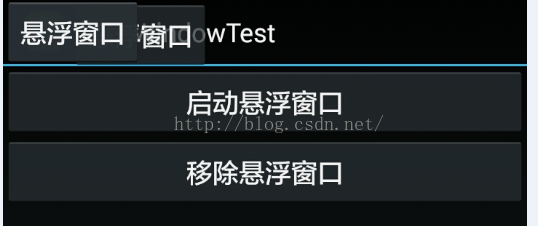
main.xml
<?xml version="1.0" encoding="utf-8"?>
<LinearLayout xmlns:android="http://schemas.android.com/apk/res/android"
    android:layout_width="fill_parent"
    android:layout_height="fill_parent"
    android:orientation="vertical" >

    <Button
        android:id="@+id/start"
        android:layout_width="fill_parent"
        android:layout_height="wrap_content"
        android:text="@string/start"/>
    <Button
        android:id="@+id/stop"
        android:layout_width="fill_parent"
        android:layout_height="wrap_content"
        android:text="@string/stop"/>

</LinearLayout>
float_layout.xml
<?xml version="1.0" encoding="utf-8"?>
<LinearLayout xmlns:android="http://schemas.android.com/apk/res/android"
    android:layout_width="100dip"
    android:layout_height="100dip"
    android:orientation="vertical" >


    <Button
        android:id="@+id/float_id"
        android:layout_width="wrap_content"
        android:layout_height="wrap_content"
        android:text="@string/floating"/>
</LinearLayout>
result.xml(点击悬浮窗,进入到的界面)
<?xml version="1.0" encoding="utf-8"?>
<LinearLayout xmlns:android="http://schemas.android.com/apk/res/android"
    android:layout_width="match_parent"
    android:layout_height="match_parent" >


    <ImageView
        android:layout_width="wrap_content"
        android:layout_height="wrap_content"
        android:src="@drawable/ic_launcher"/>
</LinearLayout>
package com.phicomm.hu;

import android.app.Activity;
import android.content.Context;
import android.content.Intent;
import android.graphics.PixelFormat;
import android.os.Bundle;
import android.util.Log;
import android.view.Gravity;
import android.view.LayoutInflater;
import android.view.MotionEvent;
import android.view.View;
import android.view.WindowManager;
import android.view.View.OnClickListener;
import android.view.View.OnTouchListener;
import android.view.WindowManager.LayoutParams;
import android.widget.Button;
import android.widget.LinearLayout;

public class FloatWindowTest extends Activity {

	private static final String TAG = "FloatWindowTest";

	@Override
	public void onCreate(Bundle savedInstanceState) {
		super.onCreate(savedInstanceState);
		setContentView(R.layout.main);
		// 移动、移除悬浮窗
		Button start = (Button) findViewById(R.id.start);
		Button stop = (Button) findViewById(R.id.stop);
		/**
		 * 启动
		 */
		start.setOnClickListener(new OnClickListener() {
			@Override
			public void onClick(View v) {
				createFloatView();
			}
		});
		/**
		 * 移除
		 */
		stop.setOnClickListener(new OnClickListener() {
			@Override
			public void onClick(View v) {
				if (mFloatLayout != null) {
					mWindowManager.removeView(mFloatLayout);
					finish();
				}
			}
		});

	}

	/**
	 * 启动悬浮窗
	 */
	WindowManager mWindowManager;
	WindowManager.LayoutParams wmParams;

	// 悬浮窗布局
	LinearLayout mFloatLayout;
	// 悬浮窗的button
	Button mFloatView;

	private void createFloatView() {
		// 获取LayoutParams对象
		wmParams = new WindowManager.LayoutParams();

		// 获取的是LocalWindowManager对象
		mWindowManager = this.getWindowManager();
		// 设置window type
		wmParams.type = LayoutParams.TYPE_PHONE;
		// 设置图片格式,效果为背景透明
		wmParams.format = PixelFormat.RGBA_8888;
		// 该浮动窗不会获得焦点,但可以获得拖动
		wmParams.flags = LayoutParams.FLAG_NOT_FOCUSABLE;
		// 初始化在屏幕的左上角
		wmParams.gravity = Gravity.LEFT | Gravity.TOP;

		// 以屏幕左上角为原点,设置x、y初始值
		wmParams.x = 0;
		wmParams.y = 0;
		// 设置悬浮窗的长得宽
		wmParams.width = WindowManager.LayoutParams.WRAP_CONTENT;
		wmParams.height = WindowManager.LayoutParams.WRAP_CONTENT;

		LayoutInflater inflater = this.getLayoutInflater();
		// 悬浮窗展现的布局
		mFloatLayout = (LinearLayout) inflater.inflate(R.layout.float_layout,
				null);
		/**
		 * view The view to be added to this window. params The LayoutParams to
		 * assign to view.
		 */
		mWindowManager.addView(mFloatLayout, wmParams);
		mFloatView = (Button) mFloatLayout.findViewById(R.id.float_id);

		/**
		 * 绑定触摸移动监听
		 */
		mFloatView.setOnTouchListener(new OnTouchListener() {

			@Override
			public boolean onTouch(View v, MotionEvent event) {
				wmParams.x = (int) event.getRawX() - mFloatLayout.getWidth()
						/ 2;
				// 25为状态栏高度
				wmParams.y = (int) event.getRawY() - mFloatLayout.getHeight()
						/ 2 - 40;
				mWindowManager.updateViewLayout(mFloatLayout, wmParams);
				return false;
			}
		});

		// 绑定点击监听
		mFloatView.setOnClickListener(new OnClickListener() {

			@Override
			public void onClick(View v) {
				// TODO Auto-generated method stub
				Intent intent = new Intent(FloatWindowTest.this,
						ResultActivity.class);
				startActivity(intent);
			}
		});

	}
}
ResultActivity(点击悬浮窗跳转到的界面)
package com.phicomm.hu;

import android.app.Activity;
import android.os.Bundle;

public class ResultActivity extends Activity {

	@Override
	protected void onCreate(Bundle savedInstanceState) {
		super.onCreate(savedInstanceState);
		setContentView(R.layout.result);
	}

}
main.xml
<?xml version="1.0" encoding="utf-8"?>
<LinearLayout xmlns:android="http://schemas.android.com/apk/res/android"
    android:layout_width="fill_parent"
    android:layout_height="fill_parent"
    android:orientation="vertical" >

    <Button
        android:id="@+id/start_id"
        android:layout_width="wrap_content"
        android:layout_height="wrap_content"
        android:text="@string/btn"/>
    <Button
        android:id="@+id/remove_id"
        android:layout_width="wrap_content"
        android:layout_height="wrap_content"
        android:text="@string/stop"
        />
</LinearLayout>
float_layout.xml
<?xml version="1.0" encoding="utf-8"?>
<LinearLayout xmlns:android="http://schemas.android.com/apk/res/android"
    android:layout_width="wrap_content"
    android:layout_height="wrap_content"
    android:orientation="vertical" >

    <Button
        android:id="@+id/float_id"
        android:layout_width="wrap_content"
        android:layout_height="wrap_content"
        android:text="@string/floating"/>

</LinearLayout>
MainActivity
package com.phicomm.hu;

import java.lang.reflect.Method;

import android.app.Activity;
import android.app.ActivityManager;
import android.app.Application;
import android.content.Context;
import android.content.Intent;
import android.net.Uri;
import android.os.Bundle;
import android.view.View;
import android.view.WindowManager;
import android.view.View.OnClickListener;
import android.widget.Button;
import android.widget.LinearLayout;

public class MainActivity extends Activity {
	// 创建浮动窗口设置布局参数的对象

	@Override
	public void onCreate(Bundle savedInstanceState) {
		super.onCreate(savedInstanceState);
		setContentView(R.layout.main);
		//创建移除悬浮框
		Button start = (Button) findViewById(R.id.start_id);
		Button remove = (Button) findViewById(R.id.remove_id);
		/**
		 * 创建悬浮框
		 */
		start.setOnClickListener(new OnClickListener() {
			@Override
			public void onClick(View v) {
				Intent intent = new Intent(MainActivity.this, FxService.class);
				startService(intent);
				finish();
			}
		});
		/**
		 * 移除悬浮框
		 */
		remove.setOnClickListener(new OnClickListener() {

			@Override
			public void onClick(View v) {
				Intent intent = new Intent(MainActivity.this, FxService.class);
				stopService(intent);
			}
		});

	}


}
FxService
package com.phicomm.hu;

import android.app.Service;
import android.content.Intent;
import android.graphics.PixelFormat;
import android.os.Handler;
import android.os.IBinder;
import android.util.Log;
import android.view.Gravity;
import android.view.LayoutInflater;
import android.view.MotionEvent;
import android.view.View;
import android.view.WindowManager;
import android.view.View.OnClickListener;
import android.view.View.OnTouchListener;
import android.view.WindowManager.LayoutParams;
import android.widget.Button;
import android.widget.LinearLayout;
import android.widget.Toast;

public class FxService extends Service {

	// 定义浮动窗口布局
	LinearLayout mFloatLayout;
	WindowManager.LayoutParams wmParams;
	// 创建浮动窗口设置布局参数的对象
	WindowManager mWindowManager;
	//悬浮窗布局的按钮
	Button mFloatView;

	@Override
	public void onCreate() {
		super.onCreate();
		createFloatView();
	}

	@Override
	public IBinder onBind(Intent intent) {
		return null;
	}

	/**
	 * 创建悬浮框
	 */
	private void createFloatView() {
		wmParams = new WindowManager.LayoutParams();
		// 获取WindowManagerImpl.CompatModeWrapper
		mWindowManager = (WindowManager) getApplication().getSystemService(
				getApplication().WINDOW_SERVICE);
		// 设置window type
		wmParams.type = LayoutParams.TYPE_PHONE;
		// 设置图片格式,效果为背景透明
		wmParams.format = PixelFormat.RGBA_8888;
		// 设置浮动窗口不可聚焦(实现操作除浮动窗口外的其他可见窗口的操作)
		wmParams.flags =
		LayoutParams.FLAG_NOT_FOCUSABLE;

		// 调整悬浮窗显示的停靠位置为左侧置顶
		wmParams.gravity = Gravity.LEFT | Gravity.TOP;

		// 以屏幕左上角为原点,设置x、y初始值
		wmParams.x = 0;
		wmParams.y = 0;

		// 设置悬浮窗口长宽数据
		wmParams.width = WindowManager.LayoutParams.WRAP_CONTENT;
		wmParams.height = WindowManager.LayoutParams.WRAP_CONTENT;

		LayoutInflater inflater = LayoutInflater.from(getApplication());
		// 获取浮动窗口视图所在布局
		mFloatLayout = (LinearLayout) inflater.inflate(R.layout.float_layout,
				null);
		// 添加mFloatLayout
		mWindowManager.addView(mFloatLayout, wmParams);

		// 浮动窗口按钮
		mFloatView = (Button) mFloatLayout.findViewById(R.id.float_id);

		mFloatLayout.measure(View.MeasureSpec.makeMeasureSpec(0,
				View.MeasureSpec.UNSPECIFIED), View.MeasureSpec
				.makeMeasureSpec(0, View.MeasureSpec.UNSPECIFIED));
		// 设置监听浮动窗口的触摸移动
		mFloatView.setOnTouchListener(new OnTouchListener() {

			@Override
			public boolean onTouch(View v, MotionEvent event) {
				// getRawX是触摸位置相对于屏幕的坐标,getX是相对于按钮的坐标
				wmParams.x = (int) event.getRawX()
						- mFloatView.getMeasuredWidth() / 2;
				// 25为状态栏的高度
				wmParams.y = (int) event.getRawY()
						- mFloatView.getMeasuredHeight() / 2 - 25;
				// 刷新
				mWindowManager.updateViewLayout(mFloatLayout, wmParams);
				return false;
			}
		});

		mFloatView.setOnClickListener(new OnClickListener() {

			@Override
			public void onClick(View v) {
				Toast.makeText(FxService.this, "onClick", Toast.LENGTH_SHORT)
						.show();
			}
		});
	}

	@Override
	public void onDestroy() {
		super.onDestroy();
		if (mFloatLayout != null) {
			mWindowManager.removeView(mFloatLayout);
		}
	}

}


 1291
1291

 被折叠的 条评论
为什么被折叠?
被折叠的 条评论
为什么被折叠?
 到【灌水乐园】发言


