


我们知道JSON数据格式被广泛使用在很多的应用中,它可以帮我们保存我们应用的设置数据等。在QML中的ListView或GridView中,我们使用ListModel来显示它里面的数据。这个数据可以来源于xml或JSON。在ListView或GridView中,我们也可以动态修改ListModel中的数据。那么我们将如何保存这个数据呢?本篇文章也同样适用于xml格式的保存。这个练习就留个开发者自己了。当然保存ListModel中的数据也可以使用到SQLite数据库。这个因人而已!
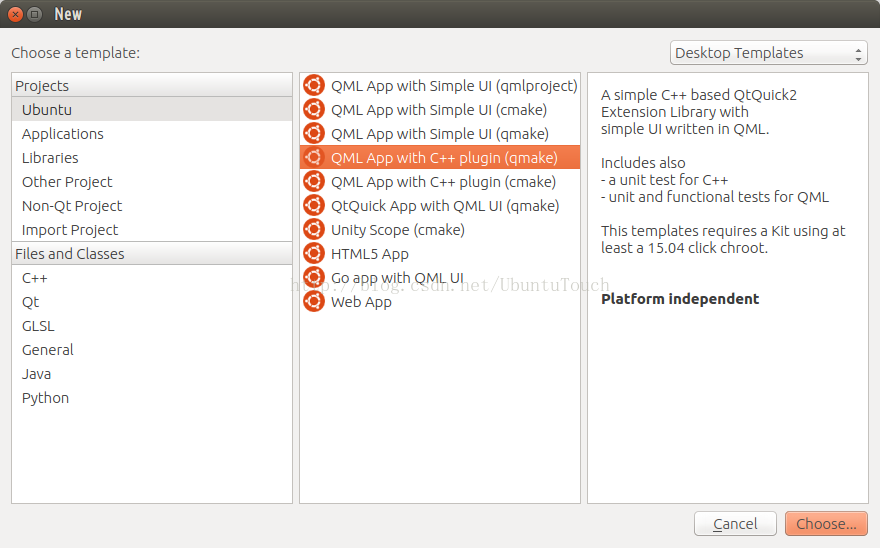
为了方便我们的设计,我们使用了Ubuntu SDK中提供的“QML App with C++ plugin (qmake)”。这个项目的模版只适用于15.04及以上的target(在14.10中不被支持)。
在plugin中,我们设计了如下的fileio.cpp文件:
fileio.cpp
#include <QStandardPaths>
#include "fileio.h"

FileIO::FileIO(QObject *parent) : QObject(parent)
{
}

FileIO::~FileIO()
{
}

void FileIO::read()
{
    if(m_path.isEmpty()) {
        return;
    }

//    QFile file(m_path.toLocalFile());
    QFile file(m_path.path());

    if(!file.exists()) {
        qWarning() << "Does not exits: " << m_path.toLocalFile();
        return;
    }
    if(file.open(QIODevice::ReadOnly)) {
        QTextStream stream(&file);
        m_text = stream.readAll();
        emit textChanged(m_text);
        qDebug() << "Text has been successfully read!";
    }
}

void FileIO::write()
{
    if(m_source.isEmpty()) {
        return;
    }

    qDebug() << "filename: " << m_path.fileName();
    qDebug() << "path: " << m_path.path();

    QFile file(m_path.path());
    qDebug() << "File path: " << file.fileName();

    if(file.open(QIODevice::WriteOnly)) {
        QTextStream stream(&file);
        stream << m_text;
        qDebug() << "Successfully write to file";
    } else {
        qWarning() << "Failed to write to the file: " << m_path;
    }
}

QString FileIO::source() const
{
    return m_source;
}

QString FileIO::text()
{
    qDebug() << "Going to read the text";
    read();
    return m_text;
}

void FileIO::setSource(QString source)
{
    if (m_source == source)
        return;

    m_source = source;
    emit sourceChanged(source);

    // at the same time update the path
    m_path = QUrl(getFilePath(source));
}

void FileIO::setText(QString text)
{
    if (m_text == text)
        return;

    m_text = text;
    write();
    emit textChanged(text);
}

QString FileIO::getFilePath(const QString filename) const
{
//    QString APP_ID = getenv("APP_ID");
//    QString app_pkgname = APP_ID.split('_')[0];
//    QString path = getenv("XDG_DATA_HOME") +
//            "/" + app_pkgname + "/" + filename;
//    qDebug() << "path: " << path;
//    return path;

    QString writablePath = QStandardPaths::
            writableLocation(QStandardPaths::DataLocation);
    qDebug() << "writablePath: " << writablePath;

    QString absolutePath = QDir(writablePath).absolutePath();
    qDebug() << "absoluePath: " << absolutePath;

    // We need to make sure we have the path for storage
    QDir dir(absolutePath);
    if ( dir.mkdir(absolutePath) ) {
        qDebug() << "Successfully created the path!";
    }

    QString path = absolutePath + "/" + filename;

    qDebug() << "path: " << path;

    return path;
}
在这里特别值得指出的是,由于Ubuntu应用的security,每个应用只有自己的独特的目录可以访问。在这个文件中,我们使用了Qt API QStandardPaths来获得应用的私有目录来访问。在以前的文章“ 如何使用Ubuntu手机平台中的照相机API来存储照片”中,我们也曾尝试使用环境变量的方法来获取这个目录,但是这些环境变量在电脑Desktop的环境中没有设置。
我们的主程序Main.qml也非常简单:
Main.qml
import QtQuick 2.4
import Ubuntu.Components 1.2
import Savejson 1.0
import "savedata.js" as Data

/*!
    \brief MainView with a Label and Button elements.
*/

MainView {
    // objectName for functional testing purposes (autopilot-qt5)
    objectName: "mainView"

    // Note! applicationName needs to match the "name" field of the click manifest
    applicationName: "savejson.liu-xiao-guo"

    /*
     This property enables the application to change orientation
     when the device is rotated. The default is false.
    */
    //automaticOrientation: true

    width: units.gu(60)
    height: units.gu(85)

    Page {
        id: mainPage
        title: i18n.tr("savejson")
        property string path: ""

        FileIO {
            id: fileio
            source: "sample.json"
        }

        // The model:
        ListModel {
            id: fruitModel

            objectName: "fruitModel"

            ListElement {
                name: "Apple"; cost: 2.45
                image: "pics/apple.jpg"
                description: "Deciduous"
            }
            ListElement {
                name: "Banana"; cost: 1.95
                image: "pics/banana.jpg"
                description: "Seedless"
            }
            ListElement {
                name: "Cumquat"; cost: 3.25
                image: "pics/cumquat.jpg"
                description: "Citrus"
            }
            ListElement {
                name: "Durian"; cost: 9.95
                image: "pics/durian.jpg"
                description: "Tropical Smelly"
            }
        }

        Component {
            id: listDelegate

            ListItem {
                id: delegateItem
                width: listView.width; height: units.gu(10)
                onPressAndHold: ListView.view.ViewItems.dragMode =
                                !ListView.view.ViewItems.dragMode

                Image {
                    id: pic
                    height: parent.height - units.gu(1)
                    width: height
                    anchors.verticalCenter: parent.verticalCenter
                    anchors.left: parent.left
                    anchors.leftMargin: units.gu(0.5)
                    source: image
                }

                Column {
                    id: content
                    anchors.top: parent.top
                    anchors.left: pic.right
                    anchors.leftMargin: units.gu(2)
                    anchors.topMargin: units.gu(1)
                    width: parent.width - pic.width - units.gu(1)
                    height: parent.height
                    spacing: units.gu(1)

                    Label {
                        text: name
                    }

                    Label { text: description }

                    Label {
                        text: '$' + Number(cost).toFixed(2)
                        font.bold: true
                    }
                }


                trailingActions: ListItemActions {
                    actions: [
                        Action {
                            iconName: "add"

                            onTriggered: {
                                console.log("add is triggered!");
                                fruitModel.setProperty(index, "cost", cost + 0.25);
                            }
                        },
                        Action {
                            iconName: "remove"

                            onTriggered: {
                                console.log("remove is triggered!");
                                fruitModel.setProperty(index, "cost", Math.max(0,cost-0.25));
                            }
                        },
                        Action {
                            iconName: "delete"

                            onTriggered: {
                                console.log("delete is triggered!");
                                fruitModel.remove(index)
                            }
                        }
                    ]
                }

                color: dragMode ? "lightblue" : "lightgray"

                ListView.onAdd: SequentialAnimation {
                    PropertyAction { target: delegateItem; property: "height"; value: 0 }
                    NumberAnimation { target: delegateItem; property: "height"; to: delegateItem.height; duration: 250; easing.type: Easing.InOutQuad }
                }

                ListView.onRemove: SequentialAnimation {
                    PropertyAction { target: delegateItem; property: "ListView.delayRemove"; value: true }
                    NumberAnimation { target: delegateItem; property: "height"; to: 0; duration: 250; easing.type: Easing.InOutQuad }

                    // Make sure delayRemove is set back to false so that the item can be destroyed
                    PropertyAction { target: delegateItem; property: "ListView.delayRemove"; value: false }
                }
            }

        }

        ListView {
            id: listView
            anchors.fill: parent
            anchors.margins: 20
            model: fruitModel
            delegate: listDelegate

            ViewItems.onDragUpdated: {
                if (event.status === ListItemDrag.Moving) {
                    model.move(event.from, event.to, 1);
                }
            }
            moveDisplaced: Transition {
                UbuntuNumberAnimation {
                    property: "y"
                }
            }
        }

        Row {
            anchors.bottom: parent.bottom
            anchors.horizontalCenter: parent.horizontalCenter
            anchors.bottomMargin: units.gu(1)
            spacing: units.gu(1)

            Button {
                id: save
                text: "Save JSON"

                onClicked: {
                    console.log("Going to save data!")
                    var data = fruitModel;
                    console.log("model data: " + JSON.stringify(fruitModel, null, 4));

                    var res = Data.serialize(data);
                    console.log("res: " + res);
                    fileio.text = res;
                }
            }

            Button {
                id: load
                text: "Load JSON"

                onClicked: {
                    var json = JSON.parse(fileio.text);
                    console.log("count: " + json.fruits.length);

                    fruitModel.clear();
                    var count = json.fruits.length;
                    for (var i in json.fruits) {
                        var fruit = json.fruits[ i ];
                        console.log("name: " + fruit.name);
                        console.log("image: " + fruit.image );
                        console.log("description: " + fruit.description);
                        console.log("cost: " + fruit.cost);
                        fruitModel.append( fruit );
                    }

                }
            }

        }
    }
}
运行我们的应用,我们的界面如下:

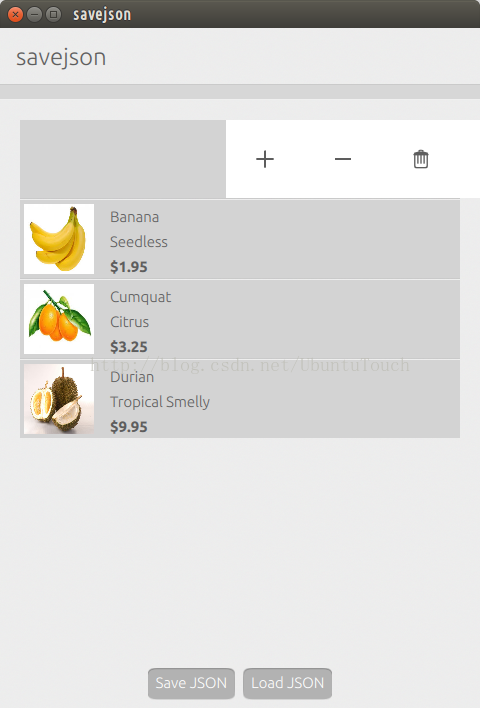
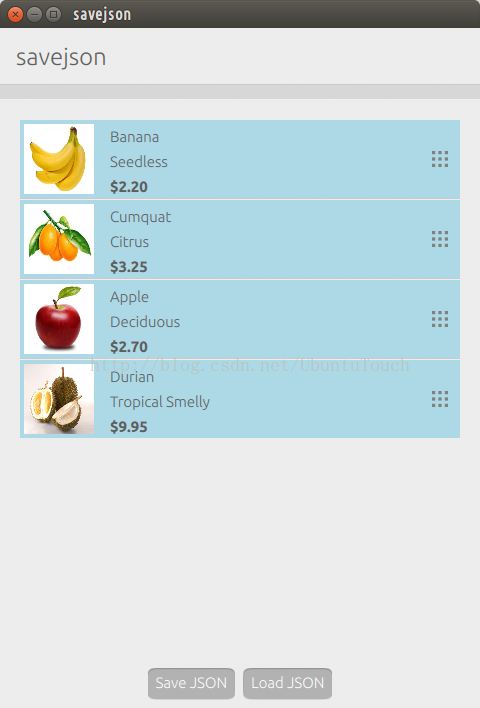
我们创建了一个ListView列表。在列表中,我们可以通过“+”及“-”来修改水果的价钱,我们也可以删除一个水果。当然,我们也可以长按列表并移动列表中的项来重新排序我们的水果顺序。
最重要的是,我们可以通过FileIO来存储或读取我们所需要的JSON文件。为了方便,我们设置了一个“sample.json”。它在电脑中的路径为“:~/.local/share/savejson.liu-xiao-guo$”。
我们使用了如下的方法来存储我们的JSON文件格式:
function serialize(model) {
    var res = "{ \"fruits\": [\n";

    console.log("count: " + model.count);

    for(var i = 0; i < model.count; ++i) {
        res += "\n{\t";
        var e = model.get(i);
        res += "\"name\": \""   + e.name + "\",\n\t";
        res += "\"image\": \"" + e.image + "\",\n\t";
        res += "\"description\": \"" + e.description + "\",\n\t";
        res += "\"cost\": " + e.cost + "\n\t";

        // The last one should not have the ending ","
        if ( i === model.count -1)
            res += "\n}";
        else
            res += "\n},";
    }

    res += "\n]}";

    console.log("res: " + res );
    return res;
}
存储的JSON文件例子为:
{
"fruits": [

	{       "name": "Banana",
	        "image": "pics/banana.jpg",
	        "description": "Seedless",
	        "cost": 2.2

	},
	{       "name": "Cumquat",
	        "image": "pics/cumquat.jpg",
	        "description": "Citrus",
	        "cost": 3.25

	},
	{       "name": "Durian",
	        "image": "pics/durian.jpg",
	        "description": "Tropical Smelly",
	        "cost": 9.95

	}
	]
}
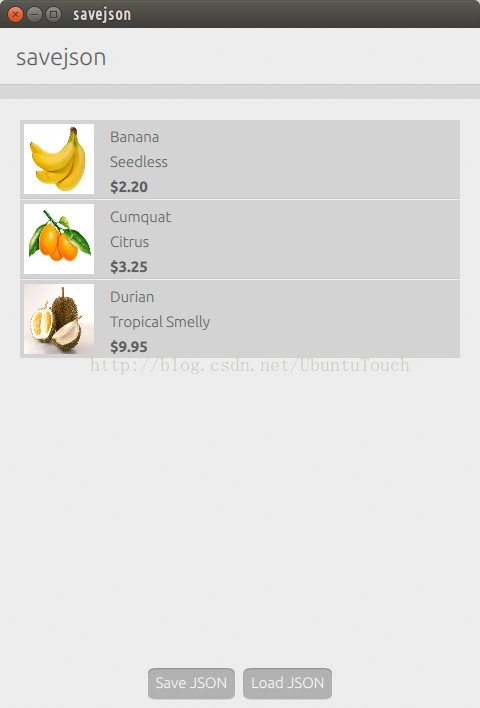
在我们修改完设置后,我们可以选择退出应用。在下次启动应用后,我们可以选择“Load JSON”按钮,我们可以看到上次修改的内容被成功地重新装载到应用中。
整个项目的源码在: https://github.com/liu-xiao-guo/savejson


 1417
1417

 被折叠的 条评论
为什么被折叠?
被折叠的 条评论
为什么被折叠?
 到【灌水乐园】发言


