


位图的使用
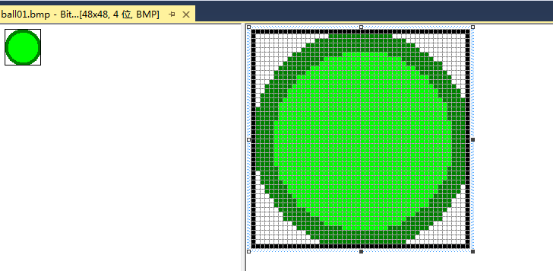
1 位图 -通过保存图像上每个点的颜色,生成相应的位图文件。
光栅图 - 可以理解为图像点阵的保存
矢量图 - .wmf 可以理解为绘图命令的保存
2 位图资源的使用
2.1 加载位图资源
HBITMAP LoadBitmap(
HINSTANCE hInstance, //位图资源所在应用程序句柄
LPCTSTR lpBitmapName ); //位图资源ID字符串
返回位图句柄HBITMAP
2.2 创建放置位图的DC
HDC CreateCompatibleDC( HDC hDC );
创建一个和指定的hDC相匹配的DC(DC中
包含信息一致)
2.3 将位图放入创建的DC中
SelectObject
2.4 绘制位图到当前DC中
BOOL BitBlt(
HDC hdcDest, //绘制的目的地DC句柄
int nXDest, //绘制的目的左上x坐标
int nYDest, //绘制的目的左上y坐标
int nWidth, //绘制的目的宽
int nHeight, //绘制的目的高
HDC hdcSrc, //需要绘制的DC句柄
int nXSrc, //需要绘制的原图的起始X坐标
int nYSrc, //需要绘制的原图的起始y坐标
DWORD dwRop); //绘图方式
可以实现图像的拉伸缩放,但是效果不好
BOOL StretchBlt(
HDC hdcDest, //绘制的目的DC句柄
int nXOriginDest,//绘制的目的左上x坐标
int nYOriginDest, //绘制的目的左上y坐标
int nWidthDest,//绘制的目的宽
int nHeightDest, //绘制的目的高
HDC hdcSrc, //需要绘制的DC句柄
int nXOriginSrc,//需要绘制的原图的起始X坐标
int nYOriginSrc,//需要绘制的原图的起始y坐标
int nWidthSrc,//需要绘制的原图的宽(可以指定,不一定与原图一样大)
int nHeightSrc,//需要绘制的原图的高(可以指定,不一定与原图一样大)
DWORD dwRop ); //绘图方式
2.5 取出位图
SelectObject
2.6 删除创建的DC
DeleteDC
2.7 删除位图
DeleteObject
2.8 获取位图信息
int GetObject(
HGDIOBJ hgdiobj,//GDI对象句柄,这里就是HBITMAP
int cbBuffer,//位图信息的BUFF的大小
LPVOID lpvObject ); //位图信息的BUFF指针
位图的BUFF类型为BITMAP 结构
// WinBmp.cpp : Defines the entry point for the application.
//
#include "stdafx.h"
#include "resource.h"
HINSTANCE g_hInst = NULL;
void DrawBmp( HDC hDC )
{ //加载位图资源
HBITMAP hBmp = LoadBitmap( g_hInst,
MAKEINTRESOURCE(IDB_BALL01) );
//获取位图的相关信息
BITMAP bmpInfo = { 0 };
GetObject( hBmp, sizeof(bmpInfo), &bmpInfo );
//创建放置位图的DC
HDC hBmpDC = CreateCompatibleDC( hDC );
//将位图放入hBmpDC
HBITMAP hOldBmp = (HBITMAP)
SelectObject( hBmpDC, hBmp );
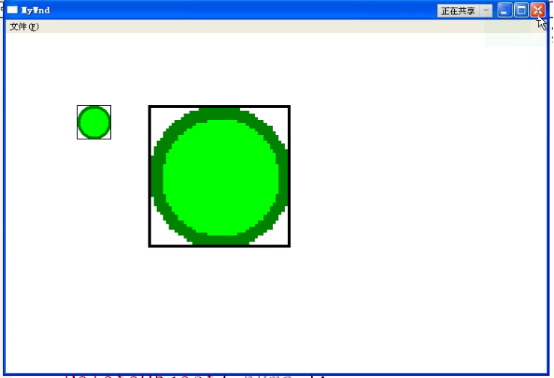
//绘制位图
BitBlt( hDC, 100, 100, bmpInfo.bmWidth,
bmpInfo.bmHeight, hBmpDC,
0, 0, SRCCOPY );
//拉伸绘制
StretchBlt( hDC, 200, 100, 300, 300,
hBmpDC, 0, 0, bmpInfo.bmWidth,
bmpInfo.bmHeight, SRCCOPY );
//取出位图
SelectObject( hBmpDC, hOldBmp );
//删除DC
DeleteDC( hBmpDC );
//删除位图
DeleteObject( hBmp );
}
void OnPaint( HWND hWnd, UINT nMsg,
WPARAM wParam, LPARAM lParam )
{
PAINTSTRUCT ps = { 0 };
HDC hDC = BeginPaint( hWnd, &ps );
DrawBmp( hDC );
EndPaint( hWnd, &ps );
}
LRESULT CALLBACK WndProc( HWND hWnd,
UINT nMsg,
WPARAM wParam,
LPARAM lParam )
{
switch( nMsg )
{
case WM_PAINT:
OnPaint( hWnd, nMsg, wParam, lParam );
break;
case WM_DESTROY:
PostQuitMessage( 0 );
return 0;
}
return DefWindowProc( hWnd, nMsg,
wParam, lParam );
}
BOOL RegisterWnd( LPSTR pszClassName )
{
WNDCLASSEX wce = { 0 };
wce.cbSize = sizeof( wce );
wce.cbClsExtra = 0;
wce.cbWndExtra = 0;
wce.hbrBackground = HBRUSH(COLOR_WINDOW);
wce.hCursor = NULL;
wce.hIcon = NULL;
wce.hIconSm = NULL;
wce.hInstance = g_hInst;
wce.lpfnWndProc = WndProc;
wce.lpszClassName = pszClassName;
wce.lpszMenuName = NULL;
wce.style = CS_HREDRAW|CS_VREDRAW;
ATOM nAtom = RegisterClassEx( &wce );
if( 0 == nAtom )
{
return FALSE;
}
return TRUE;
}
HWND CreateWnd( LPSTR pszClassName )
{
HMENU hMenu =
LoadMenu( g_hInst, MAKEINTRESOURCE(IDR_MAIN) );
HWND hWnd = CreateWindowEx( 0,
pszClassName, "MyWnd",
WS_OVERLAPPEDWINDOW, CW_USEDEFAULT,
CW_USEDEFAULT, CW_USEDEFAULT,
CW_USEDEFAULT, NULL, hMenu, g_hInst,
NULL );
return hWnd;
}
void DisplayWnd( HWND hWnd )
{
ShowWindow( hWnd, SW_SHOW );
UpdateWindow( hWnd );
}
void Message( )
{
MSG msg = { 0 };
while( GetMessage( &msg, NULL, 0, 0 ) )
{
TranslateMessage( &msg );
DispatchMessage( &msg );
}
}
int APIENTRY WinMain(HINSTANCE hInstance,
HINSTANCE hPrevInstance,
LPSTR lpCmdLine,
int nCmdShow)
{
g_hInst = hInstance;
RegisterWnd( "MYWND" );
HWND hWnd = CreateWnd( "MYWND" );
DisplayWnd( hWnd );
Message( );
return 0;
}
坐标系和映射模式
1 坐标系
1.1 设备坐标系
设备坐标系以像素为单位,X正方向从左往右,Y正方向从上往下.
根据我们的使用分为了三种坐标系:
屏幕坐标系 - 以屏幕的左上角为(0,0)点
窗口坐标系 - 以窗口最外边框的左上角为(0,0)点
客户区坐标系 - 以窗口内的客户区的左上角为(0,0)点
1.2 逻辑坐标系
以逻辑单位定义坐标系. 绘图过程中使用
的坐标基本是以逻辑坐标系绘制. 默认情况
下和设备坐标系保持一致,但是可以修改.
2 映射模式
逻辑坐标系和设备坐标系之间映射关系.
2.1 映射模式的种类
MM_TEXT - 默认的映射方式,逻辑坐标系
和设备坐标系一致.
MM_LOMETRIC - 0.1MM, X方向向右,Y方向向上
MM_HIMETRIC - 0.01MM, X方向向右,Y方向向上
MM_LOENGLISH - 0.1in, X方向向右,Y方向向上
MM_HIENGLISH - 0.01in,X方向向右,Y方向向上
MM_TWIPS - 1/1440in,X方向向右,Y方向向上
MM_ISOTROPIC - 可以指定逻辑单位和XY正方向
X轴单位=Y轴的单位
MM_ANISOTROPIC - 可以指定逻辑单位和XY正方向
X轴单位与Y轴的单位可以不相等.
2.2 映射模式的使用
2.2.1 设置新映射模式
int SetMapMode(
HDC hdc, //DC句柄 handle of device context
int fnMapMode ); //新的映射方式
返回旧的映射方式
2.2.2 绘图
2.2.3 恢复旧映射模式
SetMapMode( hdc, nOldMap );
2.2.4 MM_ISOTROPIC/MM_ANISOTROPIC模式
需要设定X/Y轴正方向,以及逻辑单位和设备
单位的比例.
SetViewportExtEx 设备坐标,像素
BOOL SetViewportExtEx(
HDC hdc, //DC句柄
int nXExtent, //显示区域的X轴的单位
int nYExtent, //显示区域的Y轴的单位
LPSIZE lpSize ); //旧值
SetWindowExtEx 逻辑坐标
BOOL SetWindowExtEx(
HDC hdc, //DC句柄
int nXExtent, //逻辑单位的X轴的单位
int nYExtent, //逻辑单位的X轴的单位
LPSIZE lpSize ); //旧值
SetViewportExtEx和SetWindowExtEx函数
的单位数量的比例关系,就是设备单位和
逻辑单位之间的比例关系. 可以使用单位
的正负号,来确定逻辑坐标系中X和Y轴的
正方向.例如:
SetViewportExtEx( hDC, 10, 10, NULL );
SetWindowExtEx( hDC, 2, -2, NULL );
MM_ISOTROPIC X轴和Y轴比例关系相等.
MM_ANISOTROPIC X轴和Y轴比例关系可不等
2.3 坐标系的原点
2.3.1 窗口坐标系 -逻辑坐标系
视口坐标系 - 设备坐标系
2.3.2 窗口坐标系和视口坐标系原点重合,也
可以修改
SetViewportOrgEx 设备坐标系原点对应
逻辑坐标系的位置
SetWindowOrgEx 逻辑坐标系原点对应
设备坐标系的位置
// WinMap.cpp : Defines the entry point for the application.
//

#include "stdafx.h"
HINSTANCE g_hInst = NULL;

void OnPaint( HWND hWnd, UINT nMsg,
	WPARAM wParam, LPARAM lParam )
{
	PAINTSTRUCT ps = { 0 };
	HDC hDC = BeginPaint( hWnd, &ps );
	Rectangle( hDC, 100, 100, 200, 200 );

	//设置新映射模式
	//int nOldMap =
	//	SetMapMode( hDC, MM_LOMETRIC );
	//绘图
	//Rectangle( hDC, 100, -100, 200, -200 );

	//SetMapMode( hDC, MM_HIMETRIC );
	//Rectangle( hDC, 100, -100, 200, -200 );

	int nOldMap = SetMapMode( hDC,
		MM_ANISOTROPIC );
	SetViewportExtEx( hDC, 4, 4, NULL );
	SetWindowExtEx( hDC, 2, 2, NULL );
	SetViewportOrgEx( hDC, 100, 100, NULL );
	Rectangle( hDC, 100, 100, 200, 200 );

	//恢复旧映射模式
	SetMapMode( hDC, nOldMap );
	EndPaint( hWnd, &ps );
}

LRESULT CALLBACK WndProc( HWND   hWnd,
						  UINT   nMsg,
						  WPARAM wParam,
						  LPARAM lParam )
{
	switch( nMsg )
	{
	case WM_PAINT:
		OnPaint( hWnd, nMsg, wParam, lParam );
		break;
	case WM_DESTROY:
		PostQuitMessage( 0 );
		return 0;
	}
	return DefWindowProc( hWnd, nMsg,
		wParam, lParam );
}

BOOL RegisterWnd( LPSTR pszClassName )
{
	WNDCLASSEX wce = { 0 };
	wce.cbSize        = sizeof( wce );
	wce.cbClsExtra    = 0;
	wce.cbWndExtra    = 0;
	wce.hbrBackground = HBRUSH(COLOR_WINDOW);
	wce.hCursor       = NULL;
	wce.hIcon         = NULL;
	wce.hIconSm       = NULL;
	wce.hInstance     = g_hInst;
	wce.lpfnWndProc   = WndProc;
	wce.lpszClassName = pszClassName;
	wce.lpszMenuName  = NULL;
	wce.style         = CS_HREDRAW|CS_VREDRAW;

	ATOM nAtom = RegisterClassEx( &wce );
	if( 0 ==  nAtom )
	{
		return FALSE;
	}

	return TRUE;
}

HWND CreateWnd( LPSTR pszClassName )
{
	HWND hWnd = CreateWindowEx( 0,
		pszClassName, "MyWnd",
		WS_OVERLAPPEDWINDOW, CW_USEDEFAULT,
		CW_USEDEFAULT, CW_USEDEFAULT,
		CW_USEDEFAULT, NULL, NULL, g_hInst,
		NULL );
	return hWnd;
}

void DisplayWnd( HWND hWnd )
{
	ShowWindow( hWnd, SW_SHOW );
	UpdateWindow( hWnd );
}

void Message( )
{
	MSG msg = { 0 };
	while( GetMessage( &msg, NULL, 0, 0 ) )
	{
		TranslateMessage( &msg );
		DispatchMessage( &msg );
	}
}

int APIENTRY WinMain(HINSTANCE hInstance,
                     HINSTANCE hPrevInstance,
                     LPSTR     lpCmdLine,
                     int       nCmdShow)
{
	g_hInst = hInstance;
	RegisterWnd( "MYWND" );
	HWND hWnd = CreateWnd( "MYWND" );
	DisplayWnd( hWnd );
	Message( );
	return 0;
}
文字和字体
1 文字的绘制
1.1 TextOut
1.2 DrawText
int DrawText(
HDC hDC,//DC句柄
LPCTSTR lpString, //字符串
int nCount,//字符串长度
LPRECT lpRect,//绘制字符串的矩形区域
UINT uFormat ); //绘制方式
DT_CENTER - 水平居中
DT_VCENTER - 垂直居中
DT_SINGLELINE - 单行显示不换行
DT_NOCLIP - 超出矩形框不剪切
DT_WORDBREAK - 换行
对于汉字字符,由于一个字符占2个字节,
所以汉字字符之间的间距应该为0;
CHAR szText2[12] = "E你xtTex好";
INT nText[10] = { 30, 0, 30, 30, 30,
30, 30, 30, 0, 10 };
ExtTextOut( hDC, 100, 300, ETO_OPAQUE,
NULL, szText2, strlen(szText2), nText );
1.4 字符绘制的相关属性
SetTextColor 设置字符的颜色
SetBkColor 设置背景色
SetBkMode 绘制的方式
2 字体的使用
2.1 创建字体
HFONT CreateFont(
int nHeight, //字体逻辑高
int nWidth, //字体逻辑宽度
int nEscapement, //切斜度
int nOrientation,//旋转
int fnWeight,//加粗
DWORD fdwItalic,//斜体
DWORD fdwUnderline,//下划线
DWORD fdwStrikeOut,//删除线
DWORD fdwCharSet,//字符集
DWORD fdwOutputPrecision, //输出
DWORD fdwClipPrecision, //剪切
DWORD fdwQuality, //输出质量
DWORD fdwPitchAndFamily, // pitch and family
LPCTSTR lpszFace ); //字体名称
2.2 设置字体
SelectObject
2.3 绘图
2.4 取出字体
SelectObject
2.5 删除字体
DeleteObject
2.6 创建字体常使用TrueType字体.
// WinText.cpp : Defines the entry point for the application.
//

#include "stdafx.h"

HINSTANCE g_hInst = NULL;

void OnPaint( HWND hWnd, UINT nMsg,
	WPARAM wParam, LPARAM lParam )
{
	PAINTSTRUCT ps = { 0 };
	HDC hDC = BeginPaint( hWnd, &ps );
	//设置文字颜色
	COLORREF nOldTextColor =
		SetTextColor( hDC, RGB(255, 0, 0 ) );
	//设置文字的背景颜色
	COLORREF nOldBKColor =
		SetBkColor( hDC, RGB( 0, 255, 0 ));
	//设置字体
	HFONT hFont = CreateFont( 300, 30, 100, 0,
		FW_BLACK, TRUE, TRUE, TRUE, DEFAULT_CHARSET,
       0, 0, 0, 0, "宋体" );
	//选择字体到DC
	HFONT hOldFont = ( HFONT )
		SelectObject( hDC, hFont );
	//绘制文字
	CHAR szText[260] =
		"Hello Text, long long long long";
	TextOut( hDC, 100, 100, szText,
		strlen(szText) );

	//设置文字背景绘制模式
	SetBkMode( hDC, TRANSPARENT );

	RECT rcText = { 0 };
	rcText.left   = 100;
	rcText.top    = 120;
	rcText.right  = 200;
	rcText.bottom = 200;
	Rectangle( hDC, rcText.left, rcText.top,
		rcText.right, rcText.bottom );
	DrawText( hDC, szText, strlen(szText),
		&rcText,
		DT_CENTER|DT_WORDBREAK);
	//DT_VCENTER|DT_SINGLELINE|DT_NOCLIP );

	CHAR szText2[12] = "E你xtTex好";
	INT  nText[10] = { 30, 0, 30, 30, 30,
		30, 30, 30, 0, 10 };
	ExtTextOut( hDC, 100, 300, ETO_OPAQUE,
		NULL, szText2, strlen(szText2), nText );

	SetTextColor( hDC, nOldTextColor );

	//取出字体
	SelectObject( hDC, hOldFont );
	//删除字体
	DeleteObject( hFont );

	EndPaint( hWnd, &ps );
}

LRESULT CALLBACK WndProc( HWND   hWnd,
						  UINT   nMsg,
						  WPARAM wParam,
						  LPARAM lParam )
{
	switch( nMsg )
	{
	case WM_PAINT:
		OnPaint( hWnd, nMsg, wParam, lParam );
		break;
	case WM_DESTROY:
		PostQuitMessage( 0 );
		return 0;
	}
	return DefWindowProc( hWnd, nMsg,
		wParam, lParam );
}

BOOL RegisterWnd( LPSTR pszClassName )
{
	WNDCLASSEX wce = { 0 };
	wce.cbSize        = sizeof( wce );
	wce.cbClsExtra    = 0;
	wce.cbWndExtra    = 0;
	wce.hbrBackground = HBRUSH(COLOR_BTNFACE+1);
	wce.hCursor       = NULL;
	wce.hIcon         = NULL;
	wce.hIconSm       = NULL;
	wce.hInstance     = g_hInst;
	wce.lpfnWndProc   = WndProc;
	wce.lpszClassName = pszClassName;
	wce.lpszMenuName  = NULL;
	wce.style         = CS_HREDRAW|CS_VREDRAW;

	ATOM nAtom = RegisterClassEx( &wce );
	if( 0 ==  nAtom )
	{
		return FALSE;
	}

	return TRUE;
}

HWND CreateWnd( LPSTR pszClassName )
{
	HWND hWnd = CreateWindowEx( 0,
		pszClassName, "MyWnd",
		WS_OVERLAPPEDWINDOW, CW_USEDEFAULT,
		CW_USEDEFAULT, CW_USEDEFAULT,
		CW_USEDEFAULT, NULL, NULL, g_hInst,
		NULL );
	return hWnd;
}

void DisplayWnd( HWND hWnd )
{
	ShowWindow( hWnd, SW_SHOW );
	UpdateWindow( hWnd );
}

void Message( )
{
	MSG msg = { 0 };
	while( GetMessage( &msg, NULL, 0, 0 ) )
	{
		TranslateMessage( &msg );
		DispatchMessage( &msg );
	}
}

int APIENTRY WinMain(HINSTANCE hInstance,
                     HINSTANCE hPrevInstance,
                     LPSTR     lpCmdLine,
                     int       nCmdShow)
{
	g_hInst = hInstance;
	RegisterWnd( "MYWND" );
	HWND hWnd = CreateWnd( "MYWND" );
	DisplayWnd( hWnd );
	Message( );
	return 0;
}
对话框
1 对话框的分类无模式对话框 - 对话框显示后,不影响其它窗口的使用
有模式对话框 - 对话框显示后,会将其它窗口,禁止输入操作.
2 对话框的基本使用方式
2.1 对话框的窗口处理函数
2.2 注册窗口(可选)
2.3 创建对话框
2.4 关闭对话框
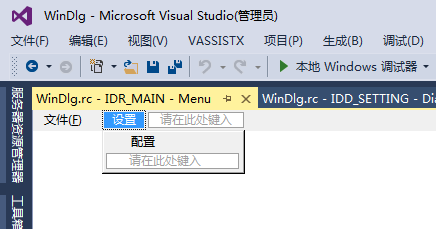
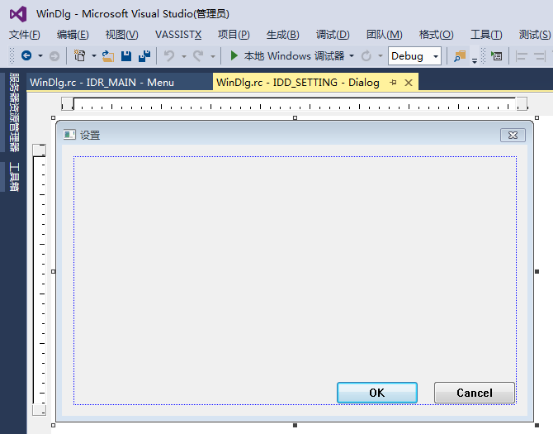
3 对话框资源
4 有模式对话框的使用
4.1 添加对话框资源
4.2 定义对话框窗口处理函数
BOOL CALLBACK DialogProc(
HWND hwndDlg, // handle to dialog box
UINT uMsg, // message
WPARAM wParam, // first message parameter
LPARAM lParam ); // second message parameter
4.3 创建对话框
int DialogBox(
HINSTANCE hInstance, //应用程序句柄
LPCTSTR lpTemplate,//对话框资源ID字符串
HWND hWndParent,//父窗口句柄
DLGPROC lpDialogFunc );//对话框窗口处理函数
4.4 关闭对话框
BOOL EndDialog(
HWND hDlg, //关闭对话框的窗口句柄
int nResult); //返回值
nResult返回值是DialogBox函数的返回值
4.5 注意点
DialogBox是一个阻塞函数,执行后会等候
返回.
只有在EndDialog结束对话框,DialogBox
才会返回.
// WinDlg.cpp : Defines the entry point for the application.
//

#include "stdafx.h"
#include "resource.h"

HINSTANCE g_hInst = NULL;
//对话框的窗口处理函数
BOOL CALLBACK SettingDlgProc( HWND hWnd,
	UINT nMsg, WPARAM wParam, LPARAM )
{
	switch( nMsg )
	{
	case WM_SYSCOMMAND:
		{
			switch( wParam )
			{
			case SC_CLOSE:
				//关闭对话框并返回1
				EndDialog( hWnd, 1 );
				break;
			}
		}
		break;
	}
	//return DefDlgProc( hWnd, nMsg,
	//	wParam, lParam );
	return 0;
}

void Setting( HWND hWnd )
{
	//创建对话框并等候返回
	int nRet = DialogBox( g_hInst,
		MAKEINTRESOURCE(IDD_SETTING), hWnd,
		SettingDlgProc );
	//根据返回值做不同处理
	if( 1 == nRet )
	{
		MessageBox( NULL, "取消配置", "WinDlg",
			MB_OK );
	}
	else
	{
		MessageBox( NULL, "应用配置", "WinDlg",
			MB_OK );
	}
}

void OnCommand( HWND hWnd, UINT nMsg,
	WPARAM wParam, LPARAM lParam )
{
	int nCmdID = LOWORD( wParam );
	switch( nCmdID )
	{
	case ID_SETTING:
		Setting( hWnd );
		break;
	case ID_EXIT:
		PostQuitMessage( 0 );
		break;
	}
}

LRESULT CALLBACK WndProc( HWND   hWnd,
						  UINT   nMsg,
						  WPARAM wParam,
						  LPARAM lParam )
{
	switch( nMsg )
	{
	case WM_COMMAND:
		OnCommand( hWnd, nMsg, wParam, lParam );
		break;
	case WM_DESTROY:
		PostQuitMessage( 0 );
		return 0;
	}
	return DefWindowProc( hWnd, nMsg,
		wParam, lParam );
}

BOOL RegisterWnd( LPSTR pszClassName )
{
	WNDCLASSEX wce = { 0 };
	wce.cbSize        = sizeof( wce );
	wce.cbClsExtra    = 0;
	wce.cbWndExtra    = 0;
	wce.hbrBackground = HBRUSH(COLOR_WINDOW);
	wce.hCursor       = NULL;
	wce.hIcon         = NULL;
	wce.hIconSm       = NULL;
	wce.hInstance     = g_hInst;
	wce.lpfnWndProc   = WndProc;
	wce.lpszClassName = pszClassName;
	wce.lpszMenuName  = NULL;
	wce.style         = CS_HREDRAW|CS_VREDRAW;

	ATOM nAtom = RegisterClassEx( &wce );
	if( 0 ==  nAtom )
	{
		return FALSE;
	}

	return TRUE;
}

HWND CreateWnd( LPSTR pszClassName )
{
	HMENU hMenu = LoadMenu( g_hInst,
		MAKEINTRESOURCE(IDR_MAIN) );
	HWND hWnd = CreateWindowEx( 0,
		pszClassName, "MyWnd",
		WS_OVERLAPPEDWINDOW, CW_USEDEFAULT,
		CW_USEDEFAULT, CW_USEDEFAULT,
		CW_USEDEFAULT, NULL, hMenu, g_hInst,
		NULL );
	return hWnd;
}

void DisplayWnd( HWND hWnd )
{
	ShowWindow( hWnd, SW_SHOW );
	UpdateWindow( hWnd );
}

void Message( )
{
	MSG msg = { 0 };
	while( GetMessage( &msg, NULL, 0, 0 ) )
	{
		TranslateMessage( &msg );
		DispatchMessage( &msg );
	}
}

int APIENTRY WinMain(HINSTANCE hInstance,
                     HINSTANCE hPrevInstance,
                     LPSTR     lpCmdLine,
                     int       nCmdShow)
{
	g_hInst = hInstance;
	RegisterWnd( "MYWND" );
	HWND hWnd = CreateWnd( "MYWND" );
	DisplayWnd( hWnd );
	Message( );
	return 0;
}


 545
545


 被折叠的 条评论
为什么被折叠?
被折叠的 条评论
为什么被折叠?
 到【灌水乐园】发言


