


前言
平行空间的欢迎界面实现是比较复杂的,整个布局是ViewPager,手机中的画面是由HorizontalScrollView,然后在滑动的时候对背景实现颜色的渐变。
效果~
1、布局使用RelativeLayout+ViewPager
2、背景的动画
1> 开始进入或者翻页之后执行一个平移动画View.setTranslationX()
2>平移完成之后,执行翻转动画
3>背景颜色的渐变
3、利用相对于屏幕的宽高百分比布局来实现HorizontalScrollView 和手机壳的宽高一致
用百分比布局。官方谷歌的百分比布局:只能相对于屏幕的宽度和高度
layout_width=50%w
layout_height=50%h
这样会造成图片变形。所以只能自定义百分比布局(可以在谷歌的版本上直接修改少量代码。)
layout_width=50%w
layout_height=70%w
Part 1、平行空间的布局文件
<?xml version="1.0" encoding="utf-8"?>
<com.andly.administrator.percent.PercentRelativeLayout
xmlns:android="http://schemas.android.com/apk/res/android"
xmlns:app="http://schemas.android.com/apk/res-auto"
android:id="@+id/rl"
android:layout_width="match_parent"
android:layout_height="wrap_content"
android:gravity="center_horizontal" >
<FrameLayout
android:id="@+id/bg_container"
android:layout_width="match_parent"
android:layout_height="wrap_content" >
<ImageView
android:id="@+id/imageView0_2"
android:layout_width="fill_parent"
android:layout_height="fill_parent"
android:scaleType="centerCrop"
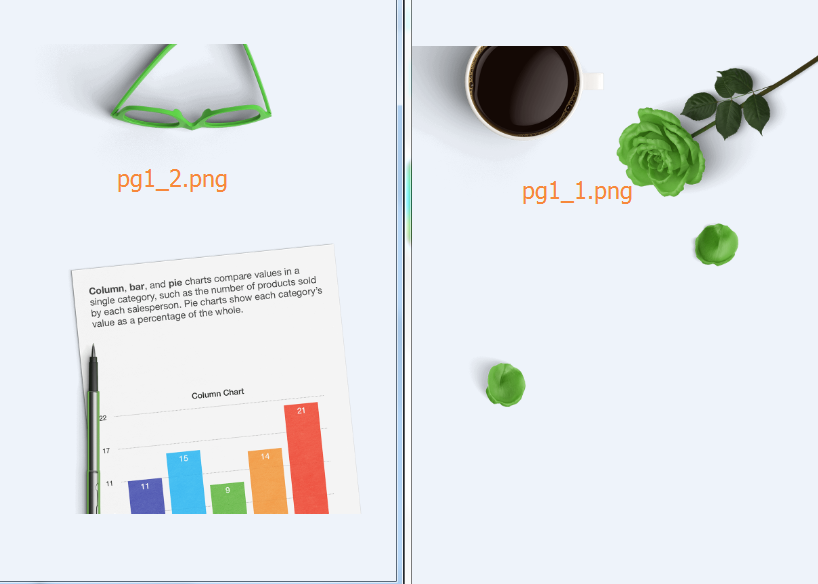
android:src="@mipmap/pg1_2" />
<ImageView
android:id="@+id/imageView0"
android:layout_width="fill_parent"
android:layout_height="fill_parent"
android:scaleType="centerCrop"
android:src="@mipmap/pg1_1" />
</FrameLayout>
<ImageView
android:id="@+id/imageView1"
android:layout_width="wrap_content"
android:layout_height="wrap_content"
android:layout_alignParentTop="true"
android:layout_centerHorizontal="true"
android:layout_marginTop="17dp"
android:src="@mipmap/wechat1" />
<TextView
android:id="@+id/textView1"
android:layout_width="wrap_content"
android:layout_height="wrap_content"
android:layout_below="@+id/imageView1"
android:layout_centerHorizontal="true"
android:layout_marginTop="16dp"
android:gravity="center_horizontal"
android:text="工作圈和生活圈\n互不干扰"
android:textColor="#fff"
android:textSize="30dp" />
<TextView
android:id="@+id/textView2"
android:layout_width="wrap_content"
android:layout_height="wrap_content"
android:layout_below="@+id/textView1"
android:layout_centerHorizontal="true"
android:layout_marginTop="16dp"
android:gravity="center_horizontal"
android:text="通过平行空间同时运行两个微信账号,将你的工作和生活轻松分离"
android:textAppearance="?android:attr/textAppearanceMedium"
android:textColor="#fff" />
<com.andly.administrator.andly_md13.MyScrollView
android:id="@+id/mscv"
android:layout_width="0dp"
android:layout_height="0dp"
android:layout_alignParentBottom="true"
android:layout_centerHorizontal="true"
app:layout_heightPercent="78%w"
app:layout_widthPercent="44%w"
android:scrollbars="none" >
<LinearLayout
android:layout_width="wrap_content"
android:layout_height="match_parent"
android:gravity="left"
android:orientation="horizontal" >
<ImageView
android:id="@+id/pg1_content1"
android:layout_width="wrap_content"
android:layout_height="fill_parent"
android:scaleType="fitStart"
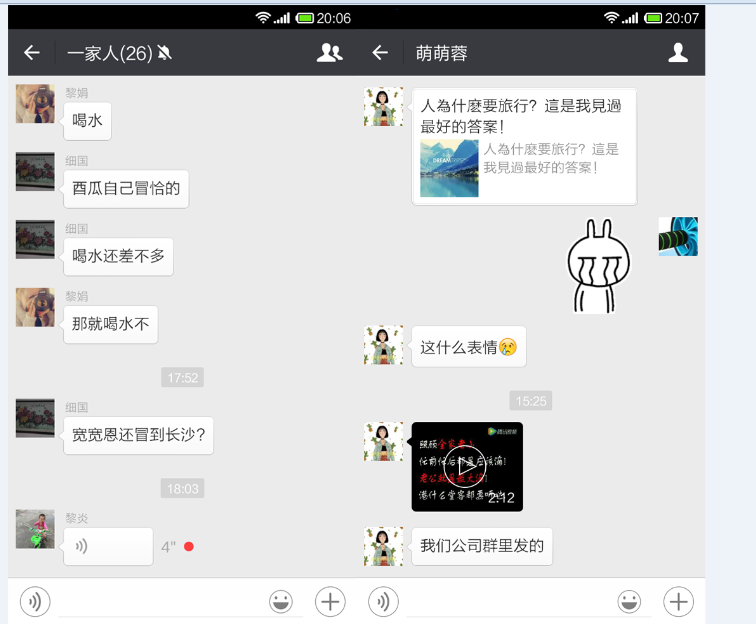
android:src="@mipmap/weixin" />
</LinearLayout>
</com.andly.administrator.andly_md13.MyScrollView>
<ImageView
android:id="@+id/iv_phone_bg"
android:layout_width="0dp"
android:layout_height="0dp"
android:layout_alignParentBottom="true"
android:layout_centerHorizontal="true"
app:layout_heightPercent="88%w"
app:layout_widthPercent="63%w"
android:background="@mipmap/phone1" />
</com.andly.administrator.percent.PercentRelativeLayout>

tips:
1、添加背景
    <FrameLayout
        android:id="@+id/bg_container"
        android:layout_width="match_parent"
        android:layout_height="wrap_content" >

        <ImageView
            android:id="@+id/imageView0_2"
            android:layout_width="fill_parent"
            android:layout_height="fill_parent"
            android:scaleType="centerCrop"
            android:src="@mipmap/pg1_2" />

        <ImageView
            android:id="@+id/imageView0"
            android:layout_width="fill_parent"
            android:layout_height="fill_parent"
            android:scaleType="centerCrop"
            android:src="@mipmap/pg1_1" />
    </FrameLayout>
2、因为要使用百分比布局让HorizontalScrollView和手机图片大小一致所以在外围使用PercentRelativeLayout
    <com.andly.administrator.andly_md13.MyScrollView
        android:id="@+id/mscv"
        android:layout_width="0dp"
        android:layout_height="0dp"
        android:layout_alignParentBottom="true"
        android:layout_centerHorizontal="true"
        app:layout_heightPercent="78%w"
        app:layout_widthPercent="44%w"
        android:scrollbars="none" >
        <LinearLayout
            android:layout_width="wrap_content"
            android:layout_height="match_parent"
            android:gravity="left"
            android:orientation="horizontal" >

            <ImageView
                android:id="@+id/pg1_content1"
                android:layout_width="wrap_content"
                android:layout_height="fill_parent"
                android:scaleType="fitStart"
                android:src="@mipmap/weixin" />
        </LinearLayout>
    </com.andly.administrator.andly_md13.MyScrollView>
    <ImageView
        android:id="@+id/iv_phone_bg"
        android:layout_width="0dp"
        android:layout_height="0dp"
        android:layout_alignParentBottom="true"
        android:layout_centerHorizontal="true"
        app:layout_heightPercent="88%w"
        app:layout_widthPercent="63%w"
android:background="@mipmap/phone1" />1、要为自定义ScrollView设置scrollbar为none
2、weixin.png的ScaleType要为fitStart(也进行按宽高比等比例进行缩放,并且与左侧对齐)
这样一个复杂的布局就完成了。
Part 2、代码的实现
主布局为一个ViewPager,Item为Fragment
		Bundle bundle = getArguments();
		int layoutId = bundle.getInt("layoutId");
		int pageIndex = bundle.getInt("pageIndex");
		View view = inflater.inflate(layoutId, container,false);
view.setTag(pageIndex);1、view.setTag(pageIndex)的意义在于后面将会使用到滑动Item的position
为ViewPager设置滑动动画效果
		transformer = new WelcompagerTransformer();
vp.setPageTransformer(true, transformer); /**
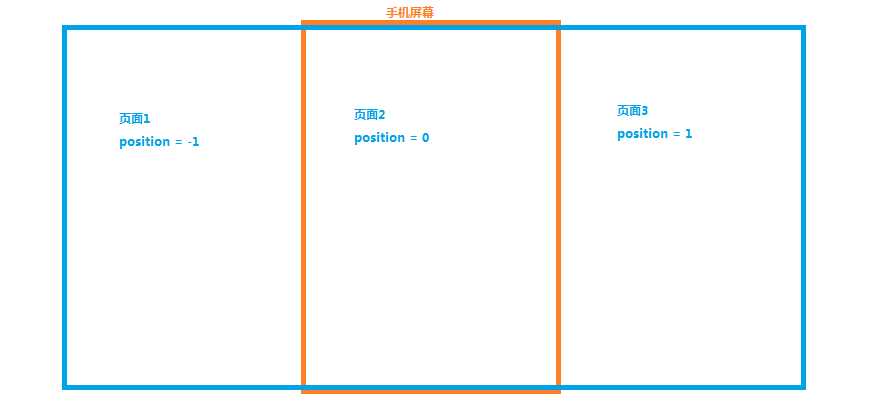
* 此方法是滑动的时候每一个页面View都会调用该方法
* view:当前的页面
* position:当前滑动的位置
*/
@Override
public void transformPage(View view, float position) {
ViewGroup v = (ViewGroup) view.findViewById(R.id.rl);
final MyScrollView mscv = (MyScrollView) v.findViewById(R.id.mscv);
View bg1 = v.findViewById(R.id.imageView0);
View bg2 = v.findViewById(R.id.imageView0_2);
View bg_container = v.findViewById(R.id.bg_container);
int bg1_green = view.getContext().getResources().getColor(R.color.bg1_green);
int bg2_blue = view.getContext().getResources().getColor(R.color.bg2_blue);
......
} Integer tag = (Integer) view.getTag();
View parent = (View) view.getParent();
//颜色估值器
ArgbEvaluator evaluator = new ArgbEvaluator();
int color = bg1_green;
if(tag.intValue()==pageIndex){
switch (pageIndex) {
case 0:
color = (int) evaluator.evaluate(Math.abs(position), bg1_green, bg2_blue);
break;
case 1:
color = (int) evaluator.evaluate(Math.abs(position), bg2_blue, bg1_green);
break;
case 2:
color = (int) evaluator.evaluate(Math.abs(position), bg1_green, bg2_blue);
break;
default:
break;
}
//设置整个viewpager的背景颜色
parent.setBackgroundColor(color);1、这里通过view.getTag()得到滑动的位置进而得到该位置的背景颜色,让ViewPager设置颜色,这里并没有让承载背景的容器设置也没有让rootView设置,原因在于滑动是ViewPager负责进行颜色的渐变效果也应该交由ViewPager来负责
2、pageIndex是由onPageSelected设置,只需要给ViewPager设置监听即可
3、颜色的变化这里使用了ArgbEvaluator估值器来实现
    public Object evaluate(float fraction, Object startValue, Object endValue) {
        int startInt = (Integer) startValue;
        int startA = (startInt >> 24) & 0xff;
        int startR = (startInt >> 16) & 0xff;
        int startG = (startInt >> 8) & 0xff;
        int startB = startInt & 0xff;

        int endInt = (Integer) endValue;
        int endA = (endInt >> 24) & 0xff;
        int endR = (endInt >> 16) & 0xff;
        int endG = (endInt >> 8) & 0xff;
        int endB = endInt & 0xff;

        return (int)((startA + (int)(fraction * (endA - startA))) << 24) |
                (int)((startR + (int)(fraction * (endR - startR))) << 16) |
                (int)((startG + (int)(fraction * (endG - startG))) << 8) |
                (int)((startB + (int)(fraction * (endB - startB))));
    }
所以判断是否为当前页就需要判断是否为0即可
		if(position==0){
if(pageChanged){1、pageChanged作用是在切换页面的时候才展示平移动画,如果不判断则会在移动一点点当前页面松开也会执行一次平移动画
在里面将两个背景显示并且增加相应平移动画
				bg1.setVisibility(View.VISIBLE);
				bg2.setVisibility(View.VISIBLE);

				ObjectAnimator animator_bg1 = ObjectAnimator.ofFloat(bg1, "translationX", 0,-bg1.getWidth());
				animator_bg1.setDuration(400);
				animator_bg1.addUpdateListener(new AnimatorUpdateListener() {

					@Override
					public void onAnimationUpdate(ValueAnimator animation) {
						mscv.smoothScrollTo((int) (mscv.getWidth()*animation.getAnimatedFraction()), 0);
					}
				});
				animator_bg1.start();

				ObjectAnimator animator_bg2 = ObjectAnimator.ofFloat(bg2, "translationX", bg2.getWidth(),0);
				animator_bg2.setDuration(400);
				animator_bg2.start();
pageChanged= false; if(position==-1||position==1){//所有效果复原
bg2.setTranslationX(0);
bg1.setTranslationX(0);
mscv.smoothScrollTo(0, 0); if(position<1&&position>-1){
final float width = bg1.getWidth();
final float height = bg1.getHeight();
final float rotation = ROT_MOD * position * -1.25f;
bg_container.setPivotX(width * 0.5f);
bg_container.setPivotY(height);
bg_container.setRotation(rotation);
}


 720
720

 被折叠的 条评论
为什么被折叠?
被折叠的 条评论
为什么被折叠?
 到【灌水乐园】发言


