


前言
CoordinatorLayout是Material Design的重要组件,协调其它组件实现联动,在实际使用过程中CoordinatorLayout通过协调调度子布局的形式实现触摸动画效果;AppBarLayout继承LinearLayout,布局为垂直方法,所以你可以将其当做LinearLayout使用;CollapsingToolbarLayout的作用是提供了一个可以折叠ToolBar。三者的结合让界面更加的美观和简洁。
效果~
Part 1、CoordinatorLayout的使用
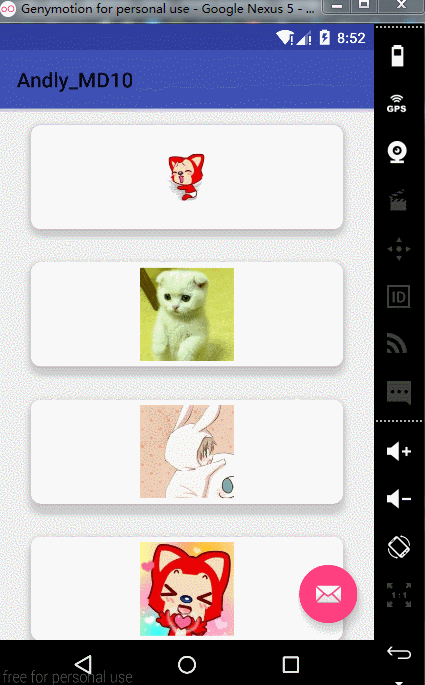
在使用FloatingActionButton+SnackBar的时候经常遇到SnackBar覆盖掉FloatingActionButton的情况,如下
当加上CoordinatorLayout之后
通过查看SnackBar的源码findSuitableParent()方法
    private static ViewGroup findSuitableParent(View view) {
        ViewGroup fallback = null;
        do {
            if (view instanceof CoordinatorLayout) {
                // We've found a CoordinatorLayout, use it
                return (ViewGroup) view;
            } else if (view instanceof FrameLayout) {
                if (view.getId() == android.R.id.content) {
                    // If we've hit the decor content view, then we didn't find a CoL in the
                    // hierarchy, so use it.
                    return (ViewGroup) view;
                } else {
                    // It's not the content view but we'll use it as our fallback
                    fallback = (ViewGroup) view;
                }
            }

            if (view != null) {
                // Else, we will loop and crawl up the view hierarchy and try to find a parent
                final ViewParent parent = view.getParent();
                view = parent instanceof View ? (View) parent : null;
            }
        } while (view != null);

        // If we reach here then we didn't find a CoL or a suitable content view so we'll fallback
        return fallback;
}SnackBar源码分析:http://blog.csdn.net/weiwozhiyi/article/details/54600150
CoordinatorLayout还具有监听滑动控件的滑动通过Behavior反馈到其他子控件并执行一些动画的功能,这里所说的滑动控件包括RecyclerView、NestScrollView和ViewPager,ListView和ScrollView不可以。
Part 2、AppBarLayout的使用
布局代码
<android.support.design.widget.CoordinatorLayout
    xmlns:android="http://schemas.android.com/apk/res/android"
    xmlns:app="http://schemas.android.com/apk/res-auto"
    xmlns:tools="http://schemas.android.com/tools"
    android:id="@+id/activity_main"
    android:layout_width="match_parent"
    android:layout_height="match_parent">

    <android.support.v7.widget.RecyclerView
        android:id="@+id/recyclerview"
        android:layout_width="match_parent"
        android:layout_height="match_parent"
        android:clipChildren="false"
        android:clipToPadding="false"
        app:layout_behavior="@string/appbar_scrolling_view_behavior"/>

    <android.support.design.widget.AppBarLayout
        android:layout_width="match_parent"
        android:layout_height="?attr/actionBarSize">

        <android.support.v7.widget.Toolbar
            android:id="@+id/toolbar"
            android:layout_width="match_parent"
            android:layout_height="?attr/actionBarSize"
            android:background="?attr/colorPrimary"
            app:layout_scrollFlags="scroll|enterAlways"/>

    </android.support.design.widget.AppBarLayout>

    <android.support.design.widget.FloatingActionButton
        android:id="@+id/fab"
        android:layout_width="wrap_content"
        android:layout_height="wrap_content"
        android:layout_gravity="bottom|end"
        android:layout_margin="16dp"
        android:clickable="true"
        android:src="@android:drawable/ic_dialog_email"
        app:elevation="10dp"
        app:fabSize="normal"
        app:layout_behavior=".FabBehavior"
        app:pressedTranslationZ="12dp"
        app:rippleColor="#ff0"/>


</android.support.design.widget.CoordinatorLayout>1、 app:layout_behavior="@string/appbar_scrolling_view_behavior" : 为RecyclerView设置Behavior
2、 app:layout_scrollFlags="scroll|enterAlways" : 将Toolbar与设置的Behavior进行绑定
scroll: 里面所有的子控件想要当滑出屏幕的时候view都必须设置这个flag,没有设置flag的view将被固定在屏幕顶部。
enterAlways : 不管滑动到了什么位置只要向下滑动则显示在顶部
enterAlwaysCollapsed:当你的视图设置了minHeight属性的时候,那么视图只能以最小高度进入,只有当滚动视图到达顶部时才扩大到完整高度。
exitUntilCollapsed:滚动退出屏幕,最后折叠在顶端。
snap:
效果~
当然你也可以使用android.support.v4.widget.NestedScrollView
    <android.support.v4.widget.NestedScrollView
        android:layout_width="match_parent"
        android:layout_height="match_parent"
        app:layout_behavior="@string/appbar_scrolling_view_behavior">

        <LinearLayout
            android:layout_width="match_parent"
            android:layout_height="match_parent"
            android:gravity="center_horizontal"
            android:orientation="vertical">
            ......
            <android.support.v7.widget.CardView
                android:layout_width="300dp"
                android:layout_height="100dp"
                android:layout_margin="16dp"
                app:cardCornerRadius="9dp"
                app:cardElevation="10dp"
                app:contentPadding="5dp">

                <ImageView
                    android:layout_width="match_parent"
                    android:layout_height="match_parent"
                    android:src="@drawable/pic8"/>

            </android.support.v7.widget.CardView>
        </LinearLayout>
    </android.support.v4.widget.NestedScrollView>
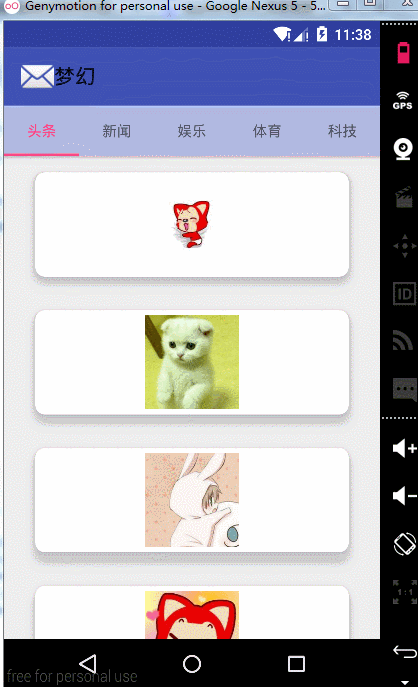
Part 3、TabLayout+ViewPager的使用
布局代码
<android.support.design.widget.CoordinatorLayout
    xmlns:android="http://schemas.android.com/apk/res/android"
    xmlns:app="http://schemas.android.com/apk/res-auto"
    xmlns:tools="http://schemas.android.com/tools"
    android:id="@+id/activity_tab_layout"
    android:layout_width="match_parent"
    android:layout_height="match_parent"
    tools:context="com.andly.administrator.andly_md10.TabLayoutActivity">

    <android.support.design.widget.AppBarLayout
        android:layout_width="match_parent"
        android:layout_height="wrap_content">

        <android.support.v7.widget.Toolbar
            android:id="@+id/toolbar"
            android:layout_width="match_parent"
            android:layout_height="?attr/actionBarSize"
            app:layout_scrollFlags="scroll|enterAlways"
            app:logo="@android:drawable/ic_dialog_email"
            app:title="梦幻"/>

        <android.support.design.widget.TabLayout
            android:id="@+id/tablayout"
            android:layout_width="match_parent"
            android:layout_height="wrap_content"
            app:tabBackground="@color/tabBackground"
            app:tabGravity="fill"
            app:tabIndicatorColor="@color/colorAccent"
            app:tabMode="scrollable"
            app:tabSelectedTextColor="@color/colorAccent"/>
    </android.support.design.widget.AppBarLayout>

    <android.support.v4.view.ViewPager
        android:id="@+id/vp"
        android:layout_width="match_parent"
        android:layout_height="match_parent"
        app:layout_behavior="@string/appbar_scrolling_view_behavior"/>

</android.support.design.widget.CoordinatorLayout>1、让ToolBar进行滑动隐藏需要设置app:layout_scrollFlags="scroll|enterAlways",TabLayout滑动不隐藏则不需要设置
2、为ViewPager、NestedScrollView、RecyclerView出现滑动控件就要设置app:layout_behavior="@string/appbar_scrolling_view_behavior"
3、app:tabMode="scrollable" : 可滚动的
效果~
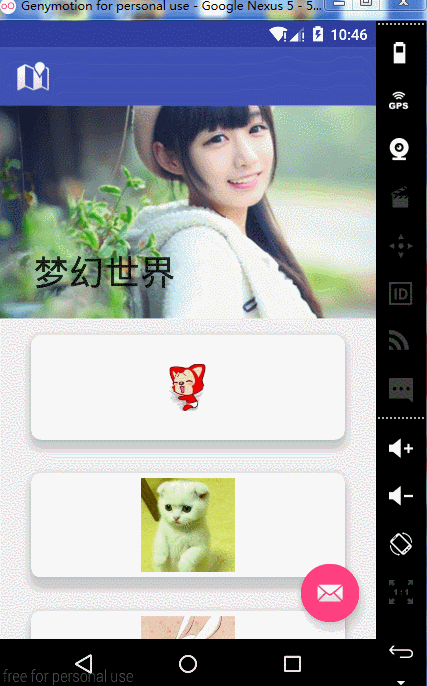
Part 4、CollapsingToolbarLayout的使用
    <android.support.design.widget.AppBarLayout
        android:layout_width="match_parent"
        android:layout_height="260dp">

        <android.support.design.widget.CollapsingToolbarLayout
            android:layout_width="match_parent"
            android:layout_height="match_parent"
            app:layout_scrollFlags="scroll|exitUntilCollapsed"
            app:title="梦幻世界"
            app:contentScrim="@color/colorPrimary"
            app:statusBarScrim="@color/colorPrimary">

            <ImageView
                android:layout_width="match_parent"
                android:layout_height="match_parent"
                android:scaleType="centerCrop"
                android:src="@drawable/mm"
                app:layout_collapseMode="parallax"
                app:layout_collapseParallaxMultiplier="1"
                />

            <android.support.v7.widget.Toolbar
                android:id="@+id/toolbar"
                android:layout_width="match_parent"
                android:layout_height="?attr/actionBarSize"
                android:background="?attr/colorPrimary"
                app:layout_collapseMode="pin"
                app:layout_scrollFlags="scroll|enterAlways"
                app:logo="@android:drawable/ic_dialog_map"/>
        </android.support.design.widget.CollapsingToolbarLayout>
</android.support.design.widget.AppBarLayout>1、AppBarLayout设置固定的高度,并且要实现折叠效果必须比toolbar的高度要高
2、CollapsingToolbarLayout最好设置成match_parent
3、app:layout_collapseMode="parallax" : parallax在折叠的时候会有折叠的视差效果,一般搭配layout_collapseParallaxMultiplier="0.5"视差的明显成都;none没有任何效果,网上滑动的时候会首先固定并推出去;pin固定模式,在折叠的时候最后固定在顶部
4、app:contentScrim="@color/colorPrimary_pink" : 内容部分的沉浸效果
5、app:statusBarScrim="@color/colorPrimary_pink" : 和状态栏的沉浸效果
效果~


 2250
2250

 被折叠的 条评论
为什么被折叠?
被折叠的 条评论
为什么被折叠?
 到【灌水乐园】发言


