前言
不同于iOS, Xamarin 在Visual Studio中针对Android, 可以直接设计使用者界面. 在本篇教学文章中, 笔者会针对Android的专案目录结构以及基本控制项进行介绍, 包含TextView, EditView, Toggle/ Switch以及Seekbar控制项.
Android 专案目录结构
在Visual Studio建立Android 应用程式专案后, 在方案总管中会看到如下图的目录结构:
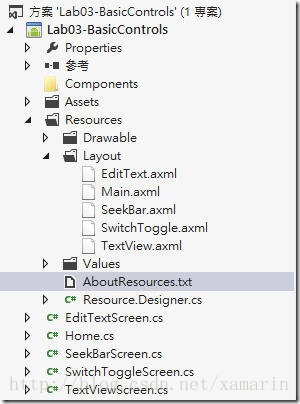
Assets: 放置在Assets资料夹中的档案, 将会一起被封装进Android的封装档中(建置动作要设定为"AndroidAsset"). 之后便可以透过如下的陈述式来存取Assets的资源。
1 | public class ReadAsset : Activity |
5 | protected override void OnCreate (Bundle bundle) { |
9 | InputStream input = Assets.Open ("my_asset.txt");}} |
Resources:包含Drawable, Layout以及Values资料夹. Drawable用来放置图片. 依照装置的解析度不同, 还可以新增drawable-hdpi, drawable-mdpi, drawable-ldpi等资料夹来存放不同解析度的档案. Layout资料夹则是存放使用者界面档(副档名为.axml). 而Value资料夹则是可以存放不同型別的XML对应档, 例如styles.xml, colors.xml… 针对Resources底下的档案, 建置动作请设定为”AndroidResource”
若您开启预设的Main.axml, 会看到如同底下的XML描述
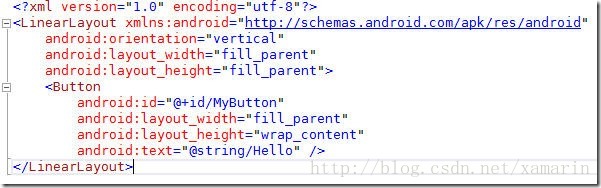
- LinearLayout: 主要的页面框架, 以垂直或水平的方式排列页面上的物件, 相当于Silverlight 中的stack panel
- @+id/[物件名称]: 告诉Android parser, 为物件建立一个resource id
- @string/[名称]: 在String.xml中建立一个字串资源, 后续可供Resource类別存取.
上述的@string则会对应到资料夹Resources\Values\String.xml
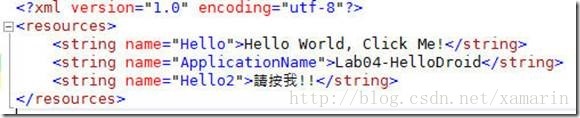
- 名称Hello对应到UI中Button的Text属性
- 名称ApplicationName对应到专案属性中的应用程式名称
- 名称Hello2为自行定义的字串资源.
有了以上的基本概念后, 接下来我们来介绍Android的基本控制项。
TextView
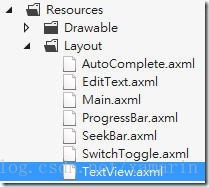
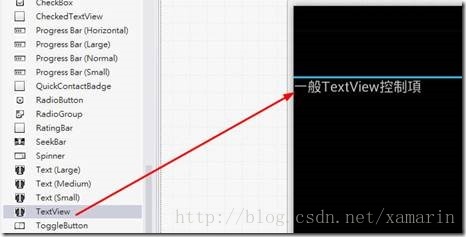
1. 开启Lab03-BasicControls 专案并开启Layout资料夹下的TextView.axml
2. 从左边的工具列将TextView拖放到画面中, 双击TextView并编辑文字
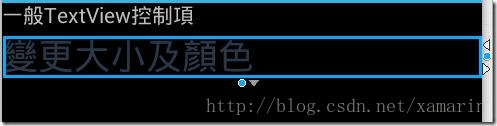
3. 接着拖拉一个TextView, 并在右边的属性视窗设定textcolor为#2A3748, textsize为24dip
4. 再拖拉一个TextView并输入文字, 包含一个超链接. 在属性中将autolink的属性值改为web.
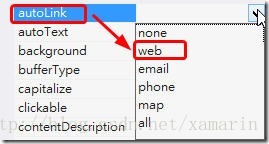
结果如下:链接文字会自动变成超链接.

5. 最后拖拉一个TextView并输入文字, 包含超过5位数的数字, 在属性中将autolink的属性值改为phone
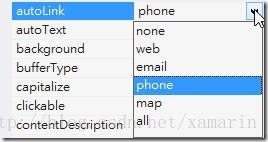
结果如下: 数字被更改为超链接

6. 开启TextViewScreen.cs 並在OnCreate 事件中载入Layout中的TextView
SetContentView(Resource.Layout.TextView);
7. 执行专案并检视及操作有链接的TextView內容.
EditText
1. 开启Layout资料夹下的EditText.axml
2. 从工具箱中拖拉1个Text(Small)及1个Plain Text物件到画面上并编辑Text的文字如下:

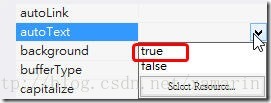
将属性中的autoText设为true
3. 拖拉一组Text及Plain Text物件到画面上并编辑Text的文字如下:

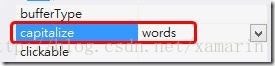
将属性中的capitalize设为words.
4. 拖拉一组Text及password物件到画面上并编辑Text的文字如下:

5. 开启EditTextScreen.cs 并在OnCreate 事件中载入Layout中的TextView
SetContentView(Resource.Layout.EditText);
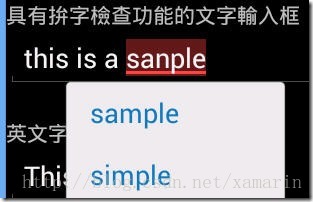
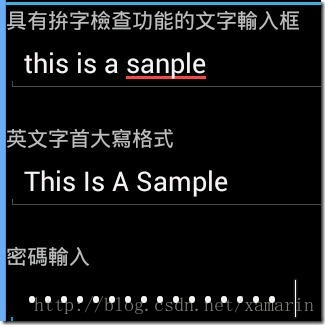
6. 执行专案, 在第一个欄位输入错的单字, 将会出现拼字错误及建议视窗.
7. 其他欄位效果如下:
Switch / Toggle button
Switch跟Toggle其实是很相似的控制项, 都是控制开和关的选项, 但显示的方式有所不同. 我们在同一个练习中使用这2个控制项. (注: Switch控制项是在Android 4.0(API14)后才有, 因此在工具箱中找不到此控制项, 必须在XML中自行输入. 此外, 您的模擬器也必须是Android 4.0以上才能执行)
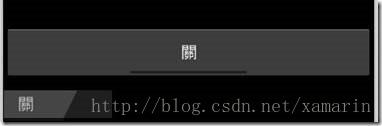
1. 开启SwitchToggle.axml. 在画面上依序部署1个TextView, 用来显示讯息, 1个ToggleButton以及1个Switch控制项. 如下圖所示:
Axml的宣告如下, 请微调部分属性:
03 | android:orientation="vertical" |
05 | android:layout_width="fill_parent" |
07 | android:layout_height="fill_parent"> |
11 | android:textAppearance="?android:attr/textAppearanceMedium" |
13 | android:layout_width="fill_parent" |
15 | android:layout_height="wrap_content" |
17 | android:id="@+id/textView1"/> |
21 | android:layout_width="fill_parent" |
23 | android:layout_height="wrap_content" |
25 | android:id="@+id/toggleButton1" |
31 | android:layout_marginBottom="6.7dp"/> |
35 | android:layout_width="fill_parent" |
37 | android:layout_height="wrap_content" |
43 | android:id="@+id/Switch1" |
45 | android:layout_marginRight="225.3dp"/> |
2. 开启SwitchToggleScreen.cs. 并撰写以下程式码.
03 | SetContentView(Resource.Layout.SwitchToggle); |
07 | ToggleButton toggle = FindViewById<ToggleButton>(Resource.Id.toggleButton1); |
09 | Switch _switch = FindViewById<Switch>(Resource.Id.Switch1); |
11 | TextView msg = FindViewById<TextView>(Resource.Id.textView1); |
15 | toggle.Click+= (sender, e) => { |
19 | msg.Text = "目前Toggle Button的状态是\"开\"";} |
23 | msg.Text = "目前Toggle Button的状态是\"关\"";};}; |
27 | _switch.Click += (sender, e) => { |
31 | msg.Text = "目前Switch Button的状态是\"开\"";} |
35 | msg.Text = "目前Switch Button的状态是\"关\"";};}; |
Toggle Button及Switch 控制项的操作几乎完全相同, 主要就是处理控制项的click事件并判断目前的开关状况.
3. 执行专案并检视执行结果.
Seek Bar
1. 开启seekBar.axml并从工具箱拖放TextView及SeekBar控制项进银幕

介面宣告的xml如下:
03 | android:orientation="vertical" |
05 | android:layout_width="fill_parent" |
07 | android:layout_height="fill_parent"> |
11 | android:textAppearance="?android:attr/textAppearanceMedium" |
13 | android:layout_width="fill_parent" |
15 | android:layout_height="wrap_content" |
17 | android:id="@+id/textView1"/> |
21 | android:layout_width="fill_parent" |
23 | android:layout_height="wrap_content" |
25 | android:id="@+id/seekBar1" |
27 | android:layout_marginTop="48.0dp"/> |
2. 开启SeekBarScreen.cs并在OnCreate事件中撰写以下程式码:
03 | SetContentView(Resource.Layout.SeekBar); |
07 | var msg = FindViewById<TextView>(Resource.Id.textView1); |
09 | var seekbar = FindViewById<SeekBar>(Resource.Id.seekBar1); |
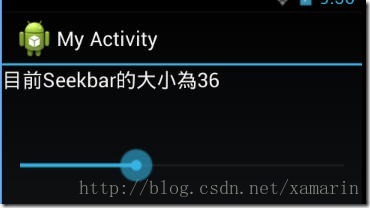
17 | seekbar.ProgressChanged += (sender, e) => { |
19 | msg.Text = string.Format("目前Seekbar的大小为{0}", seekbar.Progress.ToString()); |
SeekBar的操作非常的直觉. 您只需要处理SeekBar控制项的ProgressChanged事件即可.
3. 执行专案并检视执行结果.
结语
Android 的开发方式, 与先前介绍的iOS略有不同. iOS透过Outlet及Action将View及Controller进行连接. 而Android 则是透过Parser, 为页面上的控制项建立id属性, 让Activity可以透过FindViewById方式建立控制项的物件实体, 接下來的处理方式就与iOS或Windows Form在操作控制项的方式类似. 在下一篇教学文章中, 将说明Android应用程式的多页面处理.
本文转自:
了解更多跨平台开发工具资讯请访问:http://xamarin.csdn.net


 本文介绍如何在 Xamarin 的 Visual Studio 环境中设计 Android 应用的用户界面,包括 TextView、EditText、Switch 和 SeekBar 等基本控件的使用方法。


 1859
1859

 被折叠的 条评论
为什么被折叠?
被折叠的 条评论
为什么被折叠?
 到【灌水乐园】发言


