


这几天才是彻底浏览完了Spring实战第四版一遍,好多内容看完就忘。。因此准备逐步实践一番,记录每一次的实战内容。
一、Eclipse的spring插件安装
为了方便在eclipse中开发Spring项目,需要安装STS(spring tool suite),下载地址为:http://spring.io/tools/sts/all
选择自己的eclipse版本对于的一个,放到本地。具体步骤如下:
1、Help--> Install New Software...,选择Click Add...
2、在出现的界面选择click Archive...,找到下载的STS路径,E:\aaa\source\eclipse\springsource-tool-suite-3.7.3.RELEASE-e4.5.2-updatesite.zip,加载。
3、在出现的选择区域,选择xxx/Spring IDE的四个,然后点击finish。
注意:此时可能出现安装很慢,且出现提示
Cannot perform operation. Computing alternate solutions, may take a while STS?
此时不用管,等待加载完成,出现后续的接受license界面,等待最后加载完成重启即可。
二、Spring之HelloWorld
1、新建一个Maven工程,maven脚手架选择quickstart,工程命名为spring1。
2、新建一个HelloWorld类,代码如下:
package com.yefeng.spring.spring1;

public class HelloWorld {

	private String name;

	/**
	 * @return the name
	 */
	public String getName() {
		return name;
	}

	/**
	 * @param name the name to set
	 */
	public void setName(String name) {
		this.name = name;
	}

	public void hello(){
		System.out.println("Hello," + name);
	}
}
<?xml version="1.0" encoding="UTF-8"?>
<beans xmlns="http://www.springframework.org/schema/beans"
	xmlns:xsi="http://www.w3.org/2001/XMLSchema-instance"
	xsi:schemaLocation="http://www.springframework.org/schema/beans http://www.springframework.org/schema/beans/spring-beans.xsd">

<bean id="helloWorld" class="com.yefeng.spring.spring1.HelloWorld">
	<property name="name" value="yefengzhichen"></property>
</bean>

</beans>
<project xmlns="http://maven.apache.org/POM/4.0.0" xmlns:xsi="http://www.w3.org/2001/XMLSchema-instance"
	xsi:schemaLocation="http://maven.apache.org/POM/4.0.0 http://maven.apache.org/xsd/maven-4.0.0.xsd">
	<modelVersion>4.0.0</modelVersion>

	<groupId>com.yefeng.spring</groupId>
	<artifactId>spring1</artifactId>
	<version>0.0.1-SNAPSHOT</version>
	<packaging>jar</packaging>

	<name>spring1</name>
	<url>http://maven.apache.org</url>

	<properties>
		<project.build.sourceEncoding>UTF-8</project.build.sourceEncoding>
	</properties>

	<dependencies>
		<dependency>
			<groupId>junit</groupId>
			<artifactId>junit</artifactId>
			<version>3.8.1</version>
			<scope>test</scope>
		</dependency>
		<!-- https://mvnrepository.com/artifact/org.springframework/spring-context -->
		<dependency>
			<groupId>org.springframework</groupId>
			<artifactId>spring-context</artifactId>
			<version>4.3.0.RELEASE</version>
		</dependency>
		<!-- https://mvnrepository.com/artifact/org.springframework/spring-core -->
		<dependency>
			<groupId>org.springframework</groupId>
			<artifactId>spring-core</artifactId>
			<version>4.3.0.RELEASE</version>
		</dependency>
		<!-- https://mvnrepository.com/artifact/org.springframework/spring-beans -->
		<dependency>
			<groupId>org.springframework</groupId>
			<artifactId>spring-beans</artifactId>
			<version>4.3.0.RELEASE</version>
		</dependency>
		<!-- https://mvnrepository.com/artifact/org.springframework/spring-expression -->
		<dependency>
			<groupId>org.springframework</groupId>
			<artifactId>spring-expression</artifactId>
			<version>4.3.0.RELEASE</version>
		</dependency>

	</dependencies>
</project>
package com.yefeng.spring.spring1;

import org.springframework.context.ApplicationContext;
import org.springframework.context.support.ClassPathXmlApplicationContext;

 /**
 * @author yefengzhichen
 * 2016年7月3日
 */
public class App
{
    public static void main( String[] args )
    {
//        HelloWorld helloWorld = new HelloWorld();
//        helloWorld.setName("yefengzhichen");
    	ApplicationContext applicationContext = new ClassPathXmlApplicationContext("applicationContext.xml");
    	HelloWorld helloWorld = (HelloWorld) applicationContext.getBean("helloWorld");
        helloWorld.hello();

    }
}
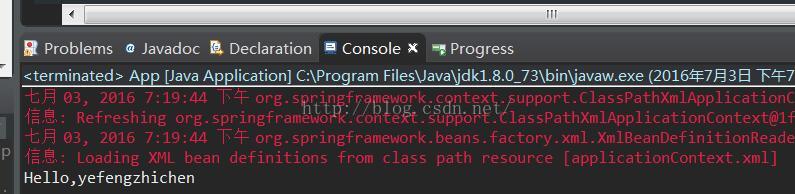
如上,输出测试成功。


 794
794


 被折叠的 条评论
为什么被折叠?
被折叠的 条评论
为什么被折叠?
 到【灌水乐园】发言


