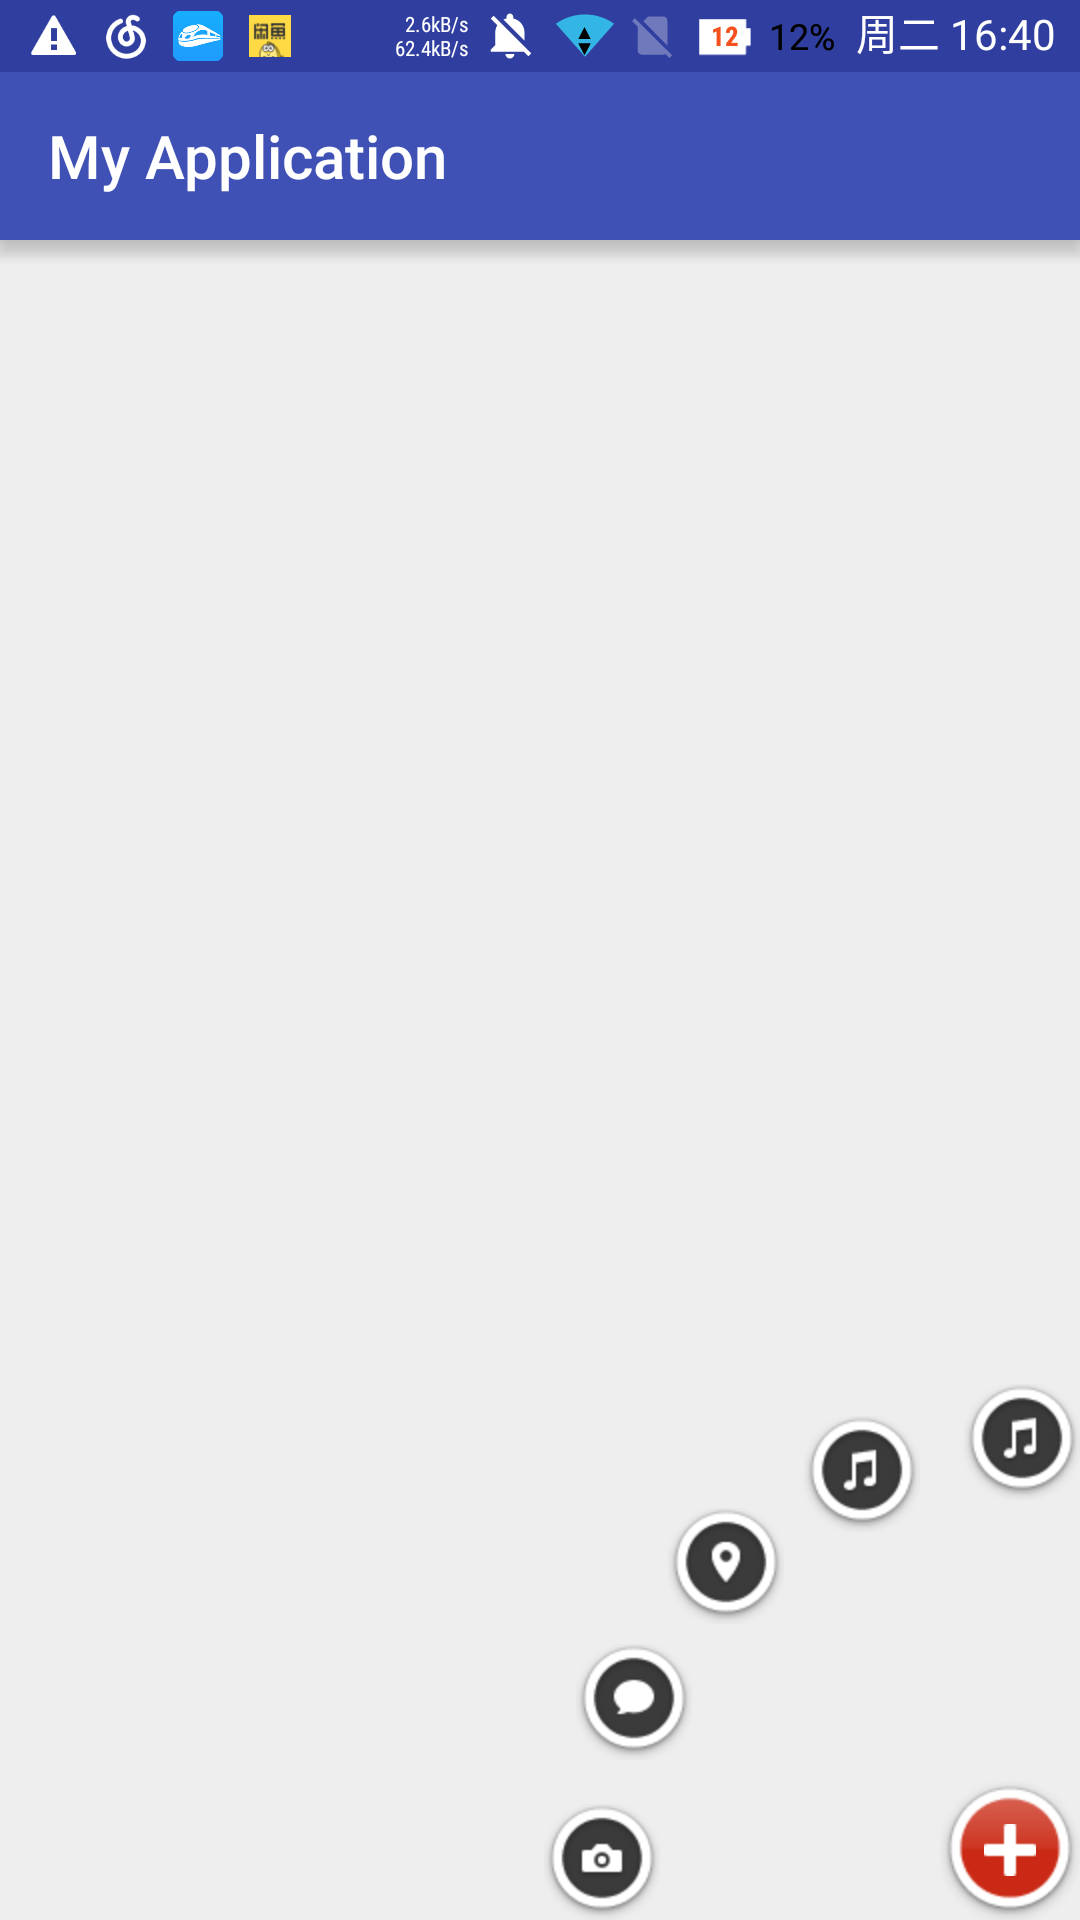
最近学习了怎么实现卫星菜单。现在来总结一下。
首先,核心思想是先把各个图片摆放到全部展开的位置,主按钮的作用就是隐藏和显示子按钮。
其次,展开的时候设计到动画效果,这里面处理的细节也很多。
最后,让我们来做一个卫星菜单吧。
- 首先
创建一个类继承ViewGroup。(因为要画的卫星菜单图里有不止一个view,所以要继承viewGroup),必须覆写它的onlayout()方法(在这个方法里确定每个子view 的位置)。
onMeasure()方法比较简单,就是挨个测量子view的大小,直接上代码。
 @Override
    protected void onMeasure(int widthMeasureSpec, int heightMeasureSpec) {

        int cCount = getChildCount();
        for (int i = 0; i < cCount; i++) {
            measureChild(getChildAt(i), widthMeasureSpec, heightMeasureSpec);
        }
        super.onMeasure(widthMeasureSpec, heightMeasureSpec);
    }
onlayout()方法确定各个子view的位置。首先要定义一个枚举类型的变量表示卫星菜单所放置的不同位置:左上角,左下角,右上角,右下角。然后再定义一个枚举类型表示菜单的开关状态。
     public enum Position {
        LEFT_TOP, LEFT_BOTTOM, RIGHT_TOP, RIGHT_BOTTOM;
    }
      public enum Stutas {
        OPEN, CLOSE;
    }
    private static final int POS_LEFT_TOP = 0;
    private static final int POS_LEFT_BOTTOM = 1;
    private static final int POS_RIGHT_TOP = 2;
    private static final int POS_RIGHT_BOTTOM = 3;
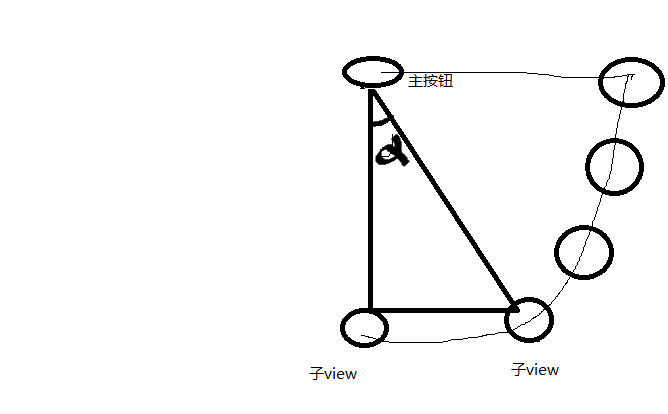
计算每个子view的位置需要一对坐标,请看一个不太专业的图
x= sinα;
y = cosα;
但是三角形的顶点在手机屏幕的不同位置,x,y也是不一样的,并且α的大小根据子view的个数决定  α = 90/(count-1);
只要确定了与左边和上边的距离一个点的位置就确定了,so

       //如果在左下或者是右下
                if (mPosition == Position.LEFT_BOTTOM ||   mPosition ==Position.RIGHT_BOTTOM) {
                    ct = getMeasuredHeight() - cheight - ct;
                }
                if (mPosition == Position.RIGHT_TOP || mPosition ==Position.RIGHT_BOTTOM) {
                    cl = getMeasuredWidth() - cwidth - cl;
                }


//这个是定位主按钮,这个好说
   private void layoutMainButton() {
        mViewButton = getChildAt(0);
        mViewButton.setOnClickListener(this);

        int l = 0;
        int t = 0;

        int width = mViewButton.getMeasuredWidth();
        int height = mViewButton.getMeasuredHeight();
        switch (mPosition) {
            case LEFT_TOP:
                l = 0;
                t = 0;
                break;
            case LEFT_BOTTOM:
                l = 0;
                t = getMeasuredHeight() - height;
                break;
            case RIGHT_TOP:
                l = getMeasuredWidth() - width;
                t = 0;
                break;
            case RIGHT_BOTTOM:
                l = getMeasuredWidth() - width;
                t = getMeasuredHeight() - height;
                break;
        }
        mViewButton.layout(l, t, l + width, t + height);
    }

//下面是定位子view
 @Override
    protected void onLayout(boolean changed, int l, int t, int r, int b) {
        if (changed) {
            layoutMainButton();
            int count = getChildCount();
            Log.d(TAG, "onLayout: count is" + count);
            for (int i = 0; i < count - 1; i++) {
                View child = getChildAt(i + 1);
                child.setVisibility(View.GONE);
                int cl = (int) (mRadius * Math.sin(Math.PI / 2 / (count - 2)
                        * i));
                int ct = (int) (mRadius * Math.cos(Math.PI / 2 / (count - 2)
                        * i));
                Log.d(TAG, "onLayout: cl is " + cl + " , ct is" + ct);
                int cwidth = child.getMeasuredWidth();
                int cheight = child.getMeasuredHeight();

                //如果在左下或者是右下
                if (mPosition == Position.LEFT_BOTTOM || mPosition ==
                        Position.RIGHT_BOTTOM) {
                    ct = getMeasuredHeight() - cheight - ct;
                }
                if (mPosition == Position.RIGHT_TOP || mPosition ==
                        Position.RIGHT_BOTTOM) {
                    cl = getMeasuredWidth() - cwidth - cl;
                }

                child.layout(cl, ct, cl + cwidth, ct + cheight);
            }

        }

    }
这样各个子view的位置就定好了.
- 其次
要实现点击主按钮的一些伸缩,旋转动画效果,这些就要需要一个动画集合来管理。
transAnima = new TranslateAnimation(0,xflag*cl,0,yflag*ct);
            transAnima.setFillAfter(true);
            transAnima.setDuration(duration);
            transAnima.setStartOffset((i * 100) / cCount);
RotateAnimation rotateAnimation = new RotateAnimation(0, 720,
                    Animation.RELATIVE_TO_SELF, 0.5f, Animation
                    .RELATIVE_TO_SELF, 0.5f);
            rotateAnimation.setFillAfter(true);
            rotateAnimation.setDuration(duration);

            animatorSet.addAnimation(rotateAnimation);
            animatorSet.addAnimation(transAnima);
            child.startAnimation(animatorSet);
- 最后实现点击子菜单的动画效果
   /**
     * 添加MenuIterm的点击动画
     * @param pos  要实现动画的位置
     */
        private void menuItermAnim(int pos) {
            for (int i = 0;i < getChildCount()-1;i++){
                View child  = getChildAt(i+1);

                if (i == pos){
                    child.startAnimation(scaleBigAnimation(300));
                }else {
                    child.startAnimation(scaleSmallAnimation(300));
                }
                child.setFocusable(false);
                child.setClickable(false);
            }
完整代码,请到github上下载 :github地址
谢谢阅读。


 879
879

 被折叠的 条评论
为什么被折叠?


