


 本文介绍如何使用Java连接LDAP服务器并进行部门查询操作。详细解释了dn(唯一标识符)的概念,并提供了完整的代码示例,包括环境配置参数、连接过程及查询部门的具体实现。
首先必须了解ldap,ldap相关可以问度娘。这边我重点要提的是dn(distinguished name),通俗的来说就是唯一标示。
然后现在可以先下一个ldapadmin,通过ldapadmin先连接已经配置好的ldap,下面是微软ad的图。
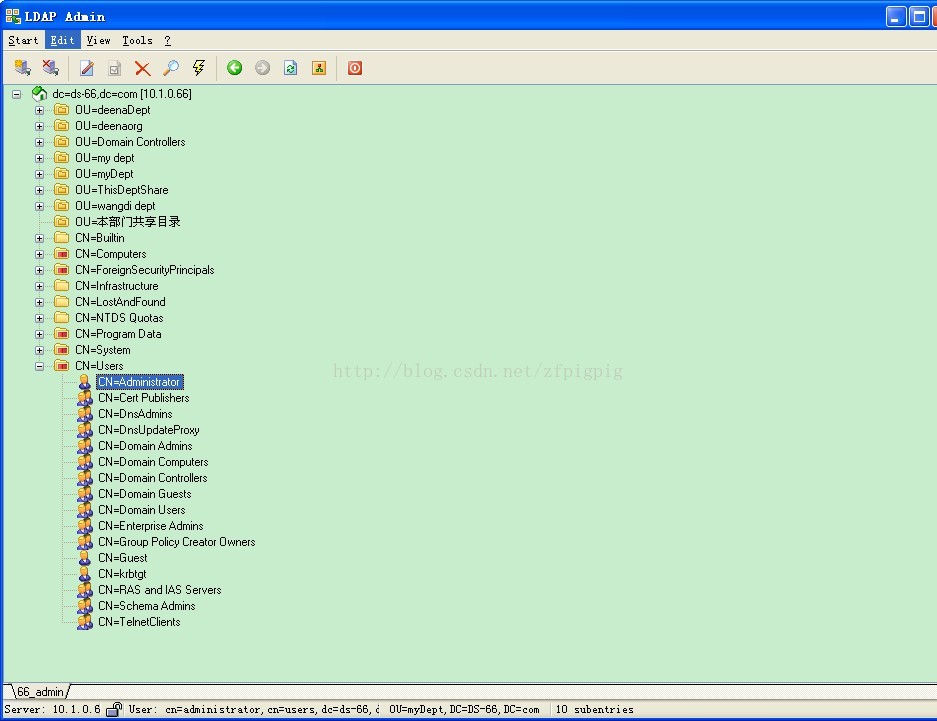
比如administrator这个用户的dn就是cn=administrator,cn=users,dc=ds-66,dc=com(简单来说就是全路径+域的形式)
最后就可以编码了,连接的代码比较简单,使用fliter的查询部门稍微复杂点,不过仔细看看也很容易理解,如下。
	public static void main(String[] args) {
		String url = "ldap://10.1.0.66:389/";
		String domain = "dc=ds-66,dc=com";
		String user = "cn=administrator,cn=users";
		String password = "111111";
		Hashtable<String, String> env = new Hashtable<String, String>();
		env.put(Context.INITIAL_CONTEXT_FACTORY, "com.sun.jndi.ldap.LdapCtxFactory"); // LDAP 工厂
		env.put(Context.SECURITY_AUTHENTICATION, "simple"); // LDAP访问安全级别
		env.put(Context.PROVIDER_URL, url);
		env.put(Context.SECURITY_PRINCIPAL, user+","+domain); //  填DN
		env.put(Context.SECURITY_CREDENTIALS, password); // AD Password
		env.put("java.naming.ldap.attributes.binary", "objectSid objectGUID");
		LdapContext ldapCtx = null;
		try {
			ldapCtx = new InitialLdapContext(env , null);
			queryGroup(ldapCtx);
			//queryUser(ldapCtx);

		} catch (NamingException e) {
			e.printStackTrace();
		} finally {
			if(ldapCtx != null) {
				try {
					ldapCtx.close();
				} catch (NamingException e) {
				}
			}
		}
	}

	private static void queryGroup(LdapContext ldapCtx) throws NamingException {
		SearchControls searchCtls = new SearchControls();
		searchCtls.setSearchScope(SearchControls.SUBTREE_SCOPE);
		String searchFilter = "objectClass=organizationalUnit";
		String searchBase = "ou=myDeptSubDept,ou=myDept,dc=DS-66,dc=com";
		String returnedAtts[] = {"distinguishedName", "objectGUID", "name"};
		searchCtls.setReturningAttributes(returnedAtts);
		NamingEnumeration<SearchResult> answer = ldapCtx.search(searchBase, searchFilter, searchCtls);
		while (answer.hasMoreElements()) {
			SearchResult sr = answer.next();
			Attributes Attrs = sr.getAttributes();
			if (Attrs != null) {
				NamingEnumeration<?> ne = Attrs.getAll();
				while(ne.hasMore()) {
					Attribute Attr = (Attribute)ne.next();
					String name = Attr.getID();
					Enumeration<?> values = Attr.getAll();
					if (values != null) { // 迭代
						while (values.hasMoreElements()) {
							String value = "";
							if("objectGUID".equals(name)) {
								value = UUID.nameUUIDFromBytes((byte[]) values.nextElement()).toString();
							} else {
								value = (String)values.nextElement();
							}
							System.out.println(name + " " + value);
						}
					}
				}
				System.out.println("=====================");
			}
		}

	}


 被折叠的 条评论
为什么被折叠?
被折叠的 条评论
为什么被折叠?
 到【灌水乐园】发言


