


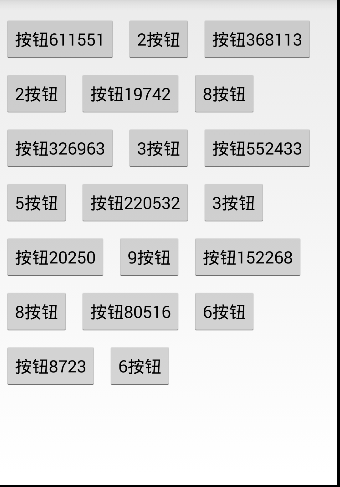
这就是我们要实现的流式布局。
难点就在于如何控制子View的布局,动态的判断是否将子View放置在下一行。
很明显,我们需要写一个类来继承ViewGroup。
package com.example.demo.autolinefeedlayout;

import android.content.Context;
import android.content.res.TypedArray;
import android.util.AttributeSet;
import android.util.Log;
import android.view.View;
import android.view.ViewGroup;
import android.widget.Button;

public class AutoLineFeedLayout extends ViewGroup {

    private static final boolean DEBUG = true;
    private static final String TAG = "AutoLineFeedLayout";

    private int paddingLeft = 0;
    private int paddingRight = 0;
    private int paddingTop = 0;
    private int paddingBottom = 0;
    private int verticalSpacing = 0;
    private int horizontalSpacing = 0;

    private int mWidth;
    public AutoLineFeedLayout(Context context, AttributeSet attrs, int defStyle) {
        super(context, attrs, defStyle);
        init(attrs);
    }
    public AutoLineFeedLayout(Context context, AttributeSet attrs) {
        this(context, attrs, 0);
    }
    public AutoLineFeedLayout(Context context) {
        this(context, null);
    }

    /**
     * 获取布局文件中的一些值
     * @param attrs
     */
    private void init(AttributeSet attrs) {
        TypedArray typedArray = getContext().obtainStyledAttributes(attrs,
                R.styleable.AutoLineFeedLayout);
        horizontalSpacing = (int) typedArray.getDimension(
                R.styleable.AutoLineFeedLayout_horizontalSpacing, 0);
        paddingLeft = (int) typedArray.getDimension(
                R.styleable.AutoLineFeedLayout_paddingLeft, 0);
        paddingTop = (int) typedArray.getDimension(
                R.styleable.AutoLineFeedLayout_paddingTop, 0);
        paddingBottom = (int) typedArray.getDimension(
                R.styleable.AutoLineFeedLayout_paddingBottom, 0);
        verticalSpacing = (int) typedArray.getDimension(
                R.styleable.AutoLineFeedLayout_verticalSpacing, 0);
        paddingRight = (int) typedArray.getDimension(
                R.styleable.AutoLineFeedLayout_paddingRight, 0);
        typedArray.recycle();
    }

    private void log(String string) {
        if (DEBUG) {
            Log.i(TAG, string);
        }
    }
    @Override
    protected void onLayout(boolean changed, int l, int t, int r, int b) {
        log("l=" + l + " t=" + t + " r=" + r + " b=" + b);
        int count = getChildCount();
        mWidth = getWidth();
        log("mWidth=" + mWidth);
        //第一个子View开始放置的距离父控件左边的距离
        int startOffsetX = paddingLeft;
        //第一个子View开始放置的距离父控件上边的距离
        int startOffsetY=0+paddingTop;
        int preEndsetX;
        **for (int i = 0; i < count; i++) {
            View childView = getChildAt(i);
            childView.measure(0,0);
            //子View的宽度
            int w = childView.getMeasuredWidth();
            //子View的高度
            int h = childView.getMeasuredHeight();
            log("w=" + w + "  h=" + h);
            //子View的右端距离父控件的左边的距离
            preEndsetX=startOffsetX+w;
            //如果距离大于宽度-右间距的距离,则该子View应该在新的一行
            if (preEndsetX > mWidth - paddingRight) {
                if (startOffsetX > paddingLeft) {
                    //设置新起一行的子View到父控件的距离
                    startOffsetX=paddingLeft;
                    startOffsetY = h + startOffsetY +horizontalSpacing;
                }
            }
            childView.layout(startOffsetX, startOffsetY, startOffsetX+ w, startOffsetY + h);
            //设置下一个子view开始放置的距离父控件左边的距离
            startOffsetX=startOffsetX+w+verticalSpacing;
        }**
    }
    public void setOnItemClickListener(final onItemClickListener onItemClickListener) {
        int count=getChildCount();
        for (int i = 0; i < count; i++) {
            final View view=getChildAt(i);
            Button btn = (Button) view.findViewById(R.id.btn);
            btn.setOnClickListener(new OnClickListener() {
                @Override
                public void onClick(View v) {
                    if (onItemClickListener != null) {
                        v.setTag(((Button)v).getText());
                        onItemClickListener.setOnItemClickListener(v);
                    }
                }
            });
        }


    }
    public interface onItemClickListener{
        void setOnItemClickListener(View v);
    }
}
MainActivity的代码:
package com.example.demo.autolinefeedlayout;

import android.app.Activity;
import android.os.Bundle;
import android.view.LayoutInflater;
import android.view.View;
import android.widget.Button;
import android.widget.Toast;

import java.util.Random;

public class MainActivity extends Activity {
    private AutoLineFeedLayout layout;
    @Override
    protected void onCreate(Bundle savedInstanceState) {
        super.onCreate(savedInstanceState);
        setContentView(R.layout.activity_main);
        Random random = new Random();

        layout = (AutoLineFeedLayout) findViewById(R.id.al);
        View view;
        for (int i = 0; i < 20; i++) {
            view = LayoutInflater.from(MainActivity.this).inflate(R.layout.button, null);
            Button button = (Button) view.findViewById(R.id.btn);
            if ((i & 1) == 0)
                button.setText("按钮" + random.nextInt(1000)+random.nextInt(1000));
            else
                button.setText(random.nextInt(10) + "按钮");
            layout.addView(view, i);
        }
        layout.setOnItemClickListener(new AutoLineFeedLayout.onItemClickListener() {
            @Override
            public void setOnItemClickListener(View view) {
                Toast.makeText(getApplicationContext(), (String) view.getTag(), Toast.LENGTH_SHORT).show();
            }
        });
    }
}
自定义该控件的属性:
<?xml version="1.0" encoding="utf-8"?>
<resources>

    <declare-styleable name="AutoLineFeedLayout">
        <attr name="paddingLeft" format="reference|dimension" />
        <attr name="paddingRight" format="reference|dimension" />
        <attr name="paddingTop" format="reference|dimension" />
        <attr name="paddingBottom" format="reference|dimension" />
        <attr name="verticalSpacing"  format="reference|dimension" />
        <attr name="horizontalSpacing"  format="reference|dimension"  />
    </declare-styleable>

</resources>
activity_main.xml:
<LinearLayout xmlns:android="http://schemas.android.com/apk/res/android"
    xmlns:tools="http://schemas.android.com/tools"
    xmlns:app="http://schemas.android.com/apk/res-auto"
    android:layout_width="match_parent"
    android:layout_height="match_parent"
    android:orientation="horizontal"
    tools:context=".MainActivity">

    <com.example.demo.autolinefeedlayout.AutoLineFeedLayout
        android:id="@+id/al"
        android:layout_width="match_parent"
        android:layout_height="match_parent"
        app:paddingLeft="5dp"
        app:paddingRight="5dp"
        app:paddingTop="20dp"
        app:paddingBottom="20dp"
        app:verticalSpacing="10dp"
        app:horizontalSpacing="10dp" />
</LinearLayout>
子View的布局文件:
<?xml version="1.0" encoding="utf-8"?>
<LinearLayout xmlns:android="http://schemas.android.com/apk/res/android"
    android:layout_width="match_parent" android:layout_height="match_parent">
<Button
    android:id="@+id/btn"
    android:layout_width="wrap_content"
    android:layout_height="wrap_content"
    />
</LinearLayout>
Demo下载:
Android流式布局Demo


 2653
2653

 被折叠的 条评论
为什么被折叠?
被折叠的 条评论
为什么被折叠?
 到【灌水乐园】发言


