


现在市面上好多App都支持主题切换功能,所谓主题切换就是当从一种主题切换到另一种主题时,并不只是单单的修改了一下背景颜色,而是将整个App的背景、字体样式、图标等都进行了一系列的修改,并且风格应该统一。
具体实现主题切换功能的方式有很多, 今天我来介绍一种热插拔实现主题切换的方式。 首先来了解一下什么叫热插拔。
所谓热插拔就是当用户想要的时候就直接安装主题Apk, 如果感觉某一套主题不太好看,或者系统硬盘比较吃紧,用户只要将主题Apk卸载掉就OK了
Okay! 废话不多说,先整理一下实现热插拔主题切换的思路
- 制作几套主题Apk
- 创建主题切换的Apk,并添加实现代码
打完收工~~ WTF!! 前面铺垫了那么多,实现思路就这么两部??? 你没有看错,就需要这两部即可(我们不要998,也不要98, 只要38,男友领回家)
制作主题Apk
如下图所示,我创建了两个工程,分别叫BlackTheme和WhiteTheme
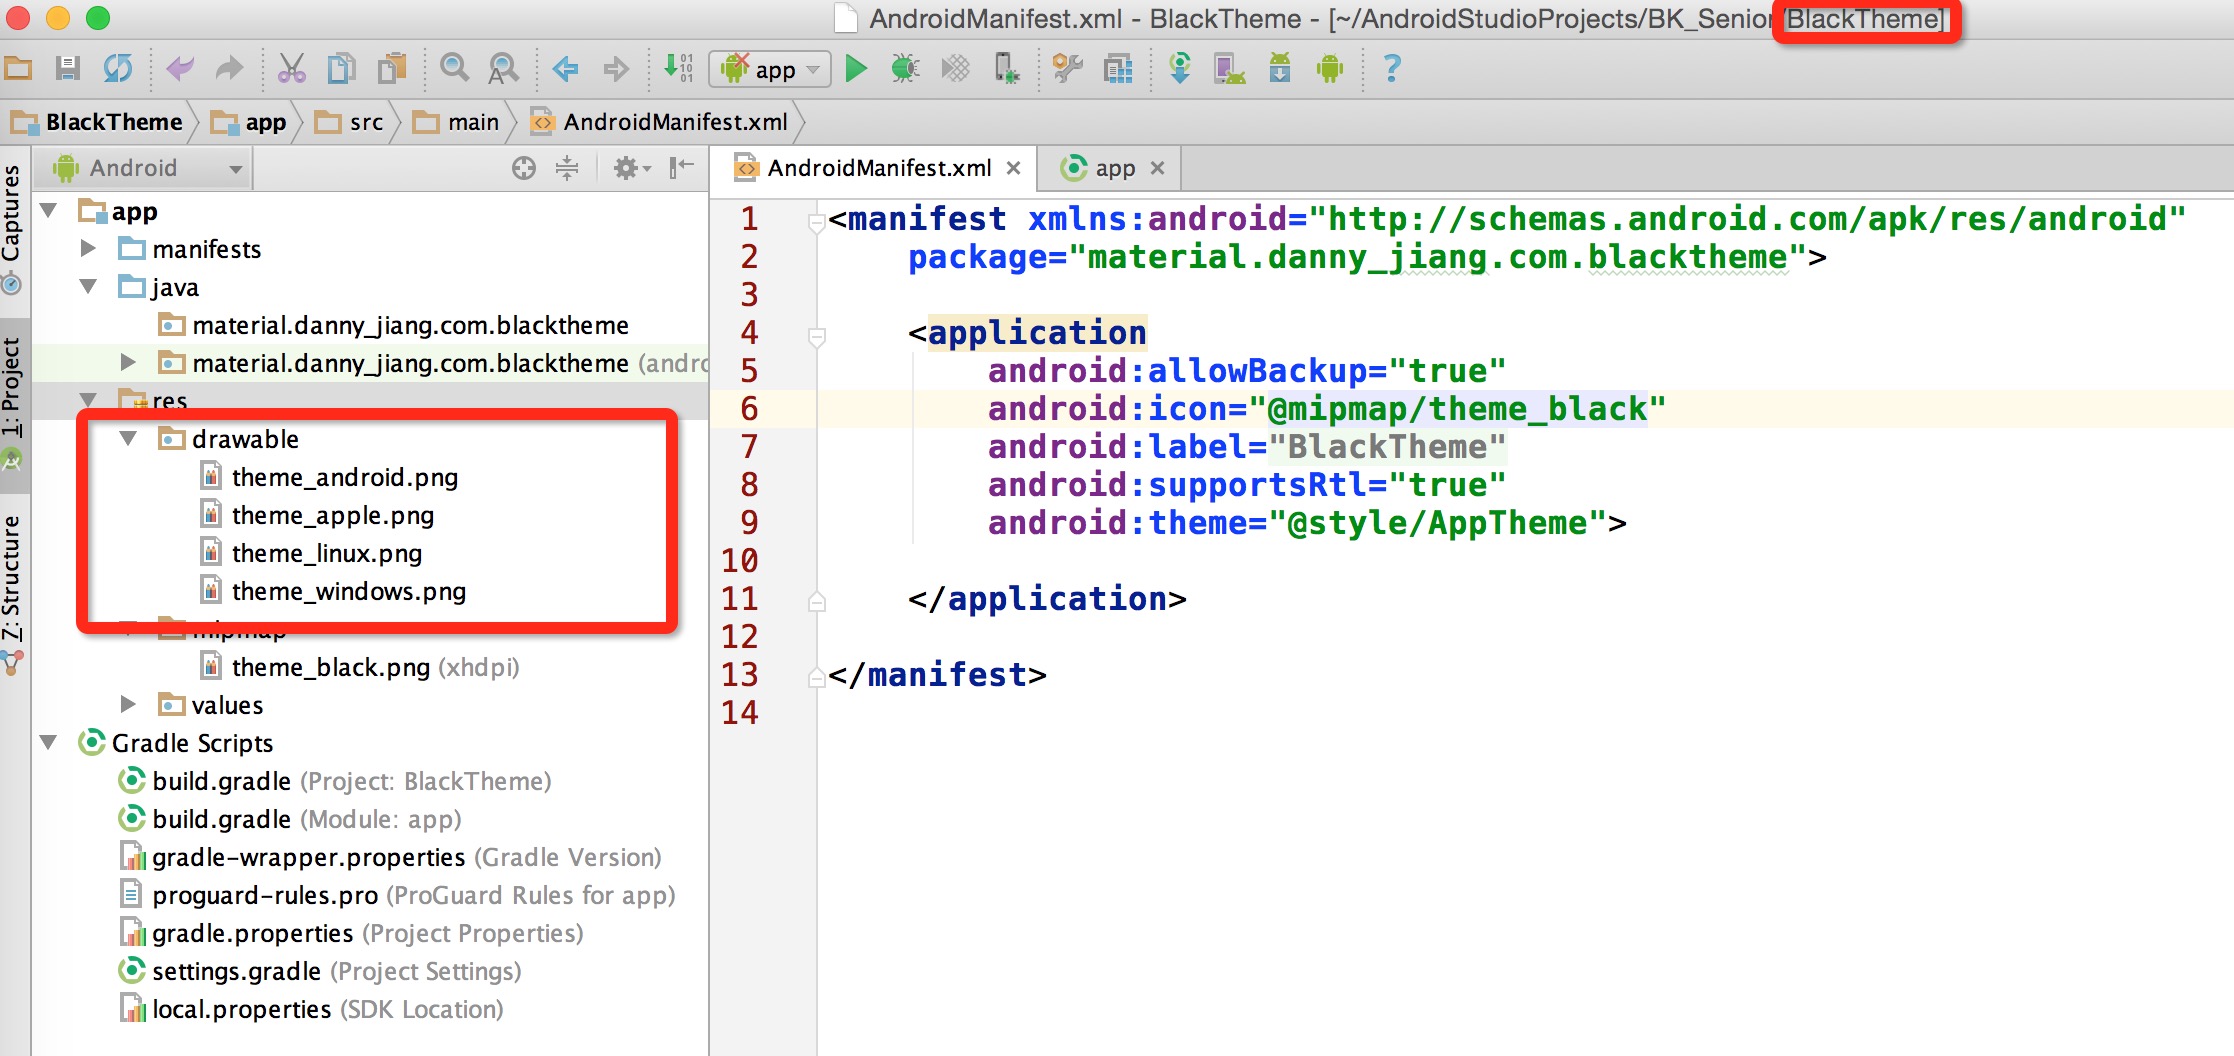
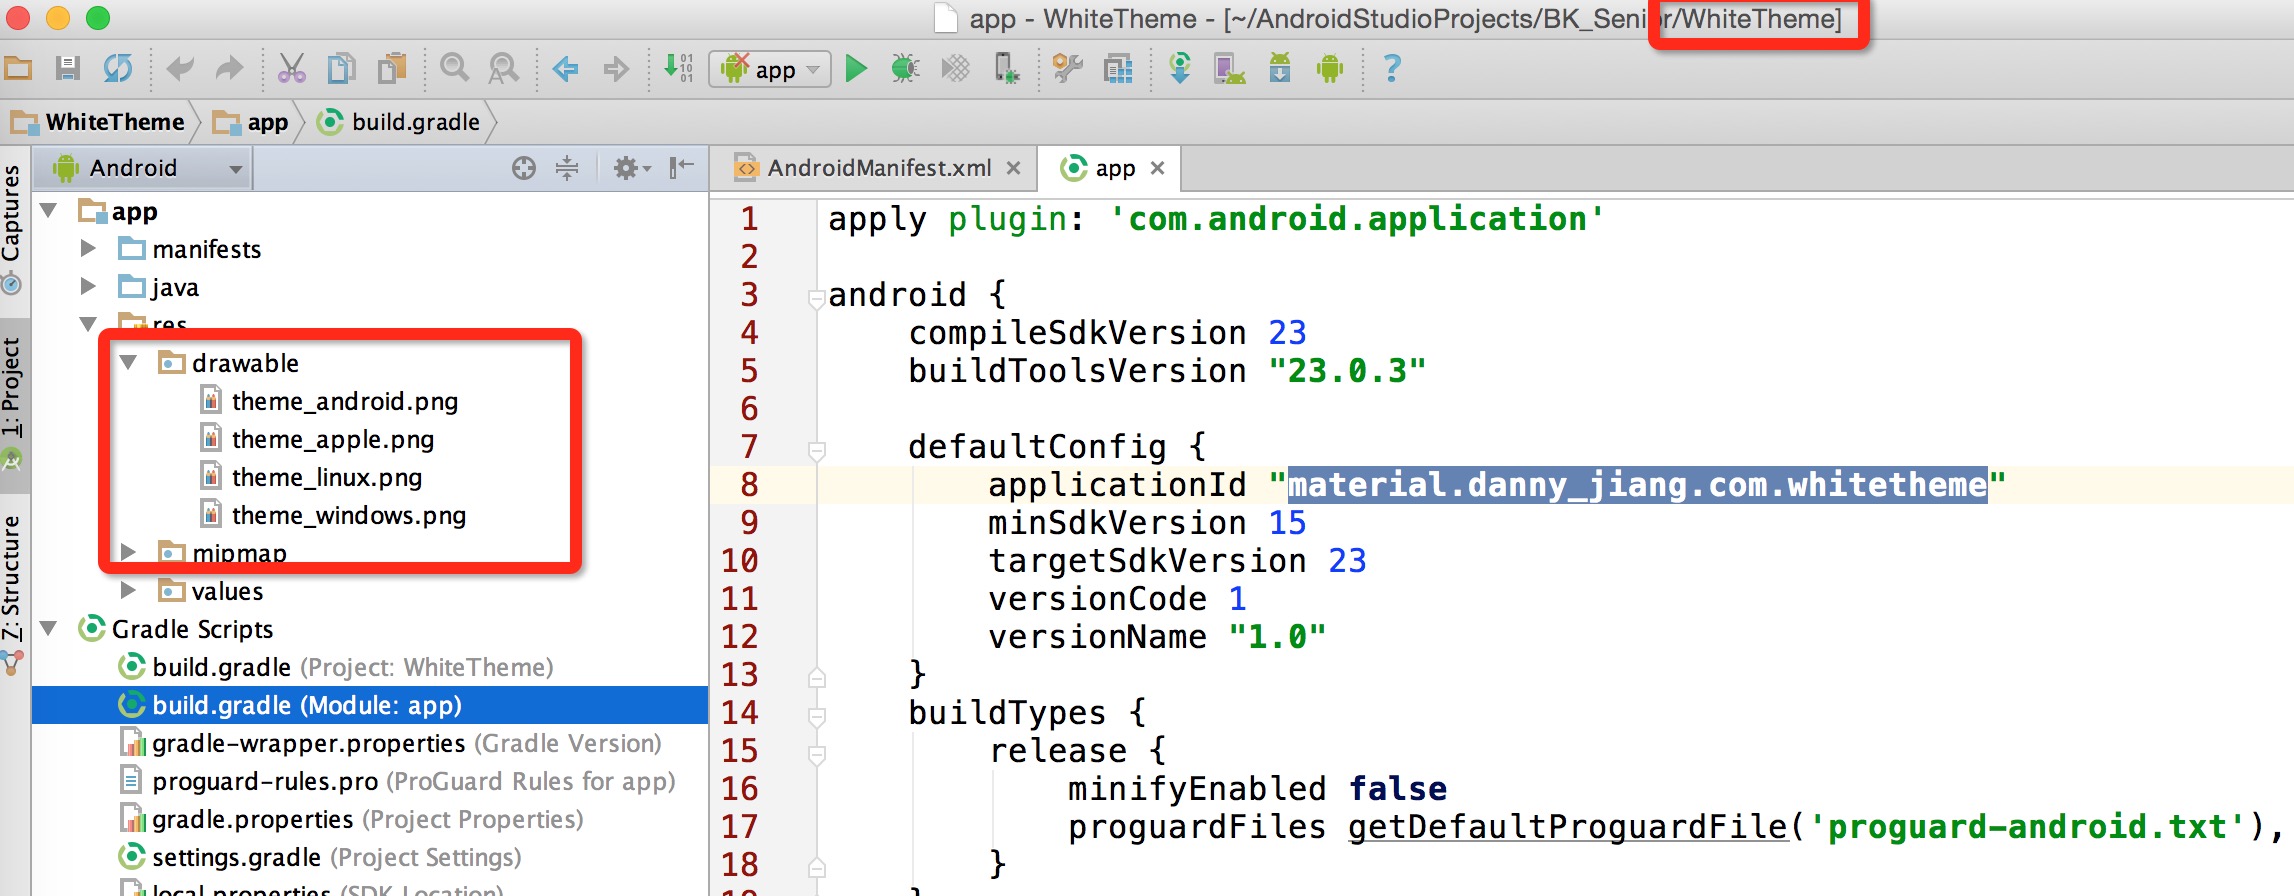
在这两个主题Apk中没有任何Activity,也没有任何布局文件,因为不需要,主题Apk只需要提供相应的主题资源(图片,颜色,字体样式等)即可。我在每一套主题Apk中都放置了4张用来表示系统的图标,分别如下:


创建主题切换的Apk,并添加实现代码
接下来创建实现主题切换的Apk,创建工程结构如下所示:

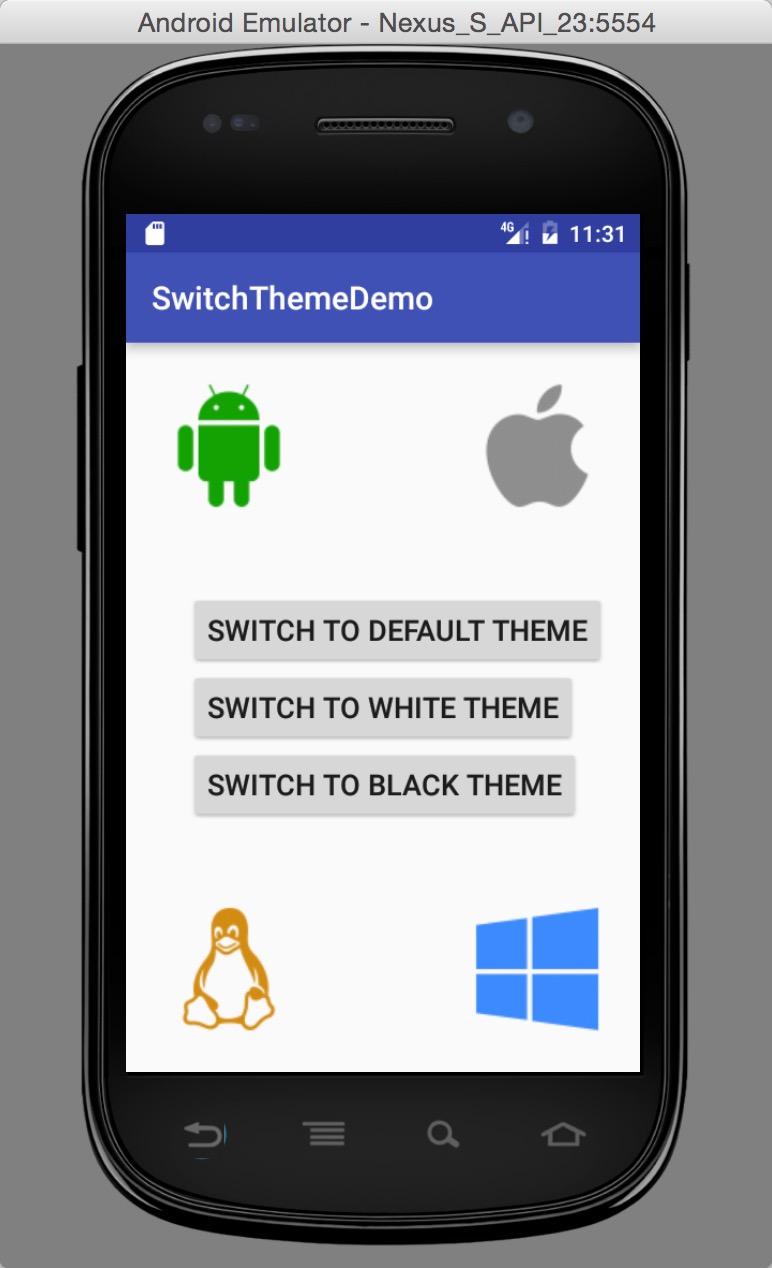
在主应用中也有4张表示系统的图标, 默认图标如下:


接下来修改主界面布局xml文件, 代码如下
<?xml version="1.0" encoding="utf-8"?>
<RelativeLayout xmlns:android="http://schemas.android.com/apk/res/android"
    xmlns:tools="http://schemas.android.com/tools"
    android:layout_width="match_parent"
    android:layout_height="match_parent"
    android:paddingBottom="@dimen/activity_vertical_margin"
    android:paddingLeft="@dimen/activity_horizontal_margin"
    android:paddingRight="@dimen/activity_horizontal_margin"
    android:paddingTop="@dimen/activity_vertical_margin"
    tools:context="material.danny_jiang.com.switchthemedemo.MainActivity">

    <Button
        android:id="@+id/whiteBtn"
        android:text="switch to white theme"
        android:textSize="18sp"
        android:onClick="switchWhiteTheme"
        android:layout_width="wrap_content"
        android:layout_height="wrap_content"
        android:layout_centerInParent="true"/>

    <Button
        android:id="@+id/defalultBtn"
        android:text="switch to default theme"
        android:textSize="18sp"
        android:onClick="switchDefautTheme"
        android:layout_width="wrap_content"
        android:layout_height="wrap_content"
        android:layout_above="@id/whiteBtn"
        android:layout_alignLeft="@id/whiteBtn"/>

    <Button
        android:id="@+id/blackBtn"
        android:text="switch to black theme"
        android:textSize="18sp"
        android:onClick="switchBlackTheme"
        android:layout_width="wrap_content"
        android:layout_height="wrap_content"
        android:layout_below="@id/whiteBtn"
        android:layout_alignLeft="@id/whiteBtn"/>

    <ImageView
        android:id="@+id/image_Android"
        android:src="@drawable/theme_android"
        android:layout_width="wrap_content"
        android:layout_height="wrap_content"
        android:layout_alignParentTop="true"
        android:layout_alignParentLeft="true"
        />

    <ImageView
        android:id="@+id/image_Apple"
        android:src="@drawable/theme_apple"
        android:layout_width="wrap_content"
        android:layout_height="wrap_content"
        android:layout_alignParentTop="true"
        android:layout_alignParentRight="true"
        />

    <ImageView
        android:id="@+id/image_Linux"
        android:src="@drawable/theme_linux"
        android:layout_width="wrap_content"
        android:layout_height="wrap_content"
        android:layout_alignParentBottom="true"
        android:layout_alignParentLeft="true"
        />

    <ImageView
        android:id="@+id/image_Windows"
        android:src="@drawable/theme_windows"
        android:layout_width="wrap_content"
        android:layout_height="wrap_content"
        android:layout_alignParentBottom="true"
        android:layout_alignParentRight="true"
        />
</RelativeLayout>
显示效果如下:
然后,在MainActivity中实现切换主题的核心代码。
思路就是通过Context.createPackageContext(String packageName)可以获取相应包名App的上下文对象,有了此上下文对象就可以访问此包名App中的各种资源(图片,颜色值等等)
注意:每一个主题Apk中的图片名称应该一致!!!!
MainActivity中的代码如下:
package material.danny_jiang.com.switchthemedemo;

import android.content.Context;
import android.content.SharedPreferences;
import android.content.pm.PackageManager;
import android.graphics.drawable.Drawable;
import android.support.v7.app.AppCompatActivity;
import android.os.Bundle;
import android.view.View;
import android.widget.ImageView;

public class MainActivity extends AppCompatActivity {

    private ImageView imageAndroid;
    private ImageView imageApple;
    private ImageView imageLinux;
    private ImageView imageWindows;

    @Override
    protected void onCreate(Bundle savedInstanceState) {
        super.onCreate(savedInstanceState);
        setContentView(R.layout.activity_main);

        imageAndroid = ((ImageView) findViewById(R.id.image_Android));
        imageApple = ((ImageView) findViewById(R.id.image_Apple));
        imageLinux = ((ImageView) findViewById(R.id.image_Linux));
        imageWindows = ((ImageView) findViewById(R.id.image_Windows));

        String packageName = getSavedPackageName();

        switchThemeBaseOnContext(packageName);
    }

    private void switchThemeBaseOnContext(String packageName) {

        Context newContext = null;

        try {
            newContext = createPackageContext(packageName, CONTEXT_IGNORE_SECURITY);

            int theme_android_id = newContext.getResources().getIdentifier(
                    "theme_android", "drawable", newContext.getPackageName());
            Drawable drawableAndroid = newContext.getResources().getDrawable(theme_android_id);
            imageAndroid.setImageDrawable(drawableAndroid);

            int theme_apple_id = newContext.getResources().getIdentifier(
                    "theme_apple", "drawable", newContext.getPackageName());
            Drawable drawableApple = newContext.getResources().getDrawable(theme_apple_id);
            imageApple.setImageDrawable(drawableApple);

            int theme_linux_id = newContext.getResources().getIdentifier(
                    "theme_linux", "drawable", newContext.getPackageName());
            Drawable drawableLinux = newContext.getResources().getDrawable(theme_linux_id);
            imageLinux.setImageDrawable(drawableLinux);

            int theme_windows_id = newContext.getResources().getIdentifier(
                    "theme_windows", "drawable", newContext.getPackageName());
            Drawable drawableWindows = newContext.getResources().getDrawable(theme_windows_id);
            imageWindows.setImageDrawable(drawableWindows);

            saveThemeInSharedPreferences(newContext.getPackageName());
        } catch (PackageManager.NameNotFoundException e) {
            e.printStackTrace();
        }
    }

    private String getSavedPackageName() {
        SharedPreferences sp = getSharedPreferences("theme_pref", MODE_PRIVATE);

        String packageName = sp.getString("theme", getPackageName());

        return packageName;
    }

    private void saveThemeInSharedPreferences(String packageName) {
        SharedPreferences sp = getSharedPreferences("theme_pref", MODE_PRIVATE);

        SharedPreferences.Editor editor = sp.edit();

        editor.putString("theme", packageName);

        editor.commit();
    }

    public void switchWhiteTheme(View view) {
        switchThemeBaseOnContext("material.danny_jiang.com.whitetheme");
    }

    public void switchBlackTheme(View view) {
        switchThemeBaseOnContext("material.danny_jiang.com.blacktheme");
    }

    public void switchDefautTheme(View view) {
        switchThemeBaseOnContext(getPackageName());
    }

}
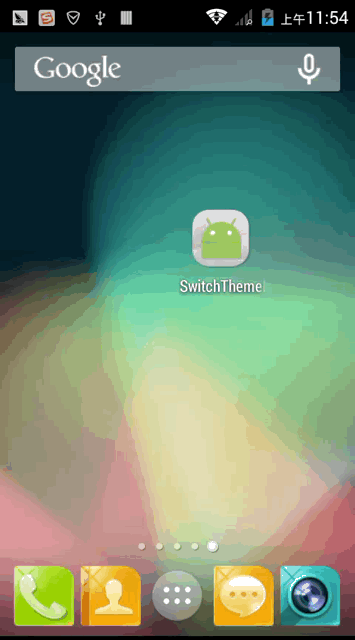
运行效果如下:
Demo下载地址 : http://download.csdn.net/detail/zxm317122667/9641979


 535
535

 被折叠的 条评论
为什么被折叠?
被折叠的 条评论
为什么被折叠?
 到【灌水乐园】发言


