


一、TableView控件的创建以及数据的添加
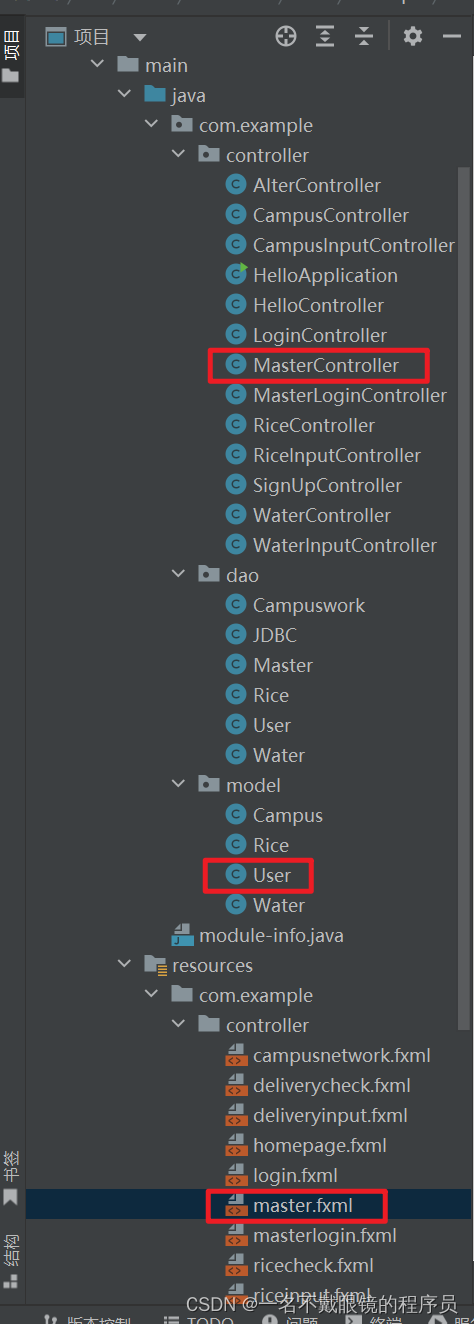
首先需要创建3个类(User类、MasterController类、JDBC类)和1个fxml文件。User类在Model包中,用于存放TableView中我们需要添加上的变量;MasterController类在Controller包中,用于实现交互。fxml文件就是页面。
创建fxml文件的具体操作:这里用到了JavaFx SceneBuilder插件。先创建一个fxml文件,将其的fx:controller路径改为上方提到的MasterController。接着再fxml文件中创建一个AnchorPane布局,然后在Controls(控件)中找到TableView并将其拖到布局中,再找到TableColumn控件,对其设置好id名称后并将其拖到布局中的TableView中即可。具体如下方所示:
<?xml version="1.0" encoding="UTF-8"?>
<?import java.lang.*?>
<?import javafx.scene.control.*?>
<?import javafx.scene.layout.*?>

<AnchorPane maxHeight="-Infinity" maxWidth="-Infinity" minHeight="-Infinity" minWidth="-Infinity" prefHeight="660.0" prefWidth="410.0" xmlns="http://javafx.com/javafx/8" xmlns:fx="http://javafx.com/fxml/1" fx:controller="com.example.controller.MasterController">
   <children>
      <TableView fx:id="tableView" layoutX="54.0" layoutY="56.0" prefHeight="340.0" prefWidth="302.0">
        <columns>
          <TableColumn fx:id="id" prefWidth="75.0" text="num" />
          <TableColumn fx:id="password" prefWidth="75.0" text="password" />
            <TableColumn fx:id="name" prefWidth="75.0" text="name" />
            <TableColumn fx:id="age" prefWidth="75.0" text="age" />
            <TableColumn fx:id="con_id" prefWidth="75.0" text="con_id" visible="false" />
        </columns>
      </TableView>
      <Button layoutX="303.0" layoutY="461.0" mnemonicParsing="false" onMouseClicked="#removeDate" text="删除" />
      <Button layoutX="352.0" layoutY="614.0" mnemonicParsing="false" onMouseClicked="#back" text="返回" />
      <Button fx:id="addButton" layoutX="303.0" layoutY="419.0" mnemonicParsing="false" onMouseClicked="#addDate" text="添加" />
      <Button layoutX="303.0" layoutY="500.0" mnemonicParsing="false" onMouseClicked="#dataRevise" text="修改" />
      <TextField fx:id="idField" layoutX="67.0" layoutY="413.0" prefHeight="36.0" prefWidth="190.0" />
      <TextField fx:id="passwordField" layoutX="67.0" layoutY="473.0" prefHeight="36.0" prefWidth="190.0" />
      <TextField fx:id="nameField" layoutX="67.0" layoutY="532.0" prefHeight="36.0" prefWidth="190.0" />
      <TextField fx:id="ageField" layoutX="67.0" layoutY="593.0" prefHeight="36.0" prefWidth="190.0" />
      <Label layoutX="28.0" layoutY="419.0" text="id" />
      <Label layoutX="3.0" layoutY="479.0" text="psword" />
      <Label layoutX="12.0" layoutY="538.0" text="name" />
      <Label layoutX="17.0" layoutY="599.0" text="age" />
      <Button layoutX="303.0" layoutY="540.0" mnemonicParsing="false" onMouseClicked="#search" text="查询" />
      <Button layoutX="303.0" layoutY="581.0" mnemonicParsing="false" onMouseClicked="#refreshMouclicked" text="刷新" />
   </children>
</AnchorPane>

在User类中,我们需要按下图方式创建变量。
package com.example.model;

import javafx.beans.property.SimpleStringProperty;
import javafx.beans.property.SimpleIntegerProperty;

public class User {
    //id,password,name,age,con_id为变量
    private SimpleIntegerProperty id;
    private SimpleStringProperty password;
    private SimpleStringProperty name;
    private SimpleIntegerProperty age;
    private SimpleIntegerProperty con_id;


    public User(int id, String password, String name, int age, int con_id){
        this.id = new SimpleIntegerProperty(id);
        this.password = new SimpleStringProperty(password);
        this.name = new SimpleStringProperty(name);
        this.age = new SimpleIntegerProperty(age);
        this.con_id = new SimpleIntegerProperty(con_id);
    }

    public User(){

    }


    public int getId() {
        return id.get();
    }

    public SimpleIntegerProperty idProperty(){
        return id;
    }

    public void setId(int id) {

        this.id.set(id);
    }

    public String getPassword() {
        return password.get();
    }

    public SimpleStringProperty passwordProperty(){
        return password;
    }

    public void setPassword(String password) {
        this.password.set(password);
    }

    public int getAge() {
        return age.get();
    }

    public SimpleIntegerProperty ageProperty(){
        return age;
    }

    public void setAge(int age) {
        this.age.set(age);
    }

    public int getCon_id() {
        return con_id.get();
    }

    public SimpleIntegerProperty con_idProperty(){
        return con_id;
    }

    public void setCon_id(int con_id) {
        this.con_id.set(con_id);
    }

    public String getName() {
        return name.get();
    }

    public SimpleStringProperty nameProperty(){
        return name;
    }

    public void setName(String name) {
        this.name.set(name);
    }


}
接着在MasterController类中,我们需要声明控件(TableView和TableColumn),创建集合,编写lodaDate()方法用于初始化TableView,并将loadDate()方法添加到initialize()方法中。具体见下方代码。
package com.example.controller;

import com.example.dao.JDBC;
import com.example.dao.Master;
import com.example.model.User;


import javafx.collections.FXCollections;
import javafx.collections.ObservableList;
import javafx.event.ActionEvent;
import javafx.fxml.FXML;
import javafx.scene.control.Button;
import javafx.scene.control.TableColumn;
import javafx.scene.control.TableView;
import javafx.scene.control.TextField;
import javafx.scene.control.cell.PropertyValueFactory;
import javafx.scene.input.MouseEvent;


import java.io.IOException;
import java.sql.ResultSet;
import java.sql.SQLException;

import static com.example.dao.Master.*;
import static com.example.dao.User.conId;


public class MasterController {
    //声明每一个控件
    @FXML
    TableView<User> tableView; //声明TableView表格
    @FXML
    private TableColumn<User,Integer> id;   //声明表格中的列
    @FXML
    private TableColumn<User,String> name;
    @FXML
    private TableColumn<User,String> password;
    @FXML
    private TableColumn <User,Integer> age;
    @FXML
    private TableColumn <User,Integer> con_id;


    //创建集合userList
    ObservableList<User> userList = FXCollections.observableArrayList();


    //一进入该页面就会执行此方法
    @FXML
    public void initialize() throws Exception{
        loadData();
    }


    //此方法用来初始化表格
    public  void loadData() throws Exception{
        String sql = "SELECT id, password, name, age, con_id FROM master";
        ResultSet rs = JDBC.executeQuery(sql);

        //讲数据库中的数据从上往下 一行一行地遍历出来
        while (rs.next()) {
            int id = rs.getInt("id"); //获取数据库中名为id的字段的值
            String password = rs.getString("password");
            String name = rs.getString("name");
            int age = rs.getInt("age");
            int con_id = rs.getInt("con_id");

            User user = new User(id,password,name,age,con_id);
            userList.add(user);
        }

        //设置TableView的每一列
        id.setCellValueFactory(new PropertyValueFactory<>("id"));
        password.setCellValueFactory(new PropertyValueFactory<>("password"));
        name.setCellValueFactory(new PropertyValueFactory<>("name"));
        age.setCellValueFactory(new PropertyValueFactory<>("age"));
        con_id.setCellValueFactory(new PropertyValueFactory<>("con_id"));

        tableView.setItems(userList);
    }
JDBC类:用于实现于mysql数据库的连接
package com.example.dao;

import java.sql.*;
import java.util.Objects;

public class JDBC {
    public static Connection conn;

    public static ResultSet executeQuery(String sql , Object... params) throws Exception {
        Connection conn = getConnection();
        PreparedStatement ps = null;
        try {
            //获取预编译对象
            ps = conn.prepareStatement(sql);
            //执行参数赋值操作
            if (Objects.nonNull(params)) {
                //循环将所有的参数赋值
                for (int i = 0; i < params.length; i++) {
                    ps.setObject(i + 1, params[i]);
                }
            }
            //执行更新
            return ps.executeQuery();
        } catch (SQLException e) {
            e.printStackTrace();
        } finally {
            //关闭资源
//            close(null, ps, conn);
        }
        return null;
    }


    protected static ResultSet resultSet;

    public static PreparedStatement statement;
    public static Connection getConnection() throws Exception {
        Class.forName("com.mysql.cj.jdbc.Driver");
        String url = "jdbc:mysql://localhost:3306/myuser"; // 数据库的URL
        String username = "root"; // 数据库用户名
        String password = "123456"; // 数据库密码------------ -------------------------------------------------------------
        return DriverManager.getConnection(url, username, password); // 获取数据库连接
    }
    public static void close() throws SQLException {
        if (resultSet != null) {
            resultSet.close();
        }
        if (statement != null) {
            statement.close();
        }

    }

}
别忘了在mysql中添加数据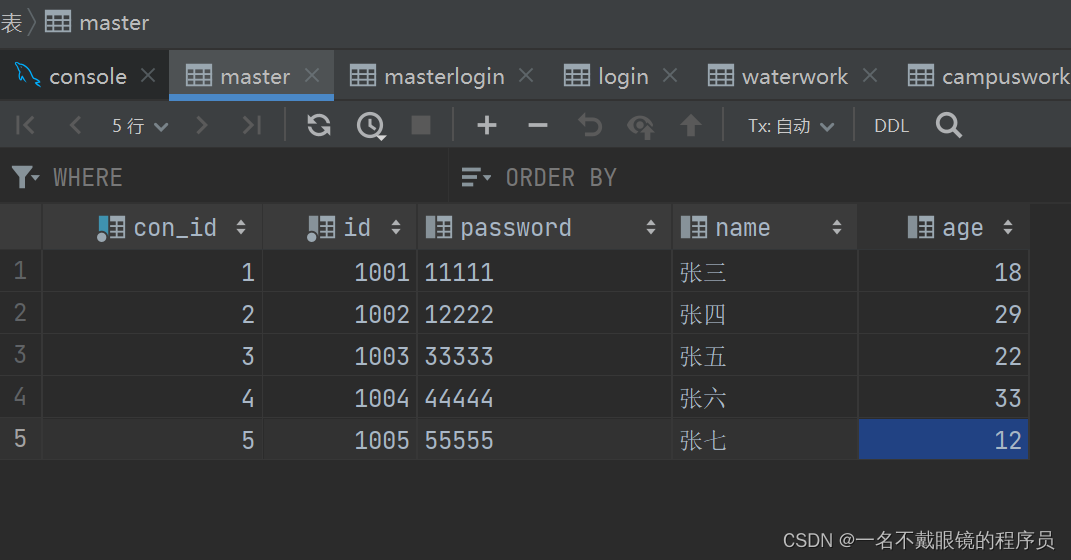
接着运行代码,切换到此页面,运行结果如下

二、实现对表格中数据的添加
实现原理:通过JDBC连接到数据库,利用DML语句增加数据库中的数据,接着重新加载TableView即可。具体代码如下方所示:
   //button的鼠标点击事件
     @FXML
    public void addDate(MouseEvent mouseEvent) throws Exception {
 addMasterSql(Interge.parseInt(idField.getText()),passwordField.getText(),nameField.getText(),Interge.parseInt(ageField.getText());
        refresh();
    }


    //将从输入框中得到的数据添加到mysql数据库中
    public static void addMasterSql(int id, String password, String name, int age) throws SQLException {
        conn.setAutoCommit(false);
        String sql_master_add = "INSERT into master (id,password,name,age) values (?,?,?,?)";
        PreparedStatement statement = conn.prepareStatement(sql_master_add);
        statement.setInt(1, id);
        statement.setString(2, password);
        statement.setString(3,name);
        statement.setInt(4, age);
        statement.executeUpdate();
        conn.commit();
        statement.close();
    }


    //表格刷新
    public void refresh() throws Exception {
        tableView.getItems().clear();
        loadData();
    }
三、实现对表格中数据的删除
实现原理:通过JDBC连接到数据库,利用DML语句删除数据库中的数据,接着重新加载TableView即可。具体代码如下方所示:
    public void removeDate(MouseEvent mouseEvent) throws Exception {
        removeDateSql();
        refresh();
    }

    @FXML
    private void removeDateSql() throws SQLException {
        ObservableList<User> selectedItems = tableView.getSelectionModel().getSelectedItems();
        if (selectedItems.size() == 0) {
            AlterController.alertSelectedError();
        } else {
            try {
                deleteMasterSql(selectedItems);
            } catch (SQLException e) {
                JDBC.conn.rollback();
                throw new RuntimeException(e);
            }
            AlterController.alertSucceed();
        }
    }

        public static void deleteMasterSql(ObservableList<com.example.model.User> selectedItems) throws SQLException {
        conn.setAutoCommit(false);
        for (User user : selectedItems) {
            int con_id = user.con_idProperty().get();
            String sql_master_delete = "DELETE FROM master WHERE con_id = ?";
            PreparedStatement statement = conn.prepareStatement(sql_master_delete);
            statement.setInt(1, con_id);
            statement.executeUpdate();
            conn.commit(); //组长牛逼
            statement.close();
        }

        //用于消除删除行所导致的auto_increase受到的影响
        Statement statement = conn.createStatement();
        String sql1 = "SET @i=0";
        String sql2 = "UPDATE `master` SET `con_id`=(@i:=@i+1)";
        String sql3 = "ALTER TABLE `master` AUTO_INCREMENT=0";
        statement.executeUpdate(sql1);
        statement.executeUpdate(sql2);
        statement.executeUpdate(sql3);
        System.out.println("消除auto_increase影响成功");
    }

    //表格刷新
    public void refresh() throws Exception {
        tableView.getItems().clear();
        loadData();
    }
四、实现对表格中数据的修改
实现原理:这里以修改name举例,
public void dataRevise(MouseEvent mouseEvent) throws Exception {
    User selectedUse = tableView.getSelectionModel().getSelectedItem();
    String newName = nameField.getText();
    System.out.println(newName);
    int con_Id = selectedUse.con_idProperty().get();
    dataNameReviseSql(newName, con_Id);
    refresh();
}

    public static void dataNameReviseSql(String name,int con_Id) throws SQLException {
            conn.setAutoCommit(false);
            String sql_master_revise = "UPDATE master set name=? WHERE con_id = ?";
            PreparedStatement statement = conn.prepareStatement(sql_master_revise);
            statement.setString(1, name);
            statement.setInt(2, con_Id);
            statement.executeUpdate();
            conn.commit();
            statement.close();
    }
五、实现对表格中数据的查询(模糊查询+多条件查询)
    public void search(MouseEvent mouseEvent) throws Exception{
            tableView.getItems().clear();

            String norId = idField.getText();
            String norPassword = passwordField.getText();
            String norName = nameField.getText();
            String norAge = ageField.getText();

            String sql_master_add = "SELECT id,password,name,age,con_id from master where if(? = '',true, id like ?) and if(?='',true, password like ?) and if(?='',true, name like ?) and if(?='',true, age like ?)";
            PreparedStatement statement = conn.prepareStatement(sql_master_add);
            statement.setString(1, norId);
            statement.setString(2, "%"+norId+"%");
            statement.setString(3, norPassword);
            statement.setString(4, "%"+norPassword+"%");
            statement.setString(5,norName);
            statement.setString(6,"%"+norName+"%");
            statement.setString(7, norAge);
            statement.setString(8, "%"+norAge+"%");
            ResultSet rs = statement.executeQuery();
            ObservableList<User> filteredList = FXCollections.observableArrayList();

            while (rs.next()) {
                int filteredId = rs.getInt("id");
                String filteredPassword = rs.getString("password");
                String filteredName = rs.getString("name");
                int filteredAge = rs.getInt("age");
                int con_id = rs.getInt("con_id");

                User user = new User(filteredId,filteredPassword,filteredName,filteredAge,con_id);
                filteredList.add(user);
            }

            id.setCellValueFactory(new PropertyValueFactory<>("id"));
            password.setCellValueFactory(new PropertyValueFactory<>("password"));
            name.setCellValueFactory(new PropertyValueFactory<>("name"));
            age.setCellValueFactory(new PropertyValueFactory<>("age"));
            con_id.setCellValueFactory(new PropertyValueFactory<>("con_id"));

            tableView.setItems(filteredList);
            }
至此,增删改查功能已全部实现。
如有疑问可联系作者。


 248
248

 被折叠的 条评论
为什么被折叠?
被折叠的 条评论
为什么被折叠?
 到【灌水乐园】发言


