


上篇文章发了一个没有连接数据库的小练习,今天也是抽空实现了一下连接数据库,正好刚学了ssm的全注解无配置文件开发,顺便练习一下(但是我还是觉得配置文件简单一点,可能是这个小练习配置少的问题)。这里还是完整的再写一下整个模块吧。

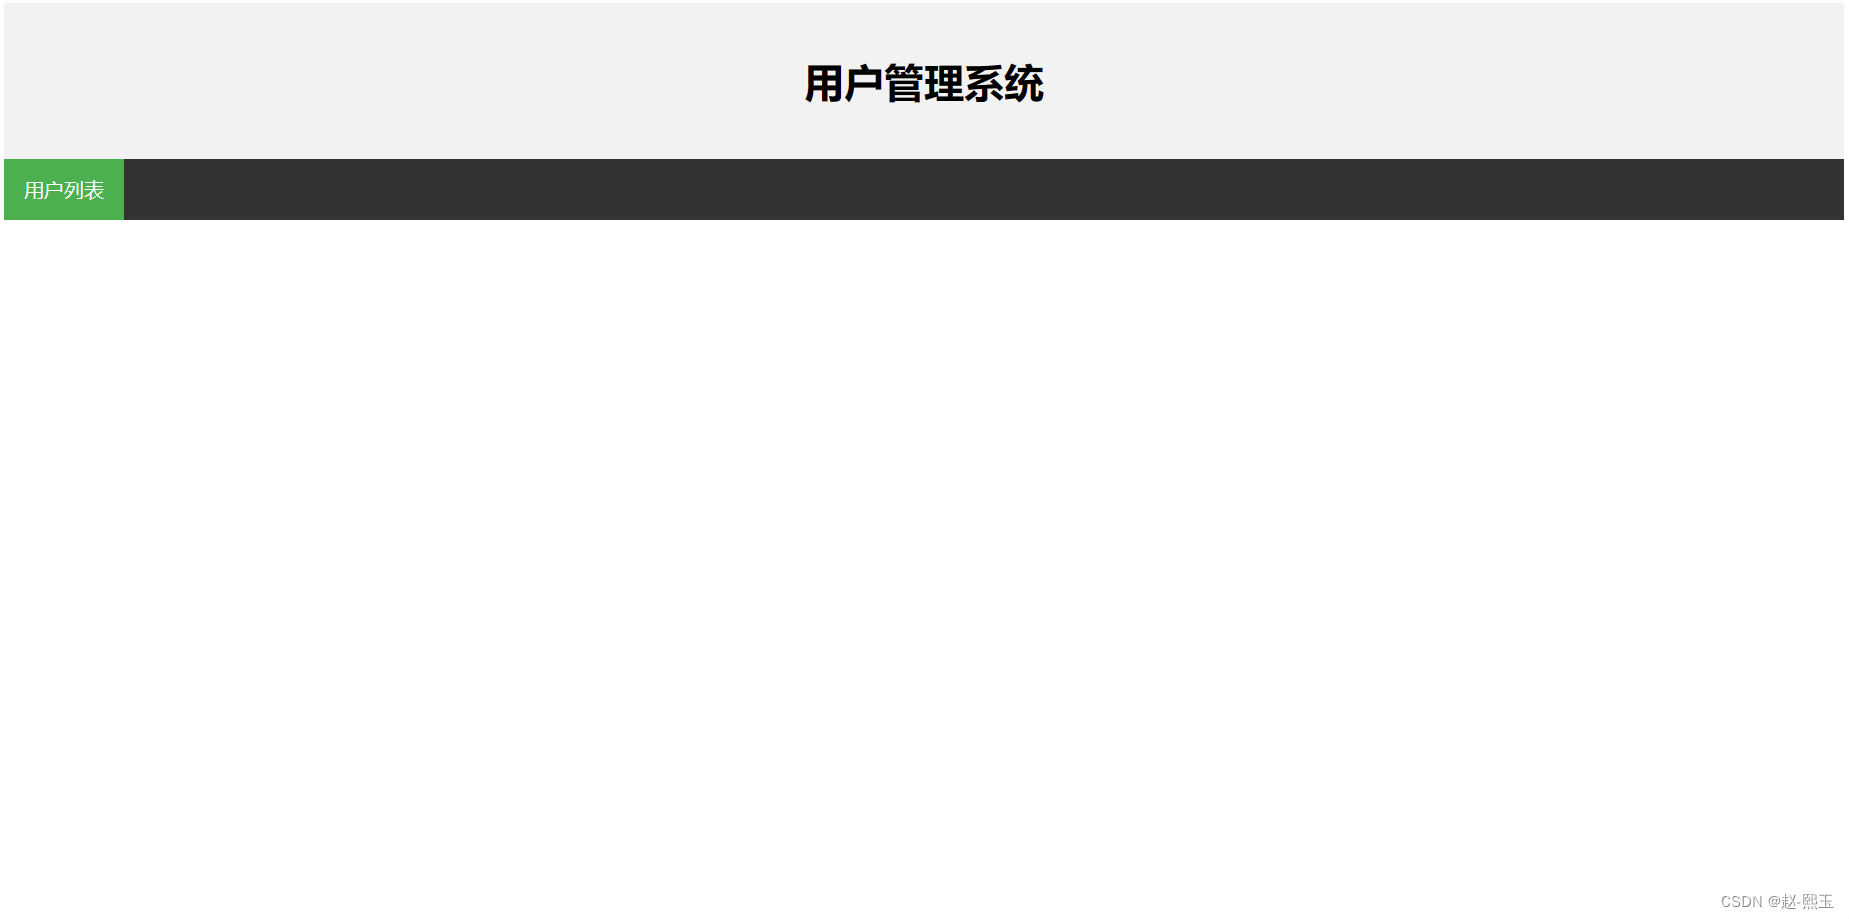
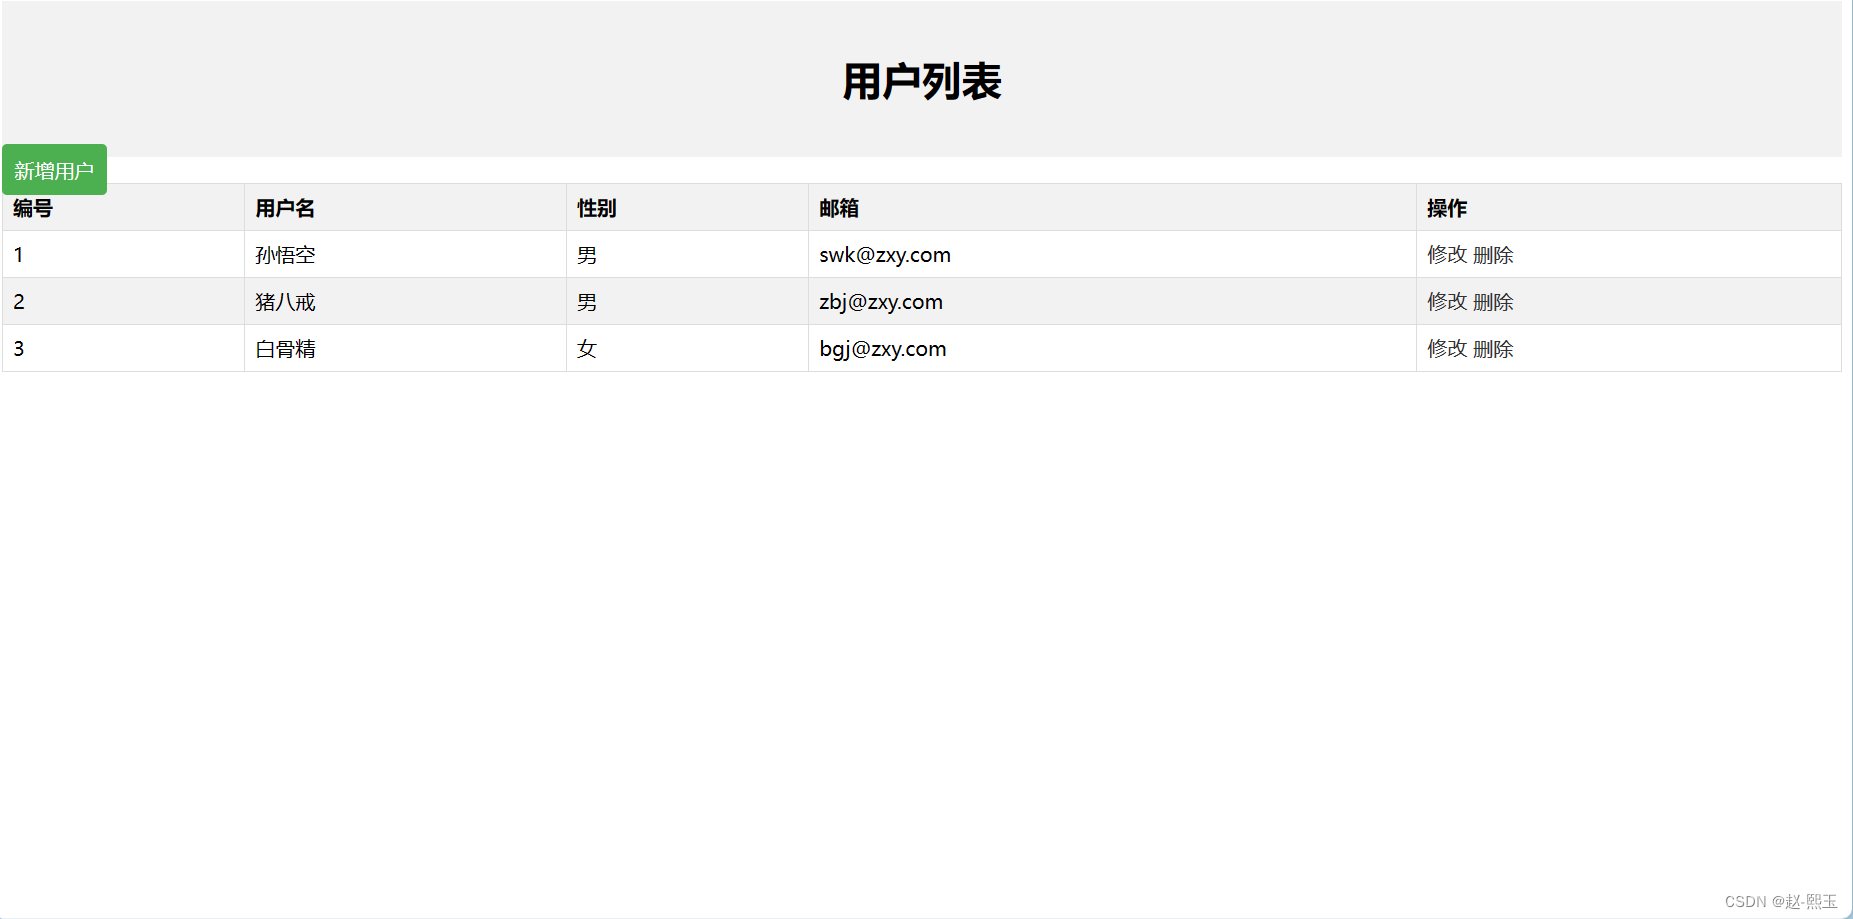
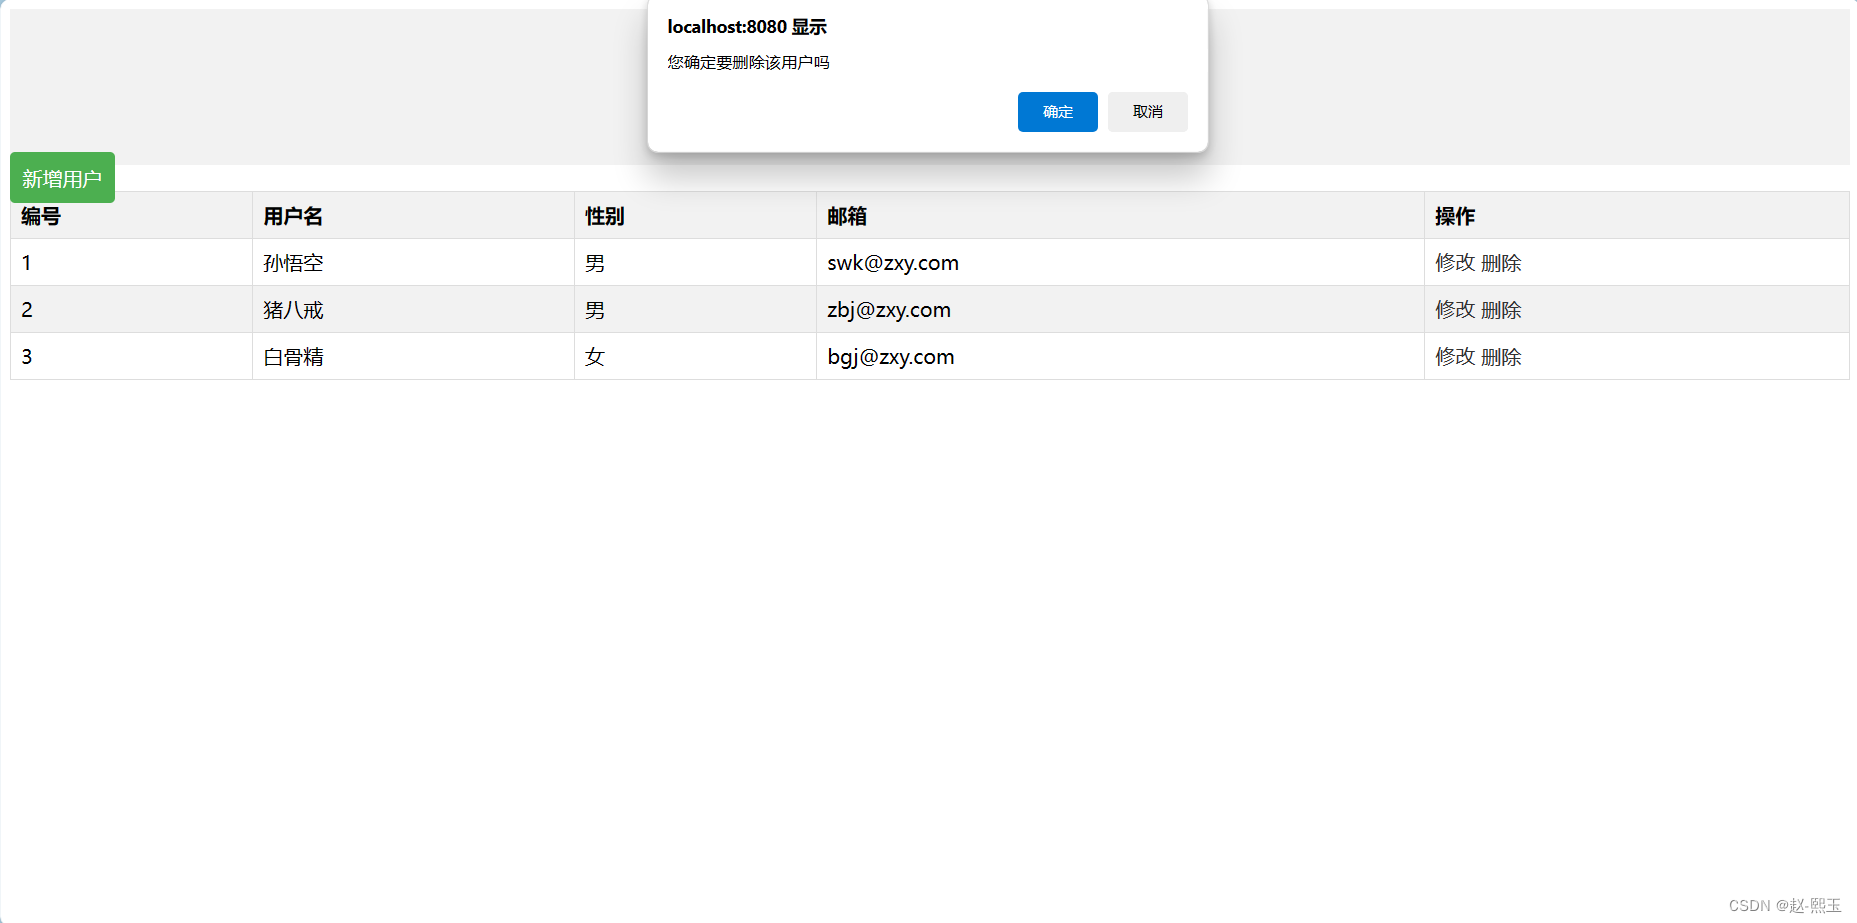
一、界面展示(还是之前的界面)
二、环境搭建
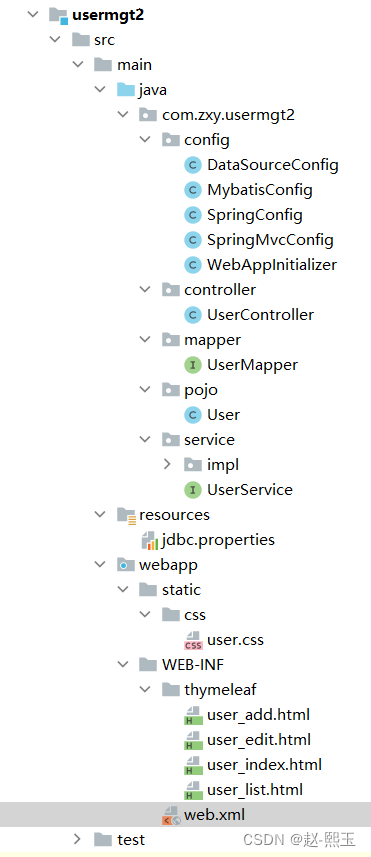
整体目录结构
1、pom.xml文件,设置打包方式war包,添加依赖
<dependencies>
        <dependency>
            <groupId>org.springframework</groupId>
            <artifactId>spring-webmvc</artifactId>
            <version>6.1.4</version>
        </dependency>

        <dependency>
            <groupId>jakarta.servlet</groupId>
            <artifactId>jakarta.servlet-api</artifactId>
            <version>6.0.0</version>
            <scope>provided</scope>
        </dependency>

        <dependency>
            <groupId>ch.qos.logback</groupId>
            <artifactId>logback-classic</artifactId>
            <version>1.5.3</version>
        </dependency>

        <dependency>
            <groupId>org.thymeleaf</groupId>
            <artifactId>thymeleaf-spring6</artifactId>
            <version>3.1.2.RELEASE</version>
        </dependency>

        <!--spring jdbc-->
        <dependency>
            <groupId>org.springframework</groupId>
            <artifactId>spring-jdbc</artifactId>
            <version>6.1.4</version>
        </dependency>
        <!--mybatis-->
        <dependency>
            <groupId>org.mybatis</groupId>
            <artifactId>mybatis</artifactId>
            <version>3.5.15</version>
        </dependency>
        <!--mybatis spring-->
        <dependency>
            <groupId>org.mybatis</groupId>
            <artifactId>mybatis-spring</artifactId>
            <version>3.0.3</version>
        </dependency>
        <!--mysql驱动-->
        <dependency>
            <groupId>com.mysql</groupId>
            <artifactId>mysql-connector-j</artifactId>
            <version>8.3.0</version>
        </dependency>
        <!--德鲁伊连接池-->
        <dependency>
            <groupId>com.alibaba</groupId>
            <artifactId>druid</artifactId>
            <version>1.2.22</version>
        </dependency>
        <!--jackson-->
        <dependency>
            <groupId>com.fasterxml.jackson.core</groupId>
            <artifactId>jackson-databind</artifactId>
            <version>2.17.0</version>
        </dependency>
    </dependencies>
2、jdbc.properties(这里填自己的数据库信息)
jdbc.driver=
jdbc.url=
jdbc.username=
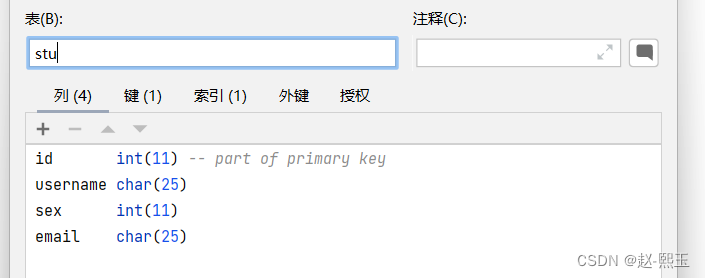
jdbc.password=3、在自己的mysql中建立一张stu的表(如下图,其中id为主键且自增)
4、各个配置类的编写(代替xml配置文件)
(1)DataSourceConfig.java
package com.zxy.usermgt2.config;

import com.alibaba.druid.pool.DruidDataSource;
import org.springframework.beans.factory.annotation.Value;
import org.springframework.context.annotation.Bean;
import org.springframework.jdbc.datasource.DataSourceTransactionManager;
import org.springframework.transaction.PlatformTransactionManager;

import javax.sql.DataSource;

/**
 * @author Z-熙玉
 * @version 1.0
 */
public class DataSourceConfig {

    @Value("${jdbc.driver}")
    private String driver;

    @Value("${jdbc.url}")
    private String url;

    @Value("${jdbc.username}")
    private String username;

    @Value("${jdbc.password}")
    private String password;

    @Bean
    public DataSource dataSource(){
        DruidDataSource dataSource = new DruidDataSource();
        dataSource.setDriverClassName(driver);
        dataSource.setUrl(url);
        dataSource.setUsername(username);
        dataSource.setPassword(password);
        return dataSource;
    }

    @Bean
    public PlatformTransactionManager platformTransactionManager(DataSource dataSource){
        DataSourceTransactionManager dataSourceTransactionManager = new DataSourceTransactionManager();
        dataSourceTransactionManager.setDataSource(dataSource);
        return dataSourceTransactionManager;
    }
}
(2)MybatisConfig
package com.zxy.usermgt2.config;

import org.mybatis.spring.SqlSessionFactoryBean;
import org.mybatis.spring.mapper.MapperScannerConfigurer;
import org.springframework.context.annotation.Bean;

import javax.sql.DataSource;

/**
 * @author Z-熙玉
 * @version 1.0
 */
public class MybatisConfig {
    @Bean
    public SqlSessionFactoryBean sqlSessionFactory(DataSource dataSource){
        SqlSessionFactoryBean sqlSessionFactoryBean = new SqlSessionFactoryBean();
        sqlSessionFactoryBean.setDataSource(dataSource);
        sqlSessionFactoryBean.setTypeAliasesPackage("com.zxy.usermgt2.pojo");
        return sqlSessionFactoryBean;
    }

    @Bean
    public MapperScannerConfigurer mapperScannerConfigurer(){
        MapperScannerConfigurer msc = new MapperScannerConfigurer();
        msc.setBasePackage("com.zxy.usermgt2.mapper");
        return msc;
    }

}
(3)SpringConfig
package com.zxy.usermgt2.config;

import org.springframework.context.annotation.ComponentScan;
import org.springframework.context.annotation.Configuration;
import org.springframework.context.annotation.Import;
import org.springframework.context.annotation.PropertySource;
import org.springframework.transaction.annotation.EnableTransactionManagement;

/**
 * @author Z-熙玉
 * @version 1.0
 */
@Configuration
@ComponentScan({"com.zxy.usermgt2.service"})
@PropertySource("classpath:jdbc.properties")
@Import({DataSourceConfig.class, MybatisConfig.class})
@EnableTransactionManagement
public class SpringConfig {
}
(4)WebAppInitializer
package com.zxy.usermgt2.config;

import jakarta.servlet.Filter;
import org.springframework.web.filter.CharacterEncodingFilter;
import org.springframework.web.filter.HiddenHttpMethodFilter;
import org.springframework.web.servlet.support.AbstractAnnotationConfigDispatcherServletInitializer;

/**
 * @author Z-熙玉
 * @version 1.0
 */

public class WebAppInitializer extends AbstractAnnotationConfigDispatcherServletInitializer {
    /**
     * Spring的配置
     * @return
     */
    @Override
    protected Class<?>[] getRootConfigClasses() {
        return new Class[]{SpringConfig.class};
    }

    /**
     * SpringMVC的配置
     * @return
     */
    @Override
    protected Class<?>[] getServletConfigClasses() {
        return new Class[]{SpringMvcConfig.class};
    }

    /**
     * 用来配置DispatcherServlet的 <url-pattern>
     * @return
     */
    @Override
    protected String[] getServletMappings() {
        return new String[]{"/"};
    }

    /**
     * 配置过滤器
     * @return
     */
    @Override
    protected Filter[] getServletFilters() {
        // 配置字符编码过滤器
        CharacterEncodingFilter characterEncodingFilter = new CharacterEncodingFilter();
        characterEncodingFilter.setEncoding("UTF-8");
        characterEncodingFilter.setForceResponseEncoding(true);
        characterEncodingFilter.setForceRequestEncoding(true);
        // 配置HiddenHttpMethodFilter
        HiddenHttpMethodFilter hiddenHttpMethodFilter = new HiddenHttpMethodFilter();
        return new Filter[]{characterEncodingFilter, hiddenHttpMethodFilter};
    }
}
三、静态资源文件
(1)user.css
.header {
  background-color: #f2f2f2;
  padding: 20px;
  text-align: center;
}

ul {
  list-style-type: none;
  margin: 0;
  padding: 0;
  overflow: hidden;
  background-color: #333;
}

li {
  float: left;
}

li a {
  display: block;
  color: white;
  text-align: center;
  padding: 14px 16px;
  text-decoration: none;
}

li a:hover:not(.active) {
  background-color: #111;
}

.active {
  background-color: #4CAF50;
}

form {
  width: 50%;
  margin: 0 auto;
  padding: 20px;
  border: 1px solid #ddd;
  border-radius: 4px;
}

label {
  display: block;
  margin-bottom: 8px;
}

input[type="text"], input[type="email"], select {
  width: 100%;
  padding: 6px 10px;
  margin: 8px 0;
  box-sizing: border-box;
  border: 1px solid #555;
  border-radius: 4px;
  font-size: 16px;
}

button[type="submit"] {
  padding: 10px;
  background-color: #4CAF50;
  color: #fff;
  border: none;
  border-radius: 4px;
  cursor: pointer;
}

button[type="submit"]:hover {
  background-color: #3e8e41;
}

table {
  border-collapse: collapse;
  width: 100%;
}

th, td {
  border: 1px solid #ddd;
  padding: 8px;
  text-align: left;
}

th {
  background-color: #f2f2f2;
}

tr:nth-child(even) {
  background-color: #f2f2f2;
}

.header {
  background-color: #f2f2f2;
  padding: 20px;
  text-align: center;
}

a {
  text-decoration: none;
  color: #333;
}

.add-button {
  margin-bottom: 20px;
  padding: 10px;
  background-color: #4CAF50;
  color: #fff;
  border: none;
  border-radius: 4px;
  cursor: pointer;
}

.add-button:hover {
  background-color: #3e8e41;
}
(2)user_index.html
<!DOCTYPE html>
<html lang="en" xmlns:th="www.thymeleaf.org">
<head>
  <meta charset="UTF-8">
  <title>用户管理系统</title>
  <link rel="stylesheet" th:href="@{/static/css/user.css}" type="text/css"></link>
</head>
<body>
  <div class="header">
    <h1>用户管理系统</h1>
  </div>
  <ul>
    <li><a class="active" th:href="@{/user}">用户列表</a></li>
  </ul>
</body>
</html>
(3)user_list.html
<!DOCTYPE html>
<html lang="en" xmlns:th="www.thymeleaf.org">
<head>
<meta charset="UTF-8">
<title>用户列表</title>
<link rel="stylesheet" th:href="@{/static/css/user.css}" type="text/css"></link>
</head>
<body>
<div class="header">
<h1>用户列表</h1>
</div>
<div class="add-button-wrapper">
<a class="add-button" th:href="@{/toAdd}">新增用户</a>
</div>
<table>
<thead>
<tr>
<th>编号</th>
<th>用户名</th>
<th>性别</th>
<th>邮箱</th>
<th>操作</th>
</tr>
</thead>
<tbody>
<tr th:each="user : ${users}">
<td th:text="${user.id}"></td>
<td th:text="${user.username}"></td>
<td th:text="${user.sex == 1 ? '男' : '女'}"></td>
<td th:text="${user.email}"></td>
<td>
<a th:href="@{'/user/' + ${user.id}}">修改</a>
<a th:href="@{'/user/' + ${user.id}}" onclick="del(event)">删除</a>
</td>
</tr>
</tbody>
</table>
<div style="display: none">
<form id="delForm" method="post">
<input type="hidden" name="_method" value="delete">
</form>
</div>
<script>
function del(event){
let delForm = document.getElementById("delForm");
delForm.action = event.target.href;
if(window.confirm("您确定要删除该用户吗")) {
delForm.submit();
}
//阻止超链接的默认跳转行为
event.preventDefault();
}
</script>
</body>
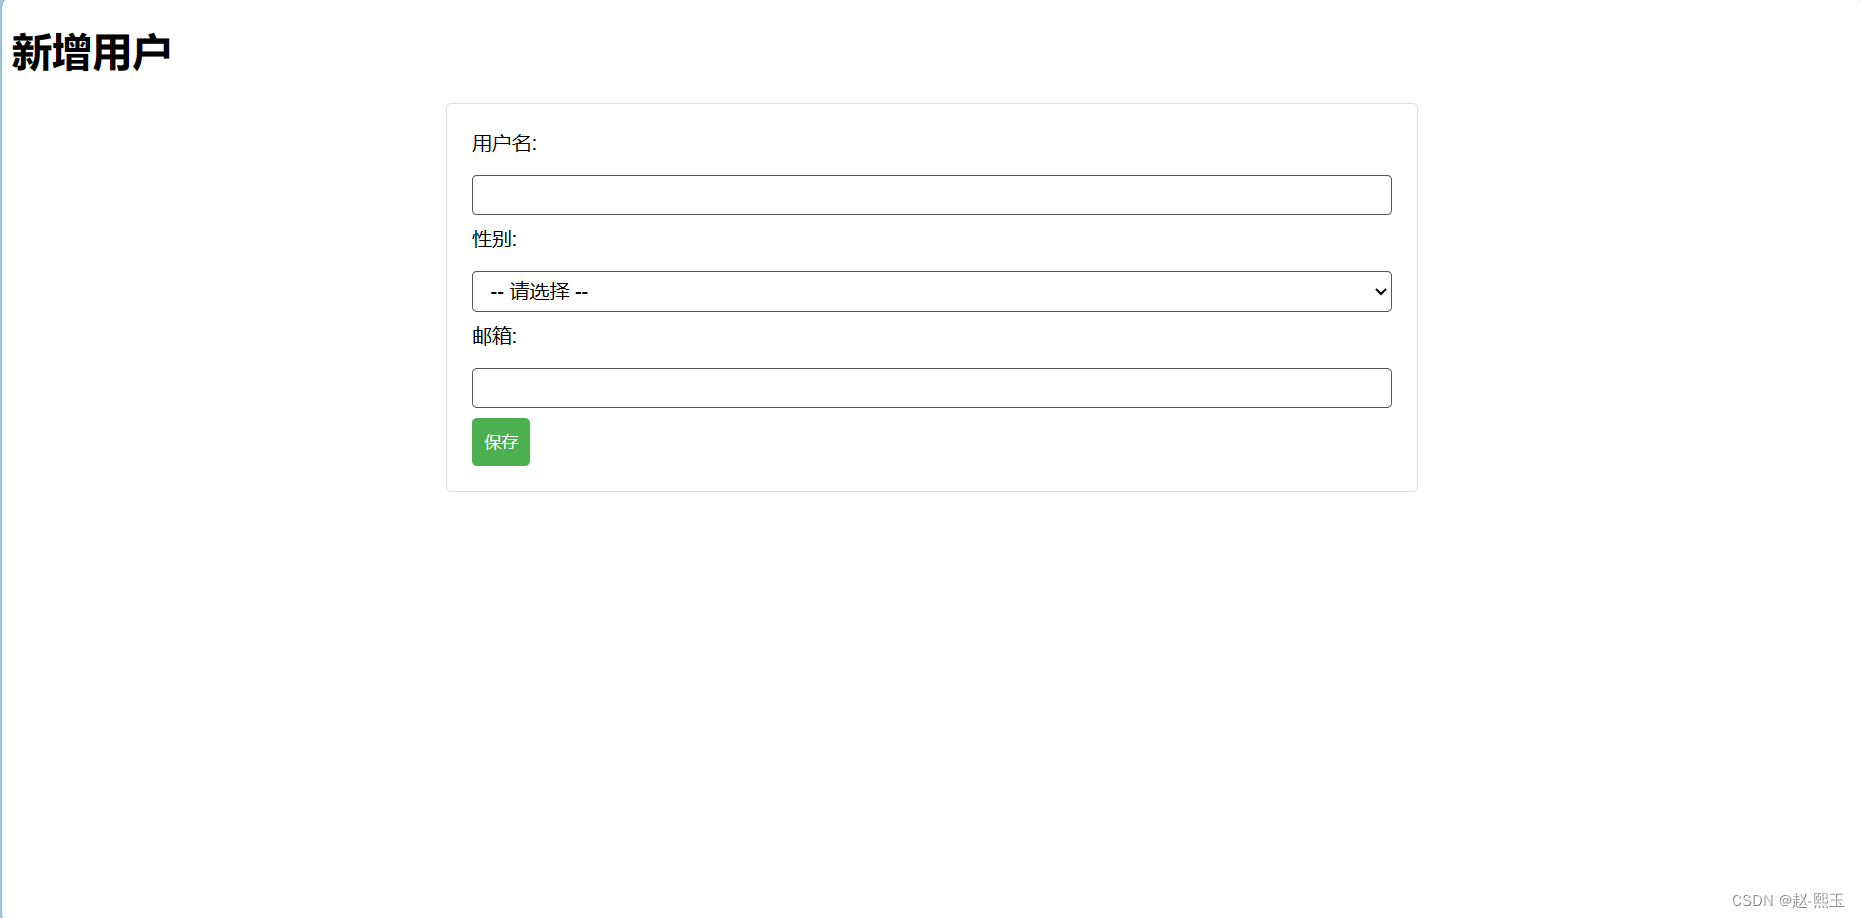
</html>(4)user_add.html
<!DOCTYPE html>
<html lang="en" xmlns:th="www.thymeleaf.org">
<head>
<meta charset="UTF-8">
<title>新增用户</title>
<link rel="stylesheet" th:href="@{/static/css/user.css}" type="text/css"></link>
</head>
<body>
<h1>新增用户</h1>
<form th:action="@{/user}" method="post">
<label>用户名:</label>
<input type="text" name="username" required>
<label>性别:</label>
<select name="gender" required>
<option value="">-- 请选择 --</option>
<option value="1">男</option>
<option value="0">女</option>
</select>
<label>邮箱:</label>
<input type="email" name="email" required>
<button type="submit">保存</button>
</form>
</body>
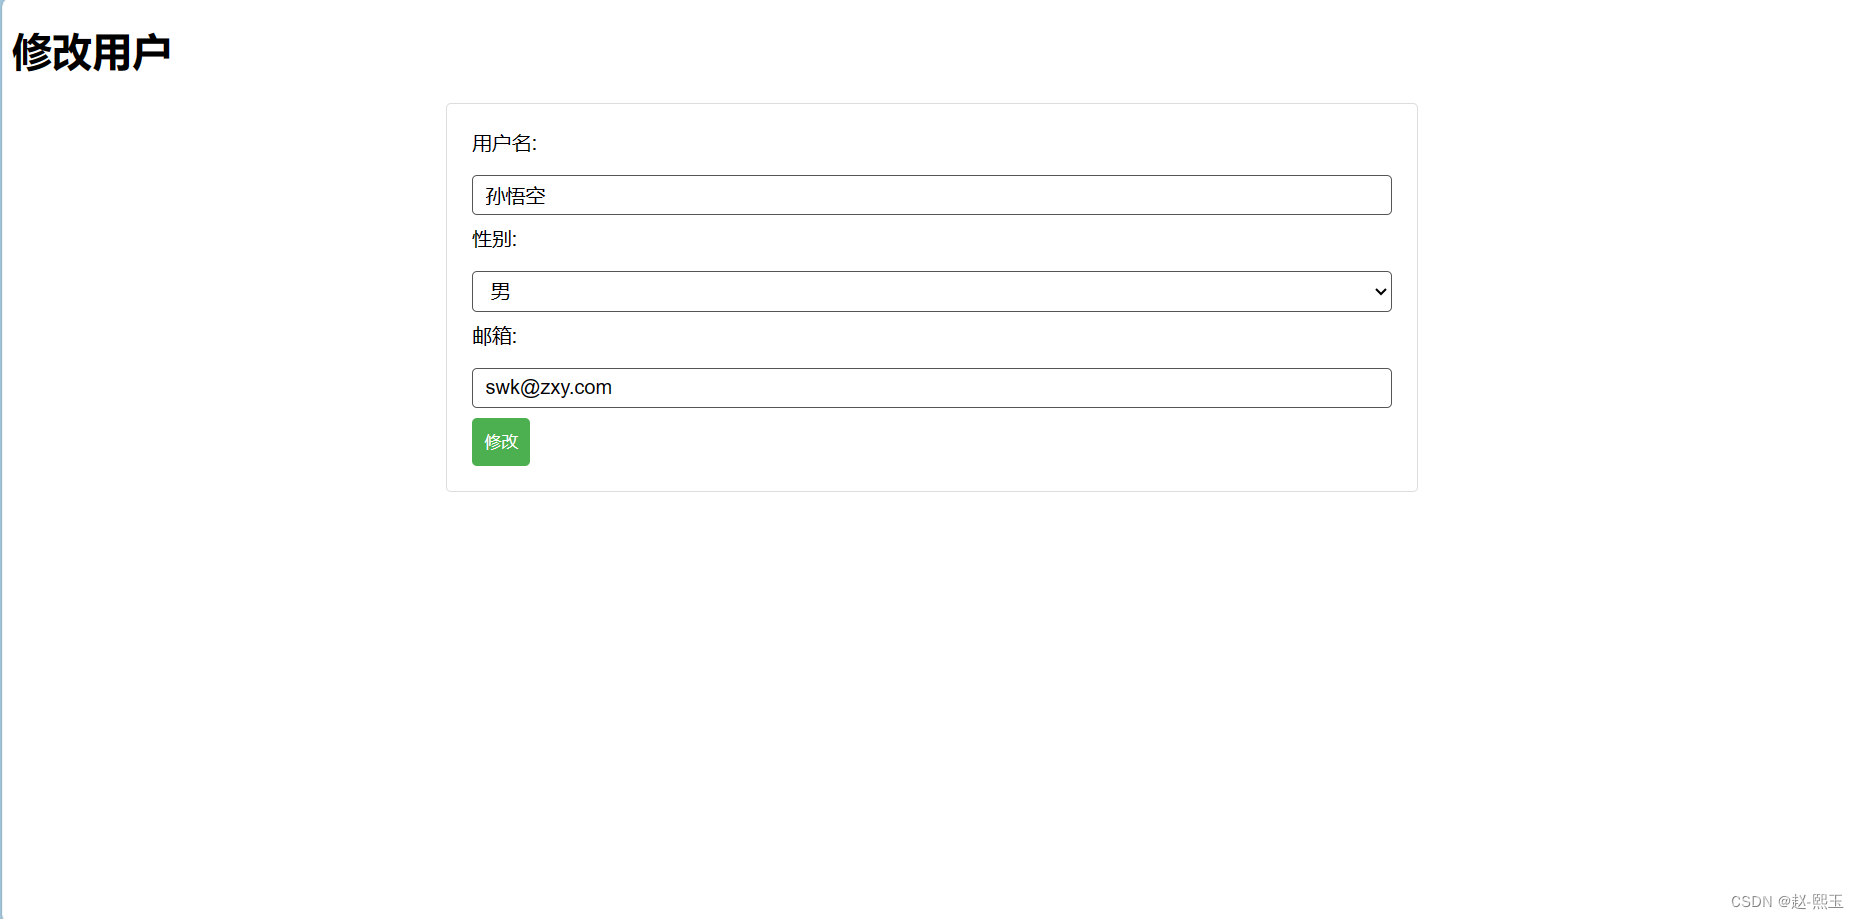
</html>(5)user_edit.html
<!DOCTYPE html>
<html lang="en" xmlns:th="www.thymeleaf.org">
<head>
  <meta charset="UTF-8">
  <title>修改用户</title>
  <link rel="stylesheet" th:href="@{/static/css/user.css}" type="text/css"></link>
</head>
<body>
  <h1>修改用户</h1>
  <form th:action="@{/user}" method="post">

    <!--隐藏域:设置请求方式-->
    <input type="hidden" name="_method" value="put">
    <!--隐藏域:提交id-->
    <input type="hidden" name="id" th:value="${user.id}">

    <label>用户名:</label>
    <input type="text" name="username" th:value="${user.username}" required>

    <label>性别:</label>
    <select name="sex" required>
      <option value="">-- 请选择 --</option>
      <option value="1" th:field="${user.sex}">男</option>
      <option value="0" th:field="${user.sex}">女</option>
    </select>

    <label>邮箱:</label>
    <input type="email" name="email" th:value="${user.email}" required>

    <button type="submit">修改</button>
  </form>
</body>
</html>
四、核心实现功能部分
(1)UserController
package com.zxy.usermgt2.controller;

import com.zxy.usermgt2.mapper.UserMapper;
import com.zxy.usermgt2.pojo.User;
import com.zxy.usermgt2.service.UserService;
import org.springframework.beans.factory.annotation.Autowired;
import org.springframework.stereotype.Controller;
import org.springframework.ui.Model;
import org.springframework.web.bind.annotation.*;

import java.util.List;

/**
 * @author Z-熙玉
 * @version 1.0
 */
@Controller
public class UserController {

    @Autowired
    private UserService userService;

    @GetMapping(value = "/user")
    public String list(Model model) {
        List<User> users = userService.selectAll();
        model.addAttribute("users",users);
        return "user_list";
    }

    @PostMapping(value = "/user")
    public String save(User user) {
        userService.insert(user);
        //重定向到用户列表界面
        return "redirect:/user";
    }

    @GetMapping(value = "/user/{id}")
    public String detail(@PathVariable("id") Long id, Model model) {
        User user = userService.selectById(id);
        model.addAttribute("user",user);
        return "user_edit";
    }

    @PutMapping("/user")
    public String modify(User user) {
        userService.update(user);
        //重定向到用户列表界面
        return "redirect:/user";
    }

    @DeleteMapping(value = "/user/{id}")
    public String del(@PathVariable("id") Long id) {
        userService.deleteById(id);
        //重定向到用户列表界面
        return "redirect:/user";
    }

}
(2)UserMapper
package com.zxy.usermgt2.mapper;

import com.zxy.usermgt2.pojo.User;
import org.apache.ibatis.annotations.Delete;
import org.apache.ibatis.annotations.Insert;
import org.apache.ibatis.annotations.Select;
import org.apache.ibatis.annotations.Update;

import java.util.List;

/**
 * @author Z-熙玉
 * @version 1.0
 */
public interface UserMapper {

    @Select("select * from stu")
    List<User> selectAll();

    @Insert("insert into stu(username, sex, email) values (#{username},#{sex},#{email})")
    void insert(User user);

    @Select("select * from stu where id=#{id}")
    User selectById(Long id);

    @Update("update stu set username=#{username},sex=#{sex},email=#{email} where id=#{id}")
    void update(User user);

    @Delete("delete from stu where id=#{id}")
    void deleteById(Long id);
}
(3)UserService
package com.zxy.usermgt2.service;

import com.zxy.usermgt2.pojo.User;

import java.util.List;

/**
 * @author Z-熙玉
 * @version 1.0
 */
public interface UserService {
    /**
     * 查询用户列表
     * @return
     */
    List<User> selectAll();

    /**
     * 新增用户
     * @param user
     */
    void insert(User user);

    /**
     * 根据id查询用户信息
     * @param id
     * @return
     */
    User selectById(Long id);

    /**
     * 更新用户信息
     * @param user
     */
    void update(User user);

    /**
     * 根据id删除用户信息
     * @param id
     */
    void deleteById(Long id);
}
(4)UserServiceImpl(这里的userMapper可能会有个红色下滑波浪线,这不是错误,不影响运行的,不用在意)
package com.zxy.usermgt2.service.impl;

import com.zxy.usermgt2.mapper.UserMapper;
import com.zxy.usermgt2.pojo.User;
import com.zxy.usermgt2.service.UserService;
import org.springframework.beans.factory.annotation.Autowired;
import org.springframework.stereotype.Service;

import java.util.List;

/**
 * @author Z-熙玉
 * @version 1.0
 */
@Service
public class UserServiceImpl implements UserService {

    @Autowired
    private UserMapper userMapper;

    @Override
    public List<User> selectAll() {
        return userMapper.selectAll();
    }

    @Override
    public void insert(User user) {
        userMapper.insert(user);
    }

    @Override
    public User selectById(Long id) {
        User user = userMapper.selectById(id);
        return user;
    }

    @Override
    public void update(User user) {
        userMapper.update(user);
    }

    @Override
    public void deleteById(Long id) {
        userMapper.deleteById(id);
    }
}
User
package com.zxy.usermgt2.pojo;

/**
 * @author Z-熙玉
 * @version 1.0
 */
public class User {
    private Long id;
    private String username;
    private Integer sex;
    private String email;

    public User(Long id, String username, Integer sex, String email) {
        this.id = id;
        this.username = username;
        this.sex = sex;
        this.email = email;
    }

    public User() {
    }

    @Override
    public String toString() {
        return "User{" +
                "id=" + id +
                ", username='" + username + '\'' +
                ", sex=" + sex +
                ", email='" + email + '\'' +
                '}';
    }

    public Long getId() {
        return id;
    }

    public void setId(Long id) {
        this.id = id;
    }

    public String getUsername() {
        return username;
    }

    public void setUsername(String username) {
        this.username = username;
    }

    public Integer getSex() {
        return sex;
    }

    public void setSex(Integer sex) {
        this.sex = sex;
    }

    public String getEmail() {
        return email;
    }

    public void setEmail(String email) {
        this.email = email;
    }
}
五、结束语
好啦,到这里就结束了,家人们可以启动tomcat试一下啦,有问题的话可以评论区留言哦。感谢家人们的支持。


 2228
2228


 被折叠的 条评论
为什么被折叠?
被折叠的 条评论
为什么被折叠?
 到【灌水乐园】发言


