


本篇将对管理系统的主页面的代码进行详细的介绍。
目录
一、主页面前端代码
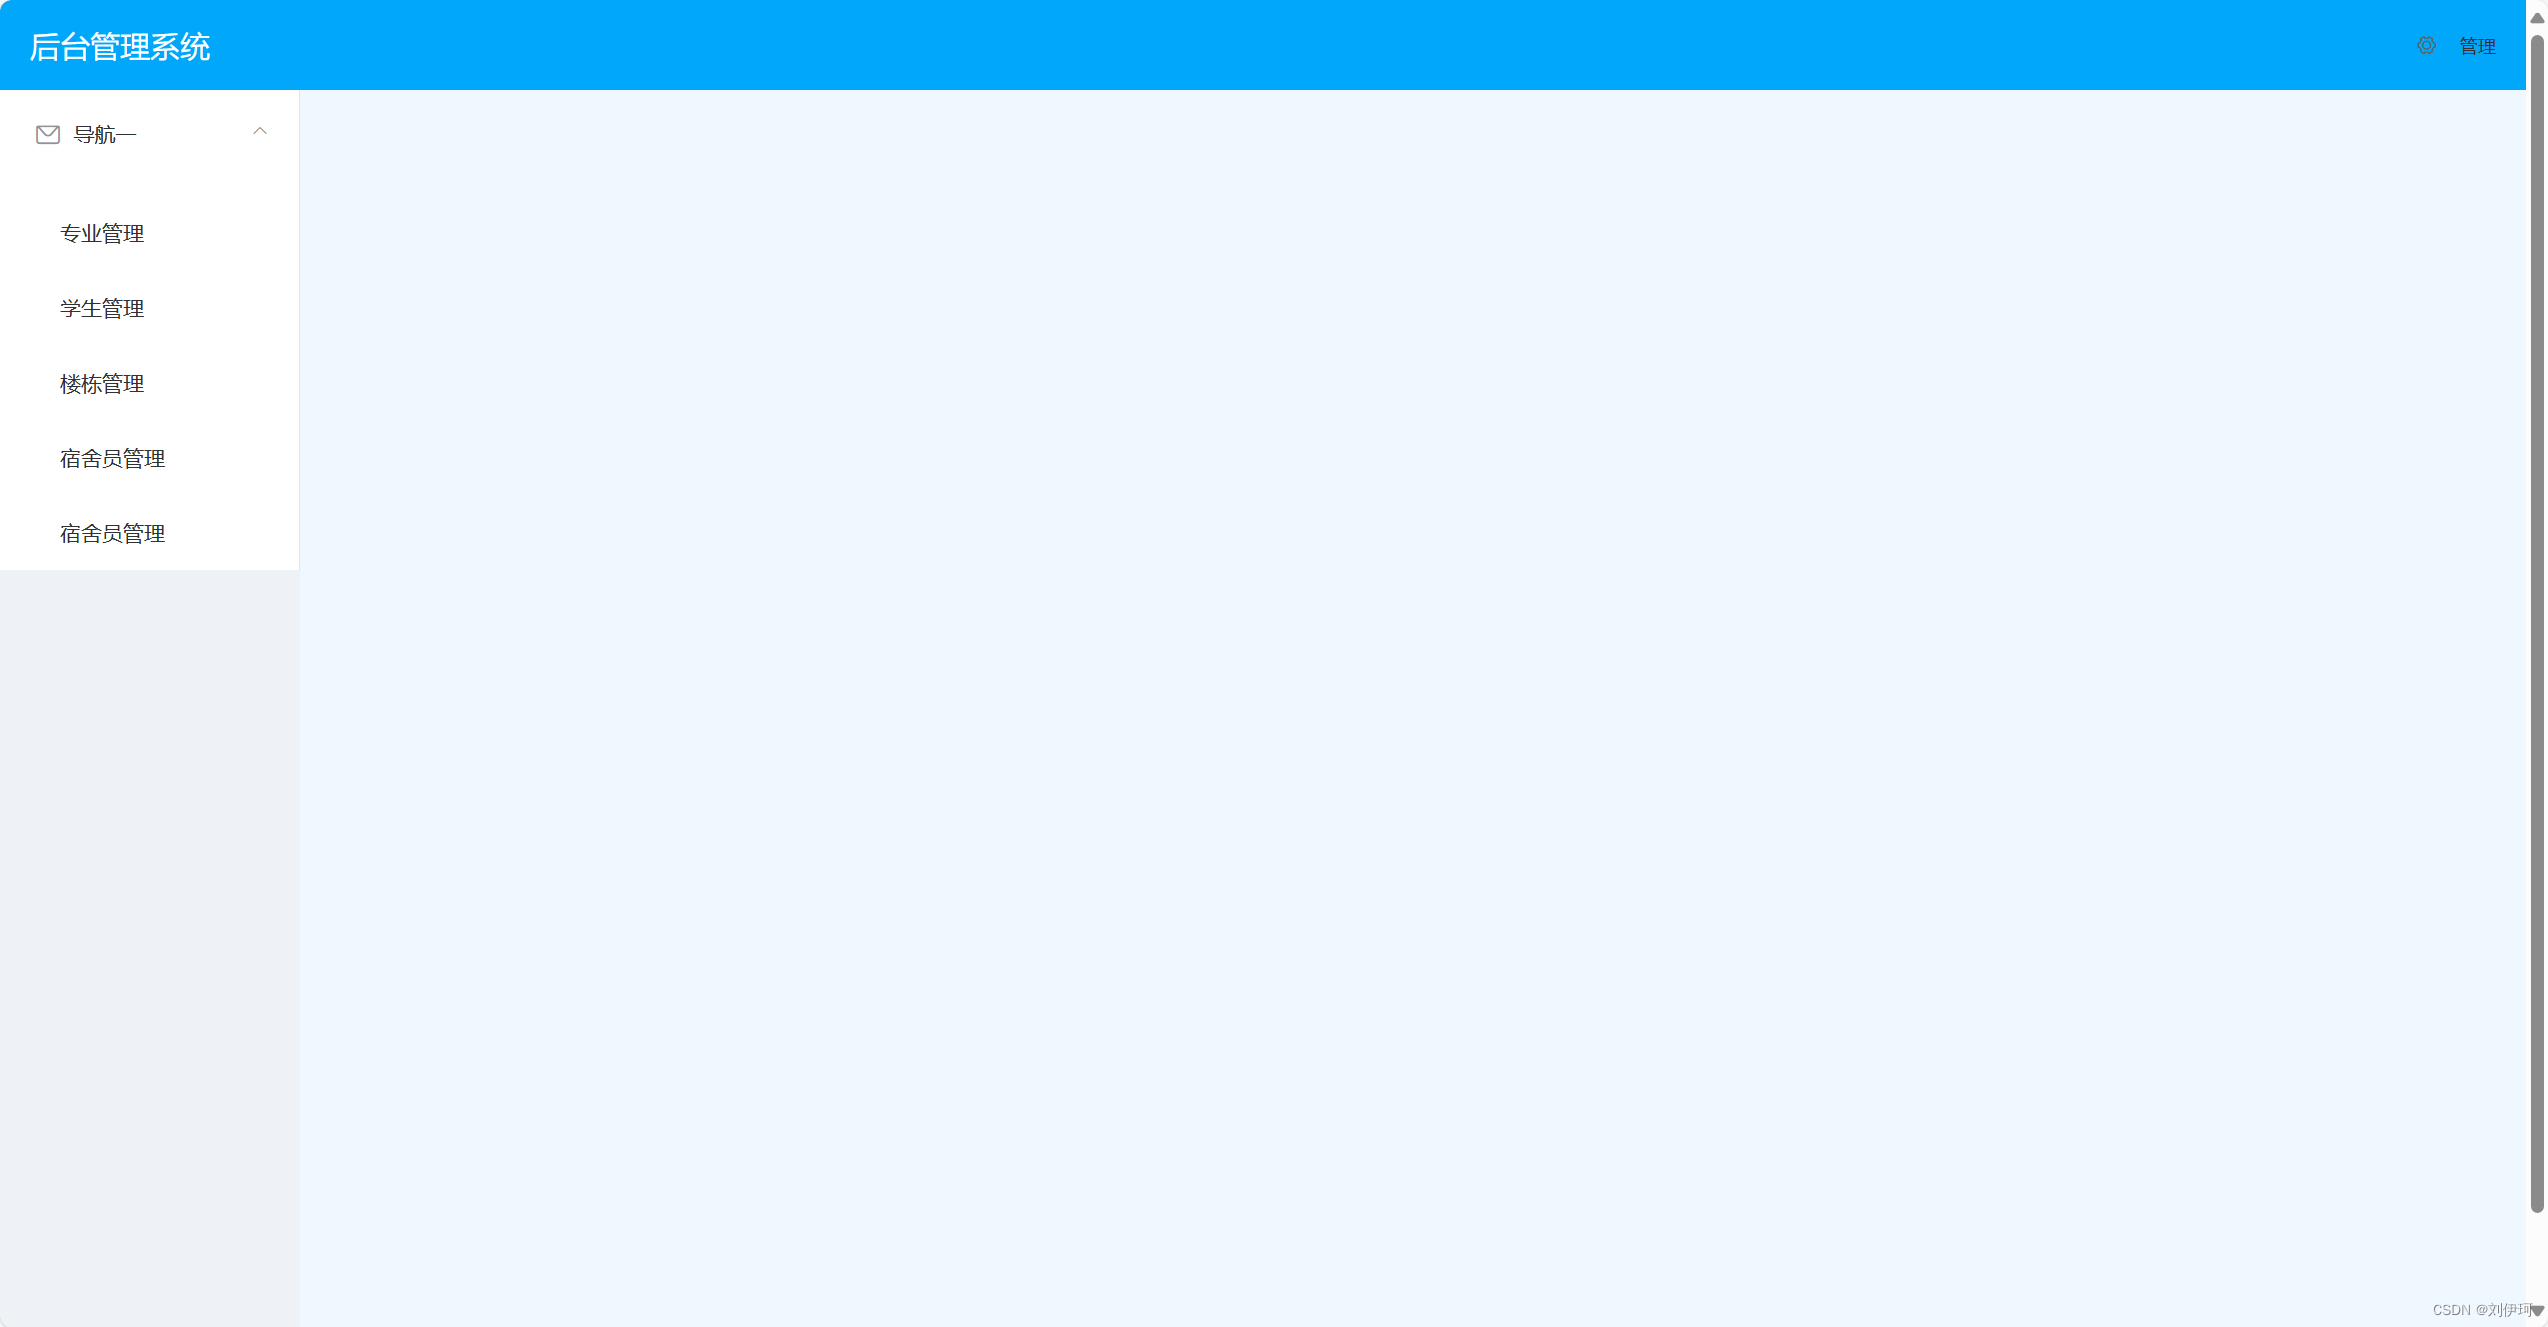
1.样式展示
2.代码详解
(1)template部分
<template>
	<el-container>
		<el-header style="text-align: right; font-size: 12px">
			<div class="header-title">
				后台管理系统
			</div>
			<el-dropdown>
				<i class="el-icon-setting" style="margin-right: 15px"></i>
				<el-dropdown-menu slot="dropdown">
					<el-dropdown-item>个人信息</el-dropdown-item>
					<el-dropdown-item>修改密码</el-dropdown-item>
					<el-dropdown-item><span @click="logout()">安全退出</span></el-dropdown-item>
				</el-dropdown-menu>
			</el-dropdown>
			<span>{{account}}</span>
		</el-header>
		<el-container>
			<el-aside width="200px" style="background-color: rgb(238, 241, 246)">

				<el-menu :default-openeds="['1', '3']" router>
					<el-submenu index="1">
						<template slot="title"><i class="el-icon-message"></i>导航一</template>
						<el-menu-item-group>
							<el-menu-item index="/majorlist">专业管理</el-menu-item>
							<el-menu-item index="/studentList">学生管理</el-menu-item>
							<el-menu-item index="/BuildList">楼栋管理</el-menu-item>
							<el-menu-item index="/BmList">宿舍员管理</el-menu-item>
							<el-menu-item index="/DormList">宿舍员管理</el-menu-item>
						</el-menu-item-group>
					</el-submenu>
				</el-menu>
			</el-aside>
			<el-main>
				<router-view></router-view>
			</el-main>
		</el-container>
	</el-container>
</template>这部分代码依旧是element-UI组件里面的布局代码,从官网上可以直接引用(Element - 全球最流行的 Vue UI 框架)。然后在基础上修改以满足自己需要的内容样式。
注意这部分的导航这部分的代码,在新建导航或者新建导航内的内容时,记得将标签前后都带上。
(2)script部分
<script>
	export default {
		data() {
			return {
				account: ""
			}
		},
		methods: {
			logout() {
				this.$confirm('您确定要退出吗?', '提示', {
					confirmButtonText: '确定',
					cancelButtonText: '取消',
					type: 'warning'
				}).then(() => {
					sessionStorage.clear();
					this.$router.replace("/login");
				})
			}
		},
		mounted() {
			//去除要显示的用户信息
			this.account = sessionStorage.getItem("account");
		}
	}
</script>
1.account数据需要显示在主页面右上角,所以需要传值
2.logout()函数:用来退出登录的,直接退出到登录界面
(3)路由导航守卫
网页有可能会跳过登录界面直接进入到主页面,是不安全的,所以要添加导航守卫,确保在点击其他的内容时吗,进行判断,当用户信息为空时返回到登录界面。
//路由导航守卫,每当前端发生一次路由跳转时,会自动触发beforeEach();
router.beforeEach((to, from, next) => {
	if (to.path == '/login') { //如果访问登录组件,不需要做任何判断,直接放行
		return next(); //放行到目标组件
	} else {
		var account = sessionStorage.getItem("account");
		if (account == null) { //用户信息为空,说明用户没有登录
			return next("/login");
		} else { //说明用户已经登录
			next();
		}
	}
})
(4)在vue中引用vue
在vue中调用其他的vue文件,会重新打开一个新的页面来显示新的vue内的东西,我们需要的是在本网页内打开,所以需要使用children方法:
routes: [{
			path: '/',
			component: Login
		},
		{
			path: '/login',
			component: Login
		},
		{
			path: '/Main',
			component: Guanli,
			children: [{
					path: "/majorlist",
					component: MajorList
				},
				{
					path: "/StudentList",
					component: StudentList
				},
				{
					path: "/BuildList",
					component: BuildList
				},
				{
					path: "/BmList",
					component: BmList
				},
				{
					path: "/DormList",
					component: DormList
				}
			]
		}
	]
vue中引用vue定义是这样定义的,但是还需要进行路由导入
import MajorList from '../views/major/MajorList.vue';
import StudentList from '../views/student/StudentList.vue';
import BuildList from '../views/building/BuildList.vue';
import BmList from '../views/buildmanager/BmList.vue';
import DormList from '../views/dorms/DormList.vue';
因为主页面只是用来展示,调用其他的导航内容的,所以不需要与后端交互,没有交互的内容,因此没有后端的代码。


 2123
2123


 被折叠的 条评论
为什么被折叠?
被折叠的 条评论
为什么被折叠?
 到【灌水乐园】发言


