


目录
前言
随着科学技术的飞速发展,社会的方方面面、各行各业都在努力与现代的先进技术接轨,通过科技手段来提高自身的优势,网上商城购物系统当然也不能排除在外。网上商城购物系统是以实际运用为开发背景,运用软件工程原理和开发方法,采用springboot框架构建的一个管理系统。整个开发过程首先对软件系统进行需求分析,得出系统的主要功能。接着对系统进行总体设计和详细设计。总体设计主要包括系统功能设计、系统总体结构设计、系统数据结构设计和系统安全设计等;详细设计主要包括系统数据库访问的实现,主要功能模块的具体实现,模块实现关键代码等。最后对系统进行功能测试,并对测试结果进行分析总结,得出系统中存在的不足及需要改进的地方,为以后的系统维护提供了方便,同时也为今后开发类似系统提供了借鉴和帮助。这种个性化的网上管理系统特别注重交互协调与管理的相互配合,激发了管理人员的创造性与主动性,对网上商城购物系统而言非常有利。
本网上商城购物系统采用的数据库是Mysql,使用springboot框架开发。在设计过程中,充分保证了系统代码的良好可读性、实用性、易扩展性、通用性、便于后期维护、操作方便以及页面简洁等特点。
一、技术栈
末尾获取源码
SpringBoot+Vue+JS+ jQuery+Ajax...
二、系统功能介绍
管理员功能模块
管理员登录,通过填写用户名、密码、角色进行登录
 管理员登录进入网上商城购物系统可以查看首页、个人中心、用户管理、商品分类管理、商品信息管理、订单评价管理、系统管理、订单管理等信息。
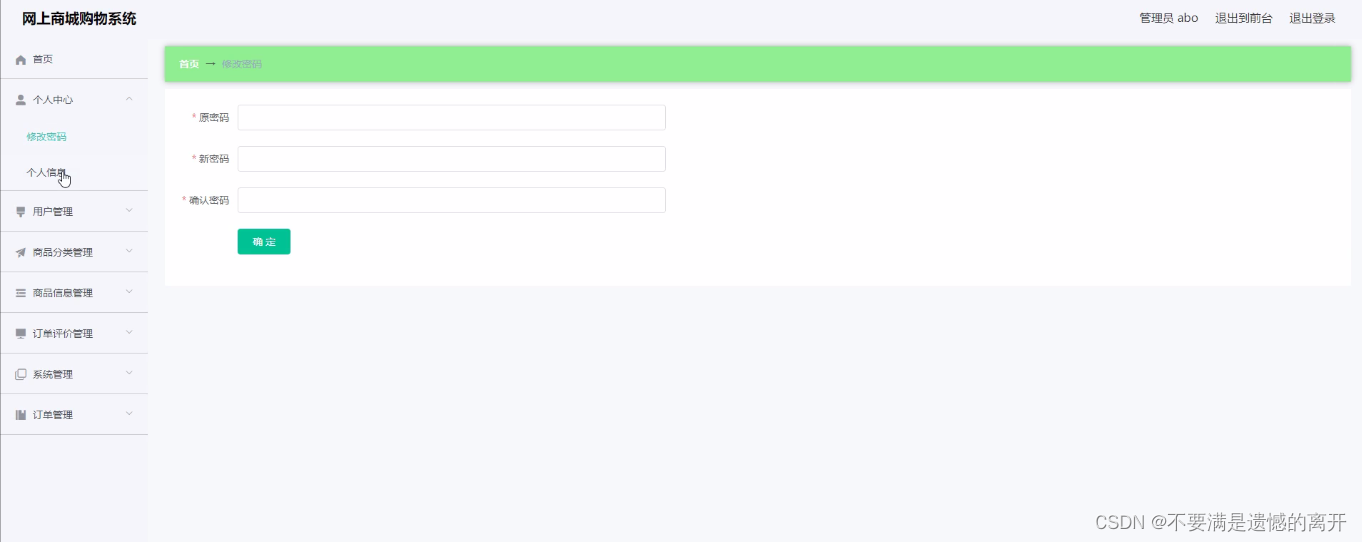
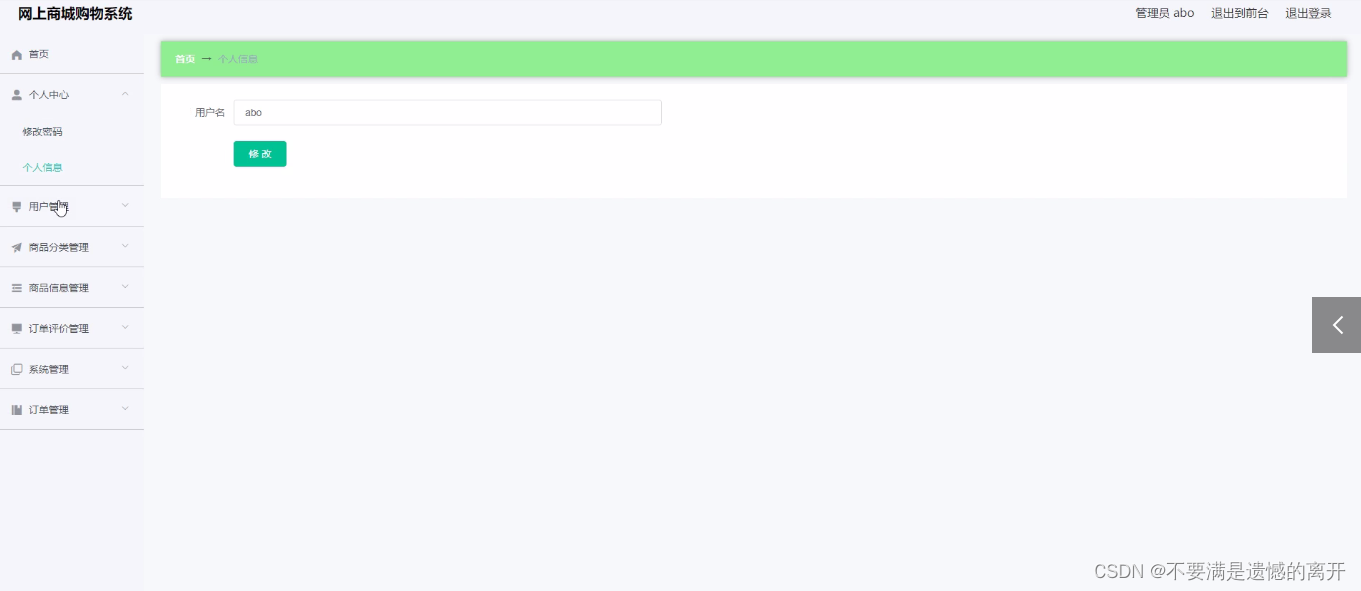
个人中心,在个人中心页面中可以通过填写原密码、新密码、确认密码等信息进行添加、修改。还可以根据需要对个人信息进行添加,修改或删除等详细操作
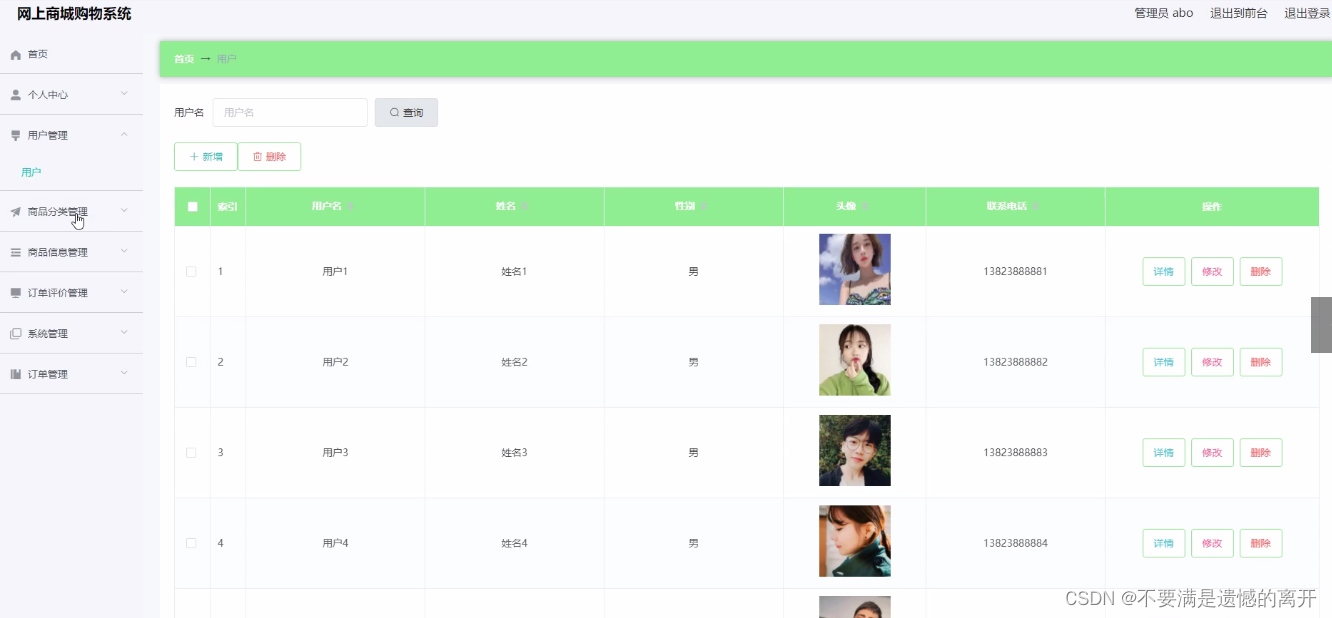
用户管理,在用户管理页面中可以查看用户名、姓名、性别、头像、联系电话等信息,并可根据需要对用户管理进行详情、修改或删除等操作
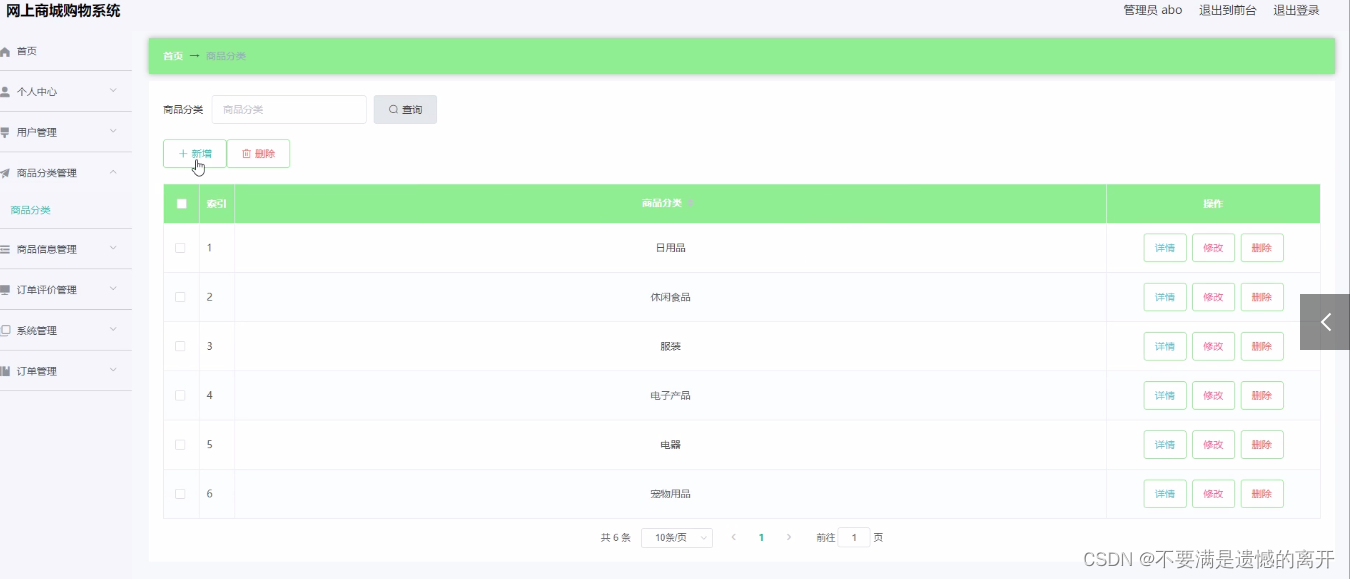
 商品分类管理,在商品分类管理页面中可以查看商品分类等信息,并可根据需要对商品分类管理进行详情、修改或删除等详细操作
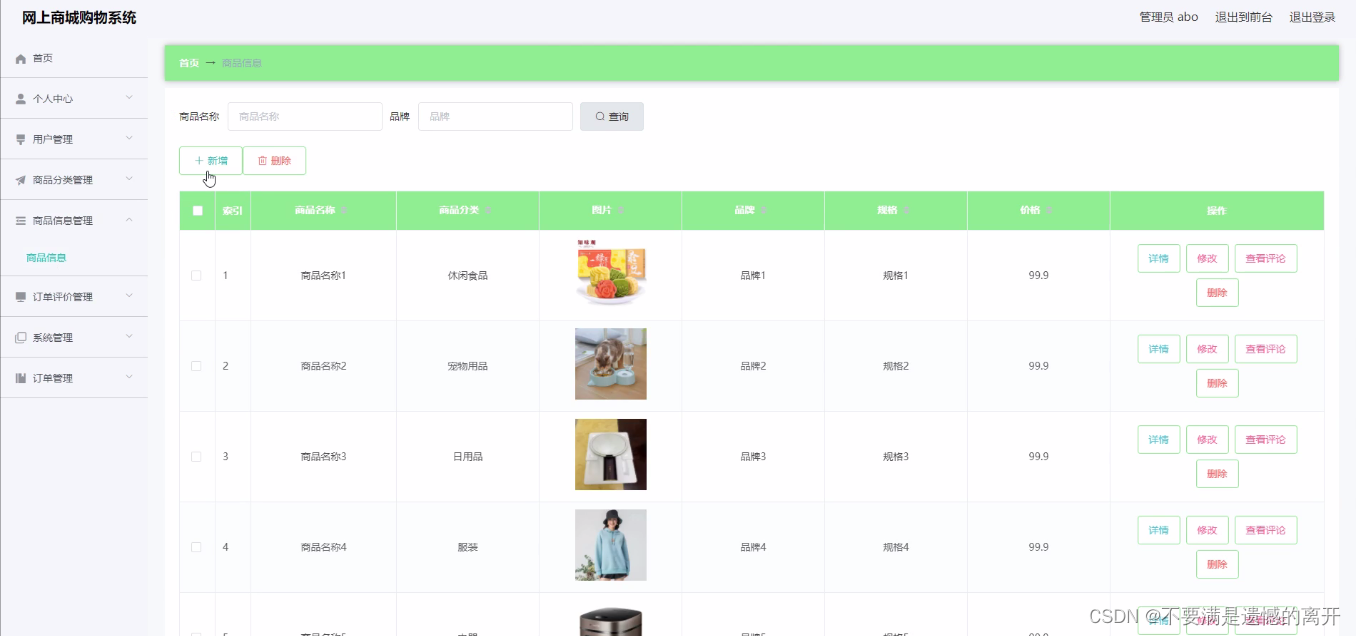
 商品信息管理,在商品信息管理页面中可以查看商品名称、商品分类、图片、品牌、规格、价格等内容,并且根据需要对商品信息管理进行详情,修改或删除等详细操作
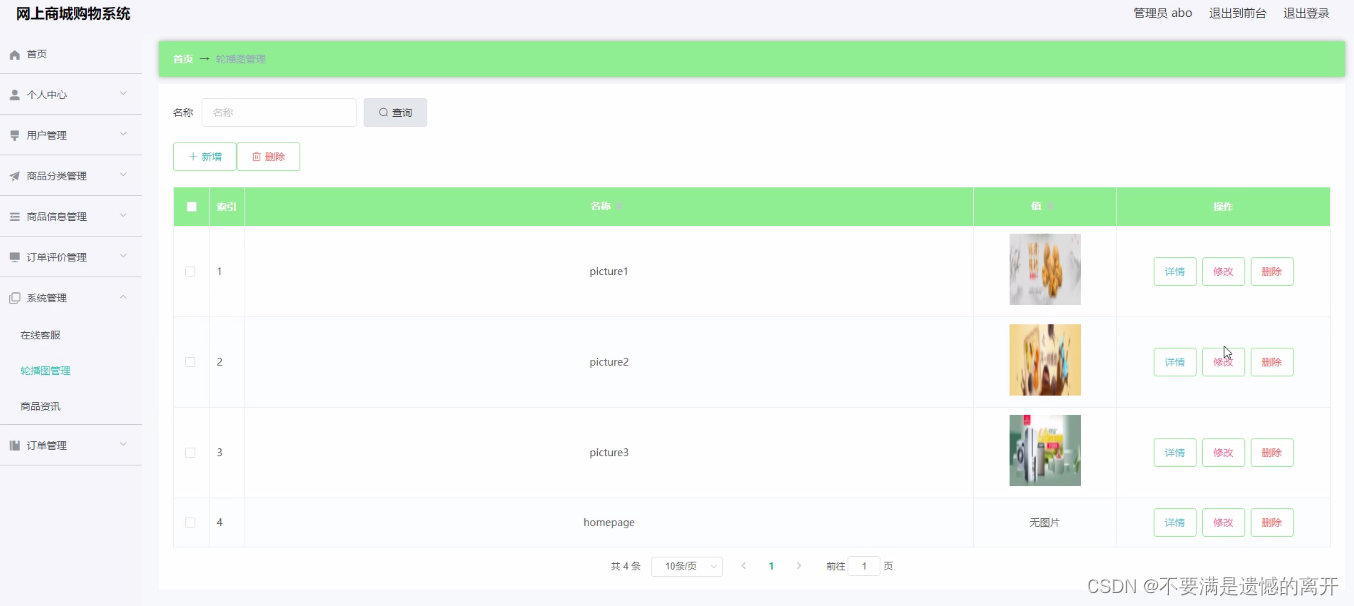
 轮播图;该页面为轮播图管理界面。管理员可以在此页面进行首页轮播图的管理,通过新建操作可在轮播图中加入新的图片,还可以对以上传的图片进行修改操作,以及图片的删除操作
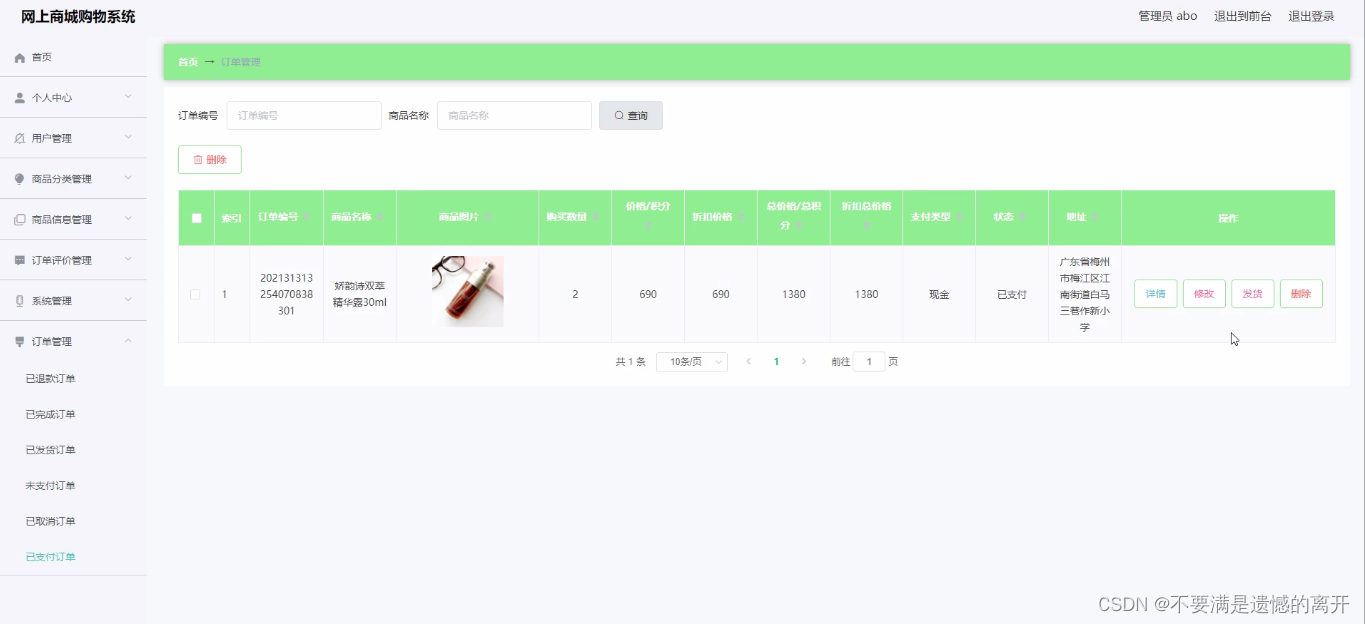
 订单管理,在订单管理页面中可以查看订单编号、商品名称、商品图片、购买数量、价格/积分、折扣价格、总价格/总积分、折扣总价格、支付类型、状态、地址等内容,并且根据需要对订单管理进行详情、修改或删除等详细操作
 订单评价管理,在订单评价管理页面中可以查看订单编号、商品名称、商品分类、品牌、规格、评分、添加图片、评价内容、评价日期、用户名、审核回复、审核状态、审核等内容,并且根据需要对订单评价管理进行详情、修改或删除等详细操作

用户功能模块
用户登录进入网上商城购物系统可以查看首页、个人中心、订单评价管理、我的收藏管理、订单管理等内容。
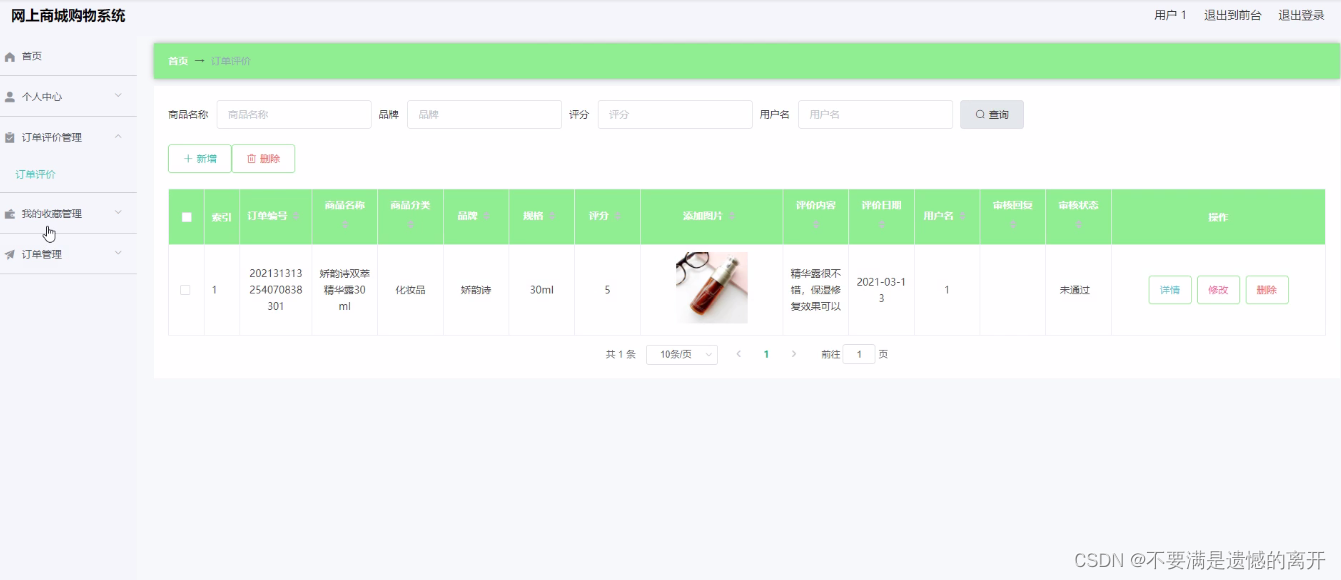
订单评价管理,在订单评价管理页面中通过查看订单编号、商品名称、商品分类、品牌、规格、评分、添加图片、评价内容、评价日期、用户名、审核回复、审核状态等信息还可以根据需要对订单评价管理进行修改
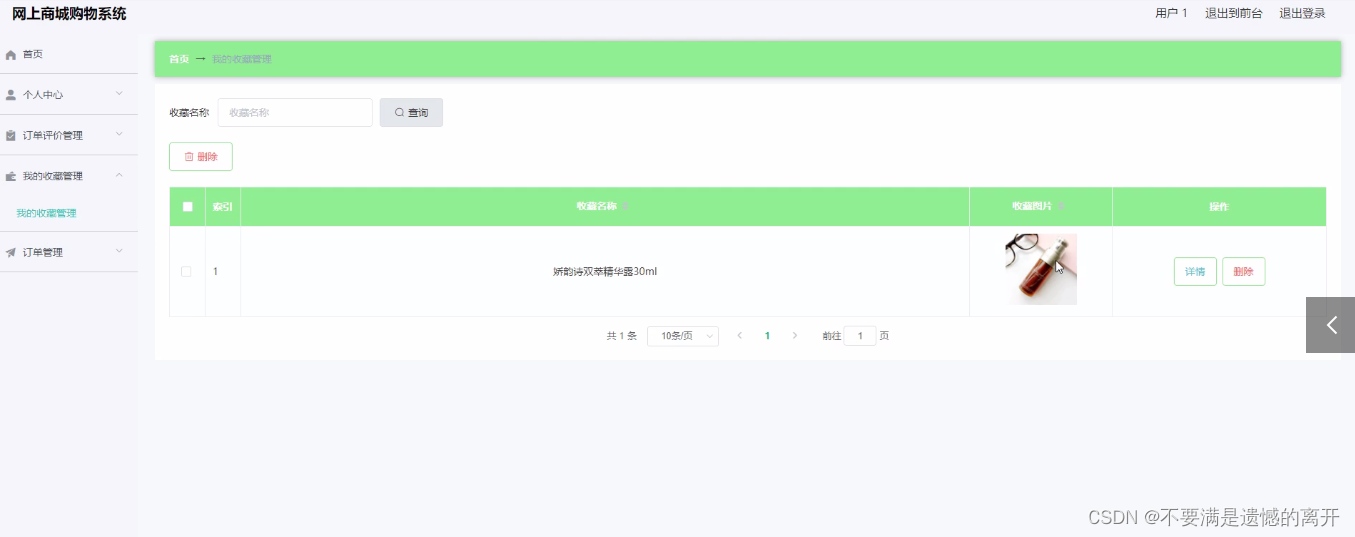
 我的收藏管理,在我的收藏管理页面中可以查看收藏名称、收藏图片等信息内容,并且根据需要对我的收藏管理进行详情或删除等其他详细操作
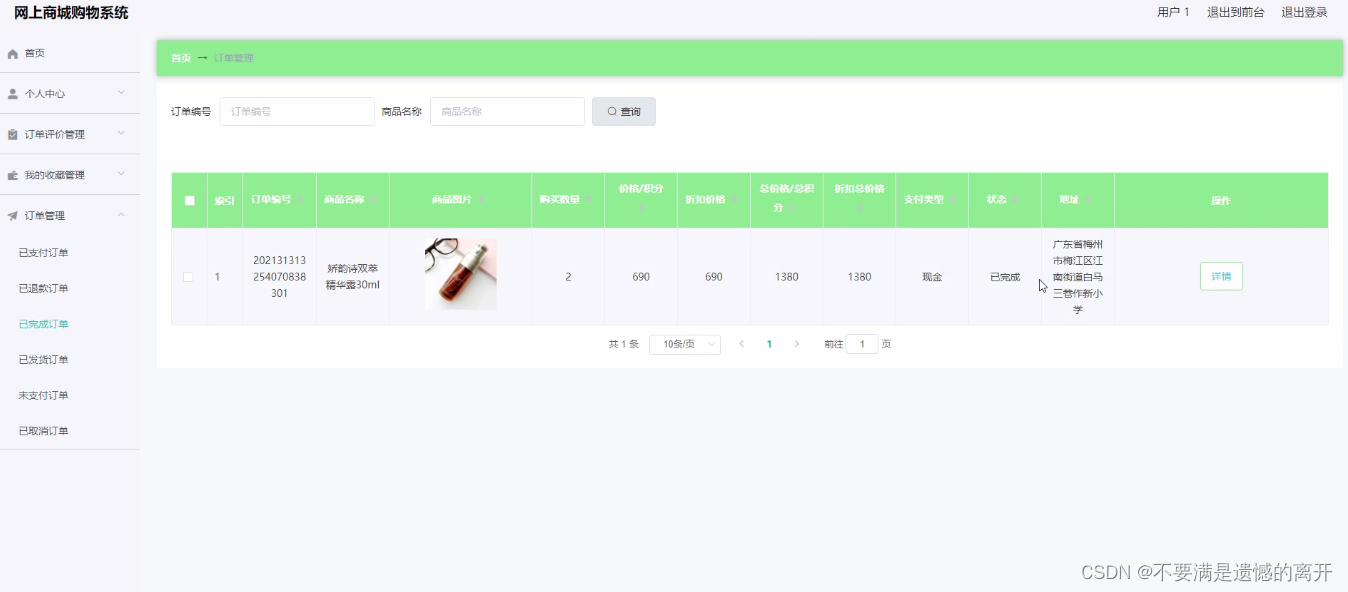
 订单管理,在订单管理页面中通过查看订单编号、商品名称、商品图片、购买数量、价格/积分、折扣价格、总价格/总积分、折扣总价格、支付类型、状态、地址等内容进行详情
前台首页功能模块
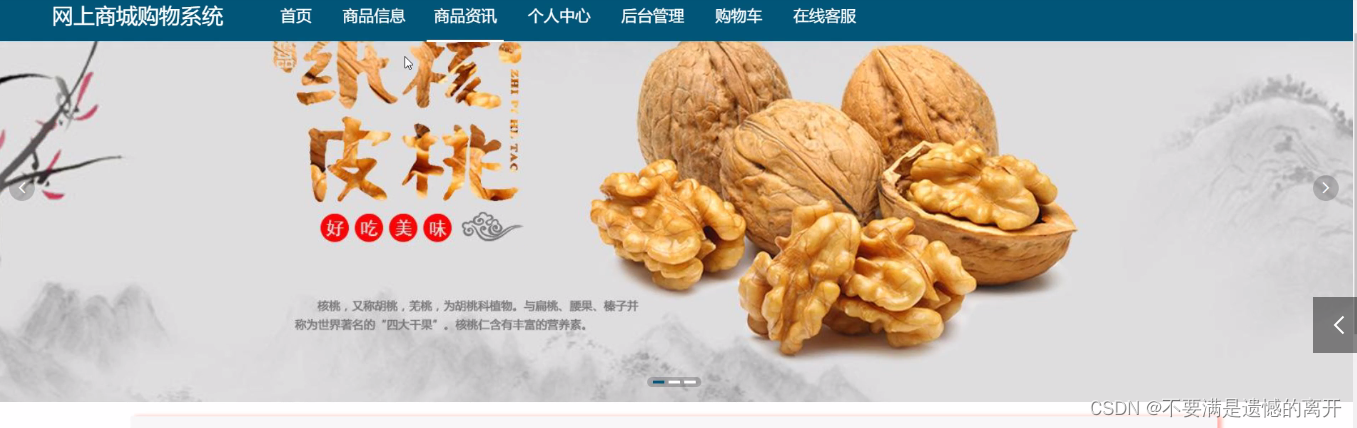
网上商城购物系统,在网上商城购物系统可以查看首页、商品信息、商品资讯、个人中心、后台管理、购物车、在线客服等内容
 用户登录、用户注册,通过注册获取用户名、密码、姓名、联系电话等信息进行注册、登录
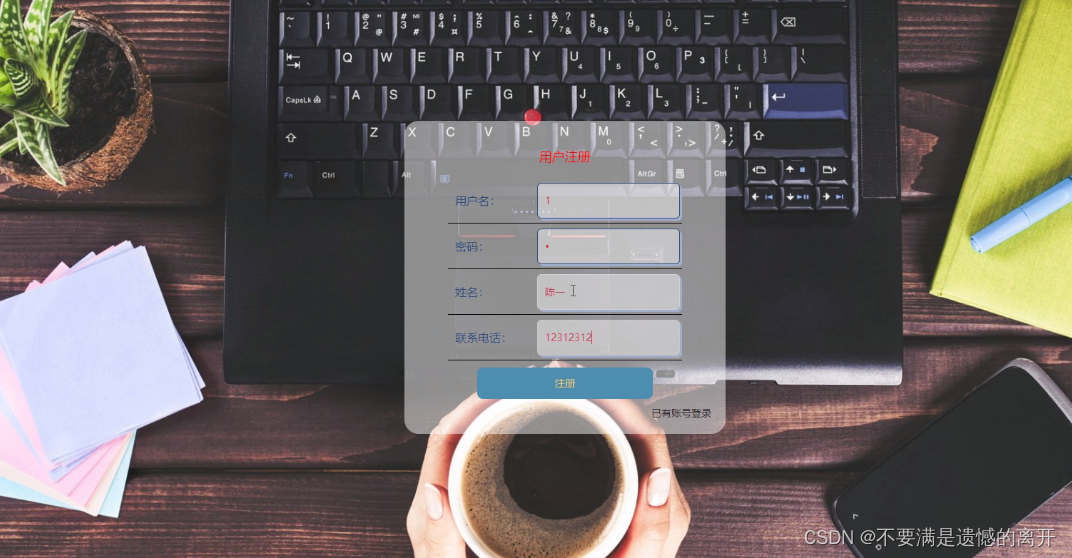
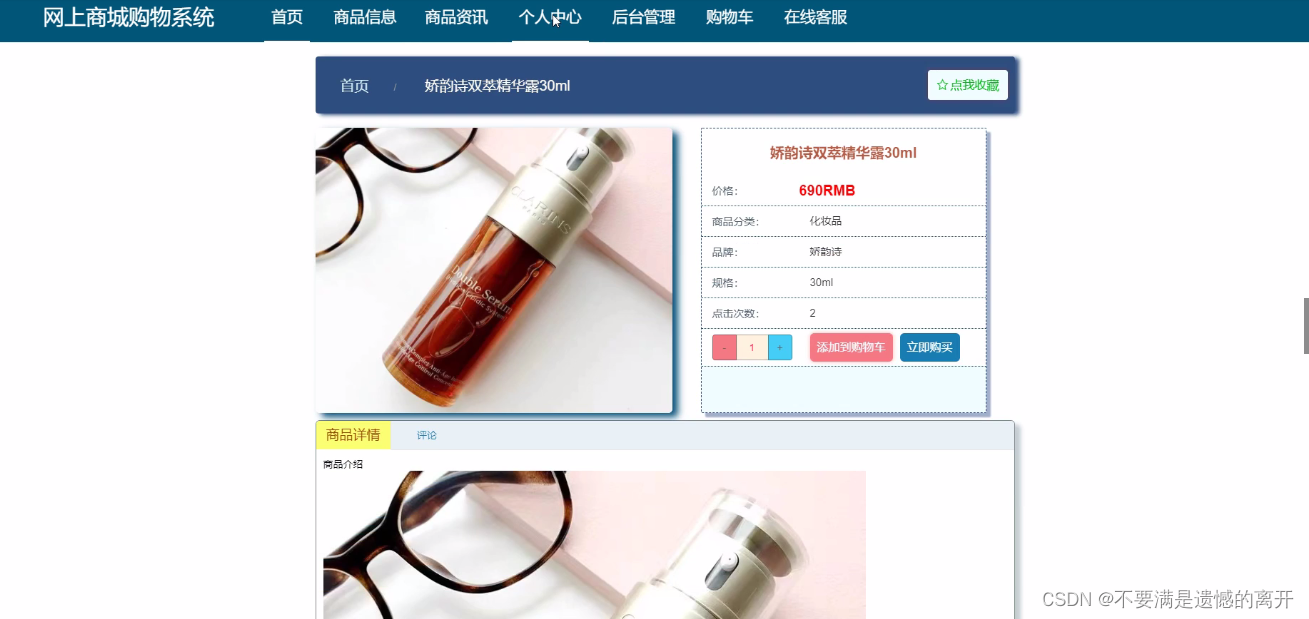
 商品信息,在商品信息页面可以查看商品名称、商品分类、图片、品牌、规格、价格等信息进行添加到购物车、立即购买
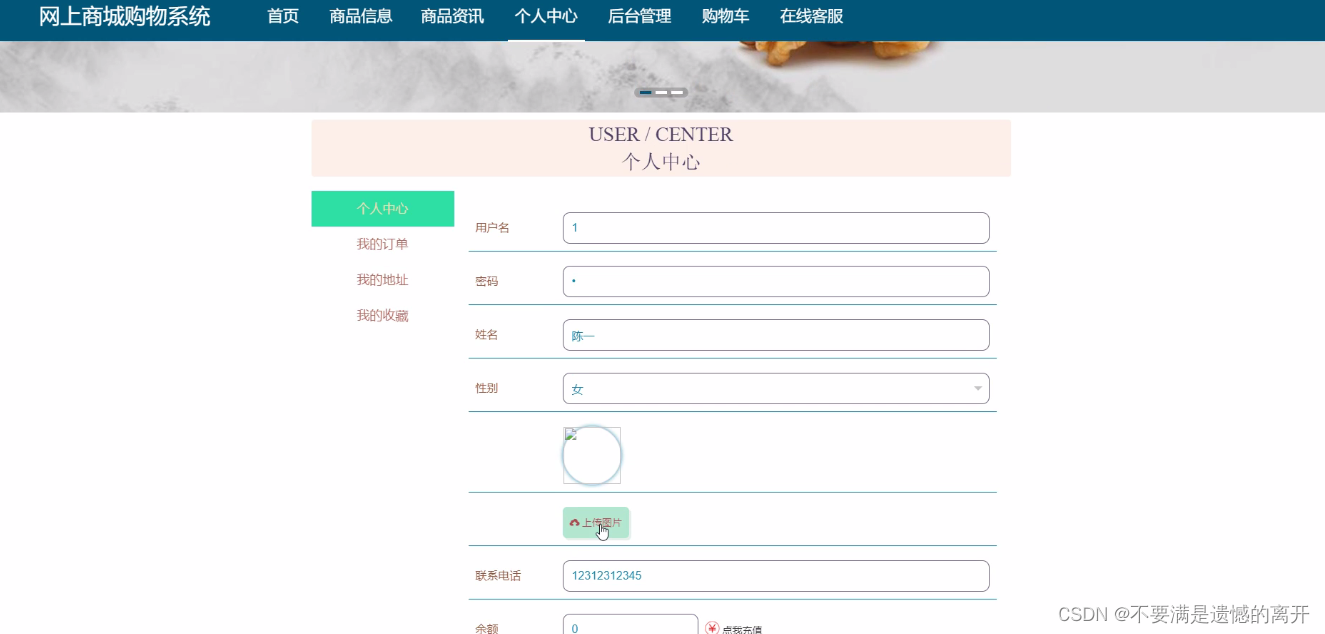
 个人中心,在个人中心页面可以查看用户名、姓名、性别、头像、联系电话等进行更新信息、退出登录
三、核心代码
1、登录模块
package com.controller;


import java.util.Arrays;
import java.util.Calendar;
import java.util.Date;
import java.util.Map;

import javax.servlet.http.HttpServletRequest;

import org.springframework.beans.factory.annotation.Autowired;
import org.springframework.stereotype.Controller;
import org.springframework.web.bind.annotation.GetMapping;
import org.springframework.web.bind.annotation.PathVariable;
import org.springframework.web.bind.annotation.PostMapping;
import org.springframework.web.bind.annotation.RequestBody;
import org.springframework.web.bind.annotation.RequestMapping;
import org.springframework.web.bind.annotation.RequestParam;
import org.springframework.web.bind.annotation.ResponseBody;
import org.springframework.web.bind.annotation.RestController;

import com.annotation.IgnoreAuth;
import com.baomidou.mybatisplus.mapper.EntityWrapper;
import com.entity.TokenEntity;
import com.entity.UserEntity;
import com.service.TokenService;
import com.service.UserService;
import com.utils.CommonUtil;
import com.utils.MD5Util;
import com.utils.MPUtil;
import com.utils.PageUtils;
import com.utils.R;
import com.utils.ValidatorUtils;

/**
 * 登录相关
 */
@RequestMapping("users")
@RestController
public class UserController{

	@Autowired
	private UserService userService;

	@Autowired
	private TokenService tokenService;

	/**
	 * 登录
	 */
	@IgnoreAuth
	@PostMapping(value = "/login")
	public R login(String username, String password, String captcha, HttpServletRequest request) {
		UserEntity user = userService.selectOne(new EntityWrapper<UserEntity>().eq("username", username));
		if(user==null || !user.getPassword().equals(password)) {
			return R.error("账号或密码不正确");
		}
		String token = tokenService.generateToken(user.getId(),username, "users", user.getRole());
		return R.ok().put("token", token);
	}

	/**
	 * 注册
	 */
	@IgnoreAuth
	@PostMapping(value = "/register")
	public R register(@RequestBody UserEntity user){
//    	ValidatorUtils.validateEntity(user);
    	if(userService.selectOne(new EntityWrapper<UserEntity>().eq("username", user.getUsername())) !=null) {
    		return R.error("用户已存在");
    	}
        userService.insert(user);
        return R.ok();
    }

	/**
	 * 退出
	 */
	@GetMapping(value = "logout")
	public R logout(HttpServletRequest request) {
		request.getSession().invalidate();
		return R.ok("退出成功");
	}

	/**
     * 密码重置
     */
    @IgnoreAuth
	@RequestMapping(value = "/resetPass")
    public R resetPass(String username, HttpServletRequest request){
    	UserEntity user = userService.selectOne(new EntityWrapper<UserEntity>().eq("username", username));
    	if(user==null) {
    		return R.error("账号不存在");
    	}
    	user.setPassword("123456");
        userService.update(user,null);
        return R.ok("密码已重置为:123456");
    }

	/**
     * 列表
     */
    @RequestMapping("/page")
    public R page(@RequestParam Map<String, Object> params,UserEntity user){
        EntityWrapper<UserEntity> ew = new EntityWrapper<UserEntity>();
    	PageUtils page = userService.queryPage(params, MPUtil.sort(MPUtil.between(MPUtil.allLike(ew, user), params), params));
        return R.ok().put("data", page);
    }

	/**
     * 列表
     */
    @RequestMapping("/list")
    public R list( UserEntity user){
       	EntityWrapper<UserEntity> ew = new EntityWrapper<UserEntity>();
      	ew.allEq(MPUtil.allEQMapPre( user, "user"));
        return R.ok().put("data", userService.selectListView(ew));
    }

    /**
     * 信息
     */
    @RequestMapping("/info/{id}")
    public R info(@PathVariable("id") String id){
        UserEntity user = userService.selectById(id);
        return R.ok().put("data", user);
    }

    /**
     * 获取用户的session用户信息
     */
    @RequestMapping("/session")
    public R getCurrUser(HttpServletRequest request){
    	Long id = (Long)request.getSession().getAttribute("userId");
        UserEntity user = userService.selectById(id);
        return R.ok().put("data", user);
    }

    /**
     * 保存
     */
    @PostMapping("/save")
    public R save(@RequestBody UserEntity user){
//    	ValidatorUtils.validateEntity(user);
    	if(userService.selectOne(new EntityWrapper<UserEntity>().eq("username", user.getUsername())) !=null) {
    		return R.error("用户已存在");
    	}
        userService.insert(user);
        return R.ok();
    }

    /**
     * 修改
     */
    @RequestMapping("/update")
    public R update(@RequestBody UserEntity user){
//        ValidatorUtils.validateEntity(user);
        userService.updateById(user);//全部更新
        return R.ok();
    }

    /**
     * 删除
     */
    @RequestMapping("/delete")
    public R delete(@RequestBody Long[] ids){
        userService.deleteBatchIds(Arrays.asList(ids));
        return R.ok();
    }
}
2、文件上传模块
package com.controller;

import java.io.File;
import java.io.FileNotFoundException;
import java.io.IOException;
import java.util.Arrays;
import java.util.Date;
import java.util.HashMap;
import java.util.List;
import java.util.Map;
import java.util.Random;
import java.util.UUID;

import org.apache.commons.io.FileUtils;
import org.apache.commons.lang3.StringUtils;
import org.springframework.beans.factory.annotation.Autowired;
import org.springframework.http.HttpHeaders;
import org.springframework.http.HttpStatus;
import org.springframework.http.MediaType;
import org.springframework.http.ResponseEntity;
import org.springframework.util.ResourceUtils;
import org.springframework.web.bind.annotation.PathVariable;
import org.springframework.web.bind.annotation.RequestBody;
import org.springframework.web.bind.annotation.RequestMapping;
import org.springframework.web.bind.annotation.RequestParam;
import org.springframework.web.bind.annotation.RestController;
import org.springframework.web.multipart.MultipartFile;

import com.annotation.IgnoreAuth;
import com.baomidou.mybatisplus.mapper.EntityWrapper;
import com.entity.ConfigEntity;
import com.entity.EIException;
import com.service.ConfigService;
import com.utils.R;

/**
 * 上传文件映射表
 */
@RestController
@RequestMapping("file")
@SuppressWarnings({"unchecked","rawtypes"})
public class FileController{
	@Autowired
    private ConfigService configService;
	/**
	 * 上传文件
	 */
	@RequestMapping("/upload")
	public R upload(@RequestParam("file") MultipartFile file,String type) throws Exception {
		if (file.isEmpty()) {
			throw new EIException("上传文件不能为空");
		}
		String fileExt = file.getOriginalFilename().substring(file.getOriginalFilename().lastIndexOf(".")+1);
		File path = new File(ResourceUtils.getURL("classpath:static").getPath());
		if(!path.exists()) {
		    path = new File("");
		}
		File upload = new File(path.getAbsolutePath(),"/upload/");
		if(!upload.exists()) {
		    upload.mkdirs();
		}
		String fileName = new Date().getTime()+"."+fileExt;
		File dest = new File(upload.getAbsolutePath()+"/"+fileName);
		file.transferTo(dest);
		FileUtils.copyFile(dest, new File("C:\\Users\\Desktop\\jiadian\\springbootl7own\\src\\main\\resources\\static\\upload"+"/"+fileName));
		if(StringUtils.isNotBlank(type) && type.equals("1")) {
			ConfigEntity configEntity = configService.selectOne(new EntityWrapper<ConfigEntity>().eq("name", "faceFile"));
			if(configEntity==null) {
				configEntity = new ConfigEntity();
				configEntity.setName("faceFile");
				configEntity.setValue(fileName);
			} else {
				configEntity.setValue(fileName);
			}
			configService.insertOrUpdate(configEntity);
		}
		return R.ok().put("file", fileName);
	}

	/**
	 * 下载文件
	 */
	@IgnoreAuth
	@RequestMapping("/download")
	public ResponseEntity<byte[]> download(@RequestParam String fileName) {
		try {
			File path = new File(ResourceUtils.getURL("classpath:static").getPath());
			if(!path.exists()) {
			    path = new File("");
			}
			File upload = new File(path.getAbsolutePath(),"/upload/");
			if(!upload.exists()) {
			    upload.mkdirs();
			}
			File file = new File(upload.getAbsolutePath()+"/"+fileName);
			if(file.exists()){
				/*if(!fileService.canRead(file, SessionManager.getSessionUser())){
					getResponse().sendError(403);
				}*/
				HttpHeaders headers = new HttpHeaders();
			    headers.setContentType(MediaType.APPLICATION_OCTET_STREAM);
			    headers.setContentDispositionFormData("attachment", fileName);
			    return new ResponseEntity<byte[]>(FileUtils.readFileToByteArray(file),headers, HttpStatus.CREATED);
			}
		} catch (IOException e) {
			e.printStackTrace();
		}
		return new ResponseEntity<byte[]>(HttpStatus.INTERNAL_SERVER_ERROR);
	}

}
3、代码封装
package com.utils;

import java.util.HashMap;
import java.util.Map;

/**
 * 返回数据
 */
public class R extends HashMap<String, Object> {
	private static final long serialVersionUID = 1L;

	public R() {
		put("code", 0);
	}

	public static R error() {
		return error(500, "未知异常,请联系管理员");
	}

	public static R error(String msg) {
		return error(500, msg);
	}

	public static R error(int code, String msg) {
		R r = new R();
		r.put("code", code);
		r.put("msg", msg);
		return r;
	}

	public static R ok(String msg) {
		R r = new R();
		r.put("msg", msg);
		return r;
	}

	public static R ok(Map<String, Object> map) {
		R r = new R();
		r.putAll(map);
		return r;
	}

	public static R ok() {
		return new R();
	}

	public R put(String key, Object value) {
		super.put(key, value);
		return this;
	}
}


 997
997


 被折叠的 条评论
为什么被折叠?
被折叠的 条评论
为什么被折叠?
 到【灌水乐园】发言


