


手动开发简单的Spring基于注解配置的程序
需求说明
1. 自 己 写 一 个 简 单 的 Spring 容 器 , 通 过 读 取 类 的 注 解 (@Component @Controller
@Service @Reponsitory),将对象注入到 IOC 容器
2.也就是说,不使用 Spring 原生框架,我们自己使用 IO+Annotaion+反射+集合 技术实现
思路分析
(1) 我们使用注解方式完成, 这里我们不用 xml 来配置
(2) 程序框架图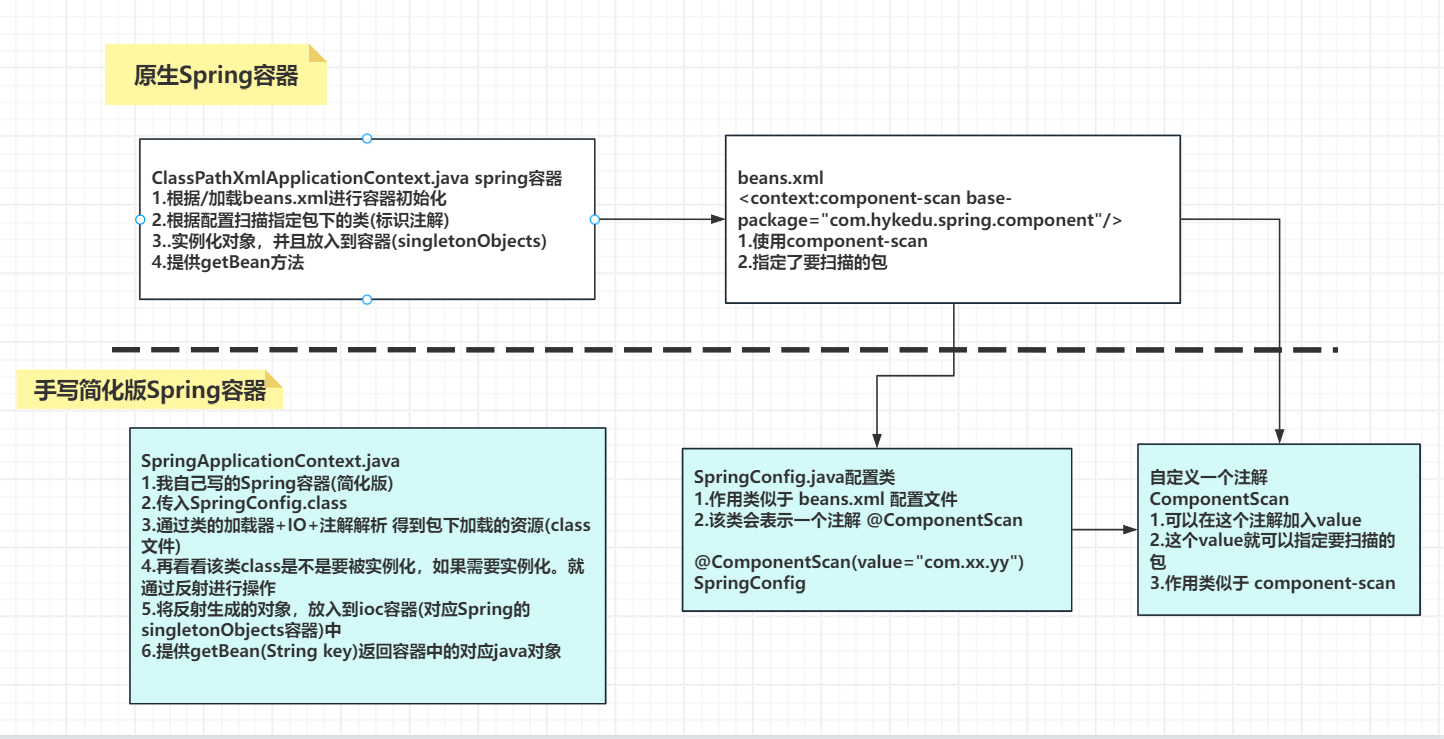
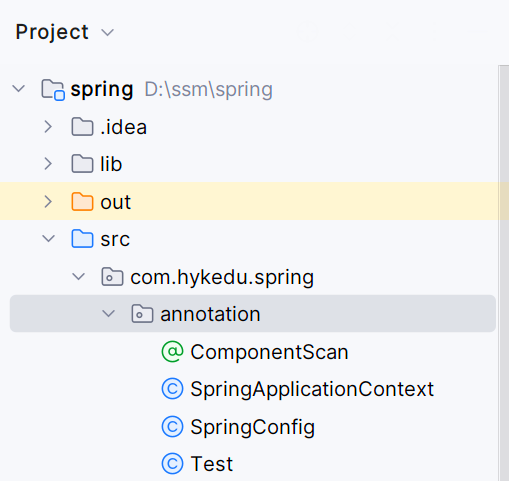
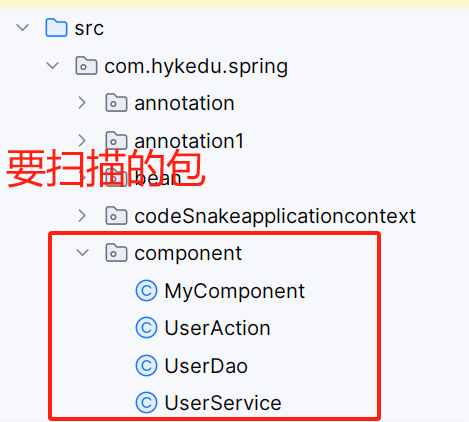
目录结构
代码实现
1.先创建ComponentScan注解
package com.hykedu.spring.annotation;

import java.lang.annotation.ElementType;
import java.lang.annotation.Retention;
import java.lang.annotation.RetentionPolicy;
import java.lang.annotation.Target;

/**
 * @author 程序员蛇皮
 * @version 1.0
 * 1.@Target(ElementType.TYPE)指定我们的 ComponentScan注解可以修饰 Type程序元素
 * 2.@Retention(RetentionPolicy.RUNTIME) ComponentScan注解 保留范围
 * 3.String value() default ""; 表示 ComponentScan注解 可以传入value
 */
@Target(ElementType.TYPE)
@Retention(RetentionPolicy.RUNTIME)
public @interface ComponentScan {
    String value() default "";
}
2.创建SpringConfig.java配置类
package com.hykedu.spring.annotation;

/**
 * @author 程序员蛇皮
 * @version 1.0
 * 这是一个配置类,作用类似于原生Spring的 beans.xml 容器配置文件
 */
@ComponentScan(value = "com.hykedu.spring.component")
public class SpringConfig {
}
**3.手写简易版Spring ioc容器 SpringApplicationContext.java
package com.hykedu.spring.annotation;
import org.springframework.stereotype.Component;
import org.springframework.stereotype.Controller;
import org.springframework.stereotype.Repository;
import org.springframework.stereotype.Service;
import org.springframework.util.StringUtils;
import java.io.File;
import java.net.URL;
import java.util.concurrent.ConcurrentHashMap;
/**
* @author 程序员蛇皮
* @version 1.0
* SpringApplicationContext 类的作用类似Spring原生ioc容器
*/
public class SpringApplicationContext {
private Class configClass;
//ioc存放的就是通过反射创建的对象(基于注解方式)
private final ConcurrentHashMap<String, Object> ioc = new ConcurrentHashMap<>();
public SpringApplicationContext(Class configClass) {
this.configClass = configClass;
System.out.println(configClass);
//获取要扫描的包
//1.先得到SpringConfig配置的@ComponentScan(value = "com.hykedu.spring.component")
ComponentScan componentScan = (ComponentScan) this.configClass.getDeclaredAnnotation(ComponentScan.class);
//2.componentScan的value就是我们要扫描的包
String path = componentScan.value();
System.out.println("要扫描的包:" + path);
//得到要扫描的包下所有的资源(类.class)
//1.得到类的加载器
ClassLoader classLoader = SpringApplicationContext.class.getClassLoader();
//2.通过类加载器获取到要扫描包的url
path = path.replace(".", "/");//把 . 替换成路径间隔符 /
URL resource = classLoader.getResource(path);
System.out.println("要扫描包的url:" + resource);
//3.将要加载的资源(.class) 路径下的文件进行遍历=>io
File file = new File(resource.getFile());
if (file.isDirectory()) {
File[] files = file.listFiles();
for (File f : files) {
String absolutePath = f.getAbsolutePath();
System.out.println("文件的绝对路径:" + absolutePath);
//这里我们只处理.class文件
if (absolutePath.endsWith(".class")) {
//1.获取到类名
String className = absolutePath.substring
(absolutePath.lastIndexOf("\\") + 1, absolutePath.lastIndexOf(".class"));
System.out.println("类名:" + className);
//2.获取类的完整路径(全类名)
String classFullName = path.replace("/", ".") + "." + className;
System.out.println("全类名:" + classFullName);
//3.判断该类是否需要注入容器,判断该类是不是有@Component/@Controller/@Repository/@Service注解
try {
Class<?> aClass = classLoader.loadClass(classFullName);
if (aClass.isAnnotationPresent(Component.class) ||
aClass.isAnnotationPresent(Controller.class) ||
aClass.isAnnotationPresent(Repository.class) ||
aClass.isAnnotationPresent(Service.class)) {
//如果在注解指定了value,将其赋值给className
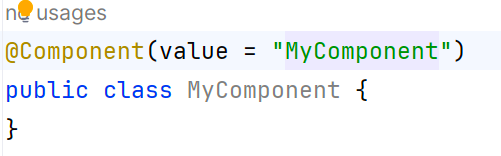
if (aClass.isAnnotationPresent(Component.class)) {
//获取到该注解的value
String id = aClass.getDeclaredAnnotation(Component.class).value();
if (!"".equals(id)) {
className = id;
}
} else if (aClass.isAnnotationPresent(Controller.class)) {
//获取到该注解的value
String id = aClass.getDeclaredAnnotation(Controller.class).value();
if (!"".equals(id)) {
className = id;
}
} else if (aClass.isAnnotationPresent(Repository.class)) {
//获取到该注解的value
String id = aClass.getDeclaredAnnotation(Repository.class).value();
if (!"".equals(id)) {
className = id;
}
} else if (aClass.isAnnotationPresent(Service.class)) {
//获取到该注解的value
String id = aClass.getDeclaredAnnotation(Service.class).value();
if (!"".equals(id)) {
className = id;
}
}
//将反射对象放入到容器中,默认类名的首字母小写作为id
Class<?> clazz = Class.forName(classFullName);
Object instance = clazz.newInstance();
ioc.put(StringUtils.uncapitalize(className), instance);
}
} catch (Exception e) {
throw new RuntimeException(e);
}
}
}
}
}
//编写方法,返回容器的对象
public Object getBean(String name) {
return ioc.get(name);
}
}
4.最后我们写个测试类Test.java
package com.hykedu.spring.annotation;

/**
 * @author 程序员蛇皮
 * @version 1.0
 */
public class Test {
    public static void main(String[] args) {
        SpringApplicationContext ioc = new SpringApplicationContext(SpringConfig.class);
        System.out.println("ok");
    }
}
用debug断点下在 “System.out.println(“ok”);” 这里
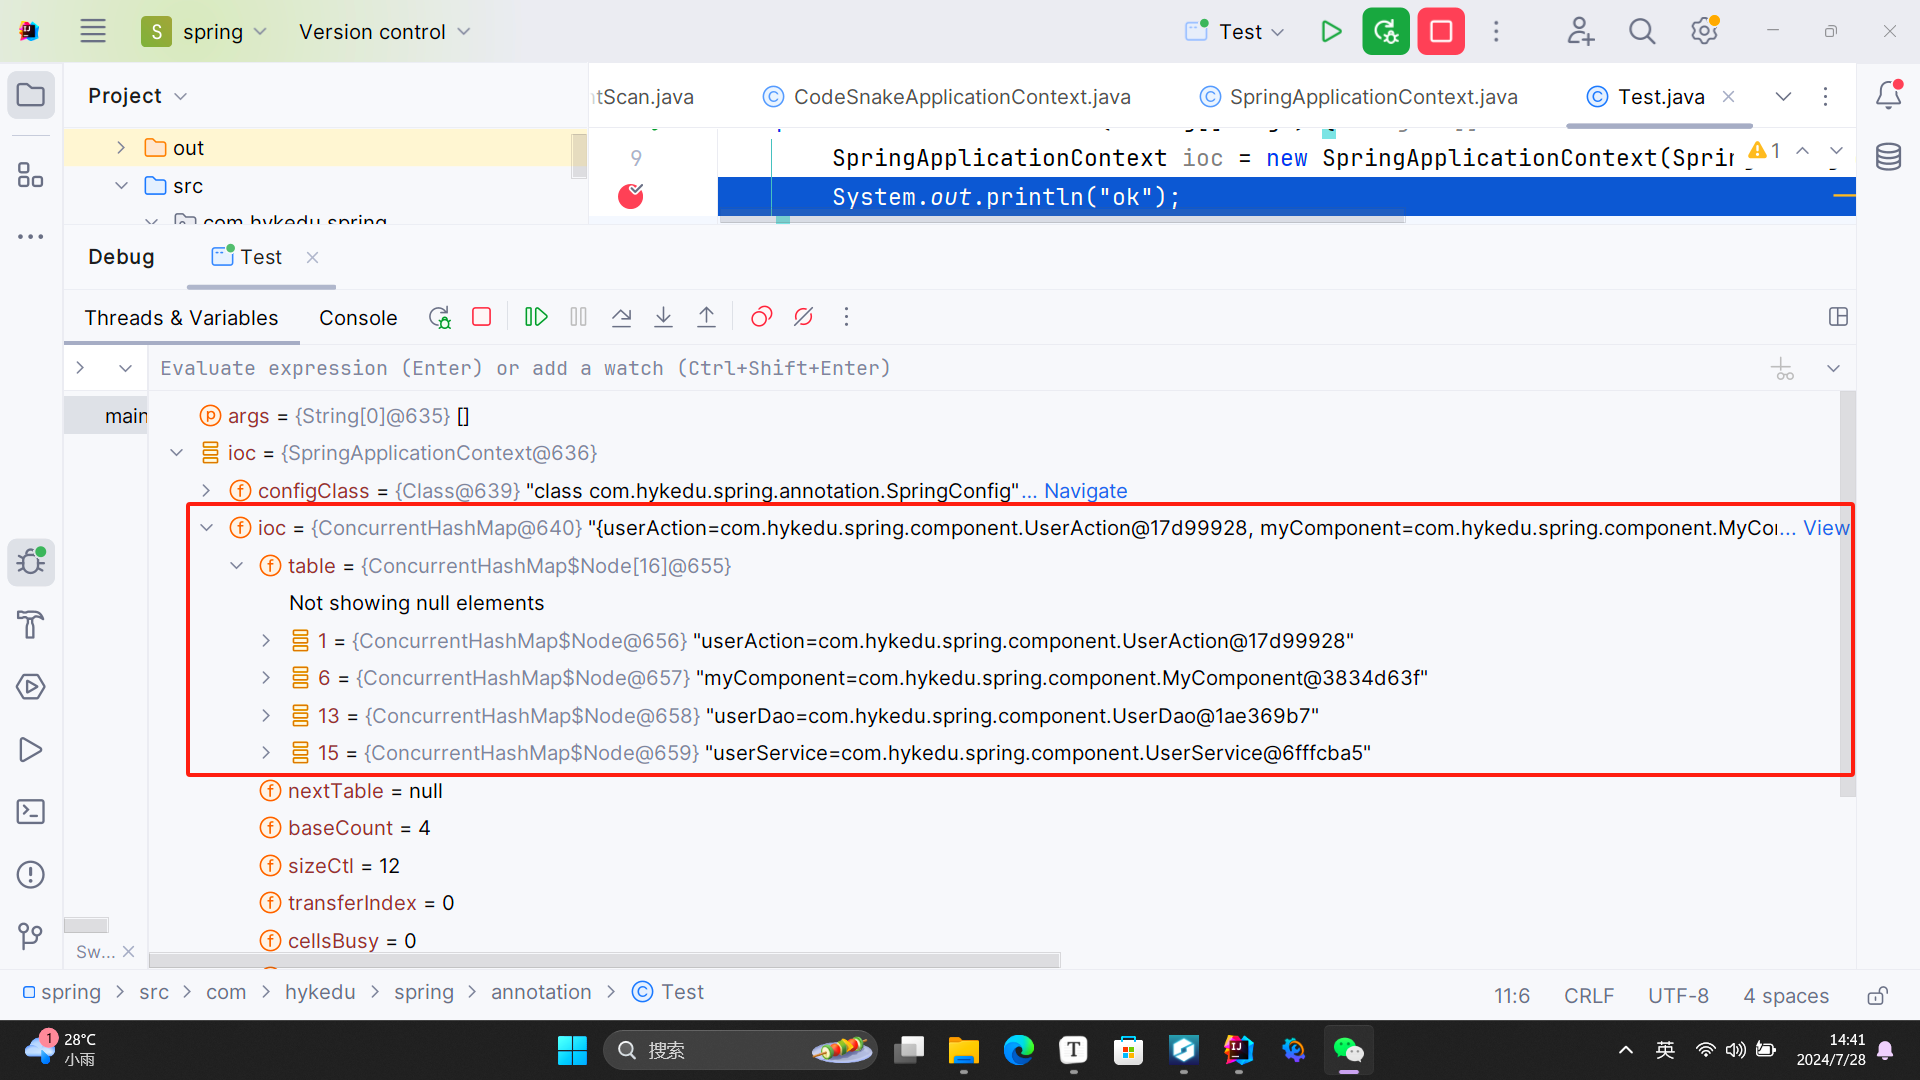
可以看到"com.hykedu.spring.component"带@Component/@Controller/@Repository/@Service注解的类成功存放到我们手写的简易Spring ioc容器中
好啦,本期的分享就到这里,感谢大家能看到最后,相信小伙伴们已经对Spring的ioc容器结构有一定的了解了,
敬请期待,如果觉得我分享的内容还不错,可以关注一下我的公众号程序员蛇皮,谢谢支持,我们下期再见!


 1281
1281

 被折叠的 条评论
为什么被折叠?
被折叠的 条评论
为什么被折叠?
 到【灌水乐园】发言


