


一、XXL-JOB简介
XXL-JOB是一个分布式任务调度平台,其核心设计目标是开发迅速、学习简单、轻量级、易扩展。它支持通过Web界面进行管理调度任务,包括任务的增删改查、执行状态监控等。同时,XXL-JOB提供了Java、Spring Boot等多种接入方式,方便开发者在现有项目中集成。
二、环境准备
操作系统:Linux或Windows。
Java环境:Java 8 或更高版本。
Maven:用于构建项目。
数据库:MySQL 5.7+,用于存储调度任务的元数据。
三、步骤详解
3.1 下载与安装
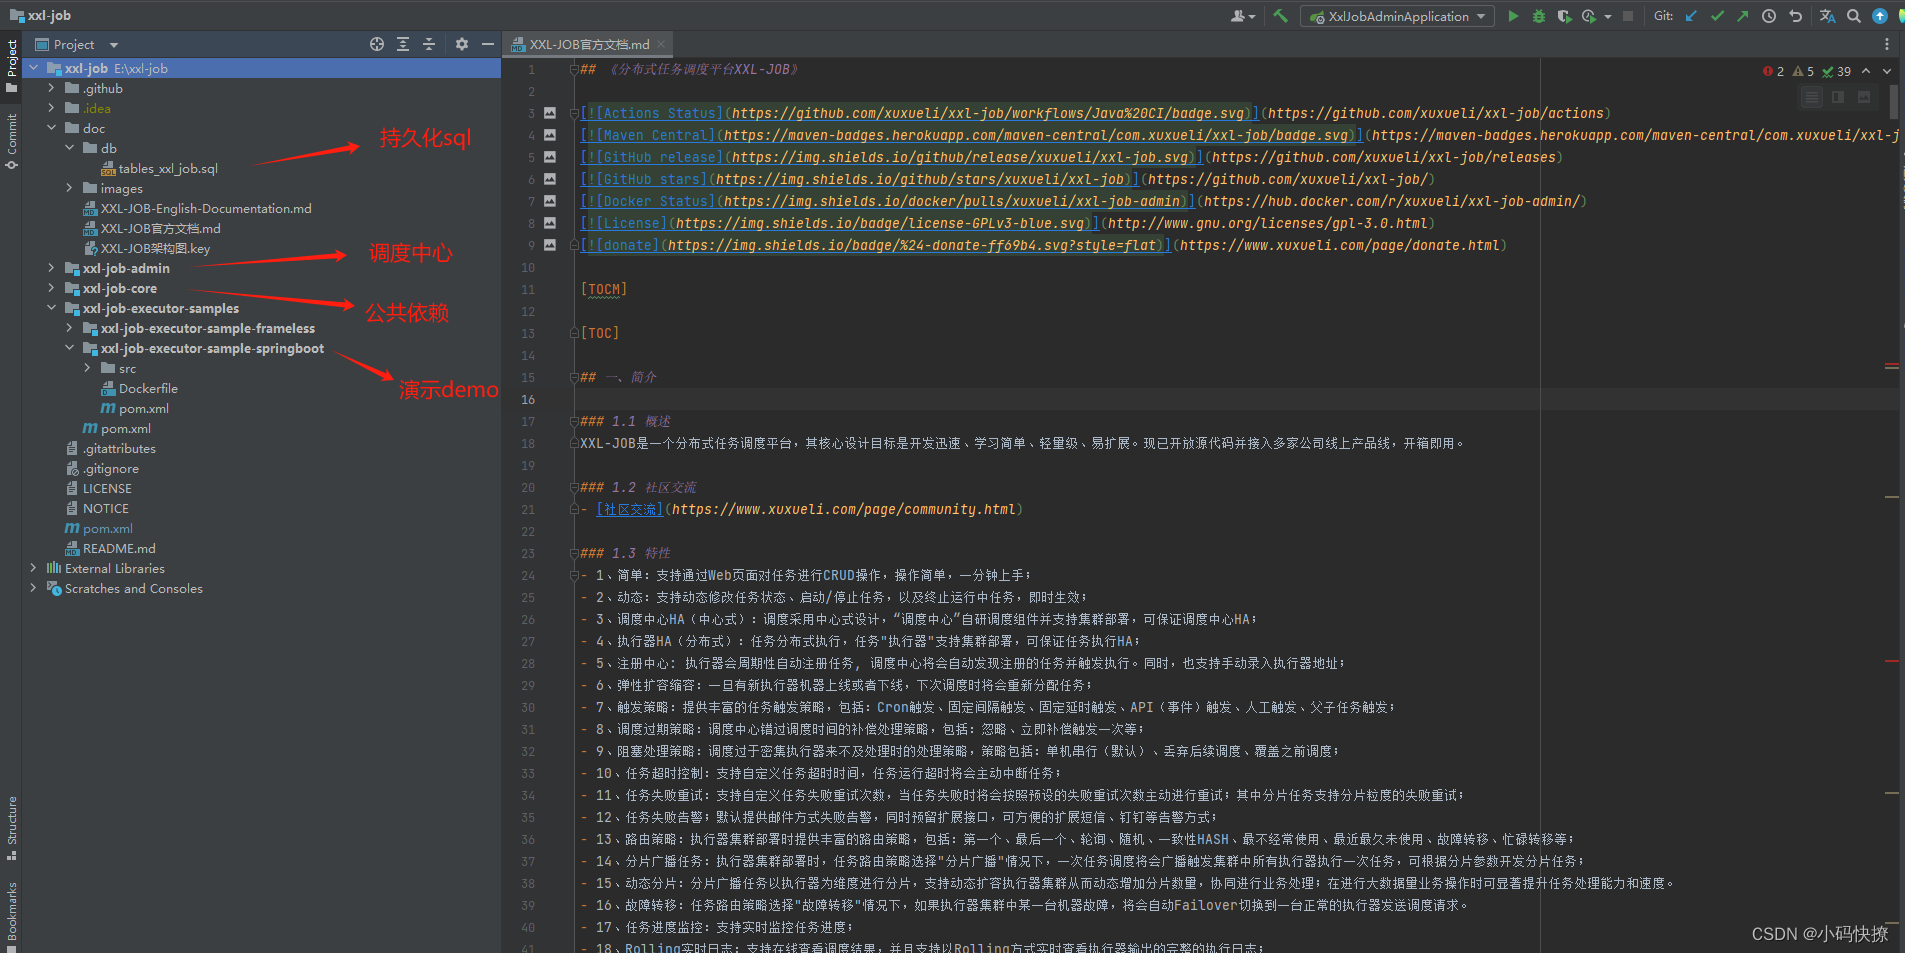
- 构建项目:进入项目根目录,使用Maven构建项目。
   cd xxl-job
   mvn clean install -Dmaven.test.skip=true
3.2 配置数据库
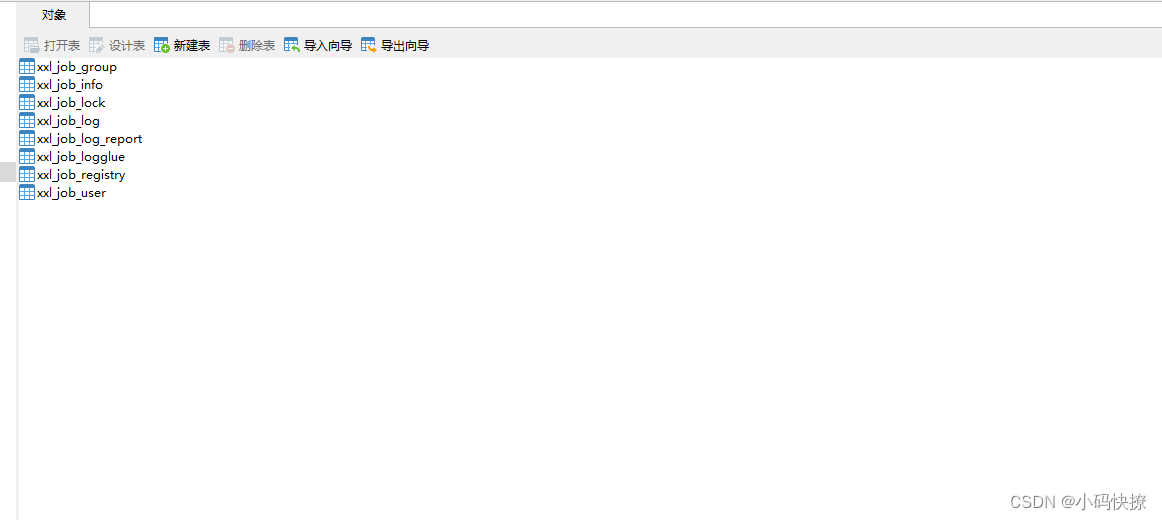
- 导入SQL脚本:在xxl-job/doc/db/目录下找到tables_xxl_job.sql,将其导入到你的MySQL数据库中。
- 修改配置文件:打开xxl-job-admin/src/main/resources/application.properties,配置数据库连接信息。
   spring.datasource.url=jdbc:mysql://localhost:3306/xxl_job?useUnicode=true&characterEncoding=UTF-8&autoReconnect=true
   spring.datasource.username=root
   spring.datasource.password=your_password
3.3 启动Admin服务
- 启动Admin:进入xxl-job-admin模块的target目录,执行jar包。
   cd xxl-job/xxl-job-admin/target
   java -jar xxl-job-admin-2.4.2-SNAPSHOT.jar
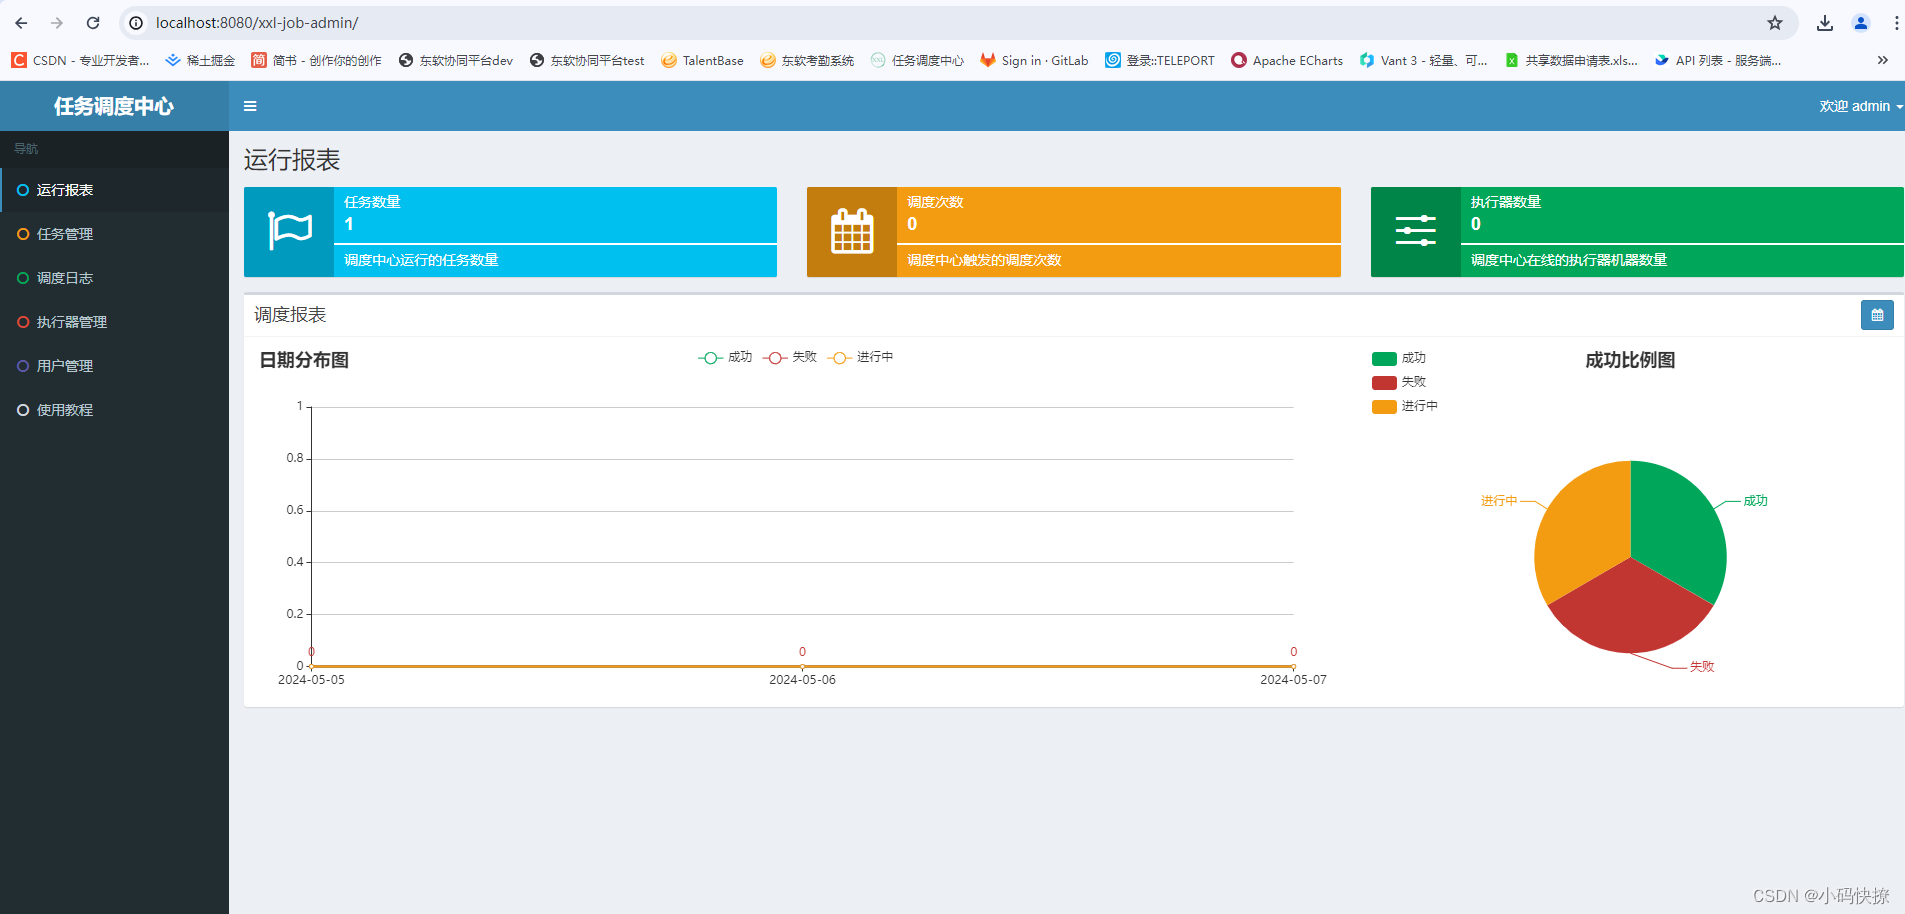
- 访问Admin界面:默认情况下,XXL-JOB Admin的Web界面可以通过http://localhost:8080/xxl-job-admin访问。
- 用户名:admin
- 密码:123456
3.4项目中使用xxl-job
- 在配置文件中添加xxl-job配置
xxl.job.accessToken=default_token
xxl.job.admin.addresses=http://192.168.140.195:8080/xxl-job-admin
xxl.job.executor.appname=reptile
xxl.job.executor.ip=
xxl.job.executor.address=
xxl.job.executor.port=9999
xxl.job.executor.logPath=/works/serv/reptile/logs/xxl-job
xxl.job.executor.logRetentionDays=30
3.4pom文件引入依赖
        <dependency>
            <groupId>com.xuxueli</groupId>
            <artifactId>xxl-job-core</artifactId>
            <version>2.3.0</version>
        </dependency>
3.5创建配置文件
package com.example.reptile.utils;

import com.xxl.job.core.executor.impl.XxlJobSpringExecutor;
import org.slf4j.Logger;
import org.slf4j.LoggerFactory;
import org.springframework.beans.factory.annotation.Value;
import org.springframework.context.annotation.Bean;
import org.springframework.context.annotation.Configuration;


@Configuration
public class XxlJobConfig {
    private Logger logger = LoggerFactory.getLogger(XxlJobConfig.class);

    @Value("${xxl.job.admin.addresses}")
    private String adminAddresses;

    @Value("${xxl.job.accessToken}")
    private String accessToken;

    @Value("${xxl.job.executor.appname}")
    private String appname;

    @Value("${xxl.job.executor.address}")
    private String address;

    @Value("${xxl.job.executor.ip}")
    private String ip;

    @Value("${xxl.job.executor.port}")
    private int port;

    @Value("${xxl.job.executor.logpath}")
    private String logPath;

    @Value("${xxl.job.executor.logretentiondays}")
    private int logRetentionDays;


    @Bean
    public XxlJobSpringExecutor xxlJobExecutor() {
        logger.info(">>>>>>>>>>> xxl-job config init.");
        XxlJobSpringExecutor xxlJobSpringExecutor = new XxlJobSpringExecutor();
        xxlJobSpringExecutor.setAdminAddresses(adminAddresses);
        xxlJobSpringExecutor.setAppname(appname);
        xxlJobSpringExecutor.setAddress(address);
        xxlJobSpringExecutor.setIp(ip);
        xxlJobSpringExecutor.setPort(port);
        xxlJobSpringExecutor.setAccessToken(accessToken);
        xxlJobSpringExecutor.setLogPath(logPath);
        xxlJobSpringExecutor.setLogRetentionDays(logRetentionDays);

        return xxlJobSpringExecutor;
    }
}
3.6编写定时任务
package com.example.reptile.xxlJob;

import com.example.reptile.csdn.UrlCrawBokeh;
import com.xxl.job.core.handler.annotation.XxlJob;
import org.springframework.beans.factory.annotation.Autowired;
import org.springframework.stereotype.Component;

import java.io.IOException;
import java.util.Date;


@Component
public class xxlJobTest {
    @Autowired
    UrlCrawBokeh urlCrawBokeh;

    @XxlJob("xxlJobTest")
    public String xxlJobTest() {
        System.out.println("xxl-job-------- xxlJobTest定时任务执行成功---------- ");
        try {
            urlCrawBokeh.Crawling();
        } catch (IOException e) {
            throw new RuntimeException(e);
        } catch (InterruptedException e) {
            throw new RuntimeException(e);
        }
        System.out.println("定时任务调度完成:"+new Date());
        return "success";

    }
}
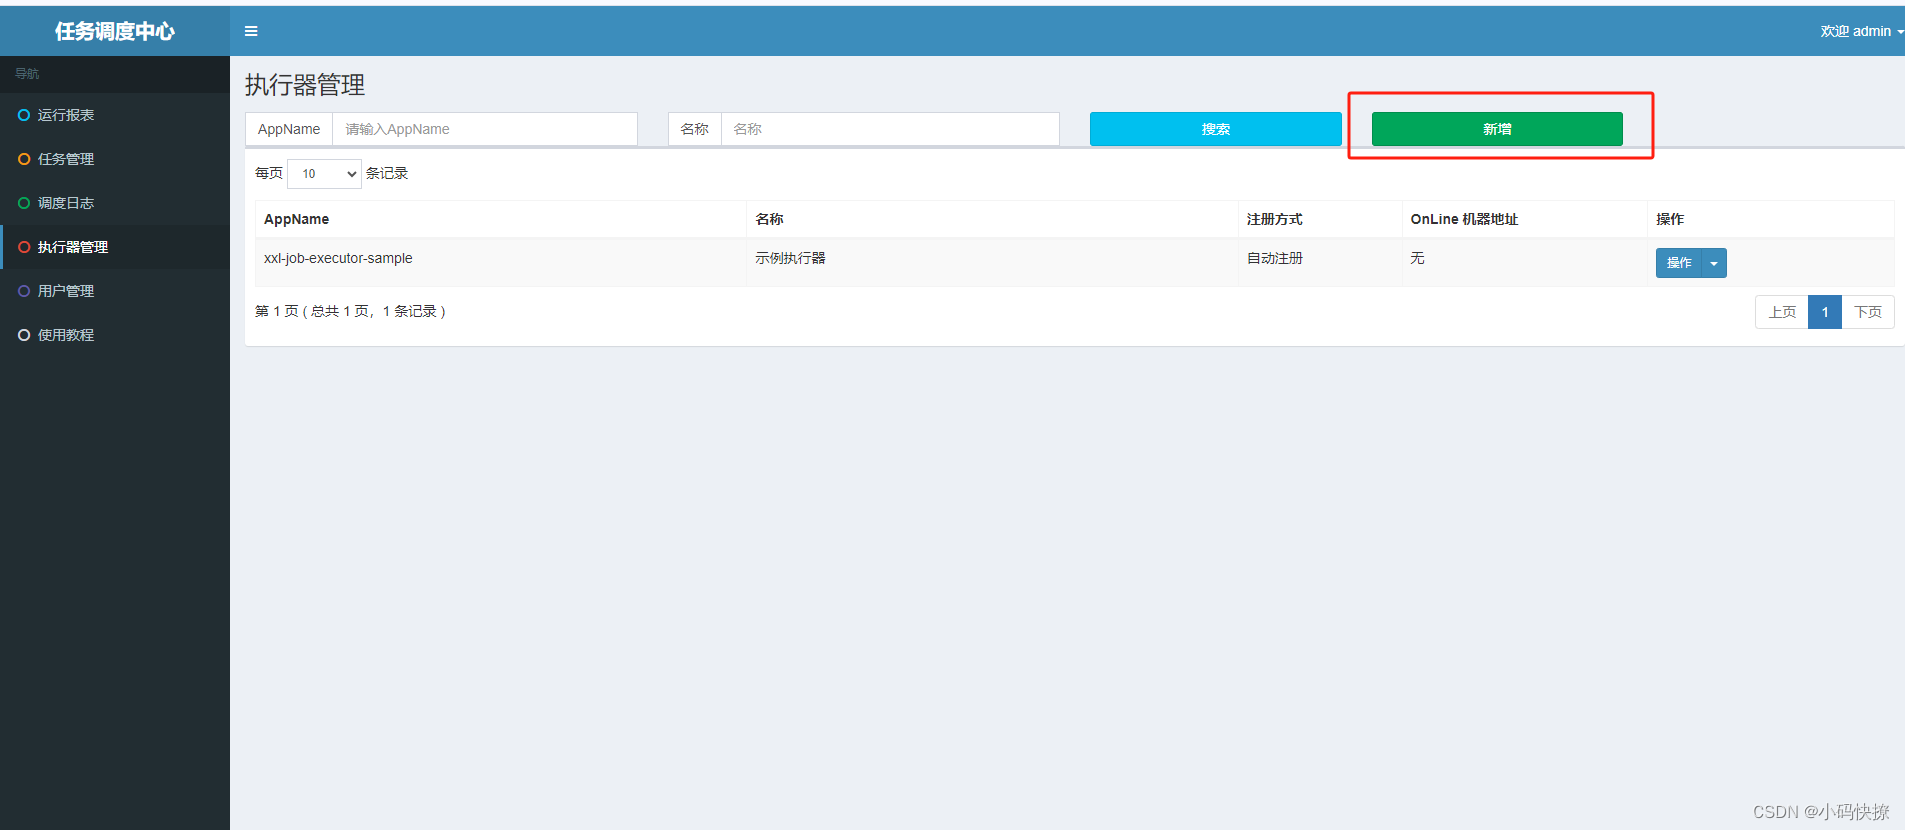
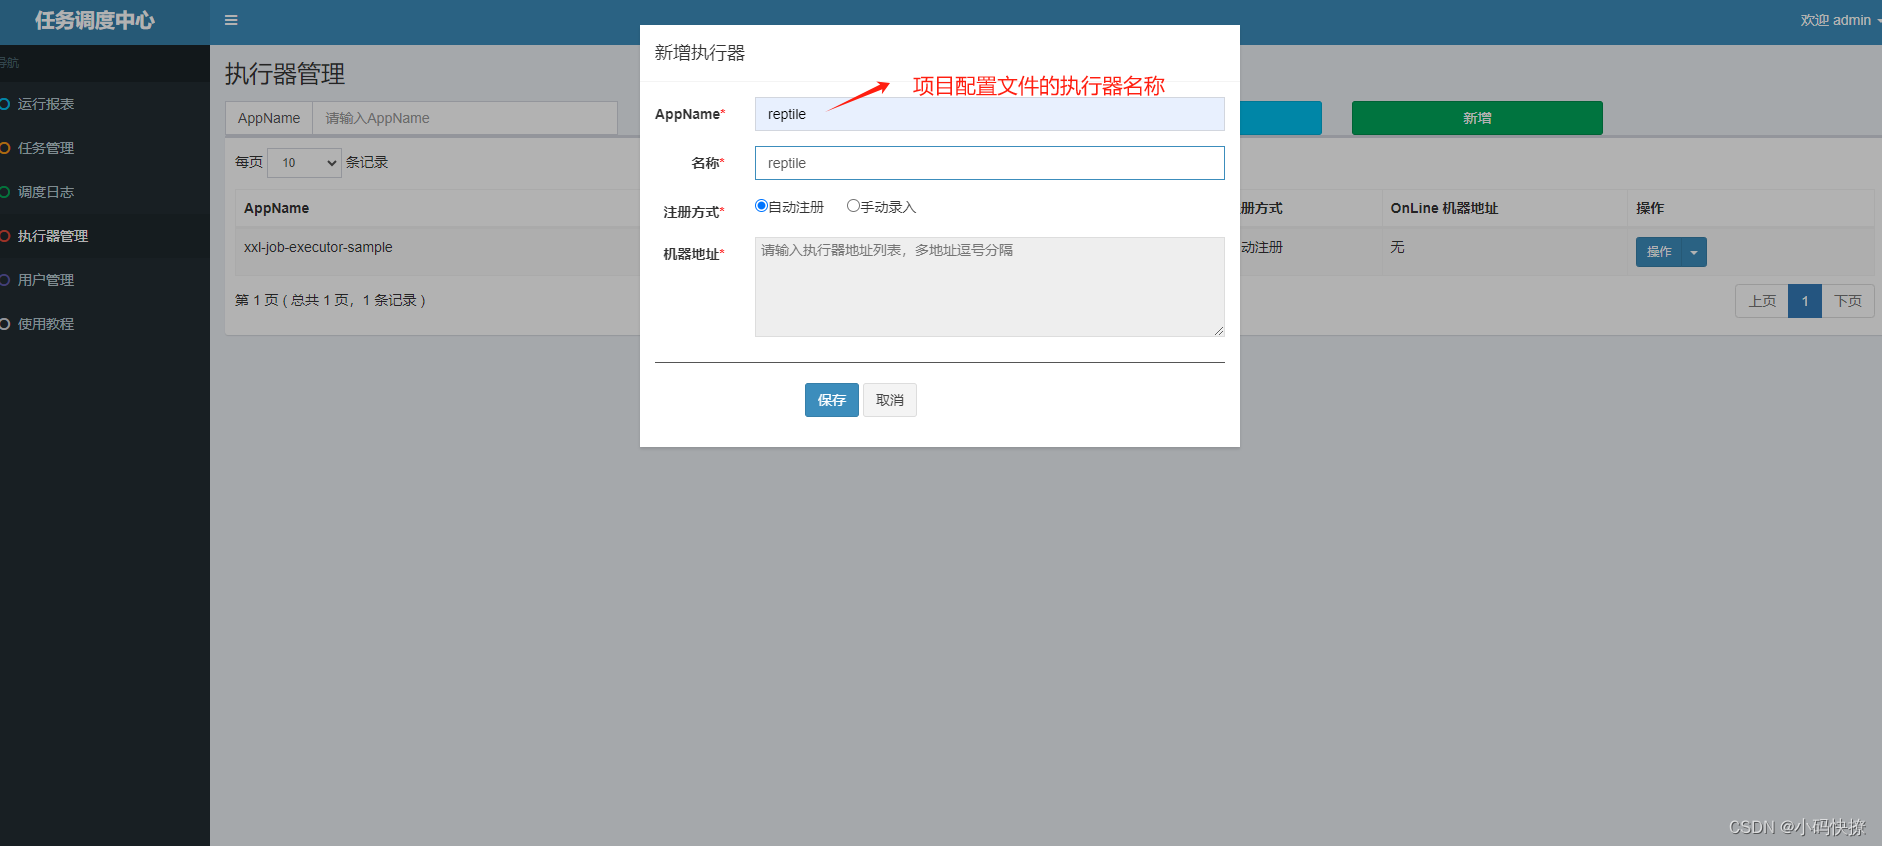
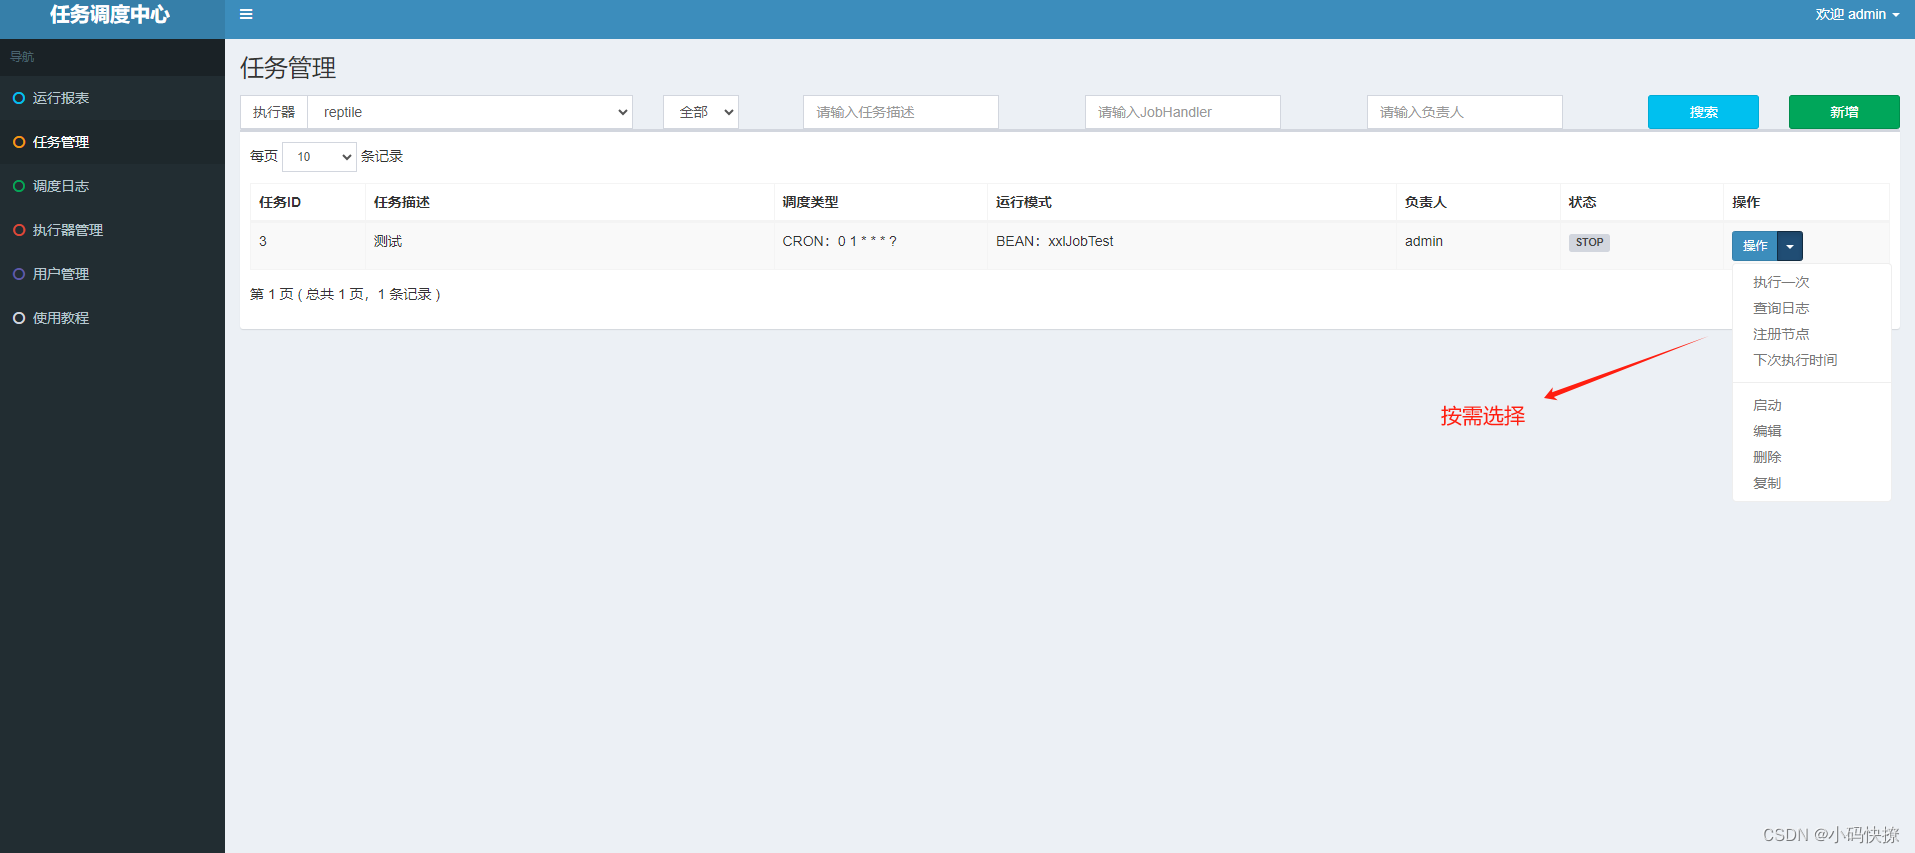
3.7进入调度中心面板
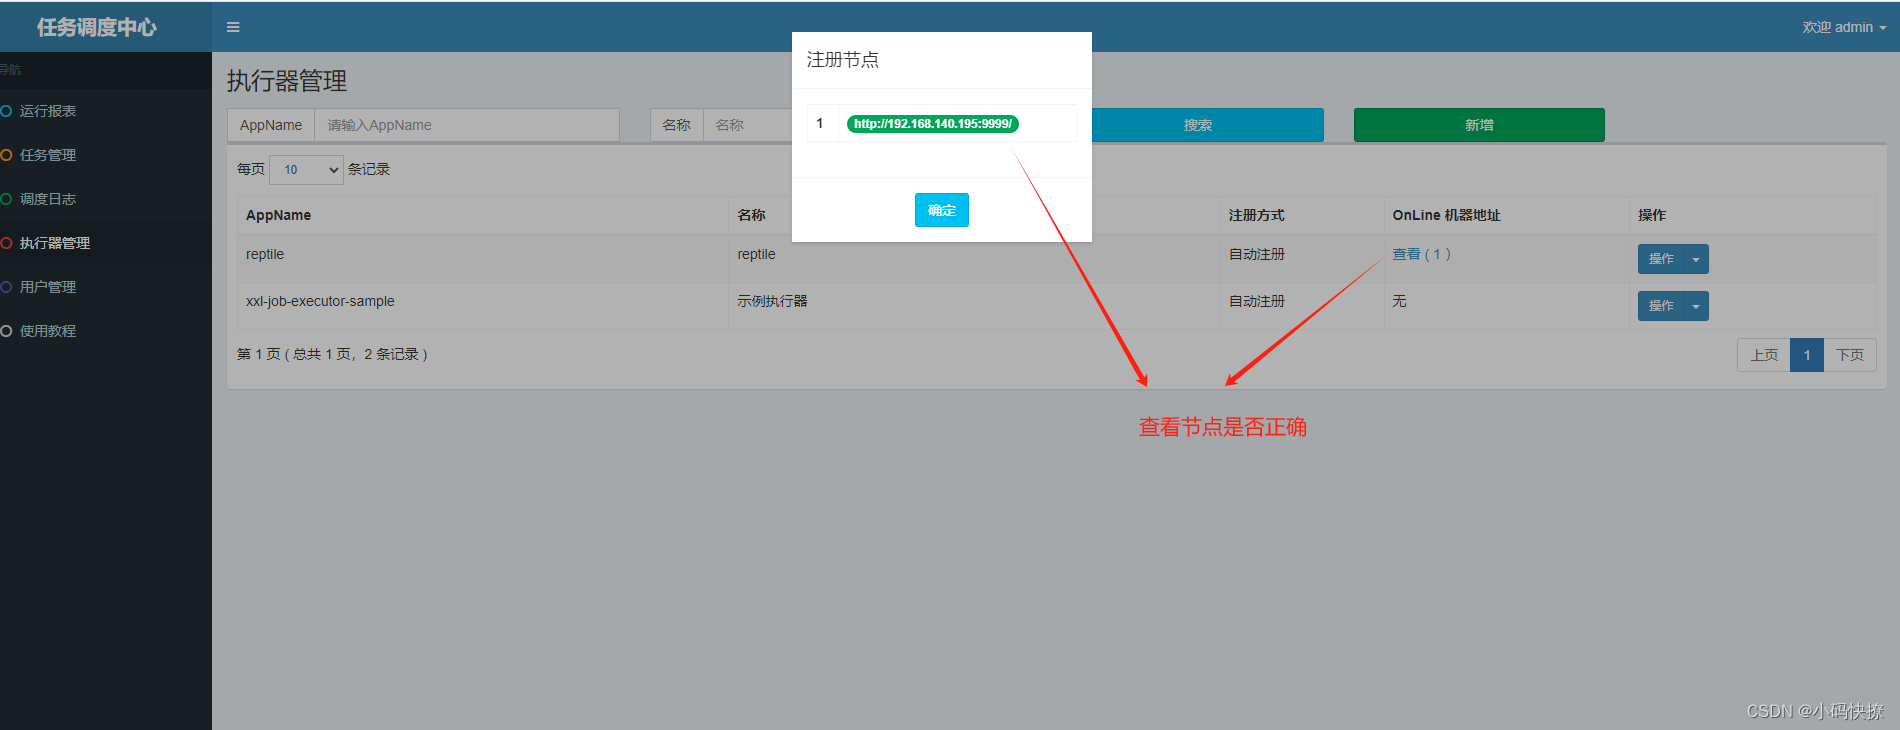
- 创建执行器,配置执行器名称
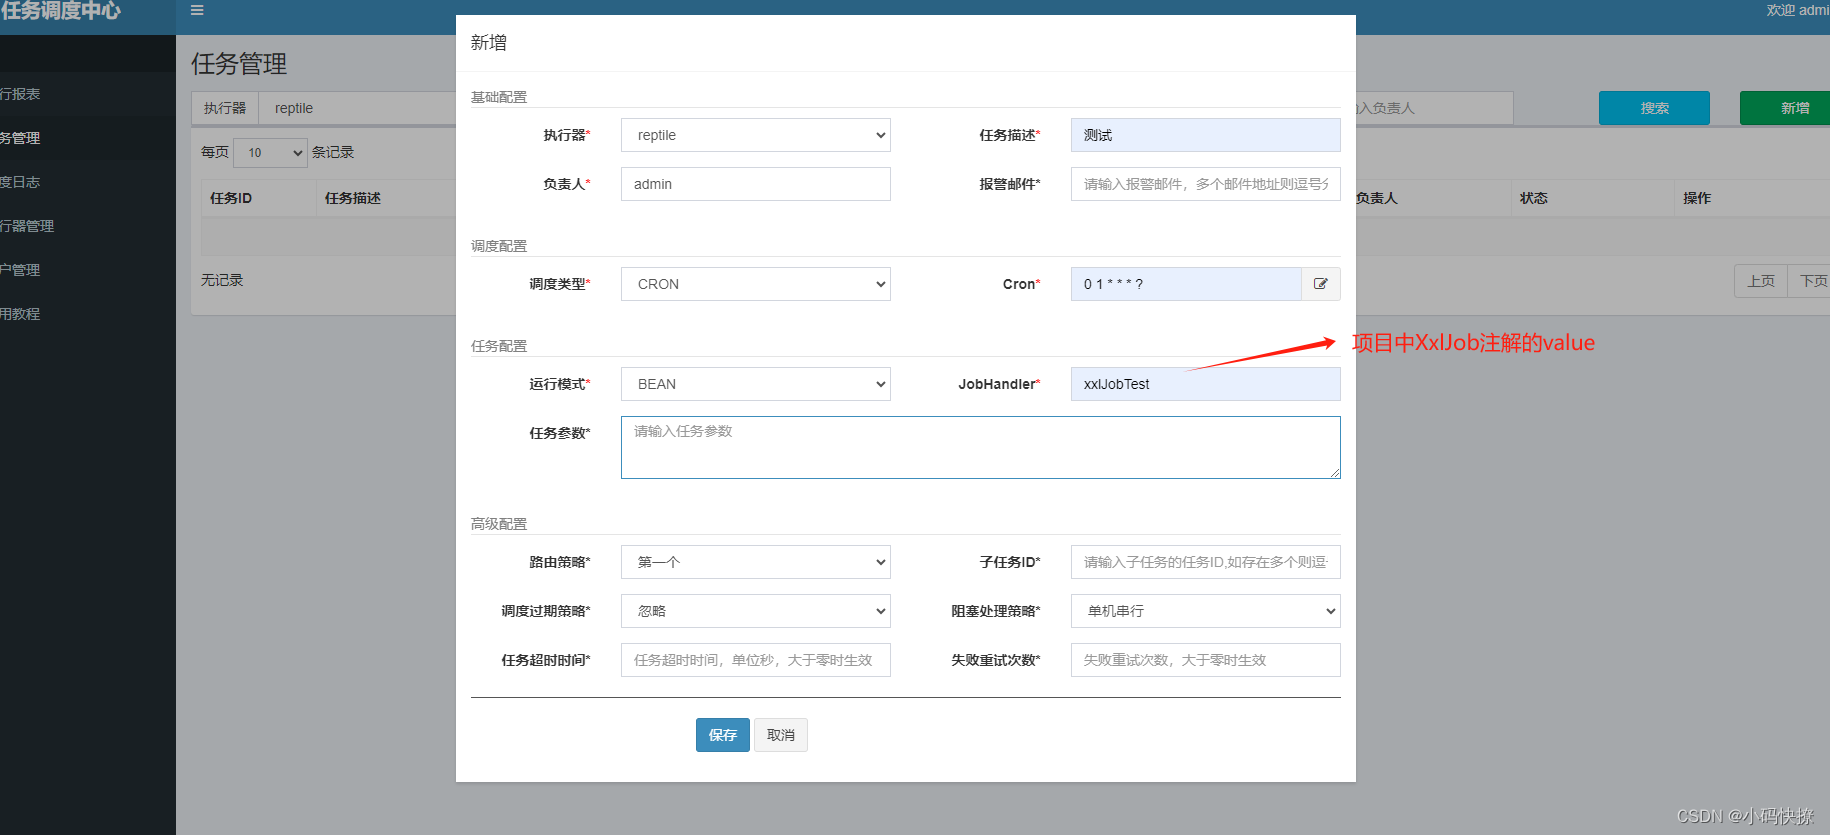
- 创建BEAN运行模式定时任务
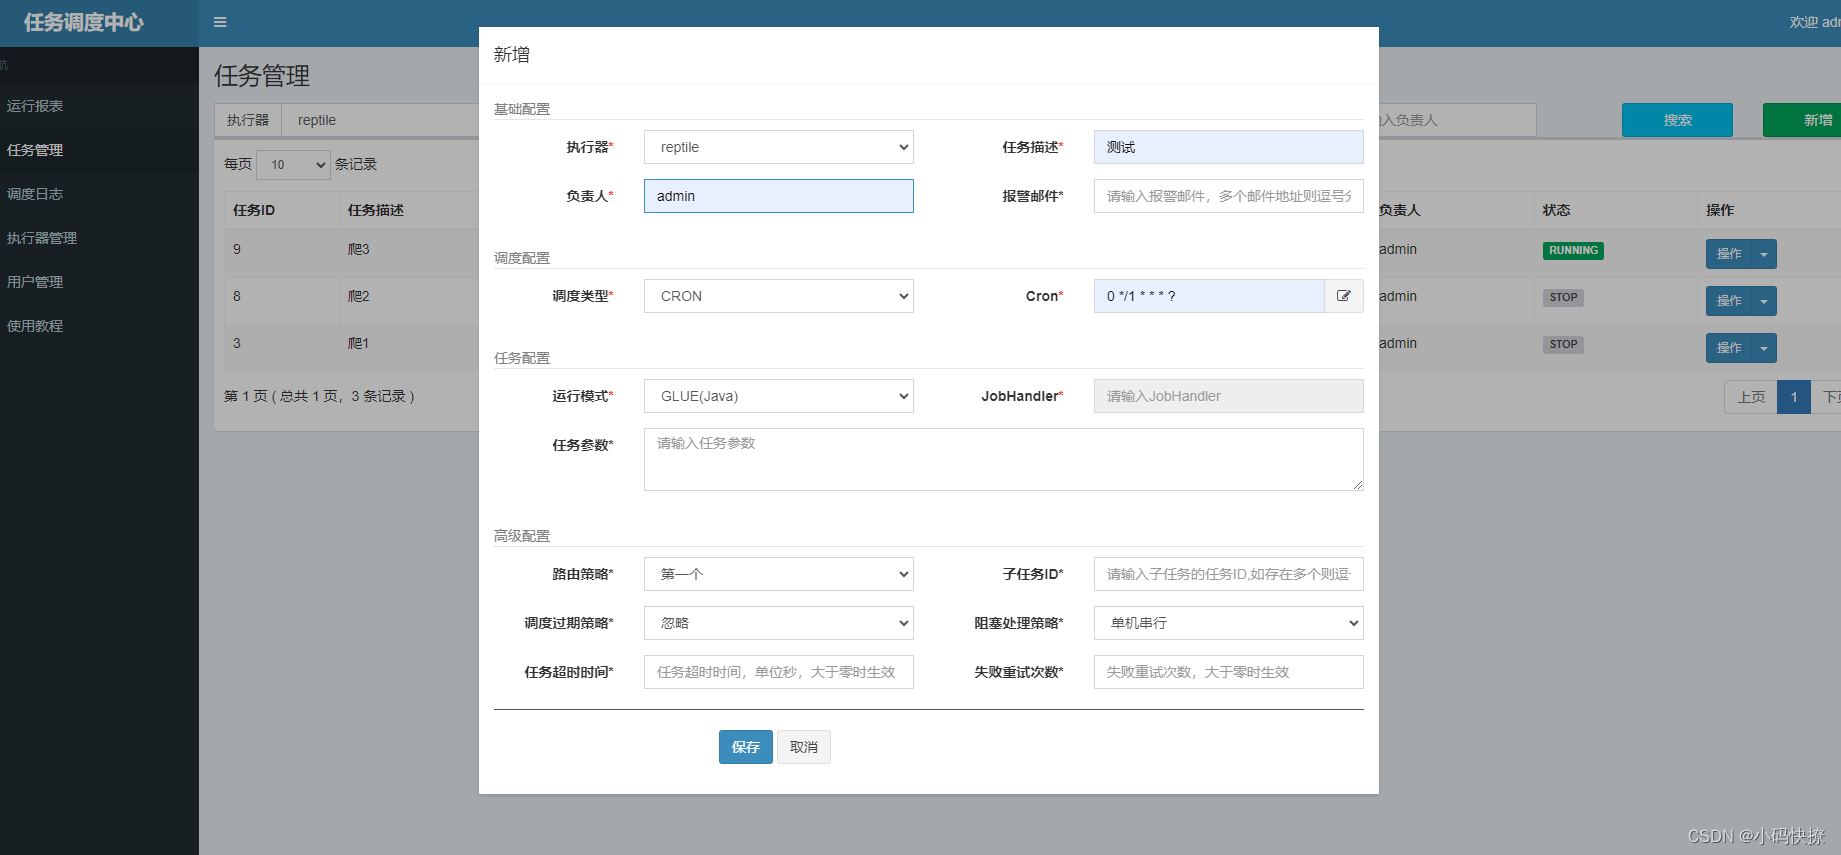
- 创建GLUE(Java)运行模式定时任务
- 编辑GLUE IDE
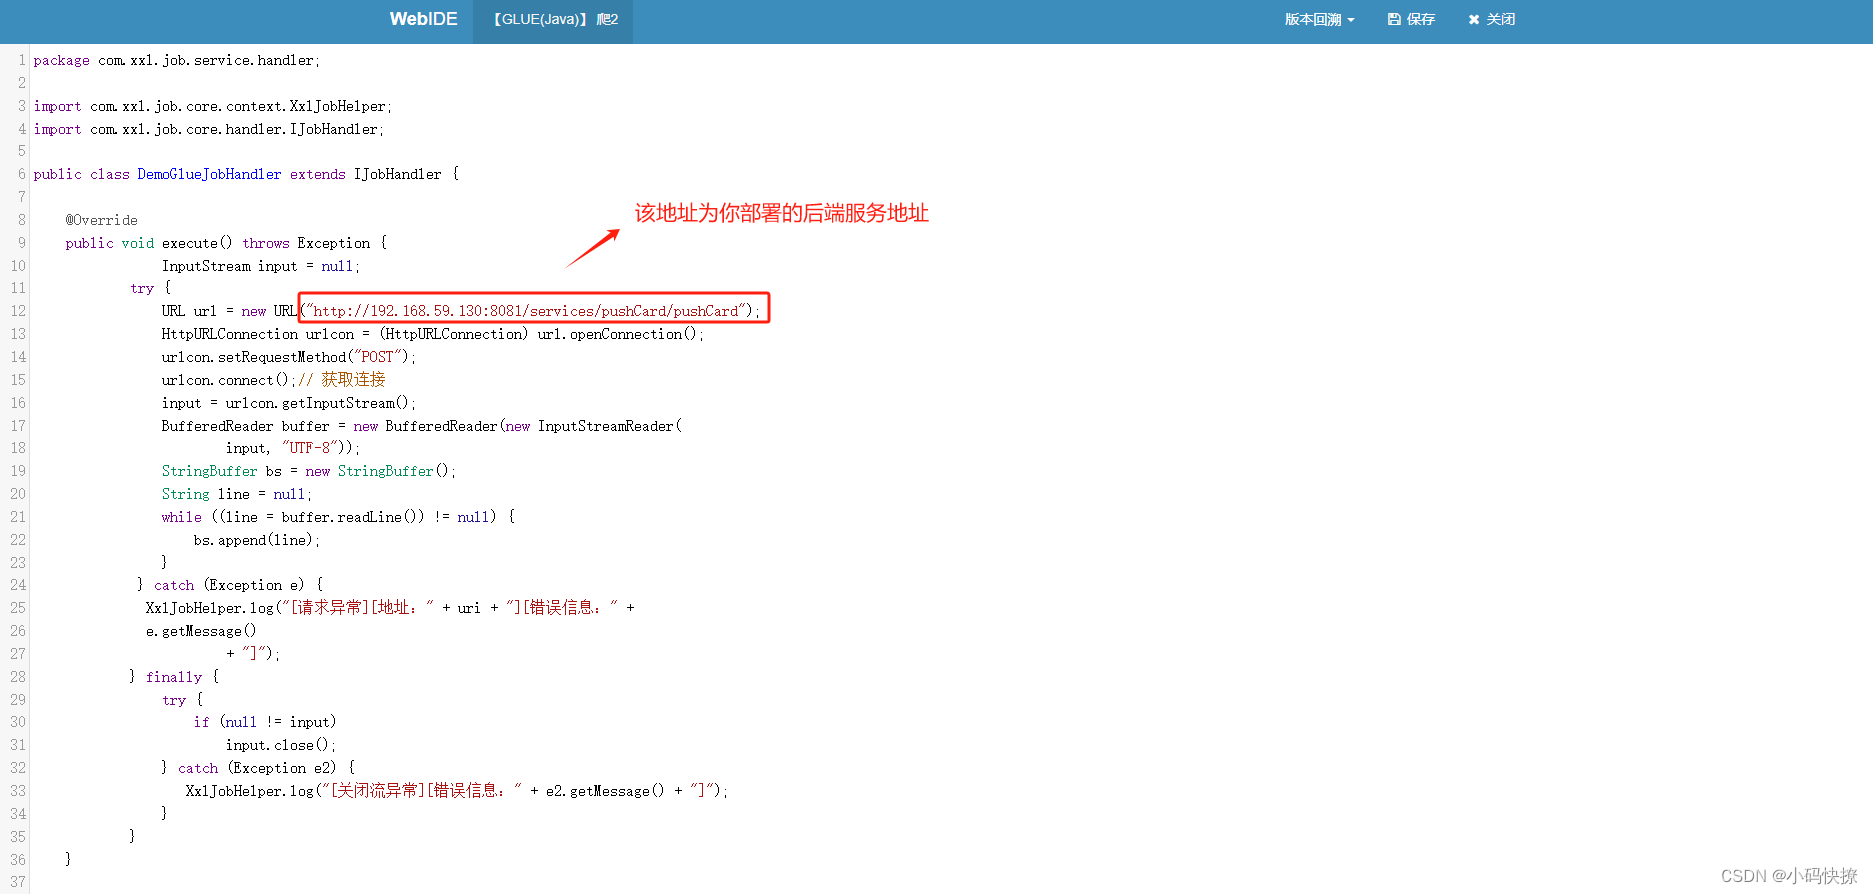
- 代码
package com.xxl.job.service.handler;

import com.xxl.job.core.context.XxlJobHelper;
import com.xxl.job.core.handler.IJobHandler;

public class DemoGlueJobHandler extends IJobHandler {

	@Override
	public void execute() throws Exception {
                InputStream input = null;
            try {
                URL url = new URL("http://192.168.59.130:8081/services/pushCard/pushCard");
                HttpURLConnection urlcon = (HttpURLConnection) url.openConnection();
                urlcon.setRequestMethod("POST");
                urlcon.connect();// 获取连接
                input = urlcon.getInputStream();
                BufferedReader buffer = new BufferedReader(new InputStreamReader(
                        input, "UTF-8"));
                StringBuffer bs = new StringBuffer();
                String line = null;
                while ((line = buffer.readLine()) != null) {
                    bs.append(line);
                }
             } catch (Exception e) {
              XxlJobHelper.log("[请求异常][地址:" + uri + "][错误信息:" +
              e.getMessage()
                        + "]");
            } finally {
                try {
                    if (null != input)
                        input.close();
                } catch (Exception e2) {
                   XxlJobHelper.log("[关闭流异常][错误信息:" + e2.getMessage() + "]");
                }
            }
	}

}
- 执行任务
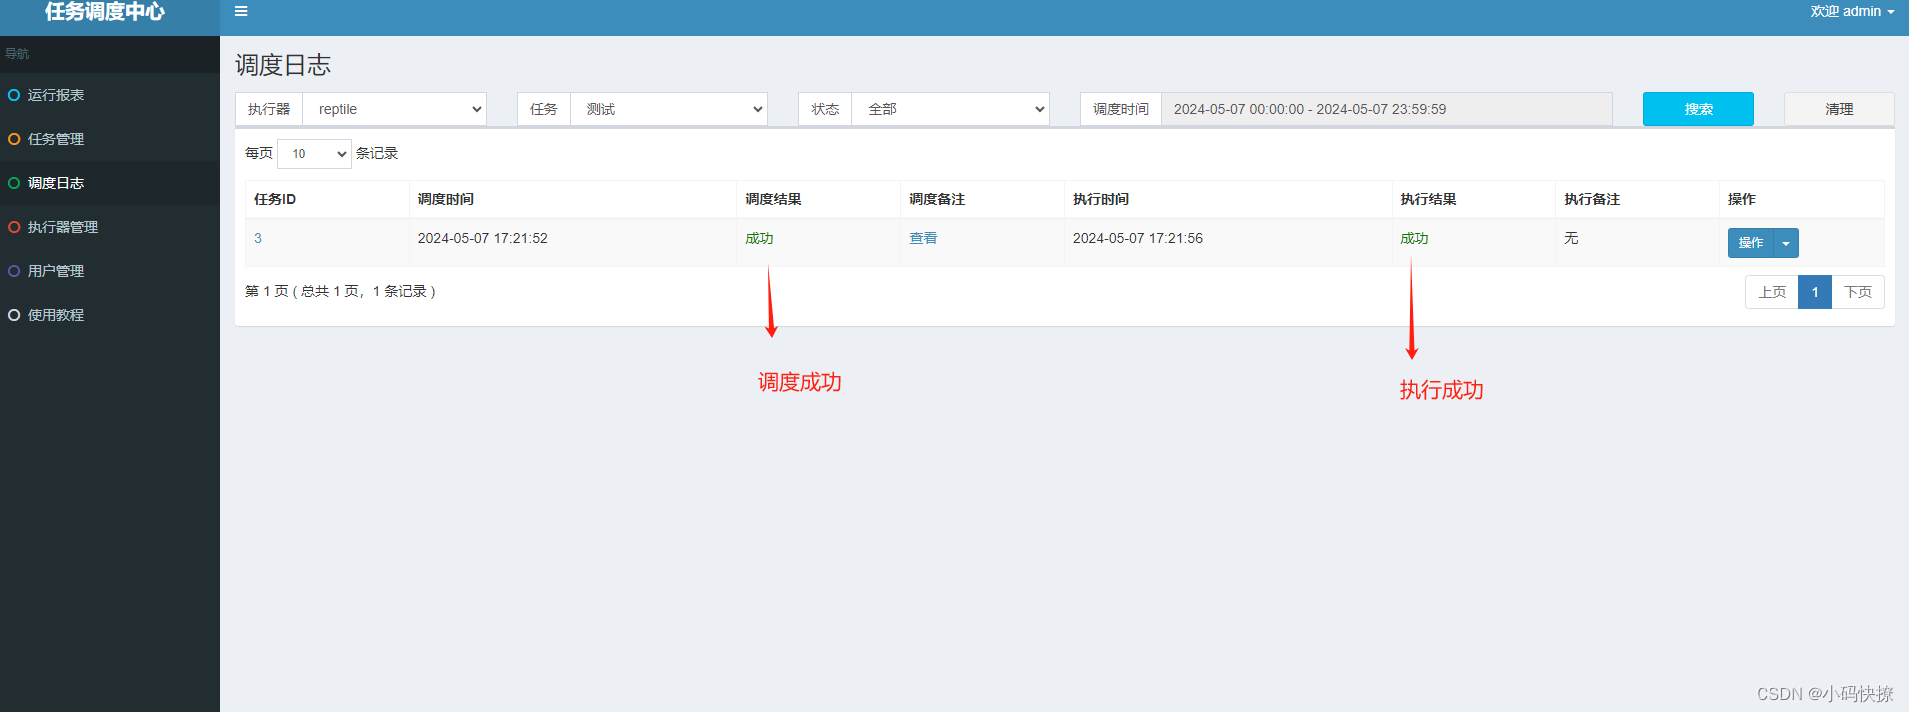
- 执行结果

四、总结
通过以上步骤,你可以成功搭建并使用XXL-JOB进行分布式任务调度。XXL-JOB以其灵活的配置、强大的功能和良好的社区支持,成为众多开发者的选择。随着实际应用的深入,不断探索其高级特性和最佳实践,将能更高效地管理复杂的任务调度场景。


 5572
5572


 被折叠的 条评论
为什么被折叠?
被折叠的 条评论
为什么被折叠?
 到【灌水乐园】发言


