


AR技术真的来势汹汹,我们也要跟进时代;平常我们给企业展示模型都是直接在大屏上展示,用ThreeJS写逻辑。这样固然很好,但是是不是还能做的更好呢?
“我要在手机上也能看我的模型!”
一句简单需求让我这一天抓耳挠腮的;通过查阅资料,我发现目前已经有个相对成熟的方案,可以通过AR.js和Aframe框架来使模型在手机上展示
接下来我们将载入Aframe和AR.js的资源库
 <script src="https://aframe.io/releases/1.2.0/aframe.min.js"></script>
  <script src="https://raw.githack.com/AR-js-org/AR.js/master/aframe/build/aframe-ar.js"></script>
创建场景:
<a-scene
    arjs
    embedded
    renderer="logarithmicDepthBuffer: true;"
    vr-mode-ui="enabled: false"
    gesture-detector
    id="scene"
>


<a-entity camera></a-entity>
</a-scene><a-scene>是Aframe的最主要的控件,用于创建一个场景,<a-entity camera>是相机组件,同时我们需要通过添加额外属性使其正确展示
属性解释
arjs
引入Aframe组件,加载3D资源
embedded
场景用嵌入式模式运行,不用全屏
renderer="logarithmicDepthBuffer: true;"
定义渲染器,启用对数深度缓冲区提高精度优化性能
vr-mode-ui="enabled: false
禁用VR(开个坑,等我什么时候买VR再写hiahiahia)
gesture-detector
启用拖动组件,这是我们待会要讲到的妙妙工具!
id="scene"
定义id
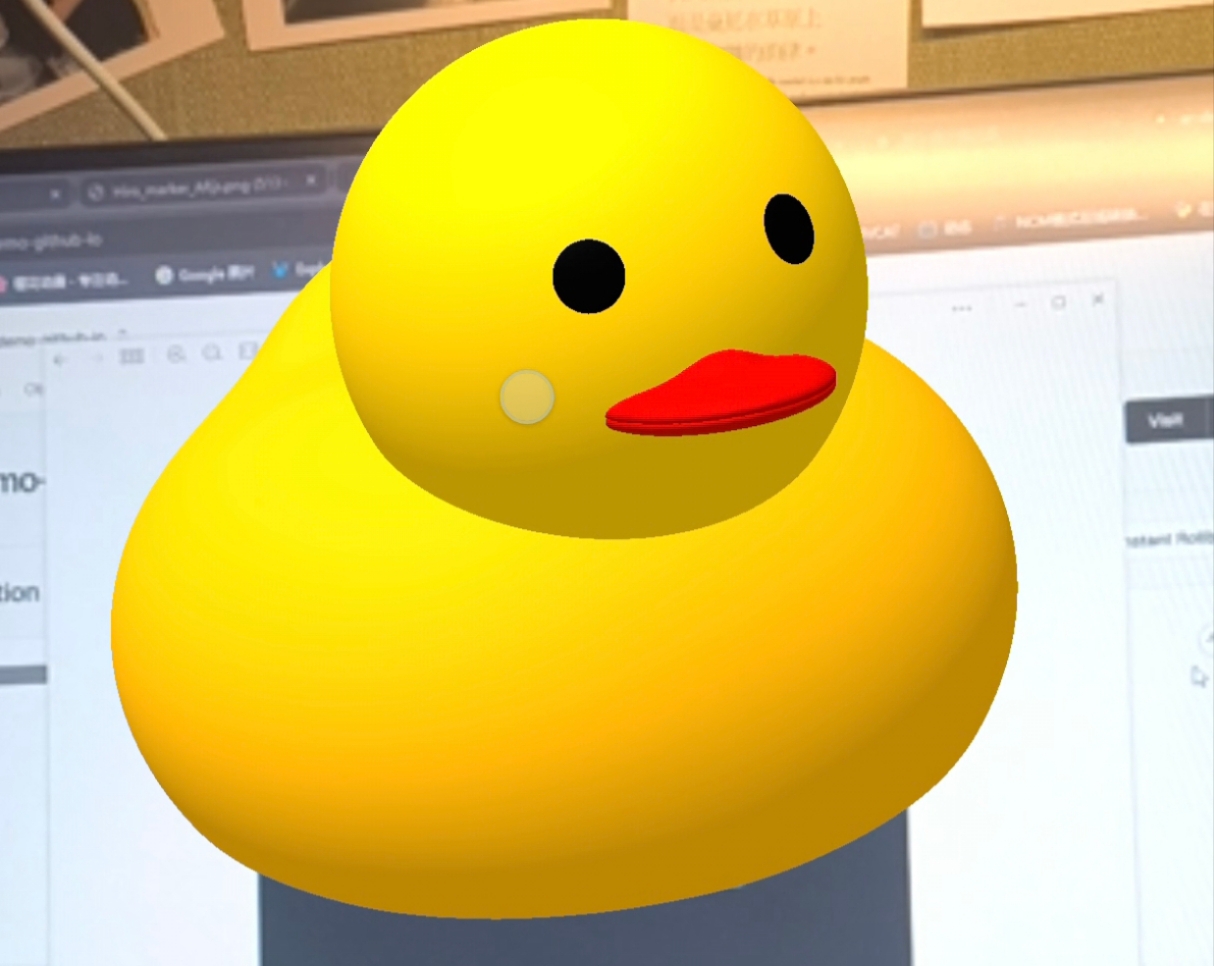
现在,我们要在场景内添加实体模型:<a-marker>、<a-entity>
<!-- Marker A - 显示黄色小鸭 -->
    <a-marker
      type="pattern"
      url="assets/pattern-markerA.patt"
      raycaster="objects: .clickable"
      emitevents="true"
      cursor="fuse: false; rayOrigin: mouse;"
      id="markerA"
    >
      <a-entity
        gltf-model="#model1"
        position="0 0 0"
        scale="0.5 0.5 0.5"
        class="clickable"
        gesture-handler
      >
      </a-entity>
    </a-marker>

    <!-- Marker B - 显示 iPhone -->
    <a-marker
      type="pattern"
      url="assets/pattern-markerB.patt"
      raycaster="objects: .clickable"
      emitevents="true"
      cursor="fuse: false; rayOrigin: mouse;"
      id="markerB"
    >
      <a-entity
        gltf-model="#model2"
        position="0 0 0"
        scale="0.5 0.5 0.5"
        class="clickable"
        gesture-handler
      >
      </a-entity>
    </a-marker>
<a-marker>是模型标识符,即你扫描的hiro图片,AR.js提供了三种供扫描的形式:
- Hiro (标识符)
- Barcode (条码)
- Pattern (图案)
<a-entity>是模型实体,定义了路径和点击事件等
你可以通过默认的Hiro图片来扫描

也可以在AR.js Marker Training 中上传自定义图片来扫描:
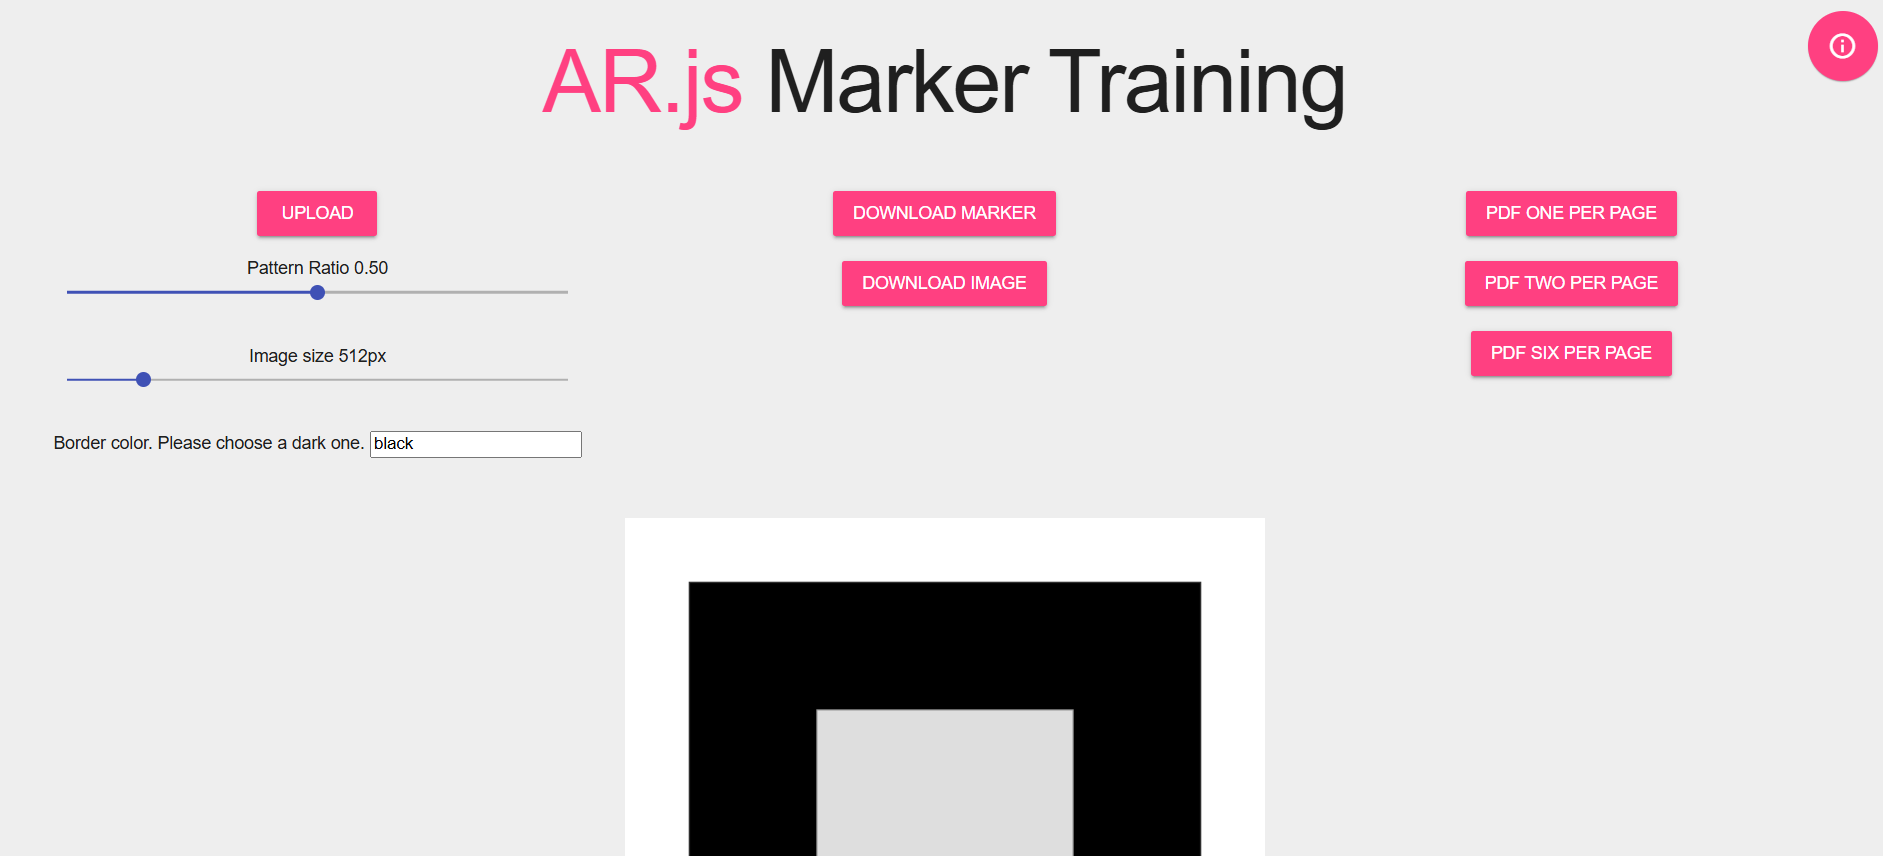
(如果使用自己的图片需要使用pattern属性,并添加url路径定义到你的patt图片)
对与模型交互事件,我编写了个手势交互的组件,实现模型单指旋转、拖拽,双指放大,只需再script处导入即可
AFRAME.registerComponent("gesture-handler", {
  schema: {
    enabled: { default: true },
    rotationFactor: { default: 5 },
    minScale: { default: 0.3 },
    maxScale: { default: 8 },
  },

  init: function () {
    this.handleScale = this.handleScale.bind(this);
    this.handleRotation = this.handleRotation.bind(this);

    this.isVisible = false;
    this.initialScale = this.el.object3D.scale.clone();
    this.scaleFactor = 1;

    this.el.sceneEl.addEventListener("markerFound", (e) => {
      this.isVisible = true;
    });

    this.el.sceneEl.addEventListener("markerLost", (e) => {
      this.isVisible = false;
    });
  },

  update: function () {
    if (this.data.enabled) {
      this.el.sceneEl.addEventListener("onefingermove", this.handleRotation);
      this.el.sceneEl.addEventListener("twofingermove", this.handleScale);
    } else {
      this.el.sceneEl.removeEventListener("onefingermove", this.handleRotation);
      this.el.sceneEl.removeEventListener("twofingermove", this.handleScale);
    }
  },

  remove: function () {
    this.el.sceneEl.removeEventListener("onefingermove", this.handleRotation);
    this.el.sceneEl.removeEventListener("twofingermove", this.handleScale);
  },

  handleRotation: function (event) {
    if (this.isVisible) {
      this.el.object3D.rotation.y +=
        event.detail.positionChange.x * this.data.rotationFactor;
      this.el.object3D.rotation.x +=
        event.detail.positionChange.y * this.data.rotationFactor;
    }
  },

  handleScale: function (event) {
    if (this.isVisible) {
      this.scaleFactor *=
        1 + event.detail.spreadChange / event.detail.startSpread;

      this.scaleFactor = Math.min(
        Math.max(this.scaleFactor, this.data.minScale),
        this.data.maxScale
      );

      this.el.object3D.scale.x = this.scaleFactor * this.initialScale.x;
      this.el.object3D.scale.y = this.scaleFactor * this.initialScale.y;
      this.el.object3D.scale.z = this.scaleFactor * this.initialScale.z;
    }
  },
});


AFRAME.registerComponent("gesture-detector", {
  schema: {
    element: { default: "" }
  },

  init: function() {
    this.targetElement =
      this.data.element && document.querySelector(this.data.element);

    if (!this.targetElement) {
      this.targetElement = this.el;
    }

    this.internalState = {
      previousState: null
    };

    this.emitGestureEvent = this.emitGestureEvent.bind(this);

    this.targetElement.addEventListener("touchstart", this.emitGestureEvent);

    this.targetElement.addEventListener("touchend", this.emitGestureEvent);

    this.targetElement.addEventListener("touchmove", this.emitGestureEvent);
  },

  remove: function() {
    this.targetElement.removeEventListener("touchstart", this.emitGestureEvent);

    this.targetElement.removeEventListener("touchend", this.emitGestureEvent);

    this.targetElement.removeEventListener("touchmove", this.emitGestureEvent);
  },

  emitGestureEvent(event) {
    const currentState = this.getTouchState(event);

    const previousState = this.internalState.previousState;

    const gestureContinues =
      previousState &&
      currentState &&
      currentState.touchCount == previousState.touchCount;

    const gestureEnded = previousState && !gestureContinues;

    const gestureStarted = currentState && !gestureContinues;

    if (gestureEnded) {
      const eventName =
        this.getEventPrefix(previousState.touchCount) + "fingerend";

      this.el.emit(eventName, previousState);

      this.internalState.previousState = null;
    }

    if (gestureStarted) {
      currentState.startTime = performance.now();

      currentState.startPosition = currentState.position;

      currentState.startSpread = currentState.spread;

      const eventName =
        this.getEventPrefix(currentState.touchCount) + "fingerstart";

      this.el.emit(eventName, currentState);

      this.internalState.previousState = currentState;
    }

    if (gestureContinues) {
      const eventDetail = {
        positionChange: {
          x: currentState.position.x - previousState.position.x,

          y: currentState.position.y - previousState.position.y
        }
      };

      if (currentState.spread) {
        eventDetail.spreadChange = currentState.spread - previousState.spread;
      }

      Object.assign(previousState, currentState);

      Object.assign(eventDetail, previousState);

      const eventName =
        this.getEventPrefix(currentState.touchCount) + "fingermove";

      this.el.emit(eventName, eventDetail);
    }
  },

  getTouchState: function(event) {
    if (event.touches.length === 0) {
      return null;
    }

    const touchList = [];

    for (let i = 0; i < event.touches.length; i++) {
      touchList.push(event.touches[i]);
    }

    const touchState = {
      touchCount: touchList.length
    };

    const centerPositionRawX =
      touchList.reduce((sum, touch) => sum + touch.clientX, 0) /
      touchList.length;

    const centerPositionRawY =
      touchList.reduce((sum, touch) => sum + touch.clientY, 0) /
      touchList.length;

    touchState.positionRaw = { x: centerPositionRawX, y: centerPositionRawY };
    const screenScale = 2 / (window.innerWidth + window.innerHeight);

    touchState.position = {
      x: centerPositionRawX * screenScale,
      y: centerPositionRawY * screenScale
    };

    if (touchList.length >= 2) {
      const spread =
        touchList.reduce((sum, touch) => {
          return (
            sum +
            Math.sqrt(
              Math.pow(centerPositionRawX - touch.clientX, 2) +
                Math.pow(centerPositionRawY - touch.clientY, 2)
            )
          );
        }, 0) / touchList.length;

      touchState.spread = spread * screenScale;
    }

    return touchState;
  },

  getEventPrefix(touchCount) {
    const numberNames = ["one", "two", "three", "many"];

    return numberNames[Math.min(touchCount, 4) - 1];
  }
});
导入组件后,添加标签属性就可以实现功能啦!
但是对于企业或者多维度需求,只扫hiro标识局限性太大,所以我们需要用到第三种:“扫描图片后展示图形”友情链接:NFT-Creator-Web,你可以在这转换为NFT图形
在这里我直接贴出HTML代码,方便学习:
<!DOCTYPE html>

<html>
  <head>
    <title>Gesture Interactions - A-Frame & AR.js</title>
    <meta charset="utf-8" />
    <meta http-equiv="X-UA-Compatible" content="IE=edge" />
    <link rel="stylesheet" href="styles.css" />

    <script src="https://aframe.io/releases/1.2.0/aframe.min.js"></script>
    <script src="https://raw.githack.com/AR-js-org/AR.js/master/aframe/build/aframe-ar-nft.js"></script>
    <script src="./gestures.js"></script>

  </head>

  <body>
    <a-scene
      arjs="trackingMethod: best; sourceType: webcam; debugUIEnabled: false;"
      embedded
      renderer="logarithmicDepthBuffer: true;"
      vr-mode-ui="enabled: false"
      gesture-detector
      id="scene"
    >

      <a-nft
        type="nft"
        url="./assets/earth"
        smooth="true"
        smoothCount="10"
        smoothTolerance=".01"
        smoothThreshold="5"
        raycaster="objects: .clickable"
        emitevents="true"
        cursor="fuse: false; rayOrigin: mouse;"
      >
        <a-entity
          gltf-model="./assets/earth.glb"
          scale="5 5 5"
          position="0 0 0"
          class="clickable"
          gesture-handler
        >
        </a-entity>
      </a-nft>

      <a-nft
      type="nft"
      url="./assets/pinball"
      smooth="true"
      smoothCount="10"
      smoothTolerance=".01"
      smoothThreshold="5"
      raycaster="objects: .clickable"
      emitevents="true"
      cursor="fuse: false; rayOrigin: mouse;"
    >
    <a-sphere
    radius="5"
    color="blue"
    position="50 0 0"
    scale="20 20 20"
    class="clickable"
    gesture-handler
  >
  </a-sphere>
    </a-nft>

      <a-entity camera></a-entity>
    </a-scene>
  </body>
</html>
只需要改变一个实例:<a-marker> => <a-nft>,其余逻辑一致
注:转换为NFT后会出现3个文件:“.fset”、“.fset3”、“.iset”,只需把它全部放入assets文件夹汇中,导入时保证名字一致,直接引用文件名,不需要加文件后缀
type="nft"
url="./assets/pinball"
快来下载我的资源包试试看吧!


 被折叠的 条评论
为什么被折叠?
被折叠的 条评论
为什么被折叠?
 到【灌水乐园】发言


