


文章目录
1. 源码包基本概述
在linux环境下面安装源码包是比较常见的, 早期运维管理工作中,大部分软件都是通过源码安装的。那么安装一个源码包,是需要我们自己把源代码编译成二进制的可执行文件。
源码包的编译用到了linux系统里的编译器,通常源码包都是用C语言开发的,这也是因为C语言为linux上最标准的程序语言。Linux上的C语言编译器叫做gcc,利用它就可以把C语言变成可执行的二进制文件。所以如果你的机器上没有安装gcc就没有办法去编译源码。可以使用yum -y install gcc来完成安装。
2. 源码包的好处
- 自定义修改源代码
- 定制需要的相关功能
- 新版软件优先更新源码
3. 源码包分类
- 源码格式(需要编译安装)
- 二进制格式(解压后可以直接使用)
4 源码包的安装
编译需要编译环境,开发环境,开发库,开发工具。
常用的编译环境有c、c++、perl、java、python5种
c环境的编译器:gcc(GNU C Complier)
c++环境的编译器:g++
make:c、c++的统一项目管理工具,编译时有可能调用gcc也有可能调用g++。使用makefile文件定义make按何种次序去编译源程序文件中的源程序
源码安装三部曲(常见):
第一步: ./configure(定制组件)
1.指定安装路径,例如 --prefix=/opt/nginx-1.12
2.启用或禁用某项功能, 例如 --enable-ssl
3.和其它软件关联,例如–with-pcre
4.检查安装环境,例如是否有编译器 gcc,是否满足软件的依赖需求
5.检测通过后生成Makefile文件
第二步: make
1.执行make命令进行编译, 可以使用-j指定CPU核心数进行编译
2.按Makefile文件进行编译, 编译成可执行二进制文件
3.生成各类模块和主程序
第三步: make install
1.按Makefile定义好的路径拷贝至安装目录中
注意:上面介绍的源码三部曲不能百分百通用于所有源码包, 也就是说源码包的安装并非存在标准安装步骤,但是大部分源码安装都是类似的步骤
建议:
拿到源码包解压后,然后进入到目录找相关的帮助文档,通常会以INSTALL或者README为文件名
4.1.configure脚本的功能
- 让用户选定编译特性
- 检查编译环境是否符合程序编译的基本需要
4.2. 编译安装注意事项
-
如果安装时不是使用的默认路径,则必须要修改PATH环境变量,以能够识别此程序的二进制文件路径;
- 修改/etc/profile文件或在/etc/profile.d/目录建立一个以.sh为后缀的文件,在里面定义export PATH=$PATH:/path/to/somewhere
-
默认情况下,系统搜索库文件的路径只有/lib,/usr/lib
- 增添额外库文件搜索路径方法:
- 在/etc/ld.so.conf.d/中创建以.conf为后缀名的文件,而后把要增添的路径直接写至此文件中。此时库文件增添的搜索路径重启后有效,若要使用增添的路径立即生效则要使用ldconfig命令
- ldconfig:通知系统重新搜索库文件
- 增添额外库文件搜索路径方法:
/etc/ld.so.conf和/etc/ls.so.conf.d/*.conf //配置文件 /etc/ld.so.cache
//缓存文件
-v //显示重新搜索库的过程
-p //打印出系统启动时自动加载并缓存到内存中的可用库文件名及文件路径映射关系
- 头文件:输出给系统
- 默认:系统在/usr/include中找头文件,若要增添头文件搜索路径,使用链接进行
- man文件路径:安装在–prefix指定的目录下的man目录
- 默认:系统在/usr/share/man中找man文件。此时因为编译安装的时候不是安装到默认路径下,如果要查找man文件则可以使用以下两种方法:
- man -M /path/to/man_dir command
- 在/etc/man_db.conf文件中添加一条MANPATH
- 默认:系统在/usr/share/man中找man文件。此时因为编译安装的时候不是安装到默认路径下,如果要查找man文件则可以使用以下两种方法:
源码安装httpd
1.基础环境准备
[root@localhost ~]# yum -y install gcc gcc-c++ make
...
Complete!

2.将httpd最新版本下载至虚拟机
[root@localhost ~]# ls
anaconda-ks.cfg  httpd-2.4.58.tar.gz

3.解压源码包并进入
[root@localhost ~]# tar xf httpd-2.4.58.tar.gz
[root@localhost ~]# ls
anaconda-ks.cfg  httpd-2.4.58  httpd-2.4.58.tar.gz
[root@localhost ~]# cd httpd-2.4.58
configure: error: APR not found.  Please read the documentation.

4.下载httpd需要的依赖包
[root@localhost ~]# ls
anaconda-ks.cfg  apr-1.7.4.tar.gz  httpd-2.4.58  httpd-2.4.58.tar.gz
[root@localhost ~]# tar xf apr-1.7.4.tar.gz
[root@localhost ~]# ls
anaconda-ks.cfg  apr-1.7.4  apr-1.7.4.tar.gz  httpd-2.4.58  httpd-2.4.58.tar.gz
[root@localhost apr-1.7.4]# ./configure --prefix=/opt/apr
config.status: include/arch/unix/apr_private.h is unchanged
[root@localhost apr-1.7.4]# make
[root@localhost apr-1.7.4]# make install
...
/usr/bin/install -c -m 755 apr-config.out /opt/apr/bin/apr-1-config

5.再次尝试安装httpd
[root@localhost httpd-2.4.58]# ./configure --prefix=/opt/httpd
...
configure: error: APR-util not found.  Please read the documentation.

6.下载httpd需要的依赖包APR-util
[root@localhost ~]# tar xf apr-util-1.6.3.tar.gz
[root@localhost ~]# ls
anaconda-ks.cfg  apr-1.7.4.tar.gz  apr-util-1.6.3.tar.gz  httpd-2.4.58.tar.gz
apr-1.7.4        apr-util-1.6.3
[root@localhost apr-util-1.6.3]# ./configure --prefix=/opt/apr-util --with-apr=/opt/apr/bin/apr-1-config
...
config.status: executing default commands
[root@localhost apr-util-1.6.3]# yum -y install expat-devel
[root@localhost apr-util-1.6.3]# make
[root@localhost apr-util-1.6.3]# make install

7.再次尝试安装httpd
[root@localhost httpd-2.4.58]# ./configure --prefix=/opt/httpd --with-apr=/opt/apr --with-apr-util=/opt/apr-util
configure: error: pcre(2)-config for libpcre not found. PCRE is required and available from http://pcre.org/

8.下载httpd需要的依赖包pcre
[root@localhost ~]# tar xf pcre-8.45.tar.gz
[root@localhost ~]# ls
anaconda-ks.cfg   apr-util-1.6.3         httpd-2.4.58.tar.gz
apr-1.7.4         apr-util-1.6.3.tar.gz  pcre-8.45
apr-1.7.4.tar.gz  httpd-2.4.58           pcre-8.45.tar.gz
[root@localhost ~]#./configure --prefix=/opt/pcre
[root@localhost ~]# make && make install
...
make[1]: Leaving directory '/root/pcre-8.45'

9.再次尝试安装httpd
[root@localhost httpd-2.4.58]# ./configure --prefix=/opt/httpd --with-apr=/opt/apr --with-apr-util=/opt/apr-util --with-pcre=/opt/pcre/bin/pcre-config
[root@localhost httpd-2.4.58]# make && make install

10.设置环境变量
[root@localhost httpd-2.4.58]# echo 'export PATH=/opt/httpd/bin:$PATH' > /etc/profile.d/httpd.sh
[root@localhost httpd-2.4.58]# source /etc/profile.d/httpd.sh
[root@localhost httpd-2.4.58]# which httpd
/opt/httpd/bin/httpd

11.关闭防火墙和selinux
[root@localhost ~]# systemctl disable --now firewalld.service
Removed "/etc/systemd/system/multi-user.target.wants/firewalld.service".
Removed "/etc/systemd/system/dbus-org.fedoraproject.FirewallD1.service".
[root@localhost ~]# vim /etc/selinux/config
[root@localhost ~]# setenforce 0

12.浏览器访问
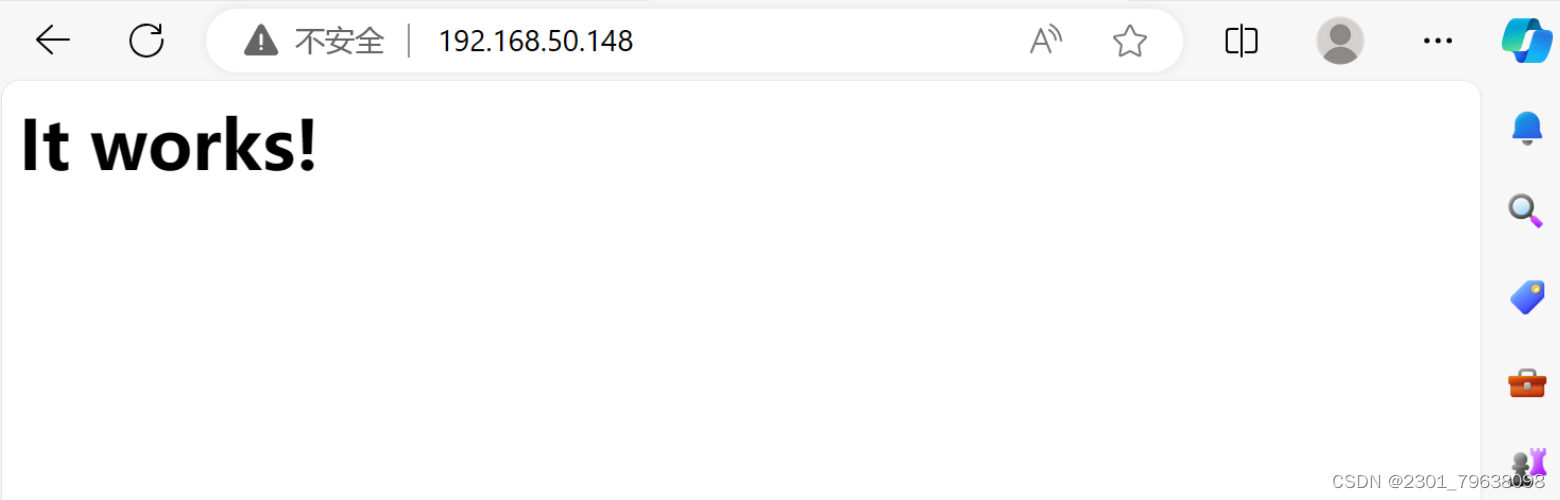
k
MySQL数据库
1.MySQL8.0.33安装
创建mysql用户
[root@localhost ~]# useradd -r -M -s /sbin/nologin mysql
[root@localhost ~]# id mysql
uid=990(mysql) gid=990(mysql) groups=990(mysql)
解压mysql文件
[root@localhost ~]# tar xf mysql-8.0.35-linux-glibc2.28-x86_64.tar.xz -C /usr/local
[root@localhost ~]# cd /usr/local/
[root@localhost local ~]# mv mysql-8.0.35-linux-glibc2.28-x86_64 mysql
[root@localhost local]# cd mysql/
设置环境变量
[root@localhost mysql]# echo 'export PATH=/usr/local/mysql/bin:$PATH' > /etc/profile.d/mysql.sh
[root@localhost mysql]# source /etc/profile.d/mysql.sh
[root@localhost mysql]# which mysql
/usr/local/mysql/bin/mysql
创建软连接
[root@localhost mysql]# ln -s /usr/local/mysql/include /usr/include/mysql
配置lib库
[root@localhost mysql]# vi /etc/lb.so.conf.d/mysql.conf
[root@localhost mysql]# cat /etc/ld.so.conf.d/mysql.conf
/usr/local/mysql/lib
[root@localhost mysql]# ldconfig
配置man
[root@localhost mysql]# vi /etc/man_db.conf
[root@localhost mysql]# cat /etc/man_db.conf
MANDATORY_MANPATH			/usr/local/share/man
MANDATORY_MANPATH                       /usr/local/mysql/man
更改属组
[root@localhost mysql]# chown -R mysql.mysql /usr/local/mysql
[root@localhost mysql]# ll
total 296
drwxr-xr-x.  2 mysql mysql   4096 Oct 12 22:11 bin
drwxr-xr-x.  2 mysql mysql     38 Oct 12 22:11 docs
drwxr-xr-x.  3 mysql mysql   4096 Oct 12 22:11 include
drwxr-xr-x.  6 mysql mysql   4096 Oct 12 22:11 lib
-rw-r--r--.  1 mysql mysql 279355 Oct 12 19:45 LICENSE
drwxr-xr-x.  4 mysql mysql     30 Oct 12 22:11 man
-rw-r--r--.  1 mysql mysql    666 Oct 12 19:45 README
drwxr-xr-x. 28 mysql mysql   4096 Oct 12 22:11 share
drwxr-xr-x.  2 mysql mysql     77 Oct 12 22:11 support-files
初始化数据库
[root@localhost mysql]# mkdir /opt/data
[root@localhost mysql]# chown -R mysql.mysql /opt/data
[root@localhost mysql]# mysqld --initialize --user mysql --datadir /opt/data
2023-12-05T10:23:22.998934Z 0 [System] [MY-013169] [Server] /usr/local/mysql/bin/mysqld (mysqld 8.0.35) initializing of server in progress as process 42127
2023-12-05T10:23:23.005651Z 1 [System] [MY-013576] [InnoDB] InnoDB initialization has started.
2023-12-05T10:23:23.249387Z 1 [System] [MY-013577] [InnoDB] InnoDB initialization has ended.
2023-12-05T10:23:24.989027Z 6 [Note] [MY-010454] [Server] A temporary password is generated for root@localhost: O28p%w)5!lCo
配置my.cnf文件
[root@localhost mysql]# vi /etc/my.cnf
[mysqld]
basedir = /usr/local/mysql
datadir = /opt/data
socket = /tmp/mysql.sock
port = 3306
pid-file = /opt/data/mysql.pid
user = mysql
skip-name-resolve
指名安装路径和数据路径
[root@localhost ~]# mkdir /etc/init.d
[root@localhost ~]# cp -a /usr/local/mysql/support-files/mysql.server /etc/init.d/mysqld
[root@localhost ~]# vi /etc/init.d/mysqld
basedir=/usr/local/mysql
datadir=/opt/data
启动服务
[root@localhost ~]# systemctl daemon-reload
[root@localhost ~]# service mysqld start
Starting MySQL.Logging to '/opt/data/localhost.localdomain.err'.
 SUCCESS!
[root@localhost ~]# ss -antl
State    Recv-Q   Send-Q     Local Address:Port        Peer Address:Port   Process
LISTEN   0        128              0.0.0.0:22               0.0.0.0:*
LISTEN   0        70                     *:33060                  *:*
LISTEN   0        151                    *:3306                   *:*
LISTEN   0        511                    *:80                     *:*
LISTEN   0        128                 [::]:22                  [::]:*
用配置文件方式启动
[root@localhost ~]# cd /usr/lib/systemd/system
[root@localhost system]# cp sshd.service mysql.service
[root@localhost system]# vi mysql.service
[root@localhost system]# cat mysql.service
[Unit]
Description=mysql server daemon
After=network.target

[Service]
Type=forking
ExecStart=service mysql start
ExecStop=service mysql stop
ExecReload=/bin/kill -HUP $MAINPID

[Install]
WantedBy=multi-user.target
[root@localhost system]#  systemctl daemon-reload
[root@localhost system]# cd
[root@localhost ~]# systemctl status mysql
○ mysql.service - mysql server daemon
     Loaded: loaded (/usr/lib/systemd/system/mysql.service; disabled; vendor preset:>
     Active: inactive (dead)
[root@localhost ~]# systemctl start mysql.service
[root@localhost ~]#  ss -antl
State    Recv-Q   Send-Q     Local Address:Port        Peer Address:Port   Process
LISTEN   0        128              0.0.0.0:22               0.0.0.0:*
LISTEN   0        70                     *:33060                  *:*
LISTEN   0        151                    *:3306                   *:*
LISTEN   0        511                    *:80                     *:*
LISTEN   0        128                 [::]:22                  [::]:*
设置开机自启
[root@localhost ~]# systemctl enable mysql.service
[root@localhost ~]# systemctl status mysql.service
● mysql.service - mysql server daemon
     Loaded: loaded (/usr/lib/systemd/system/mysql.service; enabled; vendor preset: >
     Active: active (running) since Tue 2023-12-05 18:55:15 CST; 1min 7s ago
   Main PID: 42605 (mysqld_safe)
      Tasks: 38 (limit: 48715)
     Memory: 370.5M
        CPU: 1.391s
     CGroup: /system.slice/mysql.service
             ├─42605 /bin/sh /usr/local/mysql/bin/mysqld_safe --datadir=/opt/data -->
             └─42795 /usr/local/mysql/bin/mysqld --basedir=/usr/local/mysql --datadi>

Dec 05 18:55:14 localhost.localdomain systemd[1]: Starting mysql server daemon...
Dec 05 18:55:15 localhost.localdomain service[42592]: Starting MySQL. SUCCESS!
Dec 05 18:55:15 localhost.localdomain systemd[1]: Started mysql server daemon.
设置数据库密码
[root@localhost ~]# mysql -uroot -p'O28p%w)5!lCo'
mysql: [Warning] Using a password on the command line interface can be insecure.
Welcome to the MySQL monitor.  Commands end with ; or \g.
Your MySQL connection id is 9
Server version: 8.0.35

Copyright (c) 2000, 2023, Oracle and/or its affiliates.

Oracle is a registered trademark of Oracle Corporation and/or its
affiliates. Other names may be trademarks of their respective
owners.

Type 'help;' or '\h' for help. Type '\c' to clear the current input statement.

mysql>  alter user 'root'@'localhost' identified with mysql_native_password by '1'
    -> ;
Query OK, 0 rows affected (0.01 sec)
安全初始化
[root@localhost ~]# mysql_secure_installation


 102
102


 被折叠的 条评论
为什么被折叠?
被折叠的 条评论
为什么被折叠?
 到【灌水乐园】发言


