


目录
一:Nginx性能调优
1.更改进程数与连接数
1.1进程数
在高并发环境中,需要启动更多的 Nginx 进程以保证快速响应,用以处理用户的请求,避免造成阻塞。使用 ps aux 命令查看 Nginx 运行进程的个数。从命令执行结果可以看出 master process 是 Nginx 的主进程,开启1个;worker process 是子进程,子进程也是开启了 1 个。修改 Nginx 的配置文件的 worker_processes 参数,一般设为 CPU 的个数或者核数,在高并发的情况下可设置为 CPU 个数或者核数的 2 倍,可以查看 CPU 的核数以确定参数
 [root@localhost ~]# nproc
 2
参数设置为 4,和 CPU 的核数相同。运行进程数多一些,响应客户端访问请求时,Nginx 就不会临时启动新的进程提供服务,减少了系统的开销,提升了服务速度。
[root@localhost ~]# vim /usr/local/nginx/conf/nginx.conf
worker_processes 4;
[root@localhost ~]# nginx -t
nginx: the configuration file /usr/local/nginx/conf/nginx.conf syntax is ok
nginx: configuration file /usr/local/nginx/conf/nginx.conf test is successful
[root@localhost ~]# nginx -s reload
修改完后,重启服务,使用 ps aux 查看运行进程数的变化情况。从下面执行结果中可以看出开启了 1 个主进程和 4 个子进程,参数设置起到了作用。
[root@localhost ~]# ps -ef | grep nginx
root 6665 1 0 15:10 ? 00:00:00 nginx: master process /usr/local/sbin/nginx
nginx 6682 6665 0 15:14 ? 00:00:00 nginx: worker process
nginx 6683 6665 0 15:14 ? 00:00:00 nginx: worker process
nginx 6684 6665 0 15:14 ? 00:00:00 nginx: worker process
nginx 6685 6665 0 15:14 ? 00:00:00 nginx: worker process
root 6697 6585 0 15:16 pts/2 00:00:00 grep --color=auto nginx
默认情况下,Nginx 的多个进程可能更多的跑在一颗 CPU 上。为了充分利用硬件多核多 CPU,可以分配不同的进程给不同的 CPU 处理。在一台 4 核 CPU 服务器上,可以设置每个进程分别由不同的 CPU 核心处理,达到 CPU 的性能最大化。
 [root@localhost ~]# vim /usr/local/nginx/conf/nginx.conf
 worker_cpu_affinity 0001 0010 0100 1000;
1.2连接数
单个Worker进程最大并发连接数
[root@localhost ~]# vim /usr/local/nginx/conf/nginx.conf
 events {
     worker_connections  1024;
 }
所以nginx的总并发数计算: 总并发数 = worker_processes × worker_connections
2.静态缓存功能设置
当nginx将网页数据返回给客户端后,可设置缓存时间,以便在日后进行相同内容的请求时直接返回,以避免重复请求,加快访问速度。缓存时间一般针对静态资源进行设置,对动态网页不用设置缓存时间。
2.1设置静态资源缓存
[root@localhost ~]#vim /usr/local/nginx/conf/nginx.conf
location ~ \.(gif|jpg|jepg|png|bmp|ico)$ { #重新创建一个location
root html;
expires 1d;
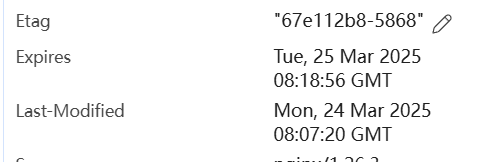
}2.2验证静态缓存
通过浏览器查看,响应头中包含字段即为缓存成功
3.设置连接超时
在企业网站中,为了避免同一个客户长时间占用连接,造成资源浪费,可设置相应的连接超时参数,实现控制连接访问时间。可以修改配置文件 nginx.conf,设置 keepalive_timeout超时时间。
[root@localhost ~]#vim /usr/local/nginx/conf/nginx.conf
 http {
 .............
 //省略内容
 #keepalive_timeout 0;
 keepalive_timeout 65 180;
 //默认是 65 秒,设置超时是 180 秒
第一个参数指定了与客户端的 keep-alive 连接超时时间,服务器将会在这个时间后关闭连接。
可选的第二个参数指定了在响应头 Keep-Alive: timeout=time中的time 值。这个头能够让一些浏览器主动关闭连接,这样服务器就不必去关闭连接了。没有这个参数,Nginx不会发送 Keep-Alive 响应头。
4.日志切割
随着 Nginx 运行时间的增加,产生的日志也会逐渐增加,为了方便掌握 Nginx 的运行状态,需要时刻关注 Nginx 日志文件。太大的日志文件对监控是一个大灾难,不便于分析排查,需要定期的进行日志文件的切割。
nginx通过 Nginx 的信号控制功能脚本来实现日志的自动切割,并将脚本加入到 Linux 的计划任务中,让脚本在每天的固定时间执行,便可实现日志切割功能。下面是具体操作步骤。
4.1编写脚本
[root@localhost ~]# vi /opt/fenge.sh
#!/bin/bash
# Filename: fenge.sh
d=$(date -d "-1 day" "+%Y%m%d")
logs_path="/var/log/nginx"
pid_path="/usr/local/nginx/logs/nginx.pid"
[ -d $logs_path ] || mkdir -p $logs_path
# 创建日志文件目录
mv /usr/local/nginx/logs/access.log ${logs_path}/test.com-access.log-$d
# 移动并重命名日志文件
kill -USR1 $(cat $pid_path)
# 重建新日志文件
find $logs_path -mtime +30 |xargs rm -rf
# 删除 30 天之前的日志文件
4.2执行脚本,查看结果
[root@localhost ~]# bash /opt/fenge.sh
[root@localhost ~]# ls /var/log/nginx/
test.com-access.log-20250323
[root@localhost ~]# ls /var/log/nginx/test.com-access.log-20250323
/var/log/nginx/test.com-access.log-20250323
设置 crontab 任务,定期执行脚本自动进行日志分割。
[root@localhost ~]# crontab -e
 30 1 * * * /opt/fenge.sh
5.配置网页压缩
Nginx 的 ngx_http_gzip_module 压缩模块提供了对文件内容压缩的功能,允许 Nginx服务器将输出内容发送到客户端之前进行压缩,以节约网站的带宽,提升用户的访问体验。默认 Nginx 已经安装该模块,只需要在配置文件中加入相应的压缩功能参数对压缩性能进行优化即可。
Ø gzipon:开启 gzip 压缩输出;
Ø gzip_min_length1k:用于设置允许压缩的页面最小字节数;
Ø gzip_buffers 4 16k:表示申请 4 个单位为 16k 的内存作为压缩结果流缓存,默认值是申请与原始数据大小相同的内存空间来存储 gzip 压缩结果;
Ø gzip_http_version 1.0:用于设置识别 http 协议版本,默认是 1.1,目前大部分浏览器已经支持 gzip 解压,但处理较慢,也比较消耗服务器 CPU 资源;
Ø gzip_comp_level 2:用来指定 gzip 压缩比,1压缩比最小,处理速度最快;9压缩比最大,传输速度快,但处理速度最慢,使用默认即可;
Ø gzip_types text/plain:压缩类型,是对哪些网页文档启用压缩功能;
Ø gzip_vary on:选项可以让前端的缓存服务器缓存经过 gzip 压缩的页面。
修改 Nginx 的配置文件,加入压缩功能参数
[root@localhost ~]# vi /usr/local/nginx/conf/nginx.conf
 http {
 gzip on;
 gzip_buffers 4 64k;
 gzip_http_version 1.1;
 gzip_comp_level 2;
 gzip_min_length 1k;
 gzip_vary on;
 gzip_types text/plain text/javascript application/x-javascript text/css text/xml application/xml application/xml+rss;
Ø gzip on;:开启 Gzip 压缩功能。
Ø gzip_buffers 4 64k;:设置用于压缩响应的缓冲区数量和大小,这里表示分配 4 个 64KB 的缓冲区。
Ø gzip_http_version 1.1;:指定启用 Gzip 压缩的 HTTP 协议版本,这里是 HTTP 1.1。
Ø gzip_comp_level 2;:设置 Gzip 压缩的级别,范围是 1 到 9,2 表示相对较低的压缩级别(压缩速度快,压缩比相对低)。
Ø gzip_min_length 1k;:指定当响应内容长度大于等于 1KB 时才进行 Gzip 压缩。
Ø gzip_vary on;:向代理服务器发送 Vary: Accept-Encoding 头信息,让代理服务器根据客户端的 Accept-Encoding 头来决定是否缓存压缩后的内容。
Ø gzip_types text/plain text/javascript application/x-javascript text/css text/xml application/xml application/xml+rss;:指定对哪些 MIME 类型的内容进行 Gzip 压缩
验证结果
二:nginx的深度监控
GoAccess 是一个开源实时 Web 日志分析器和交互式查看器,可在Linux系统上的 终端中或通过浏览器运行。它为需要动态可视化服务器报告的系统管理员提供快速且有价值的 HTTP 统计信息
1.1GOAccess安装
安装编译依赖
[root@localhost ~]# dnf install -y gcc make ncurses-devel openssl-devel gettext-devel 安装中文字体支持
[root@localhost ~]# dnf install -y wqy-microhei-fonts源码编译安装GoAccess
[root@localhost ~]# tar -xzvf goaccess-1.7.2.tar.gz
[root@localhost ~]# cd goaccess-1.7.2
[root@localhost ~]# ./configure --enable-utf8 --with-openssl
--enable-utf8:启用 Unicode 支持(显示中文必备)。
--with-openssl:支持 HTTPS 日志分析。
[root@localhost ~]# make && make install
1.2配置中文环境
[root@localhost ~]# dnf install -y glibc-langpack-zh
[root@localhost ~]# localectl set-locale LANG=zh_CN.UTF-8
#验证Locale 是否生效
[root@localhost ~]# locale
LANG=zh_CN.UTF-8
LC_CTYPE="zh_CN.UTF-8"
1.3GoAccess生成中文报告
[root@localhost~]# goaccess --log-format=COMBINED --output=/usr/local/nginx/html/report.html --real-time-html /usr/local/nginx/logs/access.log -
[PARSING /usr/local/nginx/logs/access.log] {0} @ {0/s}
-
WebSocket服务器已准备接收来自客户的连接
-
--output=report.html:生成 HTML 报告。
-
--real-time-html:实时更新报告。
1.4测试连接
2.nginx vts简介
Nginx 的 VTS 模块(Virtual Host Traffic Status) 是一个开源监控工具,用于实时收集和分析 Nginx 的流量、性能指标及状态数据。以下是其核心功能和特点:
实时监控
统计每个虚拟主机(server 块)的请求量(QPS)、带宽使用、响应时间、连接数 等关键指标。支持按状态码(如 2xx、4xx、5xx)分类统计请求。
数据可视化
提供内置监控页面(默认路径 /status),通过图表和表格展示实时及历史数据。支持 JSON 格式输出,方便集成到 Prometheus、Grafana 等监控平台。
扩展性
通过 Lua 脚本扩展自定义监控逻辑(如记录特定 API 的响应时间)。
可配置 数据存储策略(如保留最近 1 小时的数据)。
报警集成
结合阈值规则触发告警(需配合外部工具如 Zabbix、Telegram Bot)。
2.1nginx vts安装
[root@localhost ~]# tar xzf nginx-1.26.3.tar.gz
 [root@localhost ~]# unzip nginx-module-vts-master.zip
 [root@localhost ~]# cd nginx-1.26.3
 [root@localhost nginx-1.26.3]# ./configure   --prefix=/usr/local/nginx    --user=nginx   --group=nginx   --with-http_ssl_module --with-http_v2_module   --with-http_realip_module   --with-http_stub_status_module   --with-http_gzip_static_module   --with-pcre   --with-stream   --add-module=/root/nginx-module-vts-master
 [root@localhost nginx-1.26.3]# make && make install
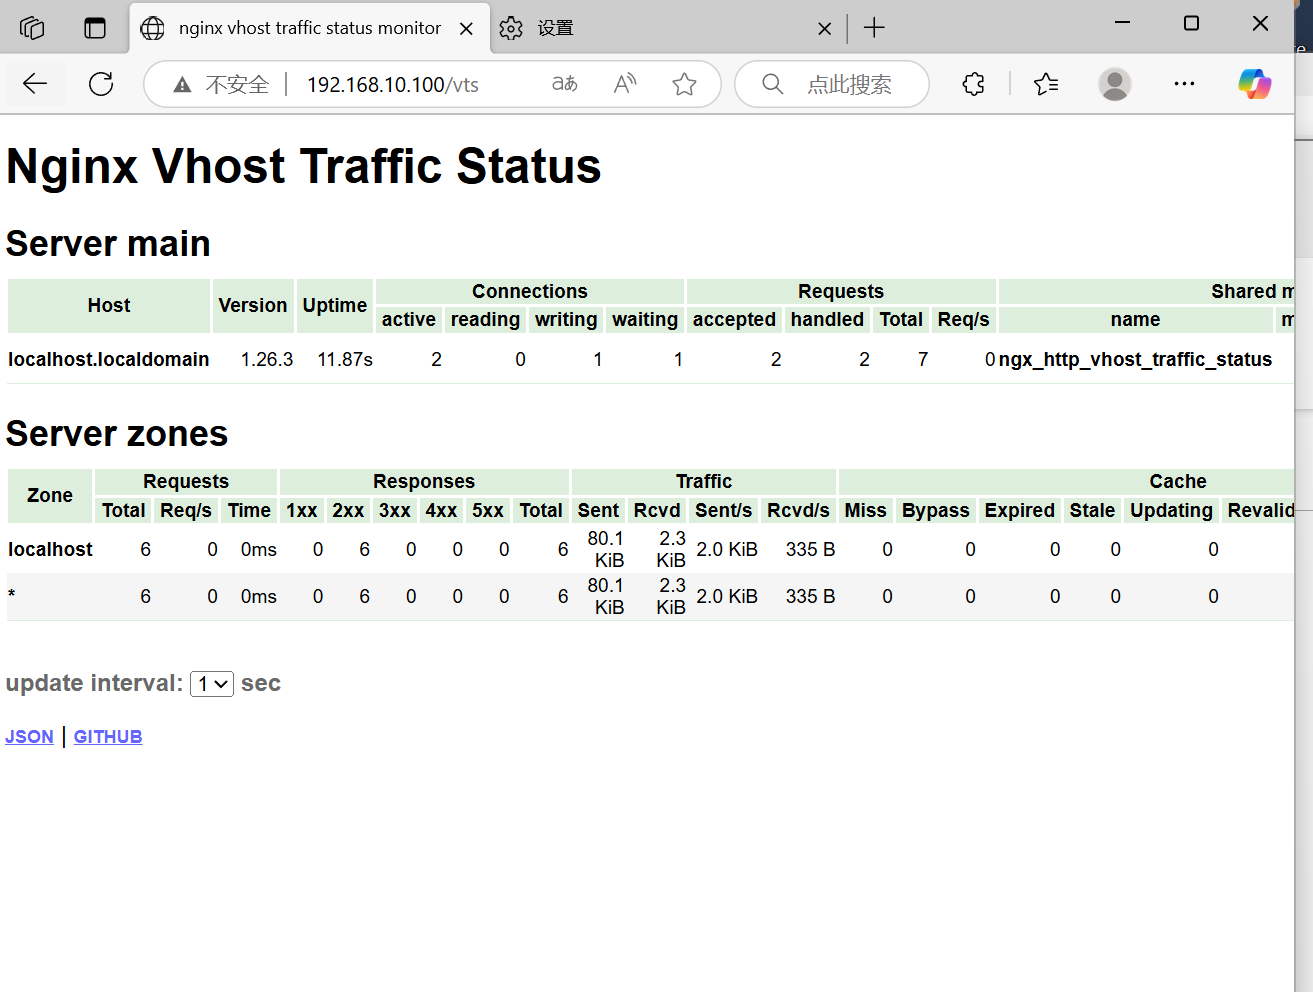
2.2nginx配置开启vts
修改nginx配置文件
[root@localhost ~]# vi /usr/local/nginx/conf/nginx.conf http { ..... vhost_traffic_status_zone; # 启用流量统计共享内存区 ...... Server { ...... location /vts { vhost_traffic_status_display; # 启用统计展示 vhost_traffic_status_display_format html; #默认SON可设为html access_log off; # 关闭访问日志 } [root@localhost ~]#nginx -t [root@localhost ~]#nginx -s reload
[root@localhost ~]# vi /usr/local/nginx/conf/nginx.conf
http {
.....
vhost_traffic_status_zone; # 启用流量统计共享内存区
......
Server {
......
location /vts {
vhost_traffic_status_display; # 启用统计展示
vhost_traffic_status_display_format html; #默认SON可设为html
access_log off; # 关闭访问日志
}
[root@localhost ~]#nginx -t
[root@localhost ~]#nginx -s reload
2.3验证访问


 被折叠的 条评论
为什么被折叠?
被折叠的 条评论
为什么被折叠?
 到【灌水乐园】发言


