


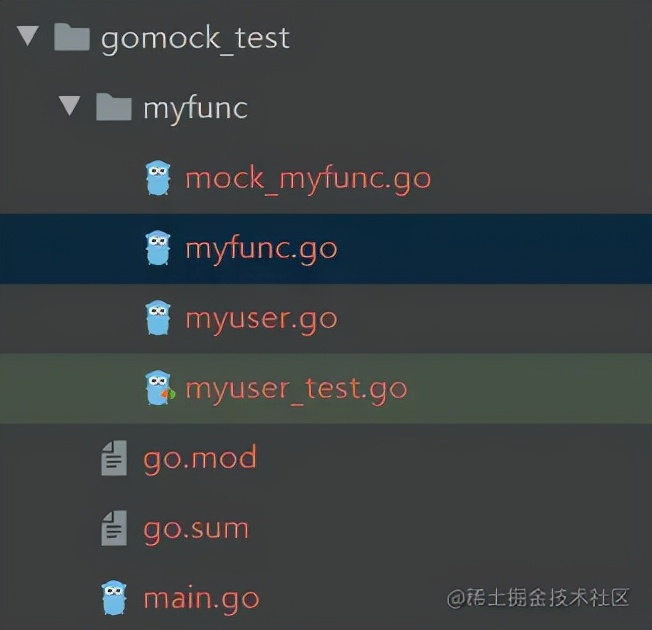
└── myuser_test.go
-
mock_myfunc.go 是使用 mockgen 工具生成的
-
myfunc.go 主要是用于模拟调用的底层实现
-
myuser.go 主要是去调用 myfunc.go 里面的接口
-
myuser_test.go 是 对应的单测文件
myfunc.go
- 编写一个 接口,里面有一个 GetInfo() string 方法,模拟获取信息
package myfunc
type MyFunc interface {
GetInfo() string
}
myuser.go
- 调用 myfunc.go 中的方法,调用接口获取信息
package myfunc
func getUser(m MyFunc) string {
user := m.GetInfo()
return user
}
========================================================================
mock_myfunc.go
这个文件不是我们自己写的,是通过 mockgen 工具生成的 ,生成方式如下:
在 myfunc.go 的同级目录下执行如下语句,填入 source 源文件 和 目标文件即可生成新的 mock 文件
mockgen -source=myfunc.go -destination=mock_myfunc.go
我们可以看一下 mockgen 的帮助文档,还有其他的参数供我们使用
mockgen
mockgen has two modes of operation: source and reflect.
Source mode generates mock interfaces from a source file.
It is enabled by using the -source flag. Other flags that
may be useful in this mode are -imports and -aux_files.
Example:
mockgen -source=foo.go [other options]
Reflect mode generates mock interfaces by building a program
that uses reflection to understand interfaces. It is enabled
by passing two non-flag arguments: an import path, and a
comma-separated list of symbols.
Example:
mockgen database/sql/driver Conn,Driver
-aux_files string
(source mode) Comma-separated pkg=path pairs of auxiliary Go source files.
-build_flags string
(reflect mode) Additional flags for go build.
-copyright_file string
Copyright file used to add copyright header
-debug_parser
Print out parser results only.
-destination string
Output file; defaults to stdout.
-exec_only string
(reflect mode) If set, execute this reflection program.
-imports string
(source mode) Comma-separated name=path pairs of explicit imports to use.
-mock_names string
Comma-separated interfaceName=mockName pairs of explicit mock names to use. Mock names default to ‘Mock’+ interfaceName suffix.
-package string
Package of the generated code; defaults to the package of the input with a ‘mock_’ prefix.
-prog_only
(reflect mode) Only generate the reflection program; write it to stdout and exit.
-self_package string
The full package import path for the generated code. The purpose of this flag is to prevent import cycles in the generated code by trying to include its own package. This can happen if the mock’s package is set to one of its inputs (usually the main one) and the output is stdio so mockgen cannot detect the final output package. Setting this flag will then tell mockgen which import to exclude.
-source string
(source mode) Input Go source file; enables source mode.
-version
Print version.
-write_package_comment
Writes package documentation comment (godoc) if true. (default true)
2021/10/30 16:43:25 Expected exactly two arguments
一般用的比较多的就是
-
-source 源文件
-
-destination 目标文件
-
-imports 依赖的需要 import 的包
-
-build_flags 传递给build工具的参数
-
-aux_files 接口文件不止一个文件时附加文件
-
-package 设置 mock 文件的包名,不设置的话,mock 文件的包名默认是 mock_输入文件的包名
通过上述指令生成的 mock 文件如下:
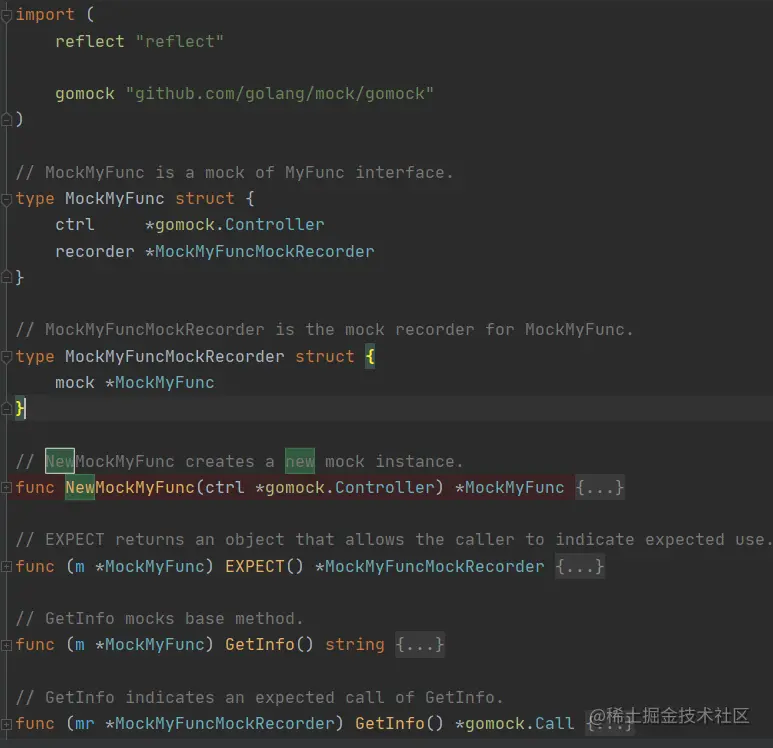
- NewMockMyFunc
创建一个新的 mock 实例
- EXPECT
允许调用者指示预期用途的对象
- GetInfo
mock 的基础方法,也就是我们需要 mock 的方法
=====================================================================
myuser_test.go
- myuser.go 对应的单测文件 , 使用了 mock 的方式
package myfunc
import (
“fmt”
“testing”
gomock “github.com/golang/mock/gomock”
)
func Test_getUser(t *testing.T) {
mockCtl := gomock.NewController(t)
mockMyFunc := NewMockMyFunc(mockCtl)
mockMyFunc.EXPECT().GetInfo().Return(“xiaomotong”)
v := getUser(mockMyFunc)
if v == “xiaomotong” {
fmt.Println(“get user right!”)
} else {
t.Error(“get error user”)
}
}
看到上述单测文件,可以还不是特别明白区别,我们来看看不用 mock 的时候,我们会是如何去写单测呢
package myfunc
import (
“fmt”
“testing”
gomock “github.com/golang/mock/gomock”
)
func Test_getUser(t *testing.T) {
m := myfunc.CreateMyFunc() // 也就是说需要自己创建一个对象
v := getUser(m)
if v == “xiaomotong” {
fmt.Println(“get user right!”)
} else {
t.Error(“get error user”)
}
}
自我介绍一下,小编13年上海交大毕业,曾经在小公司待过,也去过华为、OPPO等大厂,18年进入阿里一直到现在。
深知大多数Java工程师,想要提升技能,往往是自己摸索成长或者是报班学习,但对于培训机构动则几千的学费,着实压力不小。自己不成体系的自学效果低效又漫长,而且极易碰到天花板技术停滞不前!
因此收集整理了一份《2024年Java开发全套学习资料》,初衷也很简单,就是希望能够帮助到想自学提升又不知道该从何学起的朋友,同时减轻大家的负担。

既有适合小白学习的零基础资料,也有适合3年以上经验的小伙伴深入学习提升的进阶课程,基本涵盖了95%以上Java开发知识点,真正体系化!
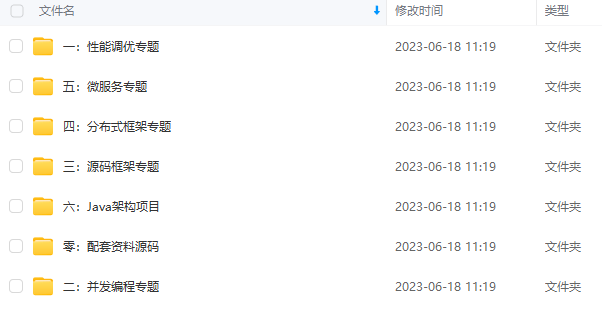
由于文件比较大,这里只是将部分目录截图出来,每个节点里面都包含大厂面经、学习笔记、源码讲义、实战项目、讲解视频,并且会持续更新!
如果你觉得这些内容对你有帮助,可以扫码获取!!(备注:Java)

最后
手绘了下图所示的kafka知识大纲流程图(xmind文件不能上传,导出图片展现),但都可提供源文件给每位爱学习的朋友

《互联网大厂面试真题解析、进阶开发核心学习笔记、全套讲解视频、实战项目源码讲义》点击传送门即可获取!
文件比较大,这里只是将部分目录截图出来,每个节点里面都包含大厂面经、学习笔记、源码讲义、实战项目、讲解视频,并且会持续更新!**
如果你觉得这些内容对你有帮助,可以扫码获取!!(备注:Java)
[外链图片转存中…(img-PeU1OBIG-1713851394542)]
最后
手绘了下图所示的kafka知识大纲流程图(xmind文件不能上传,导出图片展现),但都可提供源文件给每位爱学习的朋友
[外链图片转存中…(img-Xvq593nQ-1713851394542)]
《互联网大厂面试真题解析、进阶开发核心学习笔记、全套讲解视频、实战项目源码讲义》点击传送门即可获取!


 448
448

 被折叠的 条评论
为什么被折叠?
被折叠的 条评论
为什么被折叠?
 到【灌水乐园】发言


