


有道云:有道云笔记
spingboot3.0系列示例代码采用3.1.0版本,jdk版本使用17+
应用场景
- 解耦和削峰:中间层解耦生产者和消费者,并通过消息队列缓存削峰。
- 异步处理:不立刻返回结果,通过回调异步处理消息。
- 应用解耦:服务之间通过传递消息解耦,提高系统可扩展性。
- 日志处理:大量日志通过消息队列异步处理。
- 广播机制:向多个消费者同时推送消息实现广播。
- 数据分发:将消息路由到不同的队列实现对数据的分发。
整合Rabbitmq
工程代码
1.引入pom依赖
<dependency> <groupId>org.springframework.boot</groupId> <artifactId>spring-boot-starter-web</artifactId> </dependency> <dependency> <groupId>org.springframework.boot</groupId> <artifactId>spring-boot-starter</artifactId> </dependency> <!--rabbitmq--> <dependency> <groupId>org.springframework.boot</groupId> <artifactId>spring-boot-starter-amqp</artifactId> </dependency> <dependency> <groupId>org.projectlombok</groupId> <artifactId>lombok</artifactId> <optional>true</optional> </dependency>
2.配置文件
spring.application.name: springboot3-rabbitmq # 配置rabbitmq # 主机ip,修改成实际rabbitmq配置 spring.rabbitmq.host=127.0.0.1 # 端口,修改成实际rabbitmq配置 spring.rabbitmq.port= # 用户名,修改成实际rabbitmq配置 spring.rabbitmq.username=guest # 用户密码,修改成实际rabbitmq配置 spring.rabbitmq.password=guest logging.level.com.lfz.rabbitmq

3.直接交换配置
(1)定义DirectConfig【直接交换机配置】 com.lfz.rabbitmq.config.DirectConfig.java
创建两个direct模式队列: directQueue_A、directQueue_B。
绑定交换器: directExchange。
路由键对应: 1.directQueue_A--->directRouting1
2.directQueue_B--->directRouting2
package com.lfz.rabbitmq.config; import org.springframework.amqp.core.Binding; import org.springframework.amqp.core.BindingBuilder; import org.springframework.amqp.core.DirectExchange; import org.springframework.amqp.core.Queue; import org.springframework.context.annotation.Bean; import org.springframework.context.annotation.Configuration; @Configuration public class DirectConfig { /** * 队列名称:directQueue_A * * @return */ @Bean public Queue directQueue_A() { // durable: 是否持久化,默认是false。持久化队列:会被存储在磁盘上,当消息代理重启时仍然存在 // exclusive: 默认也是false,只能被当前创建的连接使用,而且当连接关闭后队列即被删除。此参考优先级高于durable // autoDelete: 是否自动删除,当没有生产者或者消费者使用此队列,该队列会自动删除。 // 一般设置一下队列的持久化就好,其余两个就是默认false return new Queue("directQueue_A", true); } /** * 队列名称:directQueue_B * * @return */ @Bean public Queue directQueue_B() { return new Queue("directQueue_B", true); } /** * Direct直 接交换机名称:directExchange * * @return */ @Bean public DirectExchange directExchange() { return new DirectExchange("directExchange", true, false); } /** * 将队列和交换机绑定, 并设置匹配路由键:directRouting * * @return */ @Bean public Binding bindingDirectExchange_A() { return BindingBuilder.bind(directQueue_A()).to(directExchange()).with("directRouting1"); } /** * 将队列和交换机绑定, 并设置匹配路由键:directRouting * * @return */ @Bean public Binding bindingDirectExchange_B() { return BindingBuilder.bind(directQueue_B()).to(directExchange()).with("directRouting2"); } }
(2)创建DirectReceiver消息消费者类【直接交换机消息消费者类】 com.lfz.rabbitmq.receiver.DirectReceiver.java
package com.lfz.rabbitmq.receiver; import lombok.extern.slf4j.Slf4j; import org.springframework.amqp.rabbit.annotation.Exchange; import org.springframework.amqp.rabbit.annotation.Queue; import org.springframework.amqp.rabbit.annotation.QueueBinding; import org.springframework.amqp.rabbit.annotation.RabbitListener; import org.springframework.stereotype.Component; @Slf4j @Component public class DirectReceiver { /** * 消费者监听,绑定交换机、队列、路由键 */ @RabbitListener(bindings = { @QueueBinding( exchange = @Exchange(value = "directExchange"), value = @Queue(value = "directQueue_A"), key = "directRoutingA" ) }) public void receiveDirectMsg1(String message) { //接收消息message log.info("Direct【直接交换机】模式(队列A)消费者收到消息: " + message); } /** * 消费者监听,绑定交换机、队列、路由键 */ @RabbitListener(bindings = { @QueueBinding( exchange = @Exchange(value = "directExchange"), value = @Queue(value = "directQueue_B"), key = "directRoutingB" ) }) public void receiveDirectMsg2(String message) { //接收消息message log.info("Direct【直接交换机】模式(队列B)消费者收到消息: " + message); } }
(3)创建Rabbitmq消息生产者Controller类【所有交换机统一测试控制器】 com.lfz.rabbitmq.controller.RabbitmqController
package com.lfz.rabbitmq.controller; import jakarta.annotation.Resource; import org.springframework.amqp.rabbit.core.RabbitTemplate; import org.springframework.web.bind.annotation.GetMapping; import org.springframework.web.bind.annotation.RestController; @RestController public class RabbitmqController { @Resource RabbitTemplate rabbitTemplate; @GetMapping("/sendDirectMessage") public String sendDirectMessage() { for (int i=0;i<=100;i++) { rabbitTemplate.convertAndSend("directExchange", "directRouting1", "测试直接交换机,[第"+i+"次],发送至队列A"); rabbitTemplate.convertAndSend("directExchange", "directRouting2", "测试直接交换机,[第"+i+"次],发送至队列B"); } return "ok"; } }
(4)启动主类,测试运行 localhost:8080/sendDirectMessage
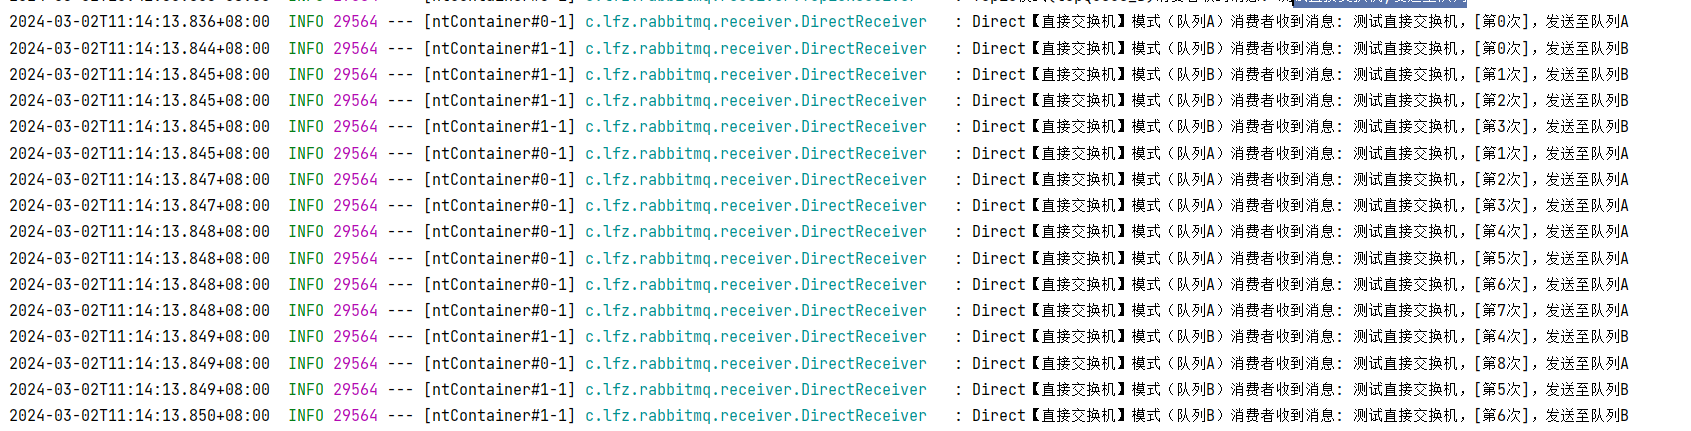
路由键与对应队列一一匹配。
4.主题交换机配置
(1)定义TopicConfig【主题交换机配置】 com.lfz.rabbitmq.config.TopicConfig.java
package com.lfz.rabbitmq.config; import org.springframework.amqp.core.Binding; import org.springframework.amqp.core.BindingBuilder; import org.springframework.amqp.core.Queue; import org.springframework.amqp.core.TopicExchange; import org.springframework.context.annotation.Bean; import org.springframework.context.annotation.Configuration; @Configuration public class TopicConfig { @Bean public Queue topQueue_A() { return new Queue("topQueue_A", true); } @Bean public Queue topQueue_B() { return new Queue("topQueue_B", true); } /** * Topic主题交换机名称:topicExchange * * @return */ @Bean public TopicExchange topicExchange() { return new TopicExchange("topicExchange", true, false); } @Bean public Binding bindingTopicFirstExchange() { return BindingBuilder.bind(topQueue_A()).to(topicExchange()).with("topic.first"); } @Bean public Binding bindingTopicSecondExchange() { //通配符: *,# //*号:匹配一个字符 //#号:匹配n个字符,n>=0 return BindingBuilder.bind(topQueue_B()).to(topicExchange()).with("topic.#"); } }
(2)创建TopicReceiver消息消费者类【主题交换机消息消费者类】 com.lfz.rabbitmq.receiver.TopicReceiver.java
package com.lfz.rabbitmq.receiver; import lombok.extern.slf4j.Slf4j; import org.springframework.amqp.rabbit.annotation.Exchange; import org.springframework.amqp.rabbit.annotation.Queue; import org.springframework.amqp.rabbit.annotation.QueueBinding; import org.springframework.amqp.rabbit.annotation.RabbitListener; import org.springframework.stereotype.Component; @Slf4j @Component public class TopicReceiver { /** * 消费者监听,绑定队列 */ @RabbitListener(queues = "topQueue_A") public void receiveTopicFirstMsg(String message) { //接收消息message log.info("Topic模式(topQueue_A)消费者收到消息: " + message.toString()); } /** * 消费者监听,绑定队列 */ @RabbitListener(queues = "topQueue_B") public void receiveTopicSecondMsg(String message) { //接收消息message log.info("Topic模式(topQueue_B)消费者收到消息: " + message.toString()); } }
(3)Rabbitmq消息生产者Controller类,添加测试方法【所有交换机统一测试控制器】 com.lfz.rabbitmq.controller.RabbitmqController
@GetMapping("/sendTopicFirstMessage") public String sendTopicFirstMessage() { rabbitTemplate.convertAndSend("topicExchange", "topic.first", "测试直接交换机,发送至队列"); return "ok"; } @GetMapping("/sendTopicSecondMessage") public String sendTopicSecondMessage() { rabbitTemplate.convertAndSend("topicExchange", "topic.second", "测试直接交换机,发送至队列"); return "ok"; }
(4)启动主类,


调用sendTopicFirstMessage消息会由 Exchange 同时转发到两个队列,
而调用 sendTopicSecondMessage则只会转发至 topQueue_B队列
5.广播交换机配置
(1)定义FanoutConfig【广播交换机配置】 com.lfz.rabbitmq.config.FanoutConfig.java
package com.lfz.rabbitmq.config; import org.springframework.amqp.core.*; import org.springframework.context.annotation.Bean; import org.springframework.context.annotation.Configuration; @Configuration public class FanoutConfig { @Bean public Queue fanoutQueue_A() { return new Queue("fanoutQueue_A", true); } @Bean public Queue fanoutQueue_B() { return new Queue("fanoutQueue_B", true); } @Bean public FanoutExchange fanoutExchange() { return new FanoutExchange("fanoutExchange", true, false); } @Bean public Binding bindingFanoutFirstExchange() { return BindingBuilder.bind(fanoutQueue_A()).to(fanoutExchange()); } @Bean public Binding bindingFanoutSecondExchange() { return BindingBuilder.bind(fanoutQueue_B()).to(fanoutExchange()); } }
(2)创建FanoutReceiver消息消费者类【广播交换机消息消费者类】 com.lfz.rabbitmq.receiver.FanoutReceiver.java
package com.lfz.rabbitmq.receiver; import lombok.extern.slf4j.Slf4j; import org.springframework.amqp.rabbit.annotation.Exchange; import org.springframework.amqp.rabbit.annotation.Queue; import org.springframework.amqp.rabbit.annotation.QueueBinding; import org.springframework.amqp.rabbit.annotation.RabbitListener; import org.springframework.stereotype.Component; @Slf4j @Component public class FanoutReceiver { /** * 消费者监听,绑定队列 */ @RabbitListener(queues = "fanoutQueue_A") public void receiveFanoutFirstMsg(String message) { //接收消息message log.info("Fanout模式(fanoutQueue_A)消费者收到消息: " + message); } /** * 消费者监听,绑定队列 */ @RabbitListener(queues = "fanoutQueue_B") public void receiveFanoutSecondMsg(String message) { //接收消息message log.info("Fanout模式(fanoutQueue_B)消费者收到消息: " + message); } }
(3)Rabbitmq消息生产者Controller类,添加测试方法【所有交换机统一测试控制器】 com.lfz.rabbitmq.controller.RabbitmqController
@GetMapping("/sendFanoutMessage") public String sendFanoutMessage() { rabbitTemplate.convertAndSend("fanoutExchange", "fanout.send", "测试广播交换机,发送至队列"); return "ok"; }
(4)启动主类,测试运行 localhost:8080/sendFanoutMessage

测试结果为绑定到 fanout 交换机上面的队列都收到了消息。


 398
398


 被折叠的 条评论
为什么被折叠?
被折叠的 条评论
为什么被折叠?
 到【灌水乐园】发言


