主窗口
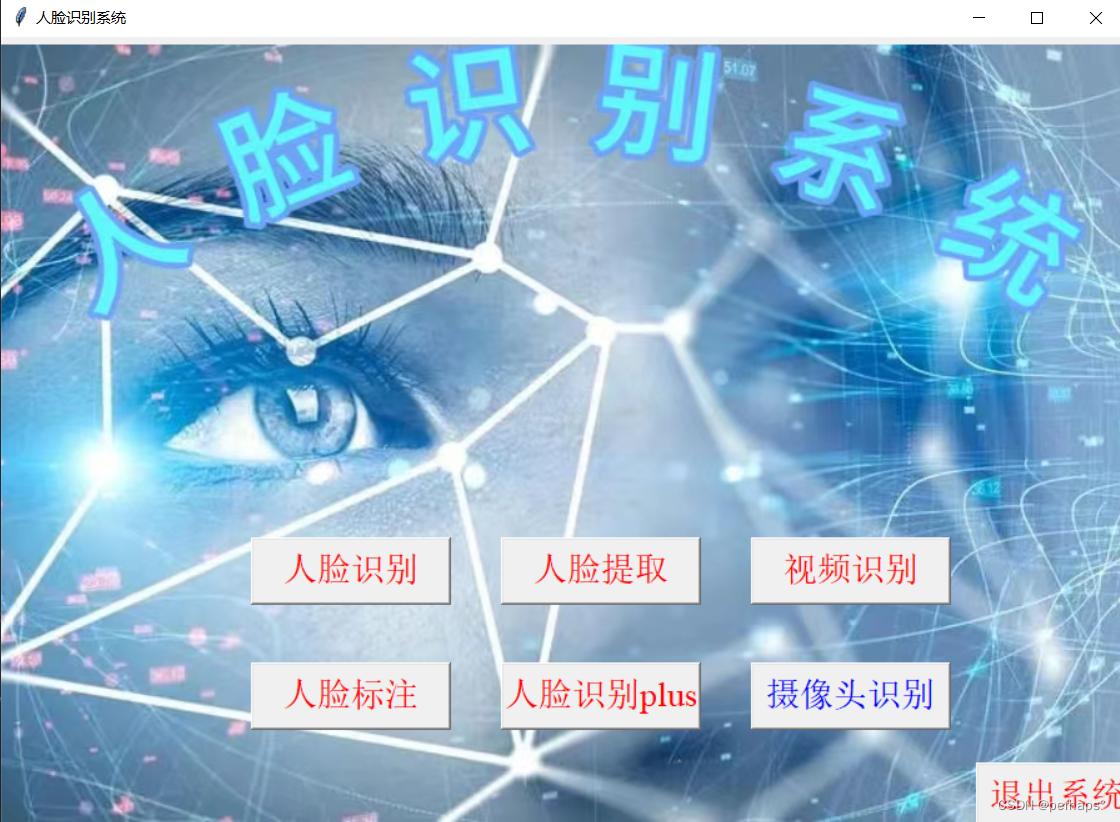
代码部分
import tkinter as tk
import subprocess
from PIL import ImageTk, Image

win = tk.Tk()
win.title("人脸识别系统")
win.geometry("900x630")

# 加载GIF图像
img = Image.open("beijing.gif")
img_tk = ImageTk.PhotoImage(img)
tk.Label(win, image=img_tk).pack(side="bottom", fill="both")

title_font = ("Verdana", 80,'italic')

def ecs():
    win.destroy()

def Face_recognition():
    subprocess.Popen(["python", "face_recognition.py"])
    win.destroy()

def Face_extraction():
    subprocess.Popen(["python", "face_extraction.py"])
    win.destroy()

def Face_annotation():
    subprocess.Popen(["python", "face_annotation.py"])
    win.destroy()

def faceplus():
    subprocess.Popen(["python", "face.py"])
    win.destroy()

def Sps():
    subprocess.Popen(["python", "视频处理.py"])
    win.destroy()

def Sxt():
    pass

my_font = ("Times New Roman",20)
face_recognition = tk.Button(win,text='人脸识别',width=10,font=my_font,
                             command=Face_recognition,fg='red')
face_recognition.place(x=200,y=400)

face_extraction = tk.Button(win,text='人脸提取',width=10,font=my_font
                            ,command=Face_extraction,fg='red')
face_extraction.place(x=400,y=400)

shipin = tk.Button(win,text='视频识别',width=10,font=my_font
                            ,command=Sps,fg='red')
shipin.place(x=600,y=400)

face_annotation = tk.Button(win,text='人脸标注',width=10,font=my_font
                            ,command=Face_annotation,fg='red')
face_annotation.place(x=200,y=500)

ta = tk.Button(win,text='人脸识别plus',width=10,font=my_font
               ,command=faceplus,fg='red')
ta.place(x=400,y=500)

sxt = tk.Button(win,text='摄像头识别',width=10,font=my_font
               ,command=faceplus,fg='blue')
sxt.place(x=600,y=500)

esc = tk.Button(win,text='退出系统',font=my_font
                ,command=ecs,fg='red')
esc.place(x=780,y=580)

win.mainloop()
人脸识别
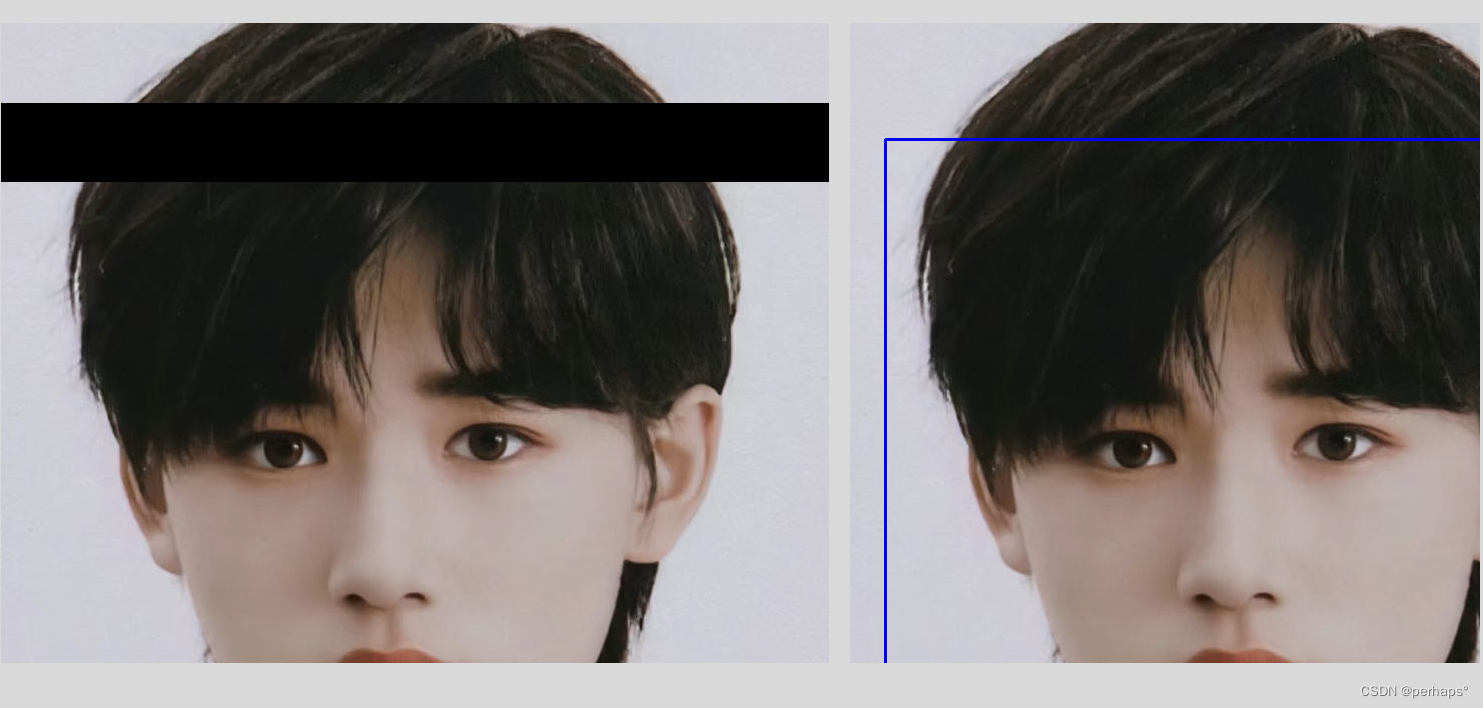
代码部分
import tkinter as tk
from tkinter import filedialog
import cv2
from PIL import Image, ImageTk
from tkinter import messagebox
import subprocess

win = tk.Tk()
win.title("人脸识别")
win.geometry("1000x800")

image_label_original = tk.Label(win)
image_label_original.pack(side=tk.LEFT,padx=10,pady=80)

image_label_detected = tk.Label(win)
image_label_detected.pack(side=tk.LEFT,padx=10,pady=80)

selected_image_path = None

my_font = ("Times New Roman",20)


def select_image():
    global selected_image_path
    # 打开文件选择对话框
    selected_image_path = filedialog.askopenfilename()

    # 使用OpenCV加载图片
    img = cv2.imread(selected_image_path)
    img_rgb = cv2.cvtColor(img, cv2.COLOR_BGR2RGB)
    img_pil = Image.fromarray(img_rgb)
    img_tk = ImageTk.PhotoImage(image=img_pil)

    # 显示原始图片
    image_label_original.config(image=img_tk)
    image_label_original.image = img_tk
def detect_faces():
    global selected_image_path
    if selected_image_path:
        # 使用OpenCV加载图片
        img = cv2.imread(selected_image_path)
        gray = cv2.cvtColor(img, cv2.COLOR_BGR2GRAY)

        # 加载人脸识别模型
        face_cascade = cv2.CascadeClassifier(cv2.data.haarcascades + 'haarcascade_frontalface_default.xml')
        faces = face_cascade.detectMultiScale(gray, 1.1, 4)

        # 判断是否检测到人脸
        if len(faces) > 0:
            # 在人脸周围画矩形框
            for (x, y, w, h) in faces:
                cv2.rectangle(img, (x, y), (x+w, y+h), (255, 0, 0), 2)

            # 转换为PIL格式并显示
            img_rgb_detected = cv2.cvtColor(img, cv2.COLOR_BGR2RGB)
            img_pil_detected = Image.fromarray(img_rgb_detected)
            img_tk_detected = ImageTk.PhotoImage(image=img_pil_detected)
            image_label_detected.config(image=img_tk_detected)
            image_label_detected.image = img_tk_detected  # keep a reference
        else:
            # 提示未检测到人脸
            messagebox.showinfo("提示", "未检测到人脸")
    else:
        messagebox.showinfo("提示", "请先选择一张图片")

def Esc():
    win.destroy()

def one():
    subprocess.Popen(["python", "main.py"])
    win.destroy()

# 创建选择图片和识别人脸的按钮
button_select = tk.Button(win, text="选择图片", command=select_image
                          ,font=my_font,fg='red')
button_select.place(x=333,y=12)

button_detect = tk.Button(win, text="识别人脸", command=detect_faces
                          ,font=my_font,fg='red')
button_detect.place(x=666,y=12)

esc = tk.Button(win,text='退出系统',font=30,command=Esc,fg='red')
esc.place(x=10,y=10)

t = tk.Button(win,text='返回系统',font=30,command=one,fg='red')
t.place(x=900,y=10)

win.mainloop()
人脸提取
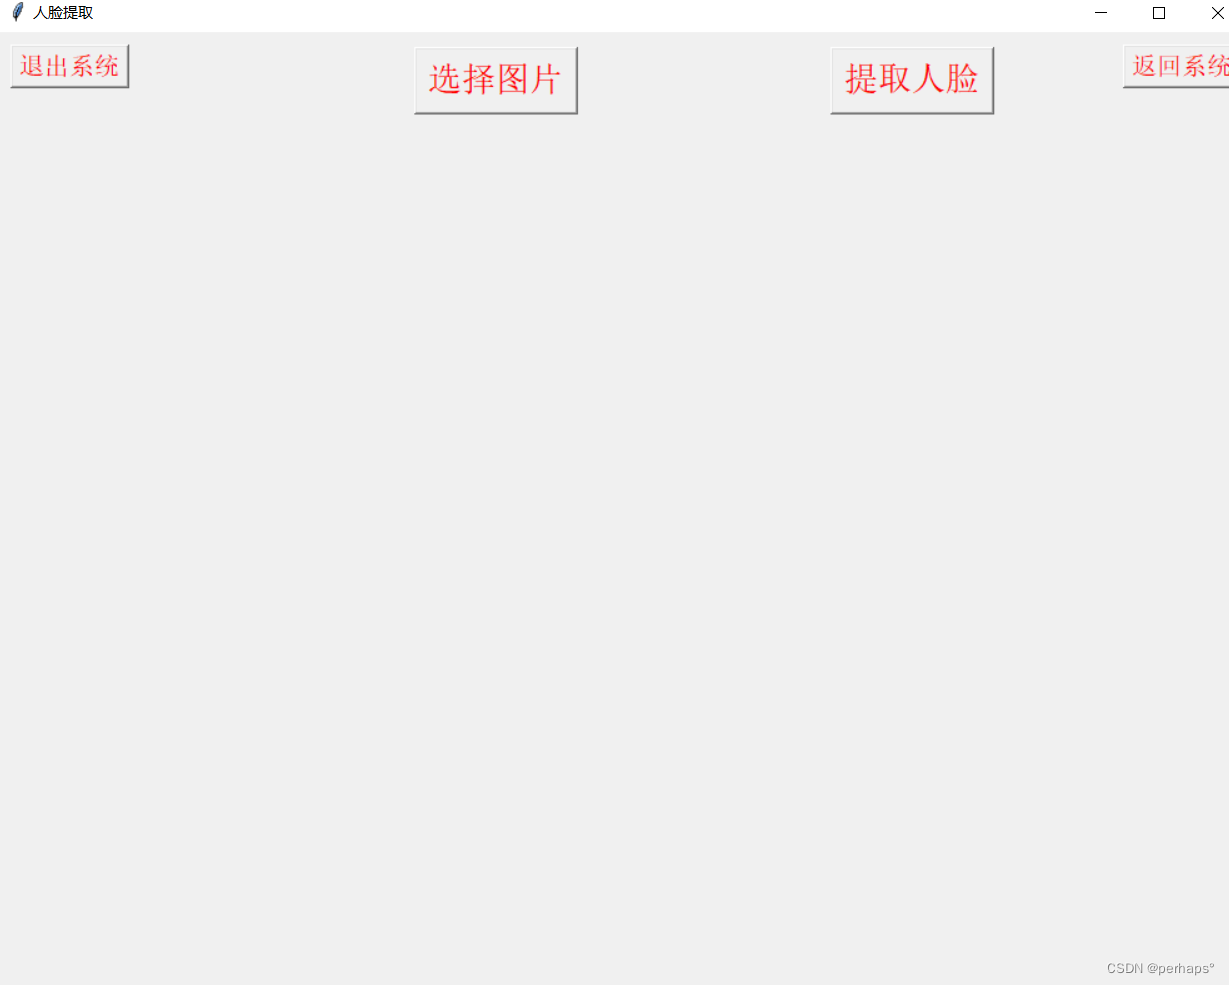
代码部分
import tkinter as tk
from tkinter import filedialog
import cv2
from PIL import Image, ImageTk
from tkinter import messagebox
import subprocess

win = tk.Tk()
win.title("人脸提取")
win.geometry("1000x800")

image_label_original = tk.Label(win)
image_label_original.pack(side=tk.LEFT,padx=10,pady=80)

image_label_detected = tk.Label(win)
image_label_detected.pack(side=tk.LEFT,padx=10,pady=80)

selected_image_path = None

my_font = ("Times New Roman",20)

def Esc():
    win.destroy()

def one():
    subprocess.Popen(["python", "main.py"])
    win.destroy()

def select_image():
    global selected_image_path
    # 打开文件选择对话框
    selected_image_path = filedialog.askopenfilename()

    # 使用OpenCV加载图片
    img = cv2.imread(selected_image_path)
    img_rgb = cv2.cvtColor(img, cv2.COLOR_BGR2RGB)
    img_pil = Image.fromarray(img_rgb)
    img_tk = ImageTk.PhotoImage(image=img_pil)

    # 显示原始图片
    image_label_original.config(image=img_tk)
    image_label_original.image = img_tk

# 人脸检测函数
def extract_faces():
    if selected_image_path:
        # 使用OpenCV的人脸检测
        img = cv2.imread(selected_image_path)
        gray = cv2.cvtColor(img, cv2.COLOR_BGR2GRAY)
        face_cascade = cv2.CascadeClassifier(cv2.data.haarcascades + 'haarcascade_frontalface_default.xml')
        faces = face_cascade.detectMultiScale(gray, 1.1, 4)

        # 如果检测到人脸,裁剪并显示
        if len(faces) > 0:
            (x, y, w, h) = faces[0]  # 获取第一个检测到的人脸
            face_img = img[y:y+h, x:x+w]  # 裁剪人脸区域

            # 转换为PIL图像并显示
            face_img = cv2.cvtColor(face_img, cv2.COLOR_BGR2RGB)
            face_img = Image.fromarray(face_img)
            face_img = ImageTk.PhotoImage(face_img)
            image_label_detected.config(image=face_img)
            image_label_detected.image = face_img
        else:
            messagebox.showinfo("信息", "没有检测到人脸")
    else:
        messagebox.showwarning("警告", "请先选择一张图片")

# 创建选择图片和识别人脸的按钮
button_select = tk.Button(win, text="选择图片",font=my_font
                          ,command=select_image,fg='red')
button_select.place(x=333,y=12)

button_extract = tk.Button(win, text="提取人脸",font=my_font
                           ,command=extract_faces,fg='red')
button_extract.place(x=666,y=12)

esc = tk.Button(win,text='退出系统',font=30,command=Esc,fg='red')
esc.place(x=10,y=10)

t = tk.Button(win,text='返回系统',font=30,command=one,fg='red')
t.place(x=900,y=10)

win.mainloop()
视频识别
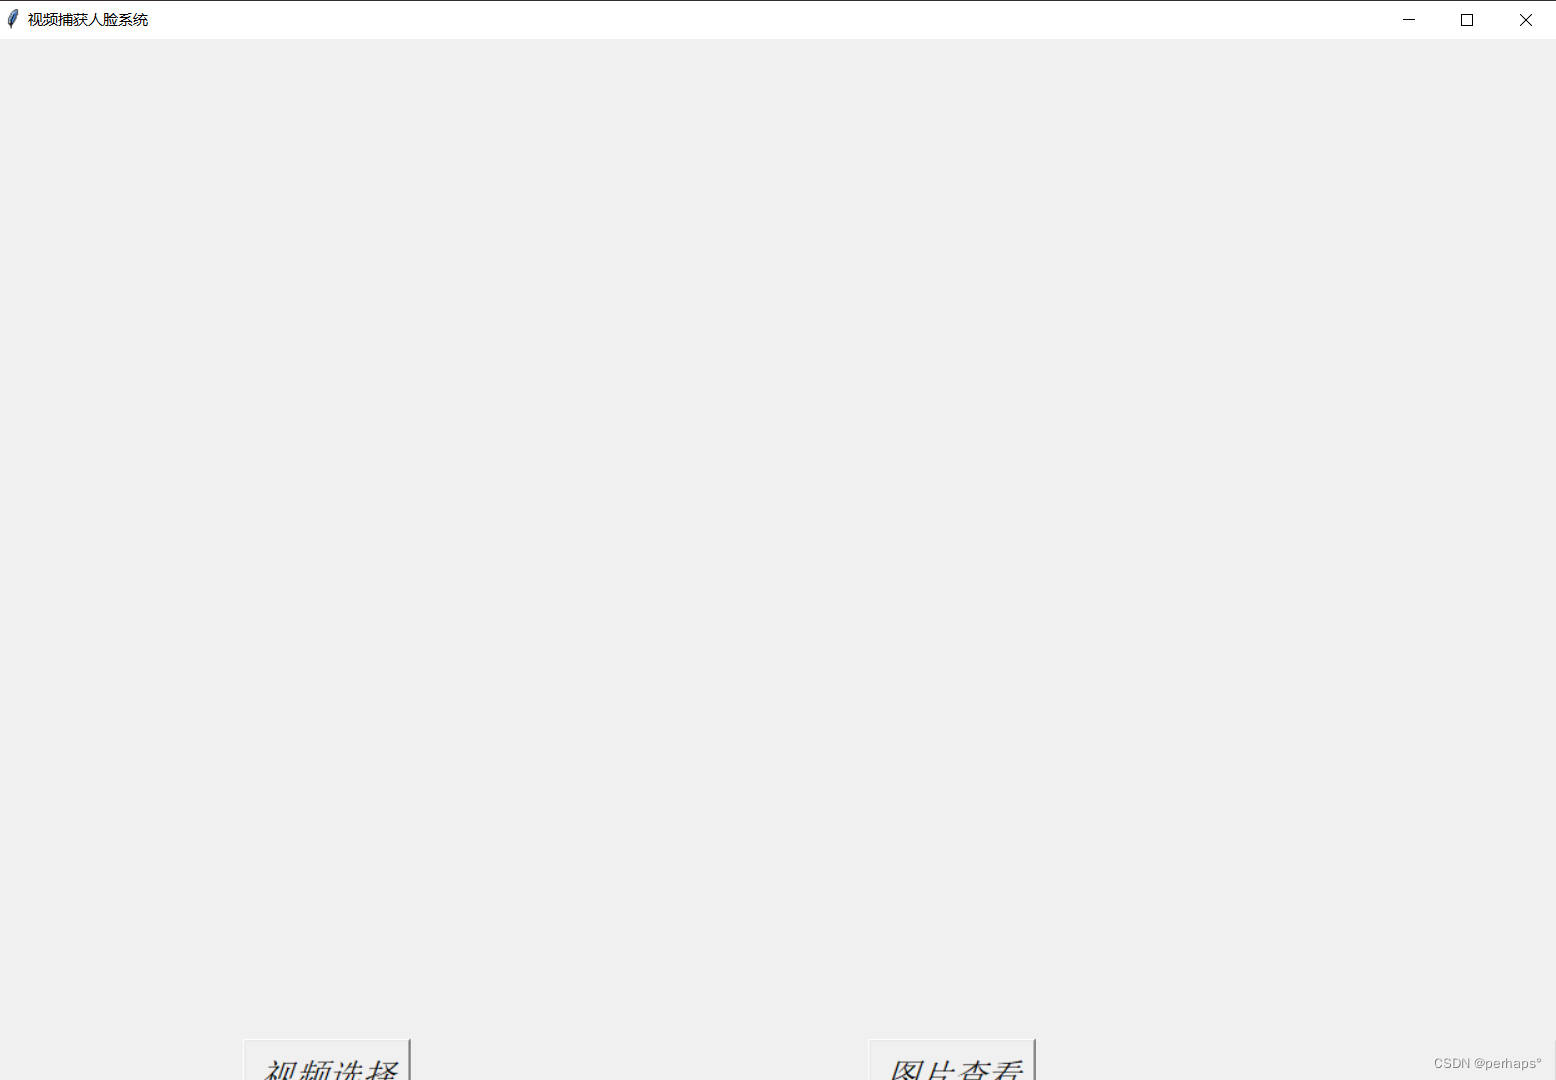
代码部分
import tkinter as tk
from tkinter import filedialog
from PIL import Image, ImageTk
import cv2
import os
import random
import subprocess

# 初始化窗口
win = tk.Tk()
win.title('视频捕获人脸系统')
win.geometry('1500x900')

title_font = ("Verdana", 20,'italic')

# 视频播放框架
video_frame = tk.Frame(win, width=1250, height=750, bg='red',)
video_frame.pack()

# 视频播放的Canvas
canvas = tk.Canvas(video_frame, width=1250, height=750)
canvas.pack(side=tk.TOP, anchor=tk.CENTER)

# 人脸检测和视频播放的函数
def detect_faces(frame):
    # 加载人脸识别的预训练模型
    face_cascade = cv2.CascadeClassifier(cv2.data.haarcascades + 'haarcascade_frontalface_default.xml')
    # 将帧转换为灰度图像,提高检测效率
    gray = cv2.cvtColor(frame, cv2.COLOR_BGR2GRAY)
    # 检测灰度图像中的人脸
    faces = face_cascade.detectMultiScale(gray, 1.3, 5)
    # 在检测到的人脸周围画框
    for (x, y, w, h) in faces:
        cv2.rectangle(frame, (x, y), (x+w, y+h), (255, 0, 0), 2)
    return frame, faces

# 在循环外部创建全局的PhotoImage对象
imgtk = None
# 播放视频的函数
def play_video():
    global imgtk  # 声明imgtk为全局变量
    # 选择视频文件
    video_path = filedialog.askopenfilename(title='选择视频', filetypes=[('视频文件', '*.mp4')])
    if video_path:
        # 打开视频文件
        cap = cv2.VideoCapture(video_path)
        # 播放视频
        limitOnTheNumberOfImages = 0  # 初始化人脸计数器
        while cap.isOpened():
            ret, frame = cap.read()
            if ret:
                frame, faces = detect_faces(frame)
                # 随机抓取人脸
                if len(faces) > 0:  # 修改这里
                    if random.choice([True, False, False, False, False, False]):
                        for (x, y, w, h) in faces:
                            if limitOnTheNumberOfImages < 4:
                                face_img = frame[y:y+h, x:x+w]
                                cv2.imwrite(f'E:\\photo\\face\\face_{x}_{y}_{w}_{h}.jpg', face_img)
                                limitOnTheNumberOfImages +=1
                                print("保存成功")
                            else:
                                break # 跳出循环,不再保存更多图片
                # 转换颜色通道并显示在Canvas上
                frame = cv2.cvtColor(frame, cv2.COLOR_BGR2RGB)
                img = Image.fromarray(frame)
                imgtk = ImageTk.PhotoImage(image=img)
                canvas.create_image(0, 0, anchor=tk.NW, image=imgtk)
                canvas.image = imgtk
                win.update_idletasks()
                win.update()
            else:
                break
        cap.release()

# 查看保存的人脸图片的函数
def view_faces():
    # 设置固定目录
    directory = 'E:\\photo\\face\\'

    # 获取该目录下所有.jpg文件
    face_paths = [os.path.join(directory, f) for f in os.listdir(directory) if f.endswith('.jpg')]

    # 使用文件对话框选择文件
    face_paths = filedialog.askopenfilenames(title='查看人脸', initialdir=directory, filetypes=[('图片文件', '*.jpg')])

    if face_paths:
        # 创建新的窗口显示图片
        for face_path in face_paths:
            img = cv2.imread(face_path)
            if img is not None:
                cv2.imshow('Face', img)
                cv2.waitKey(0)  # 等待按键事件
                cv2.destroyAllWindows()  # 关闭所有窗口
            else:
                print(f"无法加载图片: {face_path}")

def one():
    subprocess.Popen(["python", "main.py"])
    win.destroy()

# 视频选择按钮

tk.Button(win, text='视频选择', command=play_video,font=title_font).place(x=200, y=700)

# 图片查看按钮
tk.Button(win, text='图片查看', command=view_faces,font=title_font).place(x=700, y=700)

tk.Button(win,text='返回系统',font=30,command=one,fg='red').place(x=900,y=700)

win.mainloop()
人脸标注

代码部分
import tkinter as tk
from tkinter import filedialog
import cv2
from PIL import Image, ImageTk
from tkinter import messagebox
import dlib
import subprocess

win = tk.Tk()
win.title("人脸识别")
win.geometry("1500x800")


image_label_original = tk.Label(win)
image_label_original.place(x=20,y=20)

image_label_landmarks = tk.Label(win)
image_label_landmarks.place(x=520,y=20)

selected_image_path = None

my_font = ("Times New Roman",20)


def select_image():
    global selected_image_path
    # 打开文件选择对话框
    selected_image_path = filedialog.askopenfilename()

    # 使用OpenCV加载图片
    img = cv2.imread(selected_image_path)
    img_rgb = cv2.cvtColor(img, cv2.COLOR_BGR2RGB)
    img_pil = Image.fromarray(img_rgb)
    img_tk = ImageTk.PhotoImage(image=img_pil)

    # 显示原始图片
    image_label_original.config(image=img_tk)
    image_label_original.image = img_tk

# 五官标注函数
def annotate_landmarks():
    global selected_image_path
    if selected_image_path:
        # 使用OpenCV加载图片
        img = cv2.imread(selected_image_path)
        gray = cv2.cvtColor(img, cv2.COLOR_BGR2GRAY)

        # 使用Dlib进行人脸检测和特征点标注
        detector = dlib.get_frontal_face_detector()
        predictor = dlib.shape_predictor("shape_predictor_68_face_landmarks.dat")  # 确保该文件存在
        faces = detector(gray, 1)  # 参数1表示只检测一个人脸

        # 如果有检测到人脸,对每个脸部进行特征点标注
        if len(faces) > 0:
            for face in faces:
                landmarks = predictor(gray, face)
                for n in range(0, 68):
                    x = landmarks.part(n).x
                    y = landmarks.part(n).y
                    cv2.circle(img, (x, y), 1, (255, 0, 0), -1)

            # 转换为PIL格式并显示
            img_rgb_landmarks = cv2.cvtColor(img, cv2.COLOR_BGR2RGB)
            img_pil_landmarks = Image.fromarray(img_rgb_landmarks)
            img_tk_landmarks = ImageTk.PhotoImage(image=img_pil_landmarks)
            image_label_landmarks.config(image=img_tk_landmarks)
            image_label_landmarks.image = img_tk_landmarks  # keep a reference
        else:
            # 如果没有检测到人脸,显示一个提示信息
            messagebox.showinfo("提示", "未检测到人脸")
    else:
        messagebox.showinfo("提示", "请先选择一张图片")


def Esc():
    win.destroy()

def one():
    subprocess.Popen(["python", "main.py"])
    win.destroy()

# 创建选择图片和识别人脸的按钮
button_select = tk.Button(win, text="选择图片", font=my_font
                          ,command=select_image,fg='red')
button_select.place(x=333,y=12)

button_detect = tk.Button(win, text="标注人脸", font=my_font
                          ,command=annotate_landmarks,fg='red')
button_detect.place(x=666,y=12)

esc = tk.Button(win,text='退出系统',font=30,command=Esc,fg='red')
esc.place(x=10,y=10)

t = tk.Button(win,text='返回系统',font=30,command=one,fg='red')
t.place(x=900,y=10)


win.mainloop()
人脸识别plus
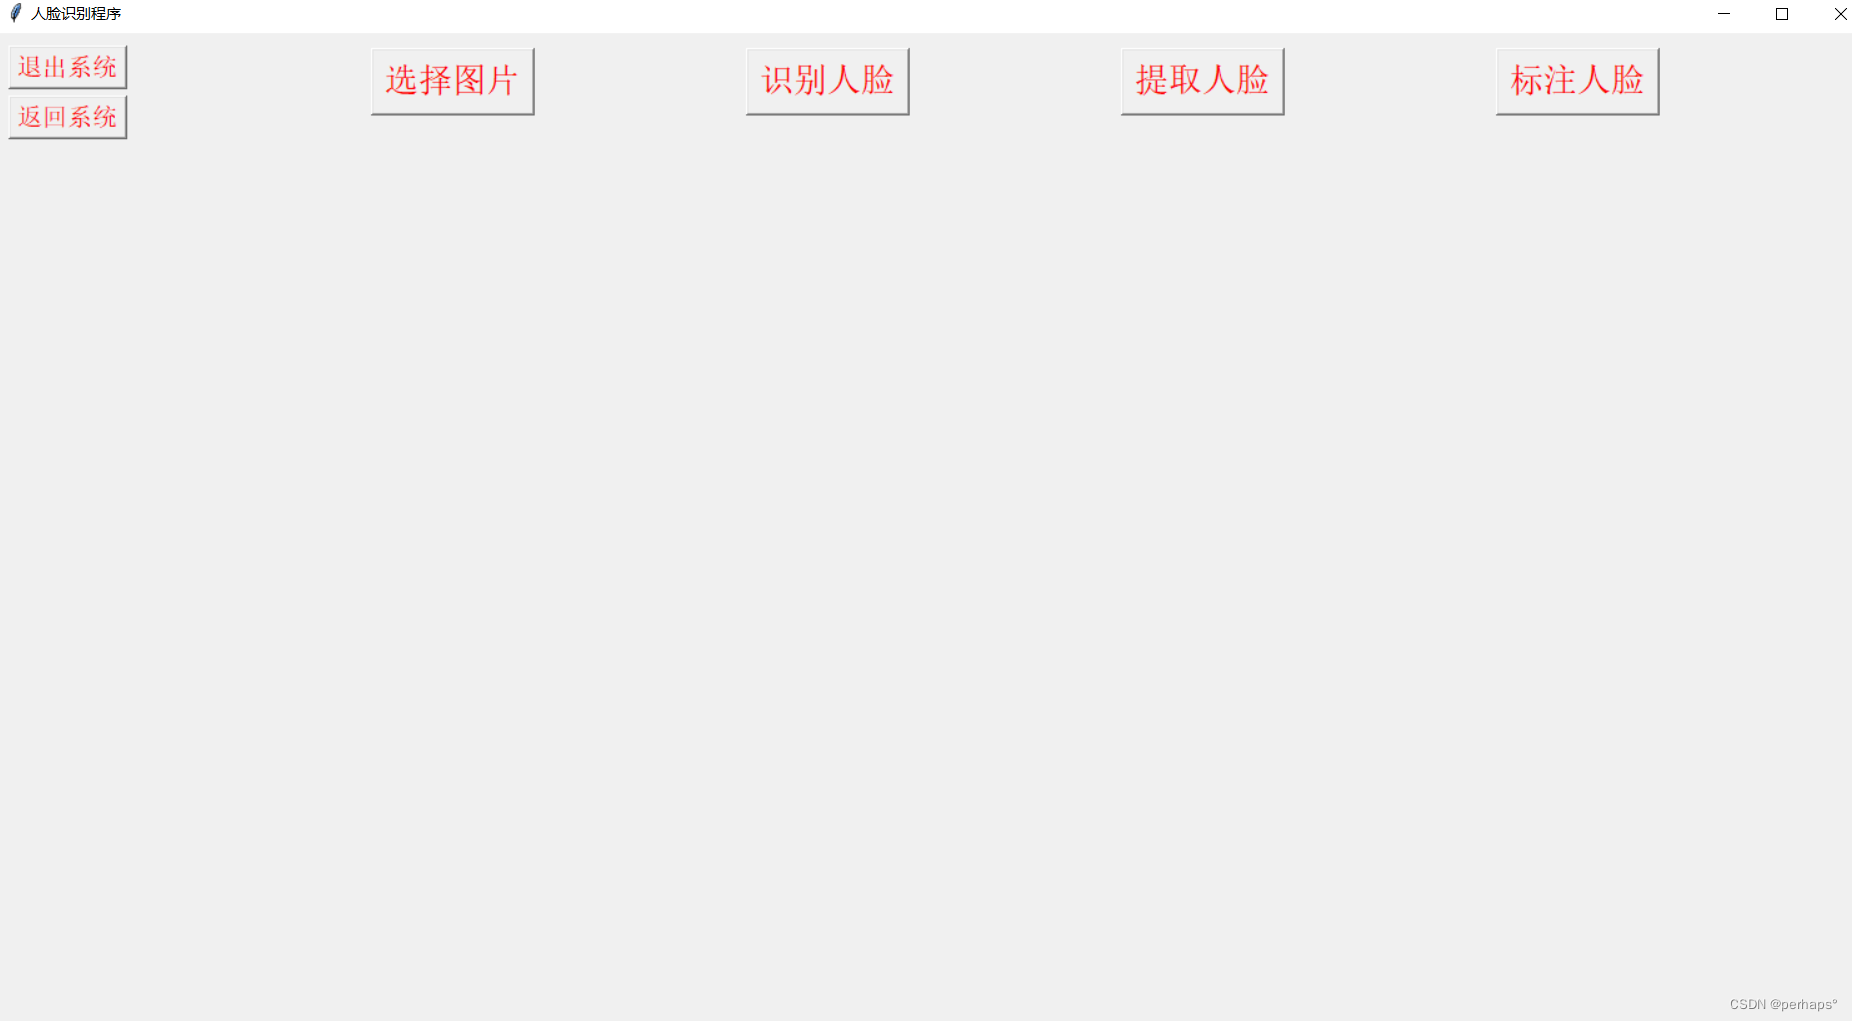
代码部分
import tkinter as tk
from tkinter import filedialog
import cv2
from PIL import Image, ImageTk
from tkinter import messagebox
import dlib
import subprocess
# 创建窗口
root = tk.Tk()
root.title("人脸识别程序")

# 设置窗口大小
root.geometry("1500x800")  # 增加窗口宽度以适应三张图片

# 创建三个Label用于显示图片
image_label_original = tk.Label(root)
image_label_original.pack(side=tk.LEFT,pady=100)

image_label_detected = tk.Label(root)
image_label_detected.pack(side=tk.LEFT,pady=100)

image_extract_face = tk.Label(root)
image_extract_face.pack(side=tk.LEFT,pady=100)

image_label_landmarks = tk.Label(root)
image_label_landmarks.pack(side=tk.RIGHT,pady=100)

# 存储用户选择的图片路径
selected_image_path = None

my_font = ("Times New Roman",20)

# 选择图片函数
def select_image():
    global selected_image_path
    # 打开文件选择对话框
    selected_image_path = filedialog.askopenfilename()

    # 使用OpenCV加载图片
    img = cv2.imread(selected_image_path)
    img_rgb = cv2.cvtColor(img, cv2.COLOR_BGR2RGB)
    img_pil = Image.fromarray(img_rgb)
    img_tk = ImageTk.PhotoImage(image=img_pil)

    # 显示原始图片
    image_label_original.config(image=img_tk)
    image_label_original.image = img_tk  # keep a reference

# 人脸识别函数
def detect_faces():
    global selected_image_path
    if selected_image_path:
        # 使用OpenCV加载图片
        img = cv2.imread(selected_image_path)
        gray = cv2.cvtColor(img, cv2.COLOR_BGR2GRAY)

        # 加载人脸识别模型
        face_cascade = cv2.CascadeClassifier(cv2.data.haarcascades + 'haarcascade_frontalface_default.xml')
        faces = face_cascade.detectMultiScale(gray, 1.1, 4)

        # 判断是否检测到人脸
        if len(faces) > 0:
            # 在人脸周围画矩形框
            for (x, y, w, h) in faces:
                cv2.rectangle(img, (x, y), (x+w, y+h), (255, 0, 0), 2)

            # 转换为PIL格式并显示
            img_rgb_detected = cv2.cvtColor(img, cv2.COLOR_BGR2RGB)
            img_pil_detected = Image.fromarray(img_rgb_detected)
            img_tk_detected = ImageTk.PhotoImage(image=img_pil_detected)
            image_label_detected.config(image=img_tk_detected)
            image_label_detected.image = img_tk_detected  # keep a reference
        else:
            # 提示未检测到人脸
            messagebox.showinfo("提示", "未检测到人脸")
    else:
        messagebox.showinfo("提示", "请先选择一张图片")

# 五官标注函数
def annotate_landmarks():
    global selected_image_path
    if selected_image_path:
        # 使用OpenCV加载图片
        img = cv2.imread(selected_image_path)
        gray = cv2.cvtColor(img, cv2.COLOR_BGR2GRAY)

        # 使用Dlib进行人脸检测和特征点标注
        detector = dlib.get_frontal_face_detector()
        predictor = dlib.shape_predictor("shape_predictor_68_face_landmarks.dat")  # 确保该文件存在
        faces = detector(gray, 1)  # 参数1表示只检测一个人脸

        # 如果有检测到人脸,对每个脸部进行特征点标注
        if len(faces) > 0:
            landmarks = predictor(gray, faces[0])
            for n in range(0, 68):
                x = landmarks.part(n).x
                y = landmarks.part(n).y
                cv2.circle(img, (x, y), 1, (255, 0, 0), -1)

            # 转换为PIL格式并显示
            img_rgb_landmarks = cv2.cvtColor(img, cv2.COLOR_BGR2RGB)
            img_pil_landmarks = Image.fromarray(img_rgb_landmarks)
            img_tk_landmarks = ImageTk.PhotoImage(image=img_pil_landmarks)
            image_label_landmarks.config(image=img_tk_landmarks)
            image_label_landmarks.image = img_tk_landmarks  # keep a reference
        else:
            # 如果没有检测到人脸,显示一个提示信息
            messagebox.showinfo("提示", "未检测到人脸")
    else:
        messagebox.showinfo("提示", "请先选择一张图片")

def extract_faces():
    if selected_image_path:
        # 使用OpenCV的人脸检测
        img = cv2.imread(selected_image_path)
        gray = cv2.cvtColor(img, cv2.COLOR_BGR2GRAY)
        face_cascade = cv2.CascadeClassifier(cv2.data.haarcascades + 'haarcascade_frontalface_default.xml')
        faces = face_cascade.detectMultiScale(gray, 1.1, 4)

        # 如果检测到人脸,裁剪并显示
        if len(faces) > 0:
            (x, y, w, h) = faces[0]  # 获取第一个检测到的人脸
            face_img = img[y:y+h, x:x+w]  # 裁剪人脸区域

            # 转换为PIL图像并显示
            face_img = cv2.cvtColor(face_img, cv2.COLOR_BGR2RGB)
            face_img = Image.fromarray(face_img)
            face_img = ImageTk.PhotoImage(face_img)
            image_extract_face.config(image=face_img)
            image_extract_face.image = face_img
        else:
            messagebox.showinfo("信息", "没有检测到人脸")
    else:
        messagebox.showwarning("警告", "请先选择一张图片")

def Esc():
    root.destroy()

def one():
    subprocess.Popen(["python", "main.py"])
    root.destroy()


# 创建选择图片和识别人脸的按钮
button_select = tk.Button(root, text="选择图片",font=my_font
                          , command=select_image,fg='red')
button_select.place(x=300,y=12)

button_detect = tk.Button(root, text="识别人脸",font=my_font
                          , command=detect_faces,fg='red')
button_detect.place(x=600,y=12)

button_extract = tk.Button(root, text="提取人脸",font=my_font
                           ,command=extract_faces,fg='red')
button_extract.place(x=900,y=12)

button_landmarks = tk.Button(root, text="标注人脸",font=my_font
                             , command=annotate_landmarks,fg='red')
button_landmarks.place(x=1200,y=12)

esc = tk.Button(root,text='退出系统',font=30,command=Esc,fg='red')
esc.place(x=10,y=10)

t = tk.Button(root,text='返回系统',font=30,command=one,fg='red')
t.place(x=10,y=50)
root.mainloop()


 703
703

 被折叠的 条评论
为什么被折叠?


