


该上传组件采用 Vue2 与 UView 进行开发,只兼容小程序。文章提供微信小程序上传所需的前置条件、问题分析及组件源码。
微信小程序上传前置条件:
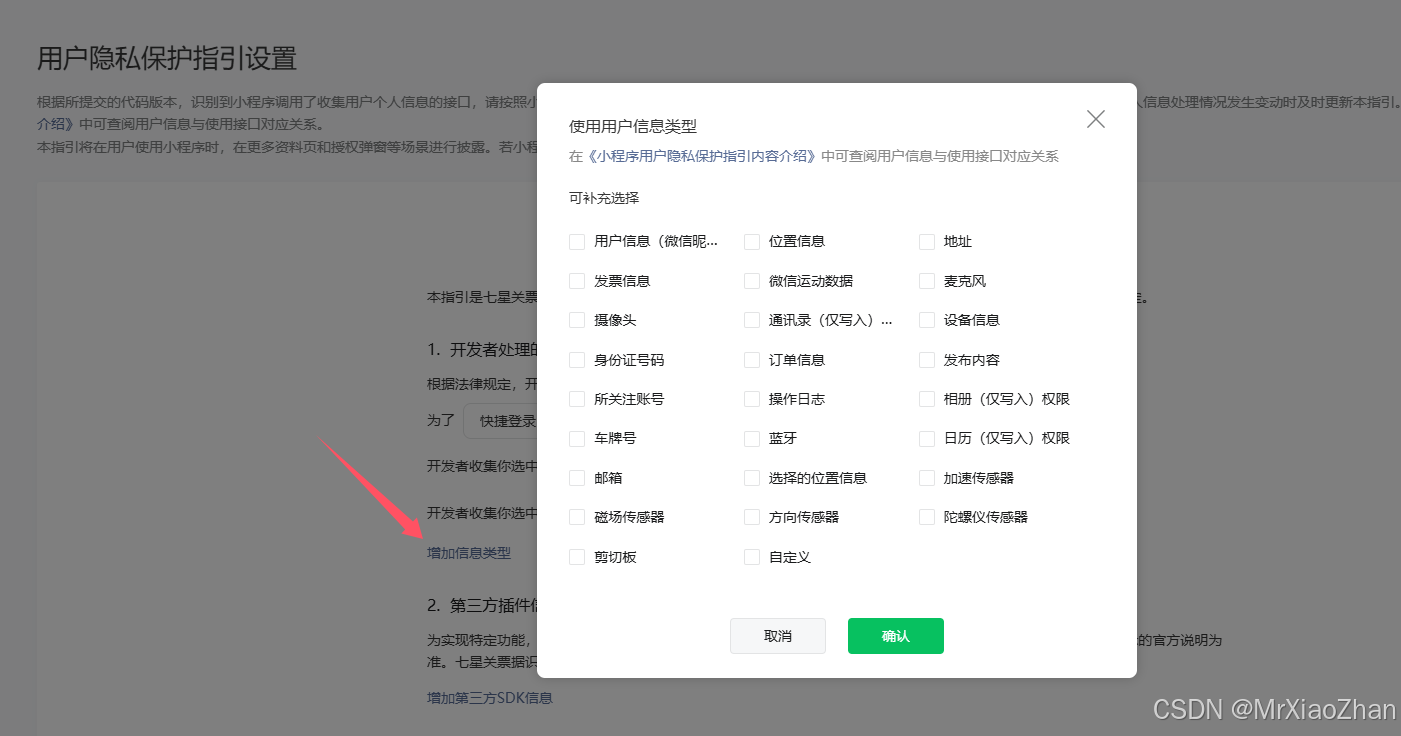
1、微信公众平台配置相应隐私权限(已配置权限不会再显示弹窗内);
步骤:微信公众平台 =》 左下角账号设置 =》 基本设置、服务内容声明 =》用户隐私保护指引;
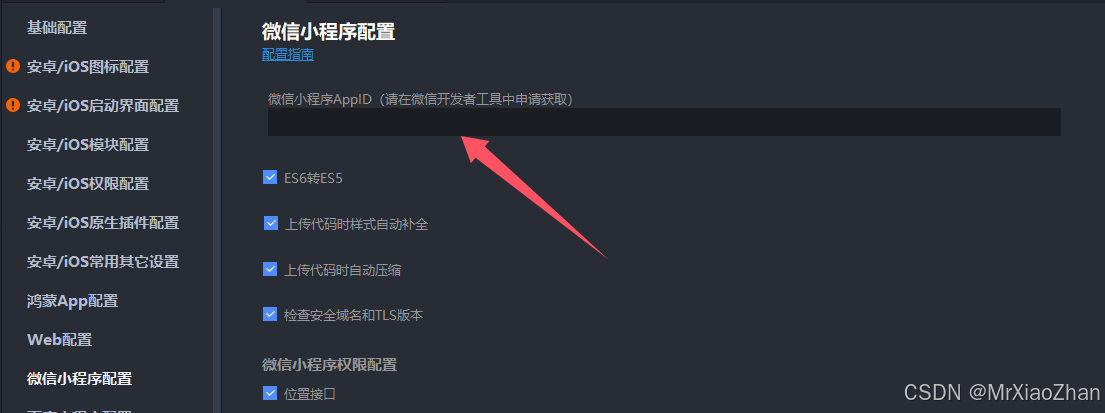
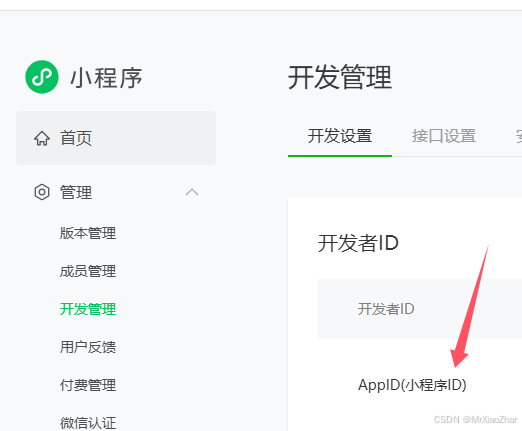
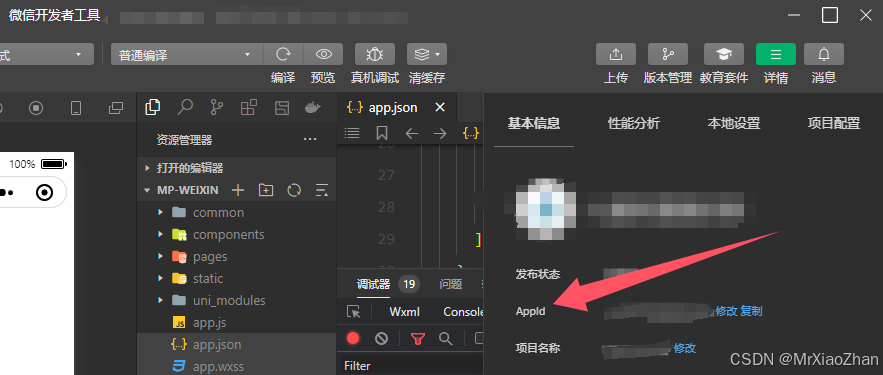
2、保证微信公众平台、HBuilder、微信开发者工具的AppId保持一致,不一致的话即使配置好了隐私权限,chooseMessageFile 方法也不会执行 success 回调;
小程序上传文件 chooseMessageFile 方法,只能从客户端会话选择文件,无法直接从本地获取文件上传,可官网看详细说明(微信公众平台);
小程序上传本地文件思路,可用 web-view 标签嵌套外部 h5 页面来跳过小程序的限制,直接上传本地的文件;
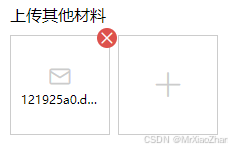
组件预览图片:
完整代码:
html 代码
<template>
	<view class="index">
		<view class="i-main">
			<view class="up-box" v-for="(v, i) in value" :key="i">
				<u-icon name="email" color="#ccc" size="28"></u-icon>
				<view class="u-b-text" v-if="v">
					{{ v.slice(-12) }}
				</view>
				<view class="icon" @click.stop="deleteImg(i)">
					<u-icon name="close" color="#fff"></u-icon>
				</view>
			</view>

			<view class="i-min" v-if="value.length < max" @click="() => onChangeFile()">
				<view class="up-box">
					<u-icon name="plus" color="#ccc" size="28"></u-icon>
				</view>
			</view>
		</view>
	</view>
</template>
js 代码
<script>
	export default {
		name: "upload-file",
		props: {
			/** 最大上传数 */
			max: {
				type: Number,
				default: 9,
			},
			/** 临时文件v-model的值 */
			value: {
				type: Array,
				default: () => [],
			},
		},
		data() {
			return {
				fileData: {},
			};
		},
		methods: {
			// 选择文件
			onChangeFile() {
				const _this = this;
				uni.chooseMessageFile({
					count: 1,
					type: "all",
					success: (res) => {
						_this.fileData = res.tempFiles[0];
						_this.onFileUpload();
					},
					fail(err) {
						if (err.errno === 112) {
							uni.showToast({
								title: "选择文件隐私政策未设置,请联系管理员",
								icon: "none",
							});
						} else if (err.errMsg.indexOf("fail cancel") === -1) {
							uni.showToast({
								title: err.errMsg,
								icon: "none",
								mask: true,
							});
							console.log("选择文件出错", err);
						}
					},
				});
			},

			// 文件上传
			onFileUpload() {
				const _this = this;
                // 获取本地存储的token
				const token = uni.getStorageSync("token");
				uni.showLoading({
					title: "上传中...",
				});

				uni.uploadFile({
					url: `替换接口上传地址`,
					filePath: _this.fileData.path,
					name: "file",
					header: {
						token: token,
					},
					success: (res) => {
						const item = JSON.parse(res.data);
						if (item.code == 200) {
							let arrUrl = this.value;
							arrUrl.push(item.data.url);
							this.$emit("input", arrUrl);
						} else {
							uni.showToast({
								title: res.msg,
								icon: "none",
							});
						}
						uni.hideLoading();
					},
				});
			},

			// 删除文件
			deleteImg(index) {
				uni.showModal({
					title: "温馨提示",
					content: "是否删除该文件",
					confirmText: "删除",
					success: (res) => {
						if (res.confirm) {
							const oldArr = this.value;
							oldArr.splice(index, 1);
							this.$emit("input", oldArr);
							uni.$u.toast("已删除");
						}
					},
				});
			},
		},
	};
</script>
css 代码
<style lang="scss" scoped>
.index {
margin-top: 10px;
.i-main {
width: 100%;
display: flex;
flex-wrap: wrap;
gap: 8px;
}
.up-box {
width: 98px;
height: 98px;
border: 1px solid #ccc;
display: flex;
flex-direction: column;
align-items: center;
justify-content: center;
position: relative;
.u-b-text {
width: 80%;
font-size: 12px;
white-space: nowrap;
overflow: hidden;
text-overflow: ellipsis;
text-align: center;
}
.icon {
position: absolute;
top: -8px;
right: -8px;
background: $uni-color-error;
padding: 2px;
border-radius: 50%;
font-size: 14px;
}
}
}
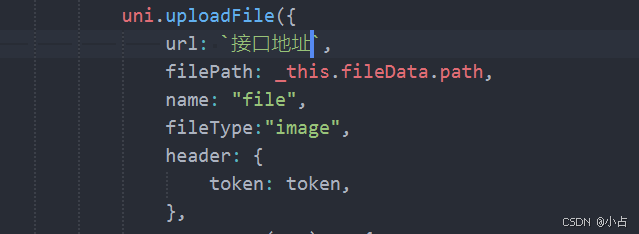
</style>上述方法上传图片会遇到无法成功调用 uploadFile 方法,需要在 uploadFile 方法里加上 fileType:"image"属性,可以解决只能上传文件无法上传图片的问题;(如下图)


 1507
1507

 被折叠的 条评论
为什么被折叠?
被折叠的 条评论
为什么被折叠?
 到【灌水乐园】发言


