


在上一篇博客中,我们已经对线性表中的顺序表已经有了一个初步的认识,并且已将顺序表的基本结构成功创建,下面我们将对整个顺序表进行增删查改。
1.遍历顺序表
在对顺序表进行增删查改之前,我们要先对顺序表中的内容进行遍历打印,以便我们进行后续操作。
注意:现在的所有方法要写到我们昨天创建的MyArrayList类当中,在对方法进行调用时要写到Main这个类,Main后面称为测试类,大家不要写错位置,注意分别
前面我们提到过,顺序表的底层其实就是一个数组,遍历顺序表也就是遍历数组
具体方法如下
 public void display() {
        for (int i = 0; i < this.usedSize; i++) {//usedSize为有效数据个数前面文章中有提到
            System.out.print(this.elem[i] +" ");
        }
        System.out.println();
}然后在测试类中进行方法的调用
 public static void main(String[] args) {
        MyArrayList myArrayList = new MyArrayList();
        myArrayList.display();
    }
运行结果

由于我们当前顺序表中无任何数据,打印为空
2.在数组最后新增元素(也就是我们常说的尾插法)
请大家仔细想想,如果一个数组只有三个位置,当前数组中已有了三个有效数据,如果强行存放,就会出现数组越界异常,说以在存放元素时,要先对数组进行判满
当数组为满时,要对数组进行扩容如果当前数组已满,在扩容时,不要忘记导入类(import java.util.Arrays;)
public void add(int data) {
        if(isFull()) {
            //扩容,
            this.elem = Arrays.copyOf(
                    this.elem,2*this.elem.length);
        }
        this.elem[this.usedSize] = data;
        this.usedSize++;
    }
//以下为判断数组是否为满


    public boolean isFull() {
        if(this.usedSize == this.elem.length) {
            return true;
        }
        return false;
}之后在测试类中调用方法
public static void main(String[] args) {
MyArrayList myArrayList = new MyArrayList();
myArrayList.display();
myArrayList.add(1);
myArrayList.add(2);
myArrayList.add(3);
myArrayList.add(4);
myArrayList.add(5);
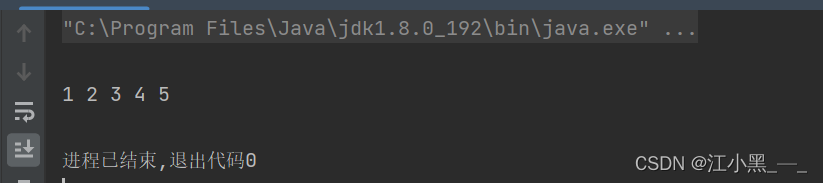
myArrayList.display();
}运行截图
3.在pos位置新增元素
下面为数组图片
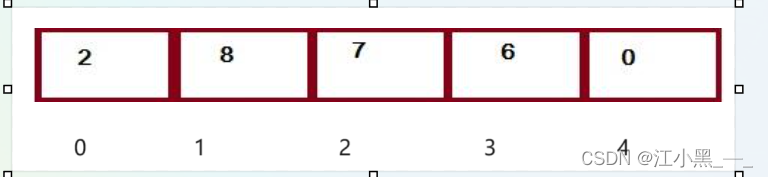
下标分别为0,1,2,3,4
如果pos= 1,要插入的值为99,那要怎么将数组插入到1下标的位置呢,下面有两种方法一对对错
1.直接将8覆盖掉, 数组内容变为2,99,7,6,0
2.将下标为1和之后的所有数据向后移动,数组变为2,99,8,7,6,0
很显然,2才是正确的,因为1会造成数据丢失
那么要怎么移动数据呢
一定要从后往前依次向后移动
1.确定最后在哪里
以上面数组为例usedSize = 5,在下标为4的位置定义一个i下标,让i= i+1;
如果是满的,也一样不能进行插入,更别提移动了
代码如下
 public void add(int pos, int data) {
        if(pos < 0 || pos > this.usedSize) {
            throw new PosOutOfBoundsException(pos+" 位置不合法!");//定义异常或者直接返回

            //System.out.println("位置不合法!");
            //return;
        }
        if(isFull()) {
            //扩容
            this.elem = Arrays.copyOf(
                    this.elem,2*this.elem.length);
        }
        for (int i = this.usedSize-1; i >= pos ; i--) {
            this.elem[i+1] = this.elem[i];
        }
        this.elem[pos] = data;
        this.usedSize++;
    }
定义异常,代码如下
public class PosOutOfBoundsException extends RuntimeException{
    public PosOutOfBoundsException() {
    }

    public PosOutOfBoundsException(String message) {
        super(message);
    }
}之后在测试类中调用方法
public class Main {
public static void main(String[] args) {
MyArrayList myArrayList = new MyArrayList();
myArrayList.display();
myArrayList.add(1);
myArrayList.add(2);
myArrayList.add(3);
myArrayList.add(4);
myArrayList.add(5);
myArrayList.display();
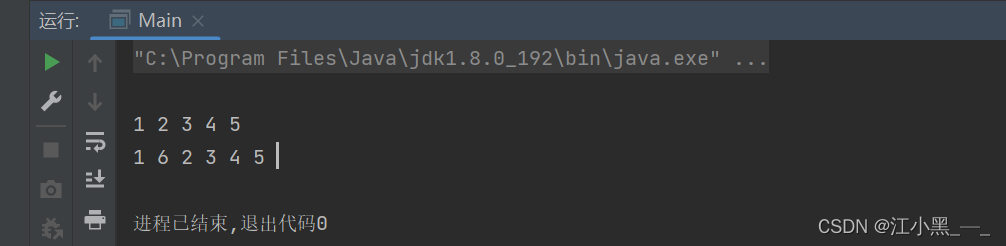
myArrayList.add(1,6);
myArrayList.display();
}
}运行截图
到此为止,我们在文章中一共介绍了遍历顺序表,尾插法,在指定位置插入元素,下一篇文章,我们将会对顺序表中的数据进行查找等,敬请期待叭~


 被折叠的 条评论
为什么被折叠?
被折叠的 条评论
为什么被折叠?
 到【灌水乐园】发言


